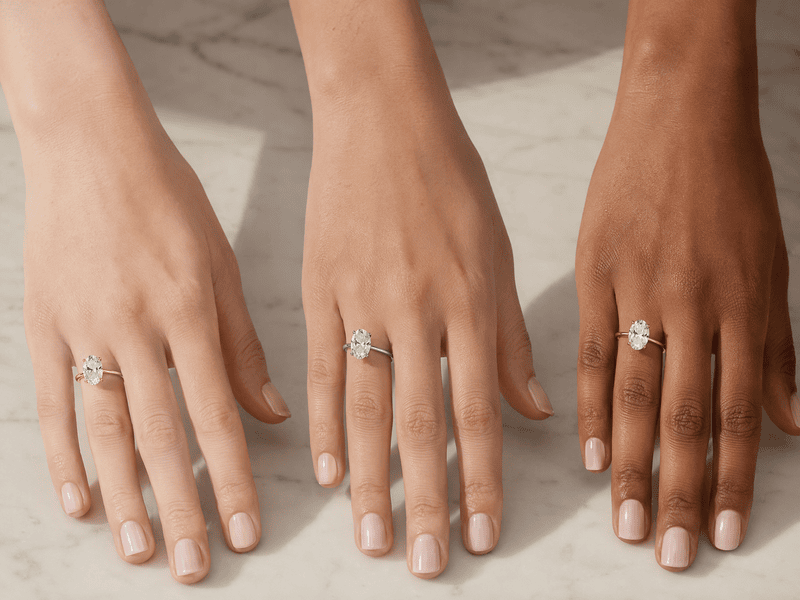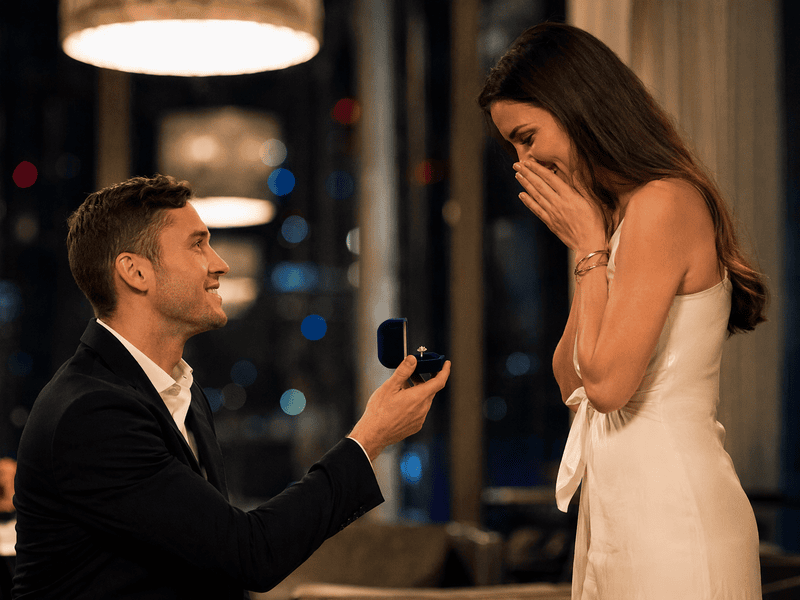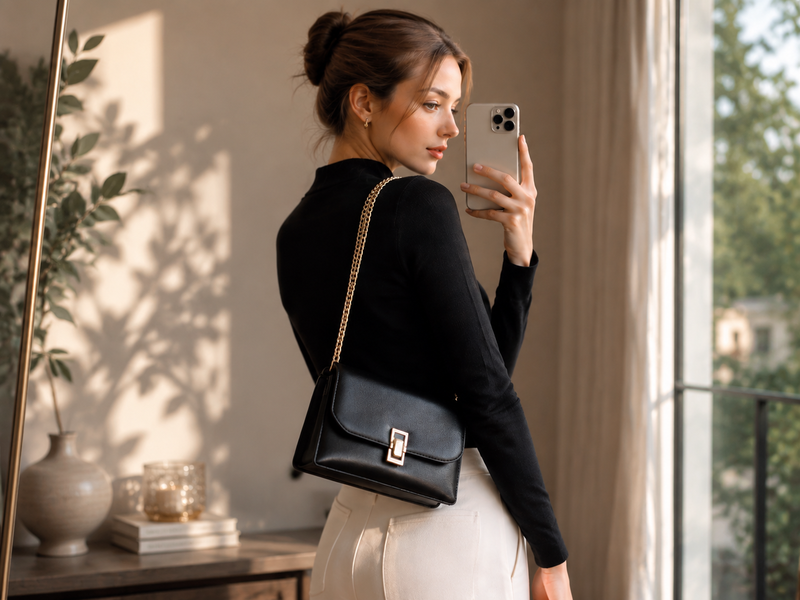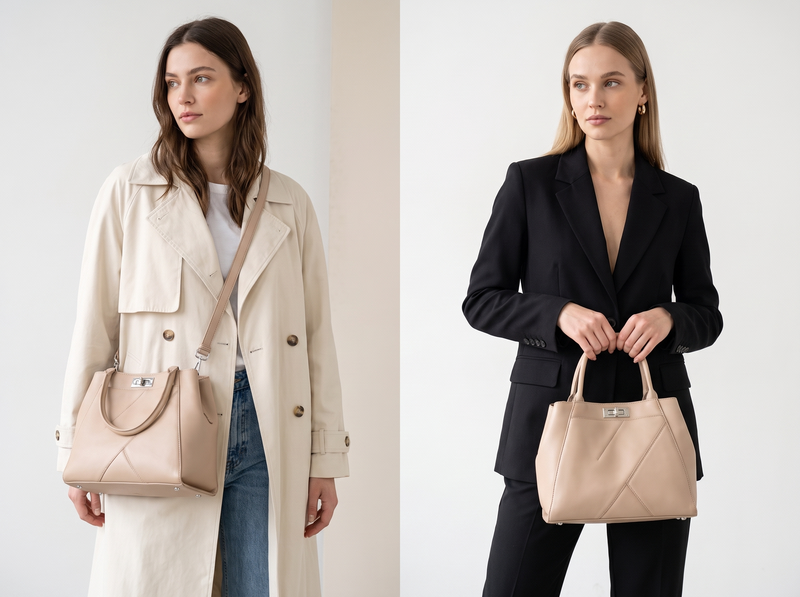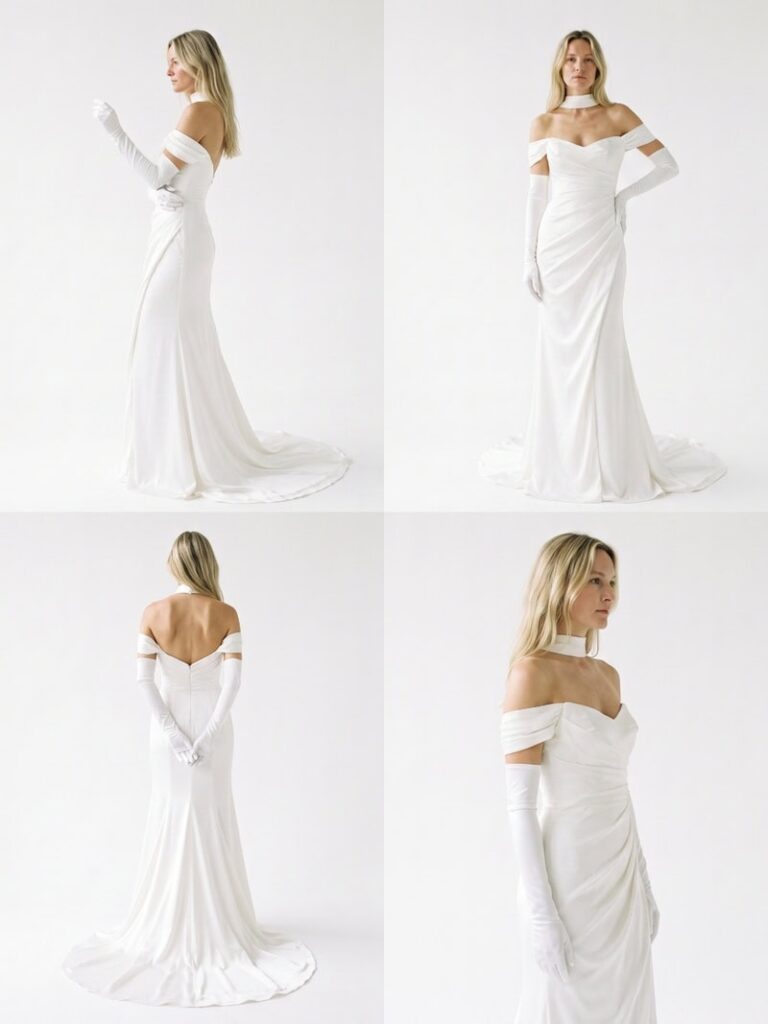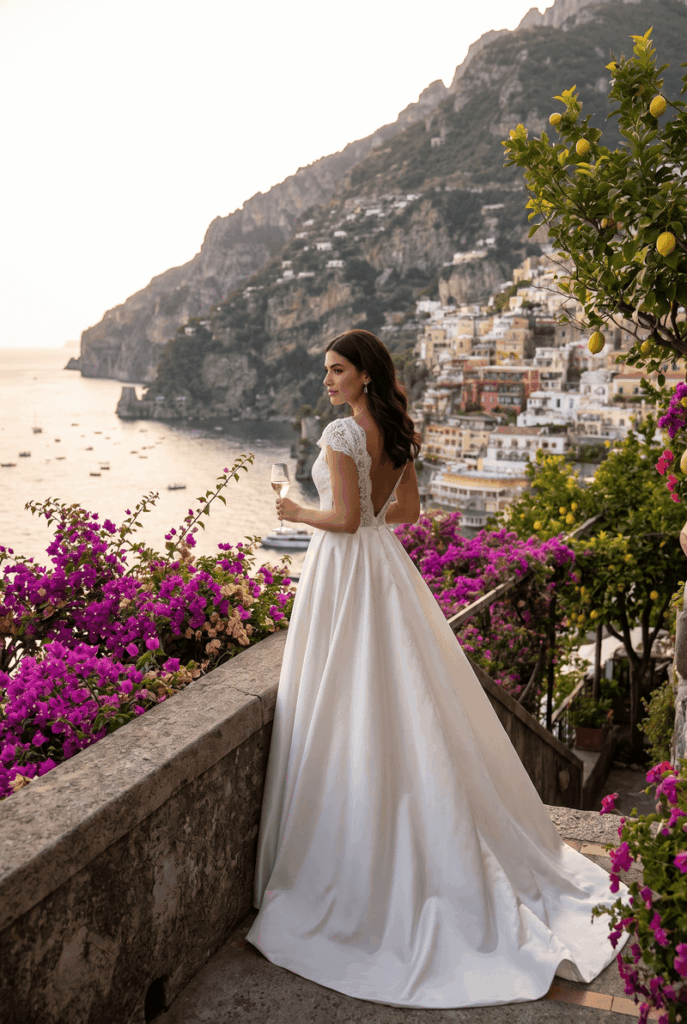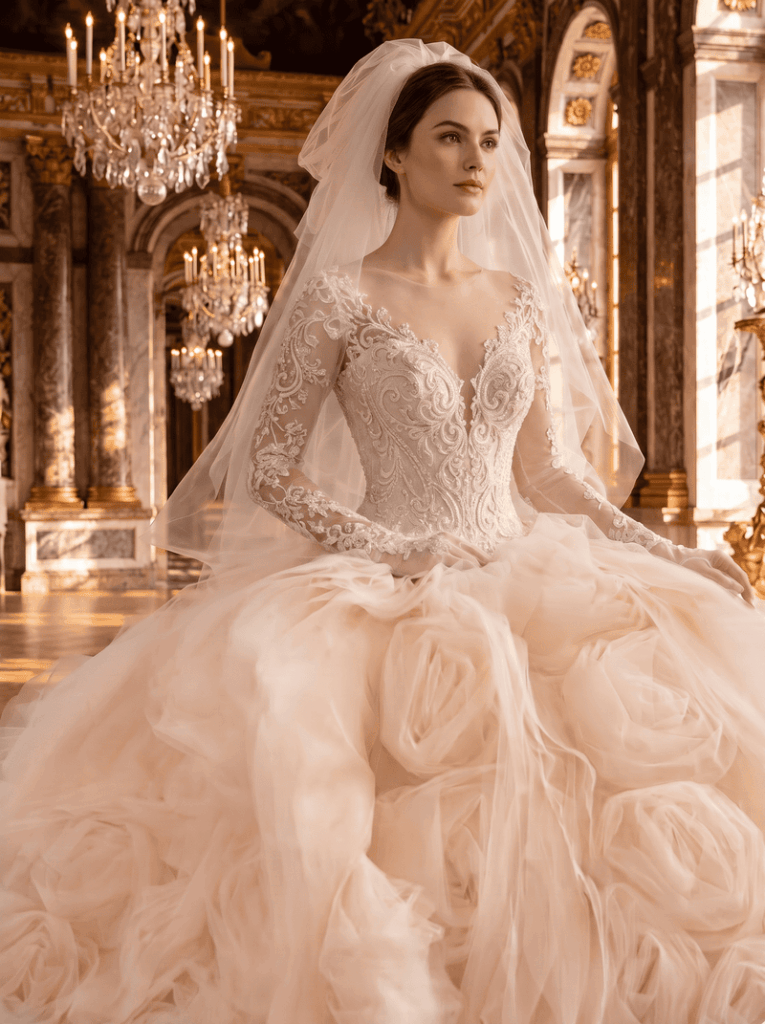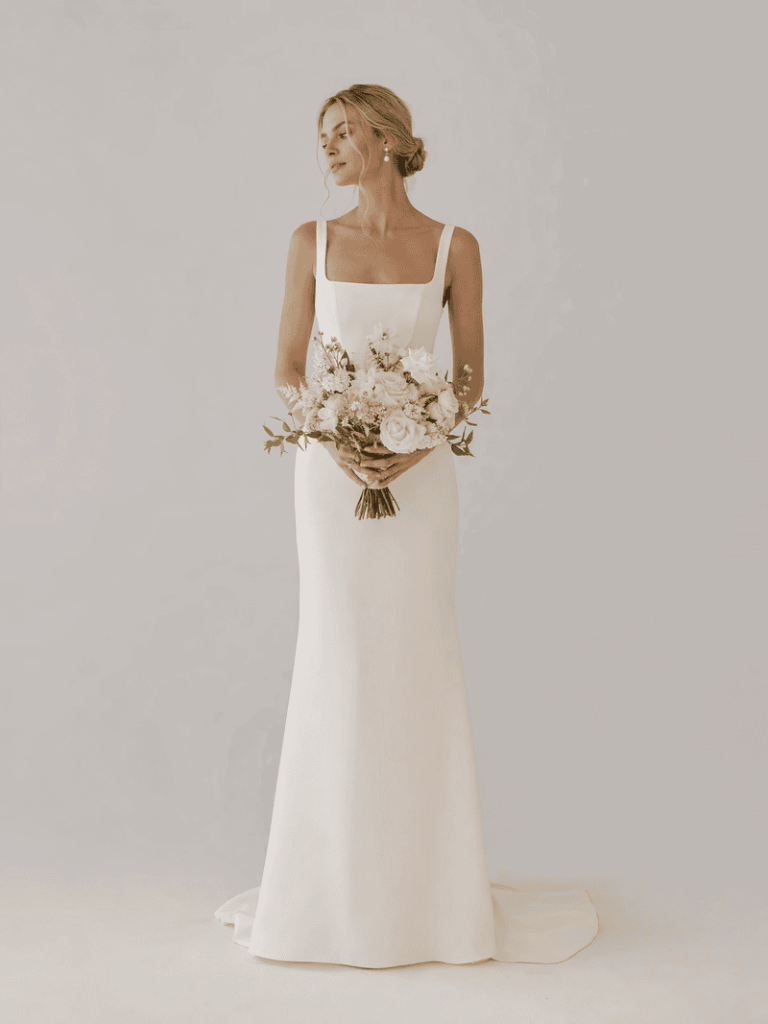
作者归档 Ethan Davis

Avatar photo 通过Ethan Davis

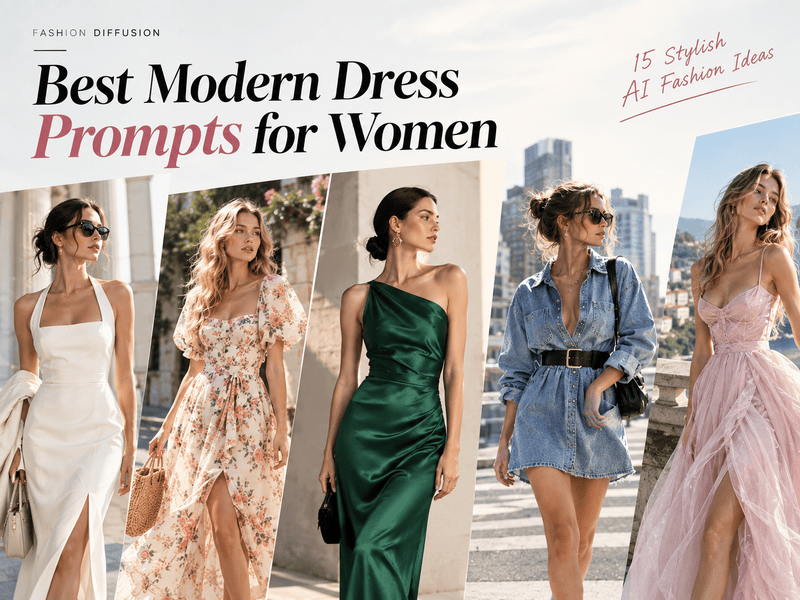
The Best Modern Dress Prompts for Women: 15 Examples & Writing Techniques

Generating the perfect AI fashion image starts long before you hit “create” — it starts with the prompt. If you’ve ever typed “woman in a modern dress” and gotten something flat, generic, or off-brand, the problem usually isn’t the AI model. It’s the prompt.

This guide breaks down what makes a great modern dress prompt for women, with real example prompts you can copy, tweak, and use to generate the outfit right away, plus the underlying structure and techniques that make them work.

15 Modern Dress Prompts You Can Use Today

Here are 15 ready-to-use prompts spanning everyday, going-out, trending-material, and editorial styles, so there’s something to copy no matter the look you’re after.

1. Minimalist Office Wear

Prompt: Young woman standing confidently in a tailored midi dress with a structured blazer collar, ivory color, straight silhouette, subtle wool texture, minimal gold jewelry, sleek low bun. Standing in a bright modern office with floor-to-ceiling windows, soft natural daylight, shot on 50mm lens, editorial fashion photography style.
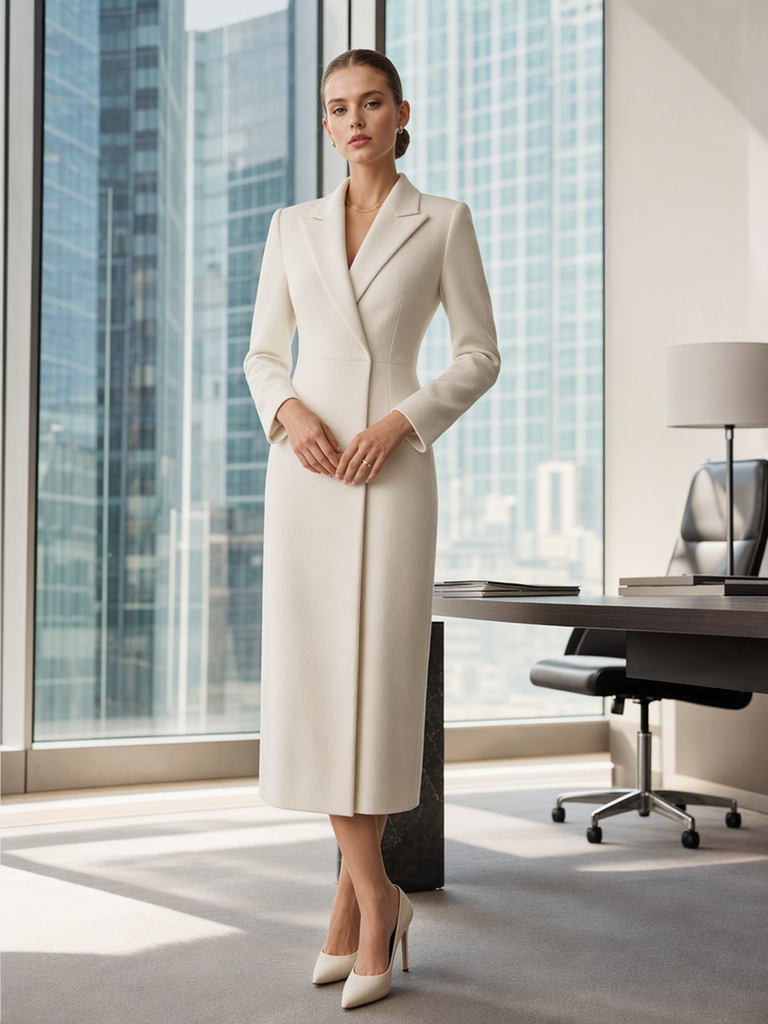
Minimalist Office Wear
Fashion Diffusion AI-generated

Why it works: It defines a clear silhouette, a specific fabric cue, and pairs the minimalist mood with a matching environment instead of leaving the setting generic.

2. Flowy Summer Dress

Prompt: Woman walking along a sunlit street in a flowing floral midi dress. Lightweight cotton fabric, cinched waist, short puff sleeves, wavy loose hair, straw tote bag, golden hour lighting, warm tones. Candid street style photography, shallow depth of field.
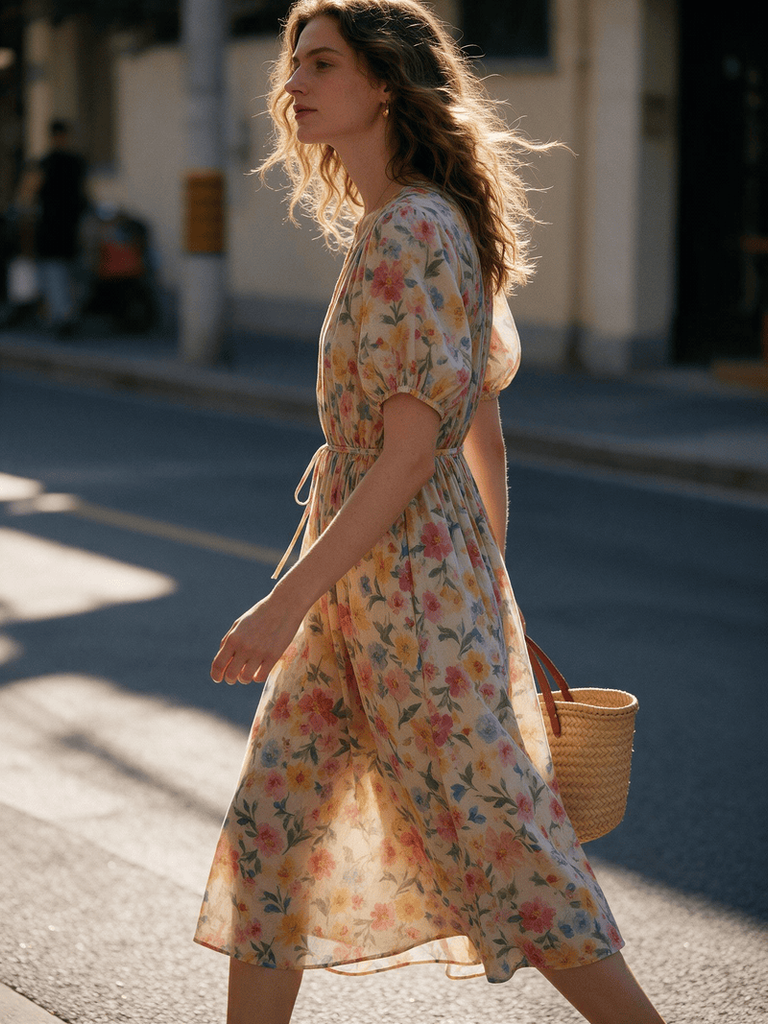
Flowy Summer Dress
Fashion Diffusion AI-generated

Why it works: Movement words like “walking” and “flowing” tell the model to render fabric with motion, which is essential for lightweight materials.

3. Evening Cocktail Dress

Prompt: Elegant woman in a fitted satin cocktail dress. Deep emerald green, one-shoulder design, knee-length hem, soft glam makeup, sleek straight hair, standing against a dark moody background with dramatic side lighting, high-fashion studio photography, glossy finish.
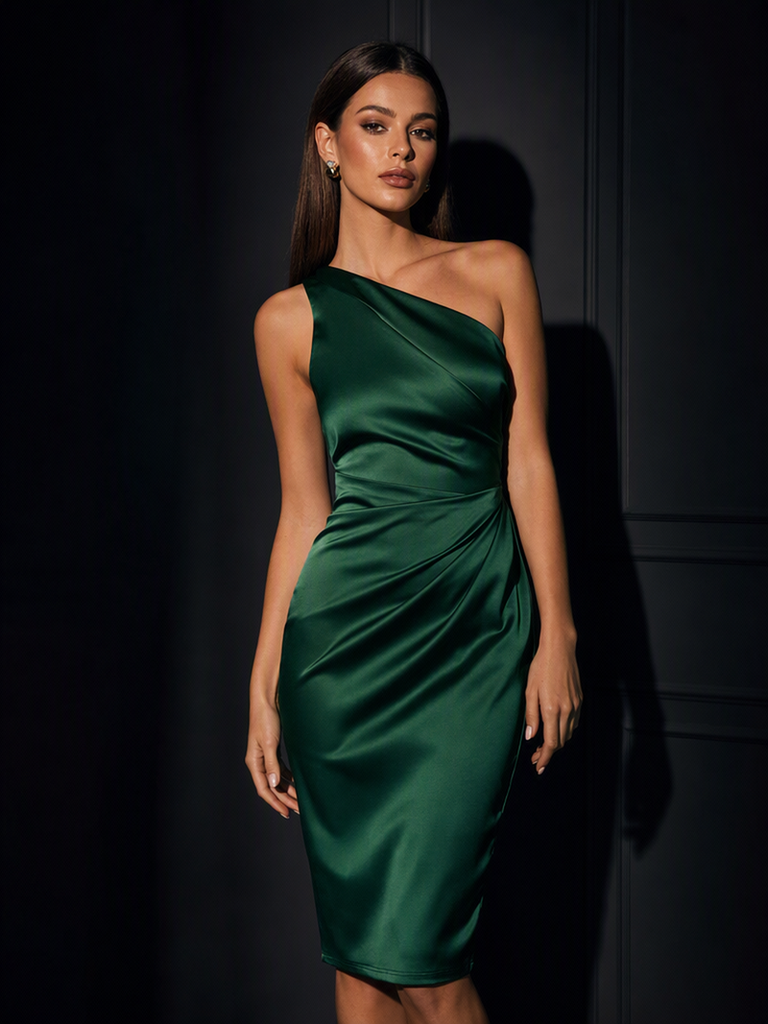
Evening Cocktail Dress
Fashion Diffusion AI-generated

Why it works: Color and fabric are named together since sheen and color interact visually, and the lighting direction is specified because studio shots depend heavily on it.

4. Streetwear-Inspired Dress

Prompt: Confident woman wearing an oversized denim shirt dress, cinched with a wide belt, chunky white sneakers, layered necklaces, urban rooftop background, city skyline in soft focus, natural daylight, casual editorial photography, Gen Z fashion aesthetic.
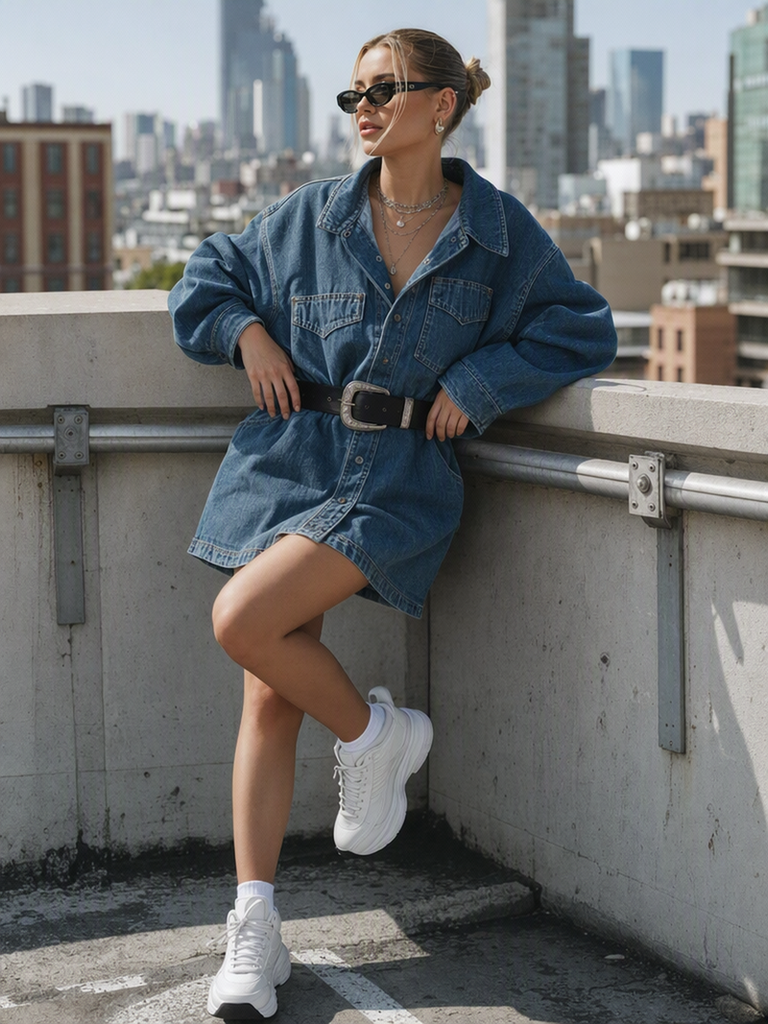
Streetwear-Inspired Dress
Fashion Diffusion AI-generated

Why it works: Naming an aesthetic category helps the model pull from a consistent visual vocabulary rather than mixing unrelated style cues.

5. Quiet Luxury Brunch Dress

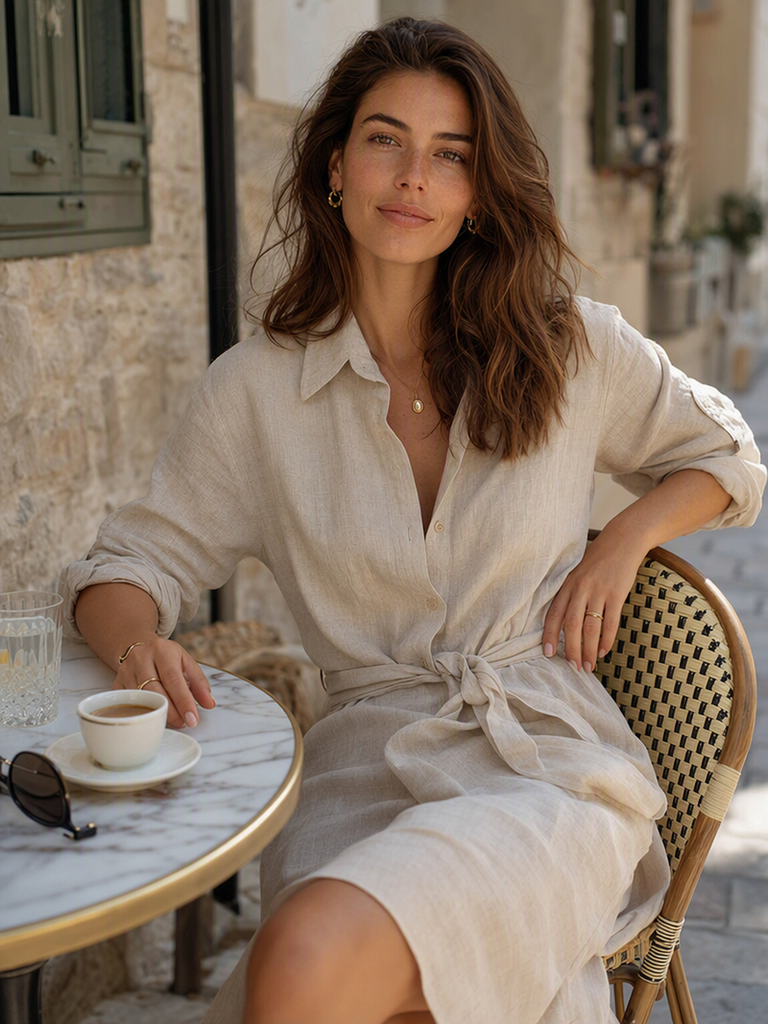
Prompt: Woman seated at a sunlit outdoor café table, wearing a relaxed linen shirt dress in a soft oatmeal tone, oversized collar, rolled sleeves, tied waist, minimal gold jewelry, natural loose waves, soft neutral makeup, warm morning light, shallow depth of field, quiet luxury lifestyle photography, calm and understated mood.
Quiet Luxury Brunch Dress
Fashion Diffusion AI-generated

Why it works: Naming the “quiet luxury” aesthetic directly steers the model away from logos or flashy details, while pairing “linen” with a specific tone (“oatmeal”) keeps the fabric read as relaxed rather than stiff.

6. Sheer Organza Dress

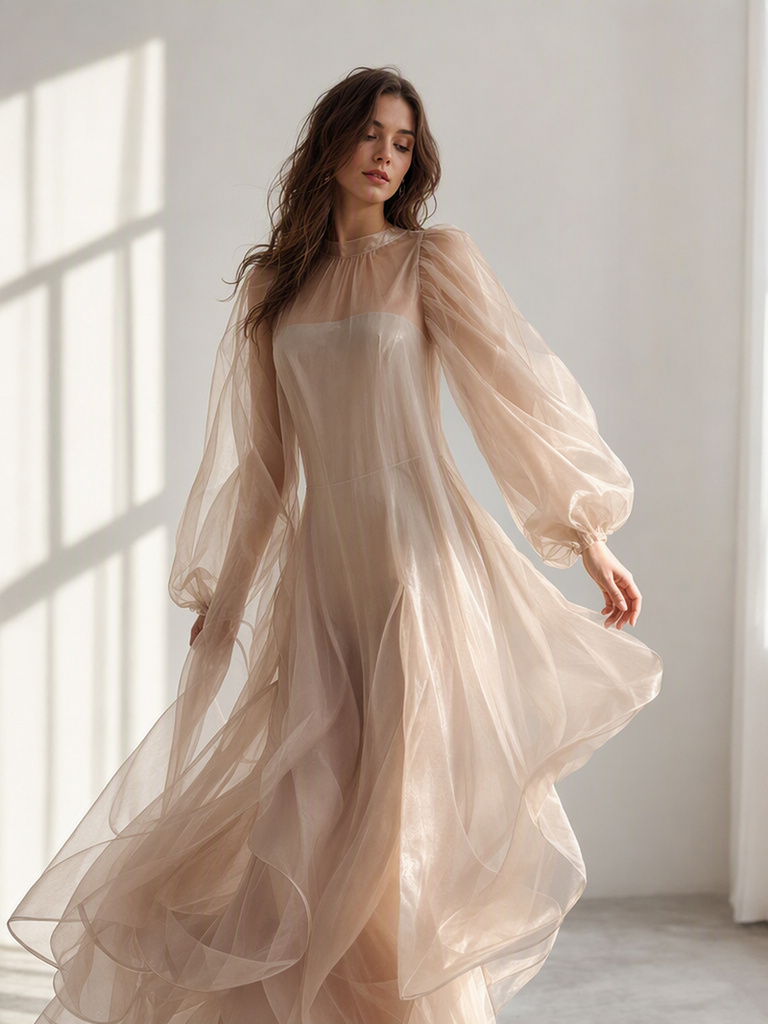
Prompt: Elegant woman in a sheer silk organza dress, beige nude tone, voluminous puffed sleeves, layered translucent fabric with a subtle sheen, delicate slip lining underneath, soft romantic makeup, loose waves. Standing in a light-filled minimalist studio, diffused window light, high-fashion editorial photography, dreamy and airy mood.
Sheer Organza Dress
Fashion Diffusion AI-generated

Why it works: Sheer fabric is tricky to render, so the prompt separates the translucent outer layer from the slip lining underneath instead of describing one ambiguous garment.

7. Lace-Trim Silk Slip Dress

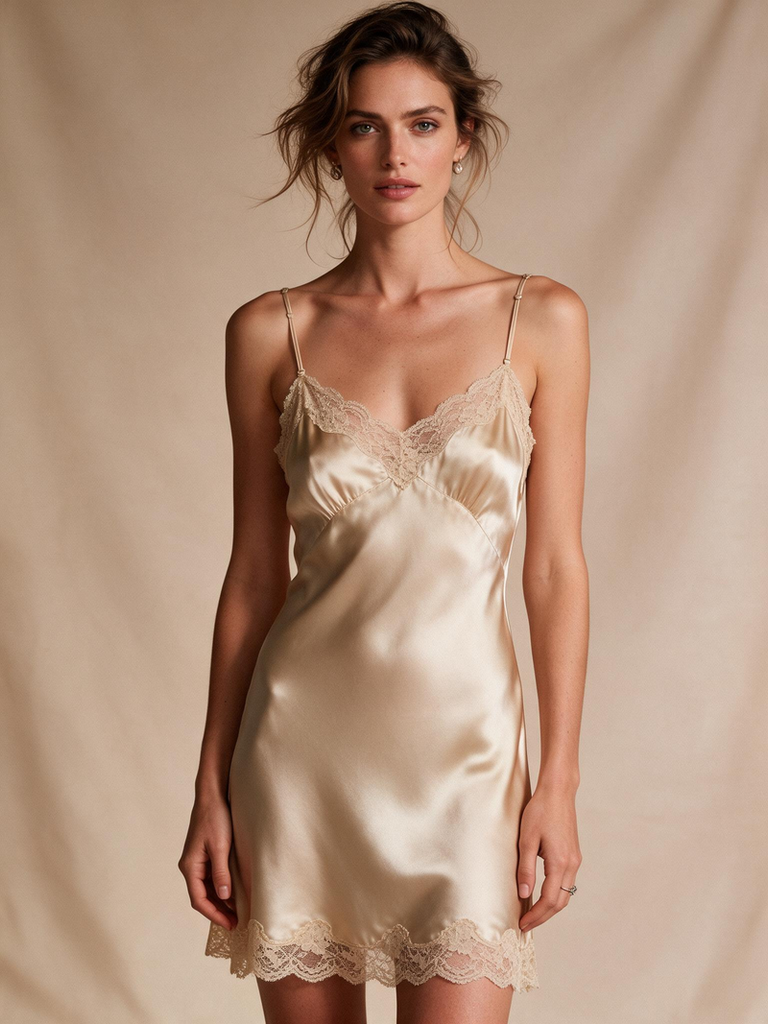
Prompt: Woman in a vintage-inspired silk slip dress, champagne color, delicate lace trim along the neckline and hem, bias-cut silhouette, thin adjustable straps, soft glossy finish, natural tousled hair, minimal jewelry. Standing against a warm beige backdrop, soft diffused lighting, retro-glam editorial photography.
Lace-Trim Silk Slip Dress
Fashion Diffusion AI-generated

Why it works: Naming the construction detail “bias-cut” tells the model how the fabric should fall and cling, which gives slip dresses their signature drape.

8. Velvet Evening Dress

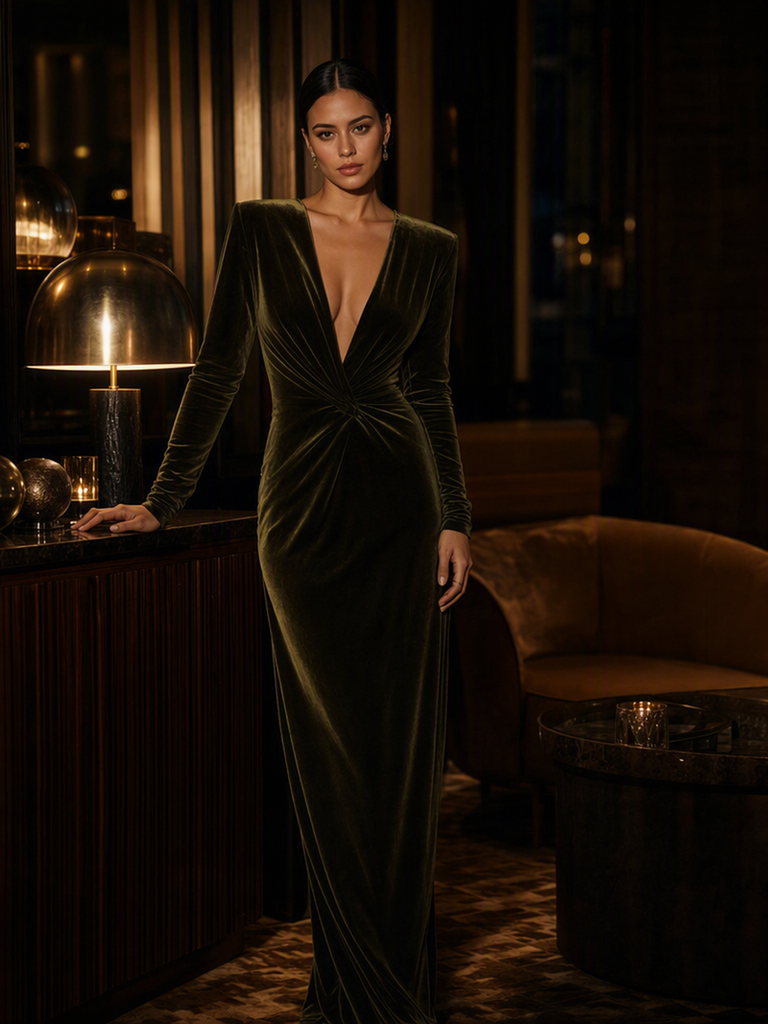
Prompt: Woman in a deep olive green velvet dress, fitted long sleeves, plunging V-neckline, floor-length column silhouette, rich matte-to-shadow texture, sultry smoky-eye makeup, sleek center-part hair. Standing in a dimly lit lounge setting, warm ambient lighting with deep shadows, luxury editorial photography, moody atmosphere.
Velvet Evening Dress
Fashion Diffusion AI-generated

Why it works: Describing velvet’s matte-to-shadow texture and pairing it with deep shadows helps the model render the fabric’s light absorption instead of defaulting to a shiny finish.

9. Balletcore Corset Mini Dress

Prompt: Young woman in a soft pink balletcore corset mini dress, structured bodice with visible boning seams, ribbon lace-up back detail, a sheer tulle underlay peeking beneath the hem, delicate ribbon straps, soft glowing skin, loose face-framing curls. Standing in a sunlit room with sheer curtains, warm soft natural light, dreamy Pinterest-aesthetic photography, high-detail fabric texture, youthful and romantic mood.
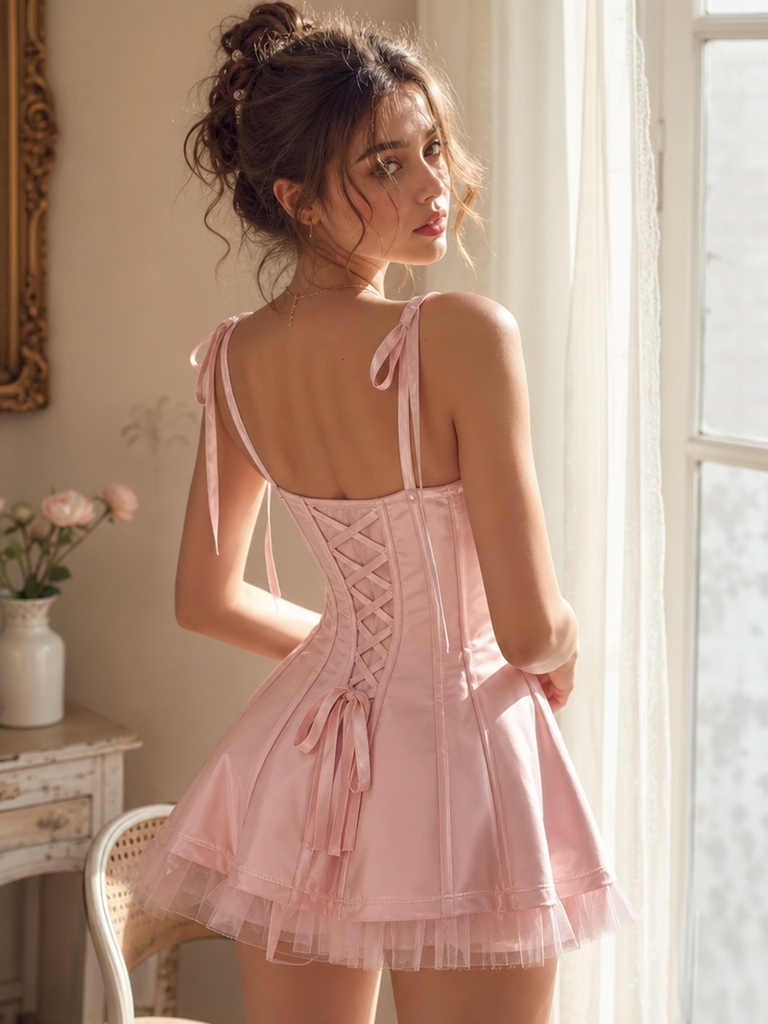
Balletcore Corset Mini Dress
Fashion Diffusion AI-generated

Why it works: Naming precise construction details like “visible boning seams” and “ribbon lace-up back” gives the model concrete garment structure to render instead of a generic “corset dress,” while the soft natural light keeps the mood dreamy and youthful rather than harsh or clinical.

10. Sheer Slip Dress Over Denim

Prompt: Sheer ivory slip dress with an uneven asymmetric strap, layered over wide-leg jeans with a loose stacked pooling effect, tucked into brown suede ankle boots. Walking down a sunlit city sidewalk, tousled beachy waves, soft dewy makeup, golden hour light, candid Pinterest-style photography, effortless youthful mood.
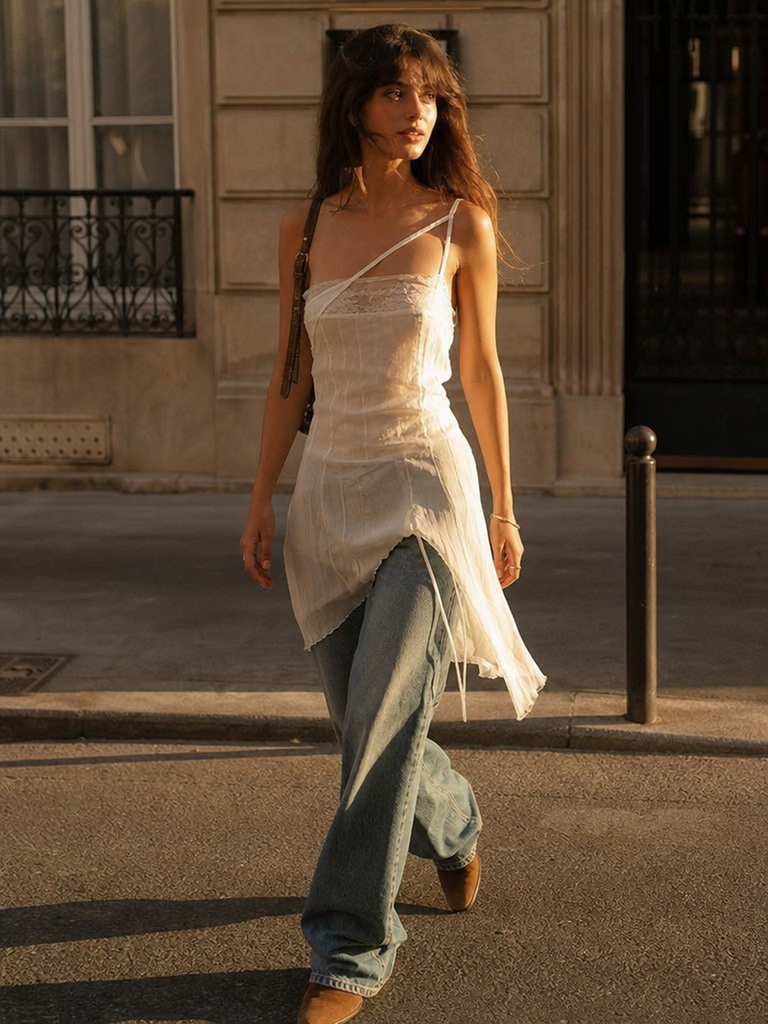
Sheer Slip Dress Over Denim
Fashion Diffusion AI-generated

Why it works: Naming the dress-over-jeans pairing directly, rather than just describing the dress alone, tells the model this is an intentional styling combination and keeps the sheer fabric from getting lost against denim.

11. Wedding Dress

Prompt: Bride in an elegant modern wedding dress, ivory silk with a fitted bodice and flowing A-line skirt, delicate lace appliqué along the neckline, sheer long sleeves, soft cathedral-length veil, natural bridal makeup, loose romantic updo, standing in a light-filled venue with large arched windows, soft golden backlighting, romantic bridal editorial photography, dreamy and elegant mood.
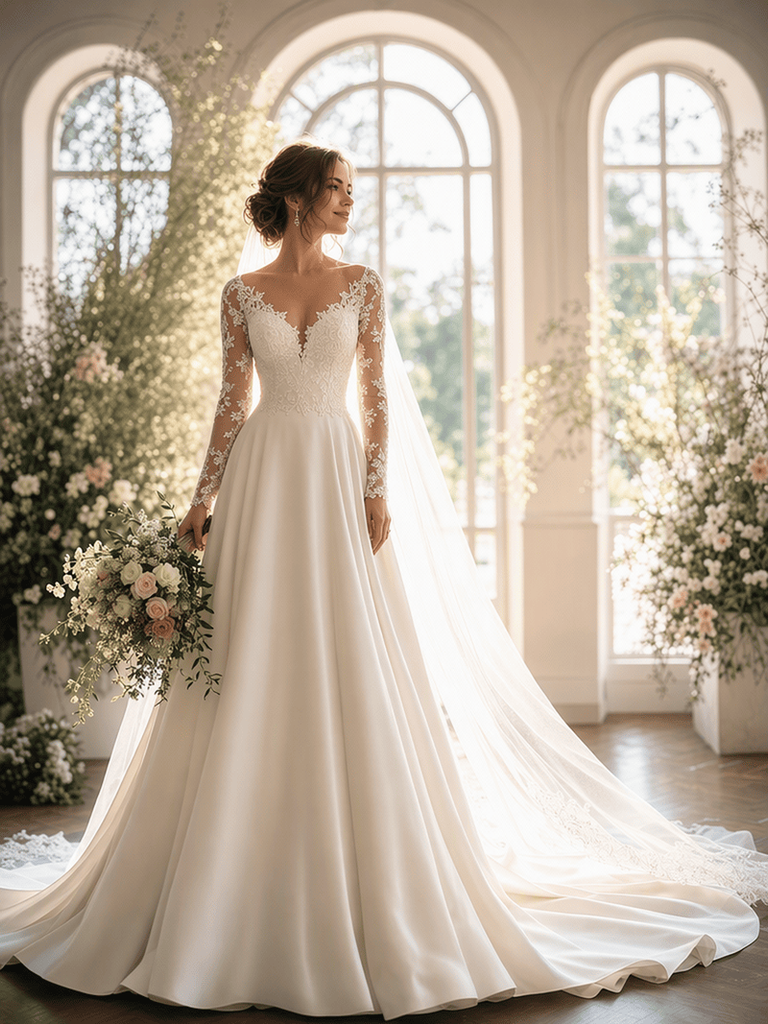
Wedding Dress
Fashion Diffusion AI-generated

Why it works: Separating structural elements like the fitted bodice from decorative ones like the lace appliqué keeps the model from blending them into one vague “lacy dress.” Want more wedding-specific styling combinations? Check out our full guide on virtual wedding dress try-on styles.

12. Denim Maxi Dress

Prompt: Woman in a relaxed denim maxi dress, medium-wash blue, drop-waist silhouette, button-front detailing, frayed hem, tucked-in fitted white tank underneath, gold hoop earrings, straight center-part hair. Standing in a sunlit outdoor courtyard, warm natural daylight, laid-back editorial photography, effortless everyday-luxury mood.
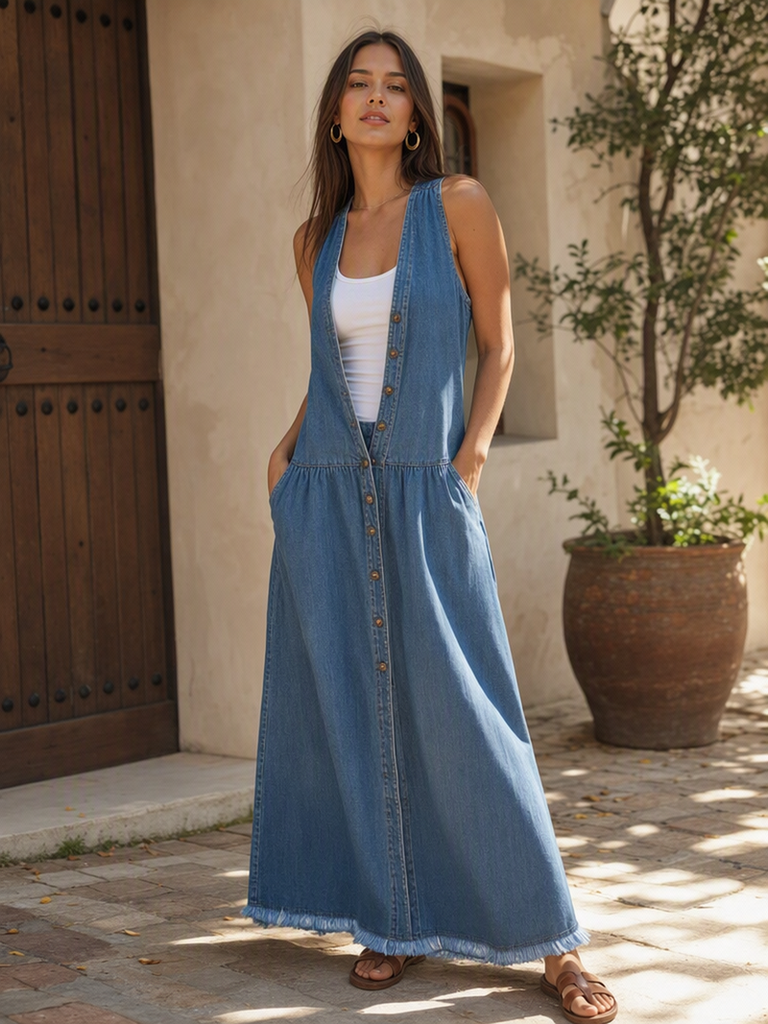
Denim Maxi Dress
Fashion Diffusion AI-generated

Why it works: Naming construction details like “button-front” and “frayed hem” gives the model concrete cues instead of leaving “denim” to be interpreted as a flat color block.

13. Asymmetric Cut-Out Dress

Prompt: A sculptural black cut-out dress with an asymmetric hem and a single waist cut-out, worn by a confident woman with slicked-back hair, minimal silver jewelry, sharp contour makeup, standing against a raw concrete wall, hard directional lighting, high-contrast fashion photography, avant-garde mood.
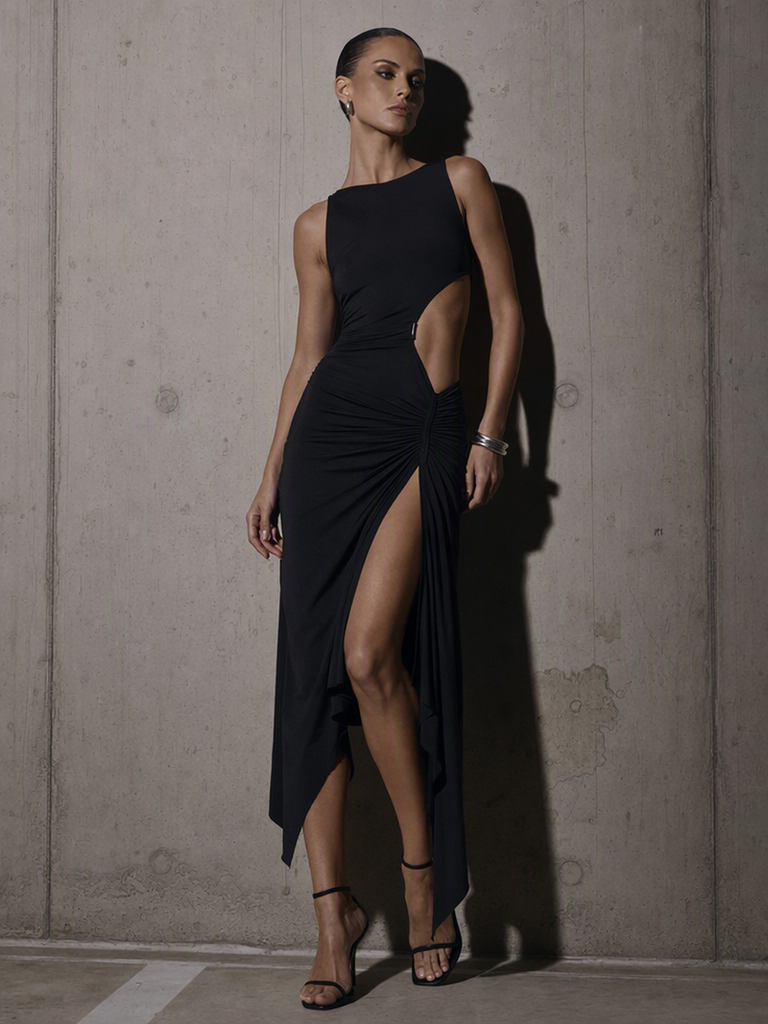
Asymmetric Cut-Out Dress
Fashion Diffusion AI-generated

Why it works: Leading with the garment instead of the subject puts the design detail front and center, which helps when the cut-out or asymmetry is the whole point of the look.

14. Modern Halter Mini Dress

Prompt: Candid street-style photograph of a woman crossing a city intersection in a fitted ivory halter mini dress with a low back, structured neckline, strappy heels, oversized sunglasses, soft afternoon light, slight motion blur in the background, downtown fashion week energy.
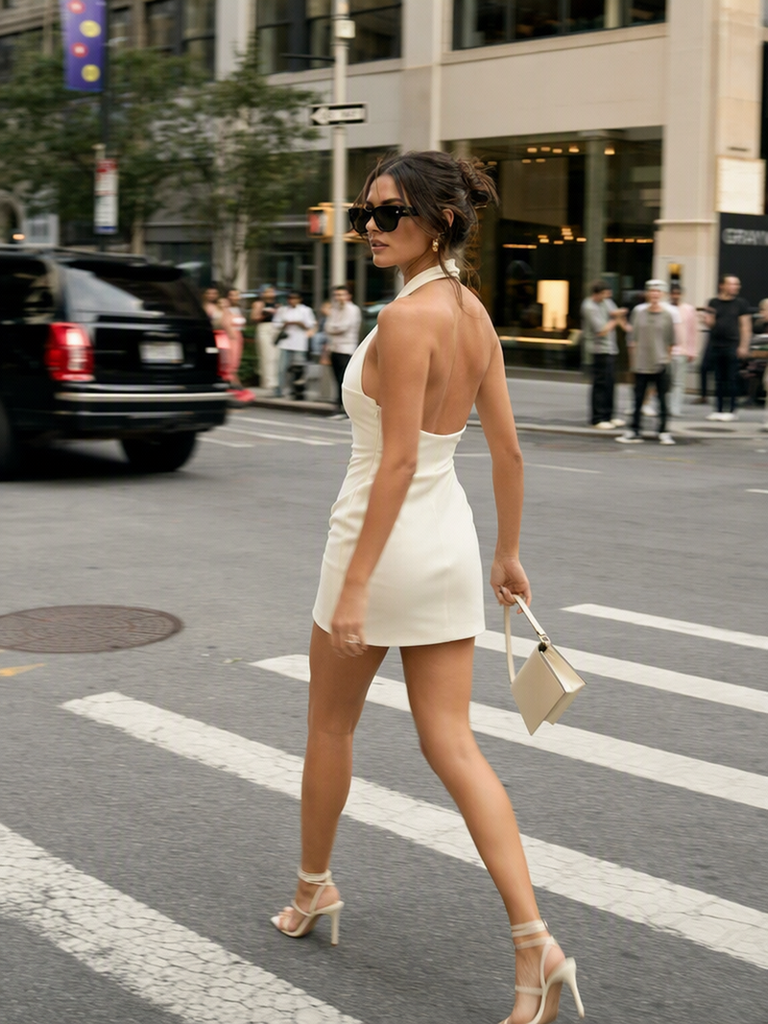
Modern Halter Mini Dress
Fashion Diffusion AI-generated

Why it works: Opening with the photography style and scene rather than the subject sets the energy of the whole shot before a single garment detail is introduced.

15. Sculptural Editorial Column Dress

Prompt: Full-body fashion photograph showcasing a contemporary ivory column dress with architectural pleating along one shoulder, worn by a poised model with a slicked-back ponytail and no visible jewelry, set against a plain white cyclorama background, bright even studio lighting, minimalist quiet-luxury aesthetic.
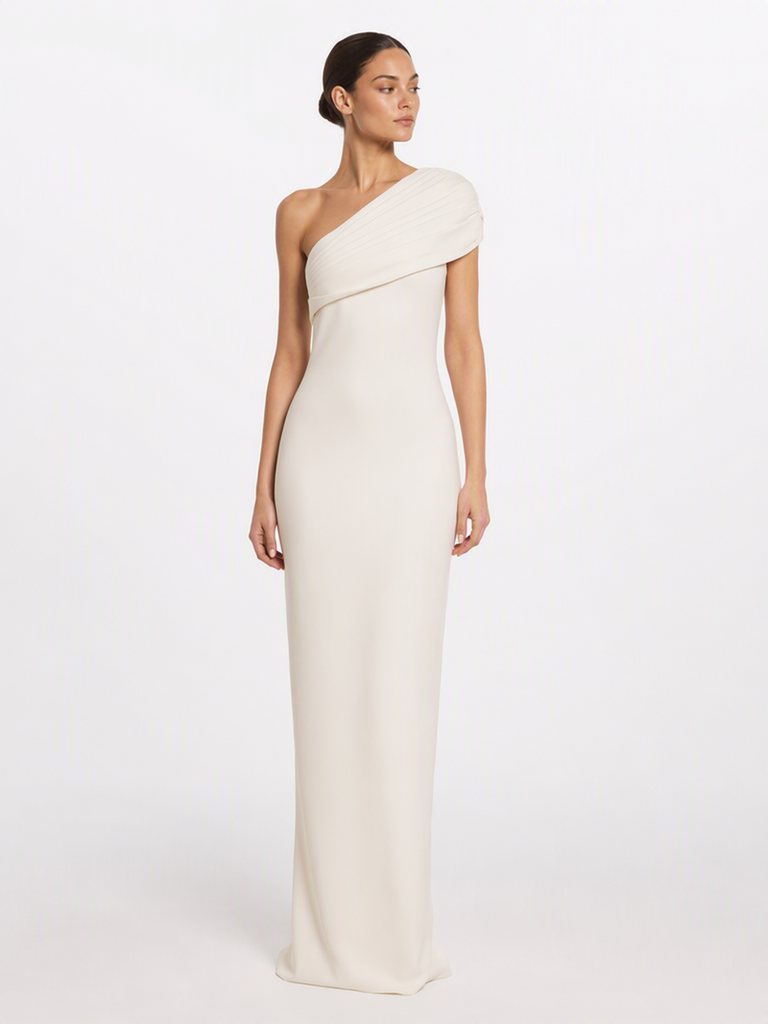
Sculptural Editorial Column Dress
Fashion Diffusion AI-generated

Why it works: Framing the prompt as a “photograph showcasing” the dress, rather than a woman wearing it, shifts focus toward the garment’s construction, which suits product-style editorial shots.

How to Write a Modern Dress Prompt

Not every well-written prompt reads as current. Modern results tend to favor clean silhouettes, asymmetric or sculptural details, understated colors, minimal styling, and an editorial photography style over busy, predictable ones. The steps below turn that idea into a repeatable process, from structure to vocabulary to a ready-to-use template.

Layer your prompt in the right order

A strong dress prompt usually layers information in a consistent order, which makes it easier to edit later without rewriting the whole thing:

  1. Subject & pose — who, and what they’re doing
  2. Garment details — silhouette, fabric, color, construction
  3. Styling — hair, accessories, makeup
  4. Setting & lighting — where the shot takes place and how it’s lit
  5. Camera & photographic style — lens, angle, mood, reference aesthetic

You don’t have to start with the subject every time. As examples 13 to 15 show, leading with the garment or the scene instead can work just as well, especially when the design detail or the setting is the main point of the image.

Apply a few key techniques

Once that order feels familiar, a handful of techniques separate a decent prompt from one that reads as modern and editorial:

  • Anchor with a photography style. Terms like “editorial fashion photography,” “studio photography,” or “candid street style” do more work than any single adjective. They tell the model how to frame, light, and compose the whole image at once.
  • Be specific about fabric behavior, not just fabric name. “Satin” alone is ambiguous. “Satin with a glossy finish” or “lightweight cotton with natural drape” gives the model a texture and movement cue to work from.
  • Pair color with material. Color reads differently on different fabrics. Specifying both, such as “deep emerald satin” instead of “deep emerald” alone, produces more predictable results.
  • Use silhouette vocabulary deliberately. Words like “fitted,” “A-line,” “straight,” “oversized,” and “cinched waist” define shape far more reliably than vague terms like “flattering” or “stylish.”
  • Match lighting to mood, not just to time of day. “Golden hour” suggests warmth and softness, while “dramatic side lighting” suggests contrast and edge. Choose lighting language that supports the emotional tone you want.
  • Keep one clear focal point. Avoid stacking too many competing style keywords, such as minimalist and boho and streetwear at once. One dominant aesthetic per prompt produces a cleaner, more coherent result.

Pull from a modern vocabulary

With the order and techniques in place, building new prompts is mostly a matter of swapping in different descriptive words within each category below.

CategoryExamples
Silhouettefitted, column, A-line, oversized
Necklinesquare, halter, asymmetric
Fabricsatin, silk, linen, organza
Detailsdraping, pleats, cut-outs
Colorivory, burgundy, chocolate brown
Aestheticminimalist, editorial, quiet luxury, balletcore, Pinterest-aesthetic

Put it all together with a template

[Subject + pose], wearing a [silhouette] [dress type] in [color], made of [fabric/texture], with [notable design detail]. [Hair/makeup/accessories]. Set in [location/background], with [lighting description]. Shot in [photography style], [camera/lens detail if desired].

Fill in each bracket using the vocabulary above, and you’ll consistently produce prompts with the structure that modern dress generation responds to best. For more ready-to-use ideas beyond dresses, our trending prompt collection is also worth a look.

Create Your Own Modern Dress Designs

Reading through prompt examples is a great starting point, but the fastest way to find your own style is to experiment directly. Take any of the prompts above, swap in your own colors, fabrics, or settings, and see how small wording changes shift the final look.

Ready to turn these prompts into real images? Head over to Fashion Diffusion and start generating your own modern dress looks today.

FAQ

What are the best modern dress prompts for women?

The strongest ones pair a clear silhouette and fabric with a defined color and a specific photography style, covering looks like sculptural editorial dresses, halter minis, and structured column silhouettes rather than relying on vague style words alone.

How do I create a modern dress design with AI?

Start with the garment’s silhouette and fabric, add one strong design detail such as a cut-out or pleating, then specify lighting and a photography style. This structure consistently produces sharper, more editorial-looking results.

What makes a dress prompt “modern” rather than generic?

A modern dress prompt combines a clear silhouette, a named fabric with texture cues, and a specific photography style instead of vague words like “trendy” or “stylish.”

Do I need to specify a camera or lens in every prompt?

Not always. Lens details help with close-up portraits, but for full-body looks, naming a photography style like “editorial fashion photography” is usually enough.

Why do my dress prompts sometimes produce the wrong fabric texture?

This usually happens when fabric behavior isn’t described. Adding a texture cue, such as “glossy finish” for satin or “soft drape” for chiffon, gives the model a clearer target.

Can I combine multiple dress styles in one prompt?

It’s best to keep one dominant aesthetic per prompt. Mixing several strong style keywords together tends to produce a less coherent image than focusing on one clear direction.

How specific should color descriptions be?

Pairing a color with its material, such as “deep emerald satin” instead of just “green dress,” produces more predictable results, since the same color reads differently on different fabrics.
Avatar photo 通过Ethan Davis

How to Generate a Fashion Sketch from Text — Step-by-Step (No Drawing Skills)

Most design ideas start as words. A floaty midi dress with wide sleeves. A structured blazer with an oversized lapel. A low-rise cargo skirt paired with a cropped halter top. The gap between having that idea and seeing it visually has always required either drawing skills or an illustrator on call.
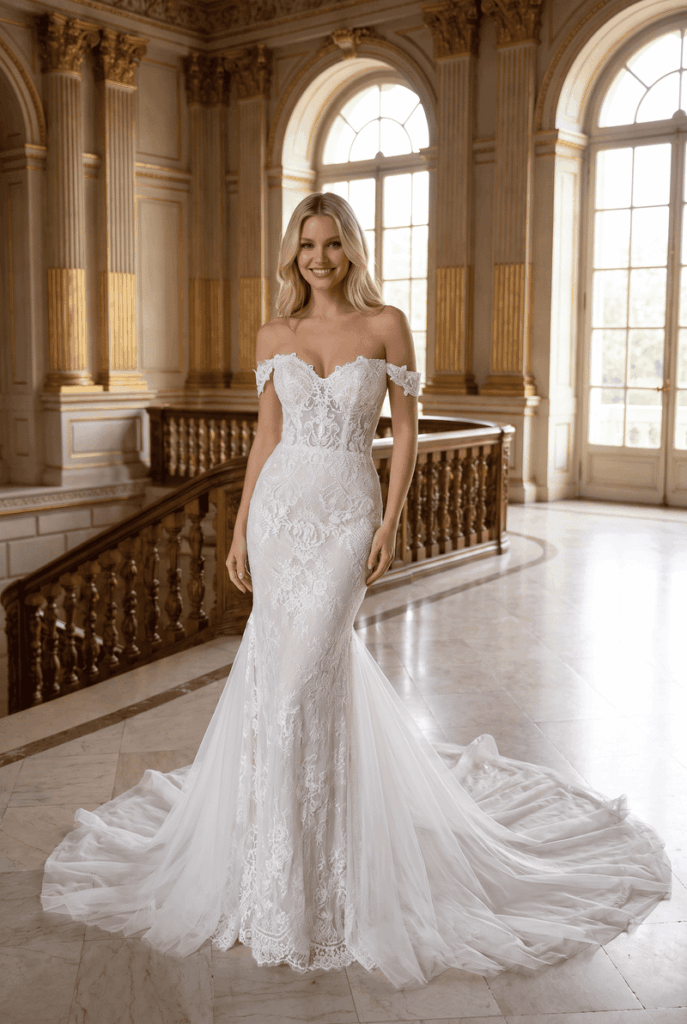
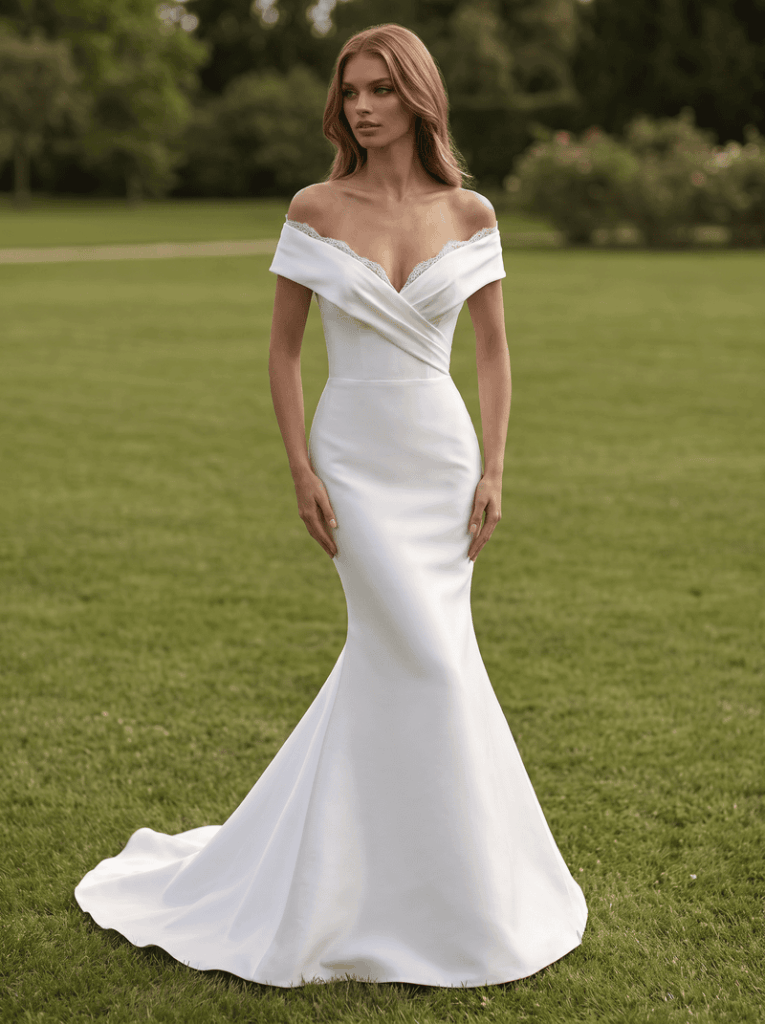
An AI fashion sketch generator closes that gap. Type a description of any garment and get a clean fashion sketch in seconds — line art or colored illustration, no drawing skills required, no software to learn. 

This guide walks through the full process: how the tool works, how to write prompts that produce accurate results, and what to do with the sketches once you have them. If you are still exploring which AI sketch tool is right for you, that’s a good place to start.

What Is an AI Fashion Sketch Generator

An AI fashion sketch generator takes a written description of a garment and converts it into a fashion sketch automatically. Unlike general-purpose image generators, a fashion-specific tool understands the vocabulary designers actually use — A-line, drop shoulder, cowl neck, raglan sleeve, bias cut — and translates those terms into accurate garment drawings.

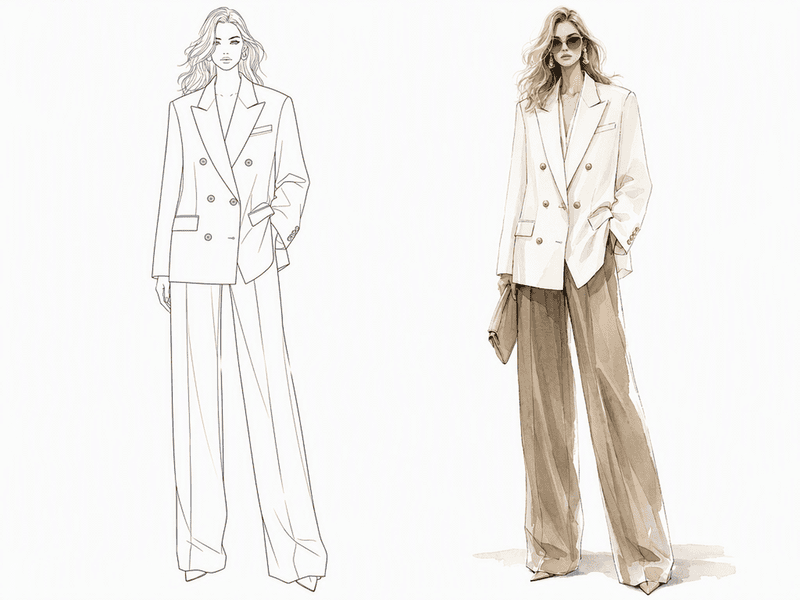
Output style varies by tool. Fashion Diffusion, for example, offers two modes: Line art for clean, minimal technical drawings suited for production briefs and tech packs, and Colored sketches for illustrated fashion visuals with color and texture, suited for mood boards and client proposals.

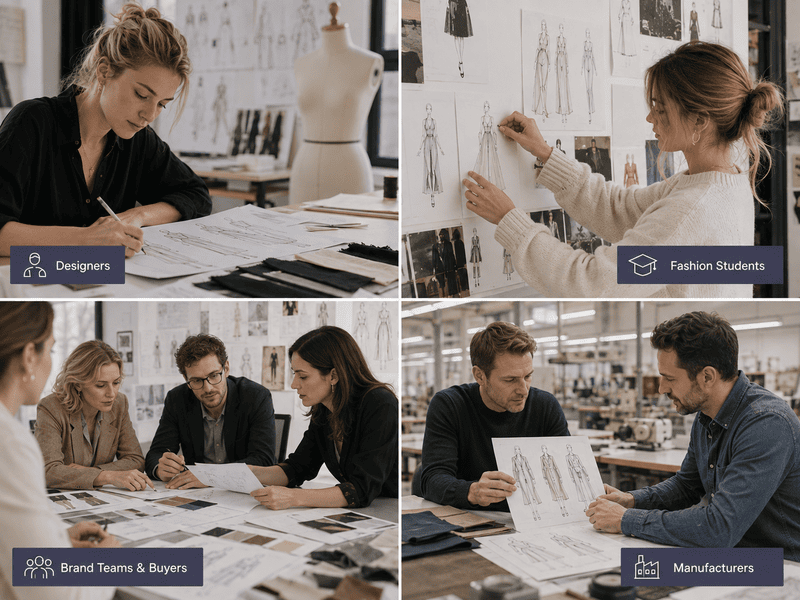
Who Uses Text to Fashion Sketch Online

The tool serves different people for different reasons — understanding where it fits your workflow is the first step.

Designers who have ideas but not the time or confidence to sketch by hand use it to generate concept drawings they can hand directly to pattern makers or present to clients. The output quality is good enough for production briefs without additional refinement.

Fashion students use it to populate portfolio boards quickly — exploring more silhouettes, garment categories, and design directions in the time it would normally take to produce one hand-drawn sketch.

Brand teams and buyers use it during range planning and buying meetings to visualize trend descriptions from market reports. Converting a written trend direction into a rough garment illustration on the spot is faster than waiting days for a designer to produce visuals.

Manufacturers use it to align on design intent before production starts. A shared visual generated from a client’s written brief reduces the misunderstandings that cause costly revisions.

Who uses text to fashion sketch online

How to Generate a Fashion Sketch from Text Online — Step by Step

Fashion Diffusion’s AI text to sketch tool runs in the browser. No software installation, no design background required.

Step 1: Open the Text to Sketch Tool

Go to Fashion Diffusion’s Text to Sketch tool and sign in. New accounts start with free credits — no payment required to try it. The interface is a text input field with two options above it: Line Art and Colored Sketch.

Fashion Diffusion's AI fashion sketch generator interface.

Step 2: Choose Your Sketch Style

Select the output type before writing your prompt.

Line Art produces black-and-white line drawings — clean outlines, minimal detail, no fill. This is the right choice when you need the sketch for a tech pack, a production brief, or a presentation where the garment construction needs to read clearly.

Colored Sketch produces illustrated fashion visuals with color, texture, and stylized figure rendering. This works better for portfolio boards, mood boards, client proposals, and any context where visual appeal matters as much as technical accuracy.

Two sketch styles.
Fashion Diffusion AI-generated

Step 3: Write Your Text Prompt

This is where the quality of your output is determined. The more specific the description, the more accurate the result. A prompt that says “a dress” gives the AI very little to work with. A prompt that describes silhouette, neckline, sleeve, fabric, length, and mood produces a result that reflects an actual design intent.

Prompt structure that works well:

[garment type] + [silhouette/fit] + [neckline] + [sleeve] + [fabric/texture] + [length] + [details] + [style/mood]

Examples across garment categories:

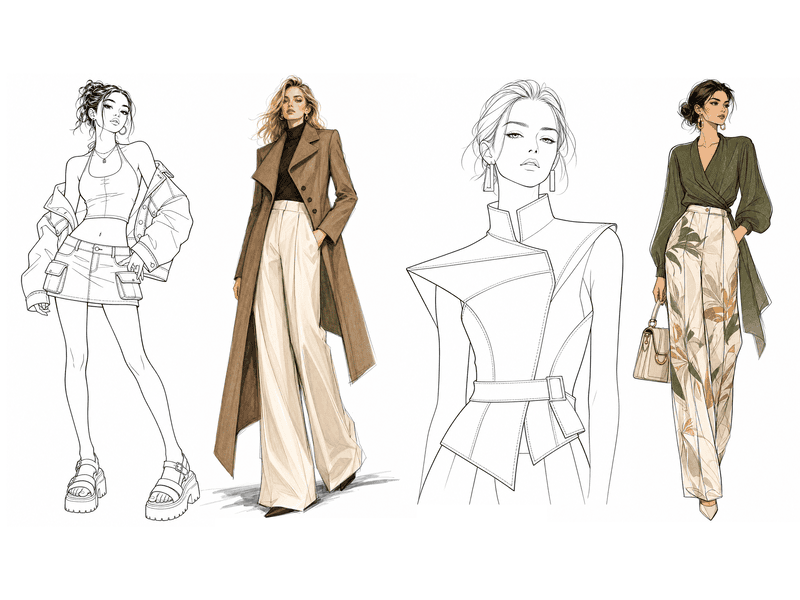
  • Dress: “Loose flowy tunic dress, wide flared long sleeves, lace trim details on cuffs, high-waisted tiered long skirt, layered ruffled sections, plenty of soft fabric gathers, thin waist belt”
  • Outerwear: “Long-length asymmetrical coat, single-breasted buttons, wide lapels and long sleeves, paired with high-waisted wide-leg trousers featuring side pockets and floor-grazing length, simple and elegant, European and American female model”
  • Streetwear: “Low-rise mini cargo skirt with big flap side pockets, fitted halter neck crop top, open back design, oversized lightweight cropped denim jacket draped over shoulders, platform chunky sandals, youthful retro 2000s silhouette, sharp clothing outlines, line art without fill”
  • Editorial: “Fashion illustration, full body female model, wearing elegant designer outfit, clean bold outlines, flat color blocks, soft grain texture, minimalist fashion editorial style, muted high-end color palette, simple solid background”
  • Croquis: “Fashion croquis sketch, black-and-white line art, female fashion figure, half-body, avant-garde structured garment, clear clothing silhouette and seam details, only outline lines, no color, minimal hatching, white background”
Sketch examples generated by Fashion Diffusion.
Fashion Diffusion AI-generated

Step 4: Generate and Refine

Click Generate. The AI produces the sketch in seconds. Review it against your original intent — does the silhouette read correctly? Is the neckline accurate? Does the overall proportion feel right?

If the result isn’t quite there, adjust the prompt rather than accepting a near-miss. Small changes in wording produce meaningfully different results: “structured” versus “relaxed,” “midi” versus “maxi,” “fitted” versus “boxy” all shift the output noticeably. Generate two or three variations before deciding on a direction.

How to Write Better Prompts for Fashion Sketches

Prompt quality is the single biggest factor in output quality. Here’s what makes a prompt work.

Be specific about silhouette. Words like “A-line,” “straight,” “fitted,” “oversized,” “balloon,” and “wrap” give the AI clear structural information. “Nice dress” gives it almost nothing.

Name the fabric or texture. “Silk,” “denim,” “linen,” “knit,” “sheer,” “velvet” all produce different visual textures in the output. Without a fabric term, the AI defaults to a generic surface that may not match your intent.

Specify construction details. Seam placement, collar type, pocket style, closure type — the more construction detail you include, the more the output resembles an actual garment rather than a generic shape.

Add a style reference. Terms like “minimalist,” “editorial,” “Megan Hess style,” “1990s tailoring,” or “avant-garde” influence the overall aesthetic of the illustration beyond just the garment. They’re especially useful for colored sketches where mood matters.

What to Do with Your Fashion Sketch

Once you have a sketch you are happy with, here’s where it can go:

  • Mood board: Import into Milanote or Canva alongside fabric swatches, color references, and trend imagery to build a coherent design direction;
  • Client brief: Present the sketch during a consultation to get immediate visual feedback rather than waiting days for a hand-drawn version;
  • Production handoff: Line art output is clear enough to communicate construction intent to a pattern maker or production team before formal tech packs are produced;
  • Design exploration: Run the same prompt with small variations (different neckline, sleeve, or length) to generate a set of options and compare them side by side.

Start Generating Fashion Sketches with Fashion Diffusion

The prompt examples and techniques in this guide cover most of what you need to get useful results quickly. The rest comes from trying things — a prompt that produces exactly what you had in mind in one attempt, or one that takes three iterations to get right. Both are part of how the tool works, and each attempt produces something you can evaluate and build on.

The design idea in your head doesn’t have to wait for someone who can draw it. Fashion Diffusion‘s AI fashion sketch generator converts any garment description into a professional fashion sketch in seconds — line art or colored illustration, free to try.

New accounts start with free credits. Write a description of the garment in your head and see what the AI produces.

FAQ

What is an AI fashion sketch generator?

A tool that generates fashion sketches from text descriptions using AI. You type a description of a garment — silhouette, neckline, sleeve, fabric, length — and the AI produces a clean fashion illustration or flat drawing in seconds, without any drawing skills required.

Do I need drawing skills to use the text to fashion sketch tool?

No. The entire workflow is text-based. You describe what you want and the AI generates the visual. No tablet, no stylus, no art background required.

What types of garments can I generate fashion sketches for?

All fashion categories — dresses, tops, trousers, outerwear, eveningwear, casualwear, streetwear, and accessories. The AI understands fashion-specific terminology including silhouette types, neckline styles, sleeve constructions, and fabric names.

Can I use AI-generated fashion sketches commercially?

Yes. Downloaded sketches from Fashion Diffusion can be used in client presentations, production briefs, portfolio work, and marketing materials.

Is the AI fashion sketch generator free?

Yes. New Fashion Diffusion accounts start with free credits that can be used on the text to fashion sketch tool. Additional credits are available on paid plans.

Avatar photo 通过Ethan Davis

Try On Engagement Rings Virtually Before You Propose — Here’s How

Choosing an engagement ring is harder than it looks. You are not shopping for yourself. You are trying to picture a ring on someone else’s hand, in a size you may not know, in a style you hope she’ll love. The ring in the display case — or on a model’s hand in a product photo — tells you almost nothing about how it will look on the person you are proposing to.

That gap is exactly what a virtual engagement ring try on closes. Try on ring online lets you do exactly that. Upload a photo of the ring and a photo of her hand. The AI shows you how the ring looks on her — before you buy, before you propose.

Why the Ring Looks Different on a Hand Than in a Display Case

Product photography is designed to show a ring at its absolute best. Studio lighting maximizes diamond brilliance. The angle is chosen to flatter the setting. A white or velvet background removes all visual competition.

Professional jewelry photography uses LED lighting and controlled setups specifically to enhance sparkle in ways that natural daylight doesn’t replicate. The stone in the product image is showing you its best-case performance, not its everyday appearance on an actual hand.

Proportion is the other variable that photos don’t convey. The same ring reads completely differently depending on the width of the finger wearing it. A stone that looks confidently sized in isolation can appear modest on a wider finger, or unexpectedly bold on a very narrow one. There’s no way to know which side of that equation you are on without seeing the ring in context, which is exactly what a virtual try-on provides.

What Is Virtual Engagement Ring Try-On

Virtual engagement ring try-on uses AI to place a ring onto a photo of a hand, generating a realistic preview of how that specific ring looks when worn. You upload two inputs: an image of the ring and a photo of a hand. The AI renders the ring at accurate scale, with natural light behavior and realistic positioning on the finger.

Unlike AR try-on tools built into specific jeweler websites, virtual try on engagement ring online tool works with any ring image from any source — a screenshot from a jeweler’s website, a Pinterest save, a photo from a magazine. And from any hand photo you already have, including a photo of your partner’s hand.

A Note on the Photo You Use

The quality of the try-on result depends significantly on the hand photo. A few things make a meaningful difference.

For your own hand: Take a photo in natural daylight, palm facing down, fingers relaxed and slightly spread. A plain, neutral background removes distractions. Avoid heavy shadow across the fingers.

For your partner’s hand: You probably have more photos than you think. A photo where her hand is clearly visible, can be cropped to isolate the hand. If the background is cluttered, run it through an AI background remover before uploading to get a cleaner result. The AI doesn’t need a posed hand photo to produce a useful result. What it needs is a clear view of the finger the ring will sit on, with enough detail to read skin tone, finger width, and natural positioning.

If the photo is taken at an angle, the ring preview will reflect that perspective. A straight-on, slightly downward angle produces the most useful result for judging proportions.

How to Try On an Engagement Ring Virtually

With your ring image and hand photo ready, the process takes less than a minute. Fashion Diffusion’s AI virtual try-on ring tool runs entirely in the browser — nothing to install, free to start.

Step 1: Find and Save the Ring Image

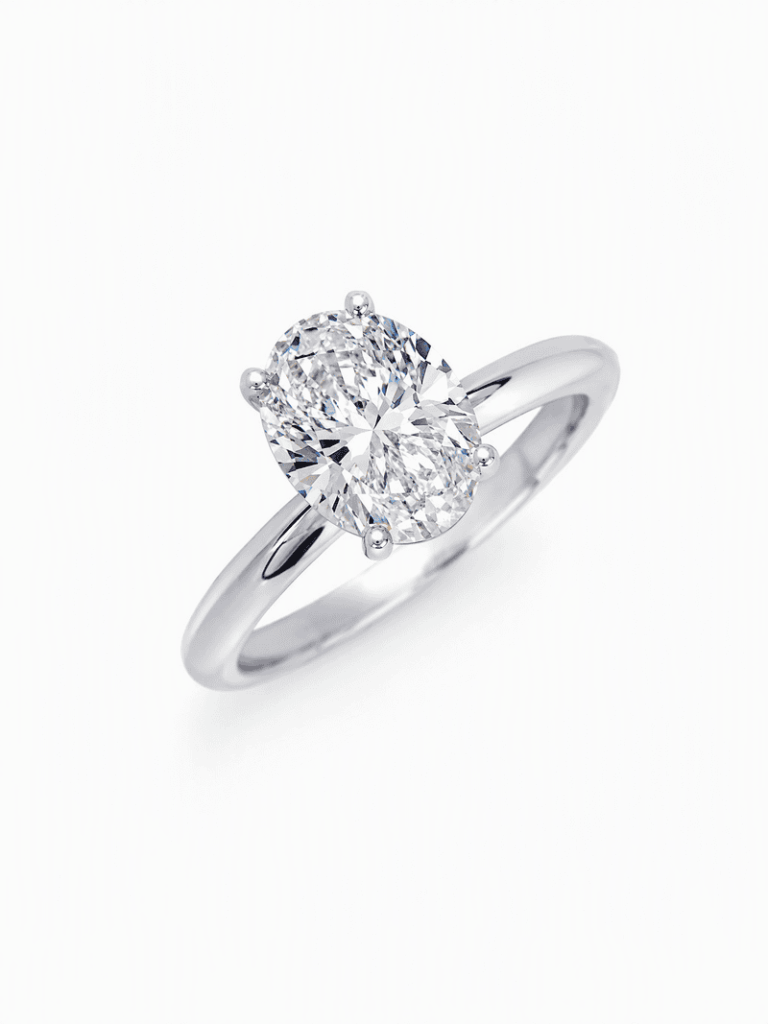
Start by saving the ring image you want to try. This can be a screenshot from any jeweler’s website — James Allen, Brilliant Earth, Blue Nile, a local jeweler, anywhere. It can also be an image you’ve saved from Pinterest, a magazine, or a ring you’ve photographed in a store. The AI reads the ring’s setting, stone shape, band width, and metal from the product image, so a clear, well-lit product photo gives the most accurate result.

Upload your ring photo.
Fashion Diffusion AI-generated

Step 2: Upload the Hand Photo

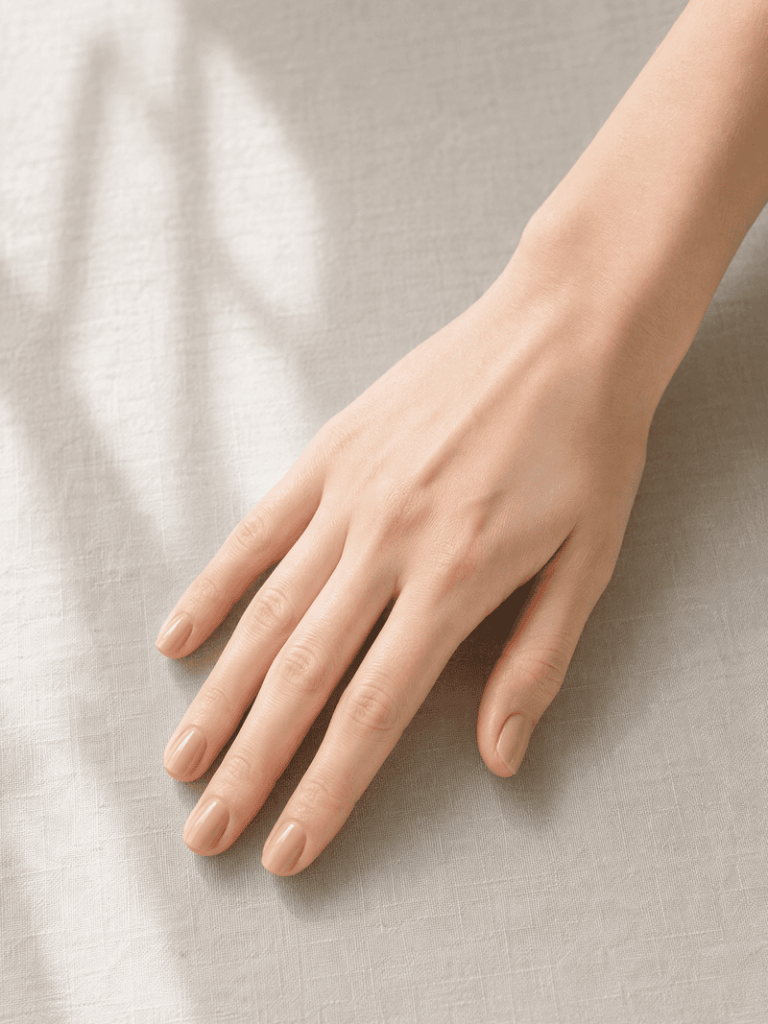
Upload the hand photo alongside the ring image. The AI uses the hand photo to determine finger proportions and skin tone, then places the ring at accurate scale on the ring finger. See the section above for guidance on what makes a good hand photo — the same advice applies whether you are using your own hand or your partner’s.

Upload your hand image.
Fashion Diffusion AI-generated

Step 3: Generate and Compare

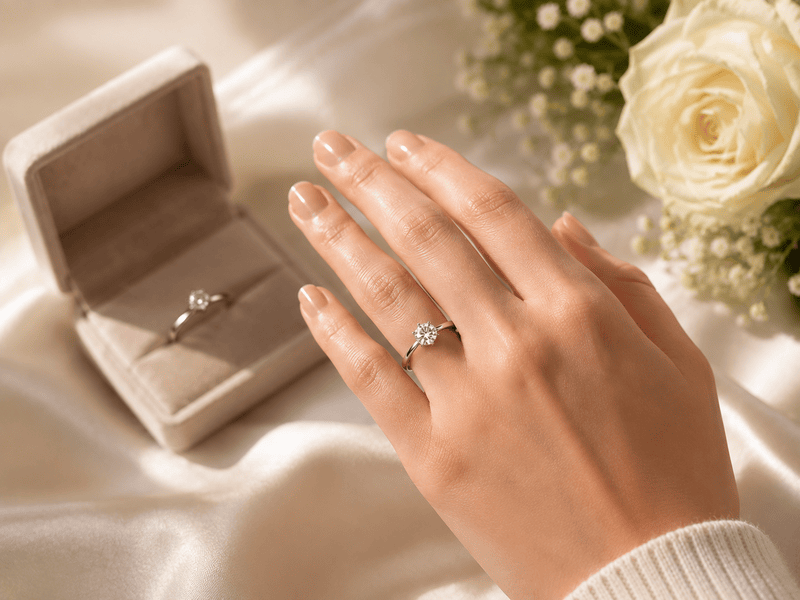
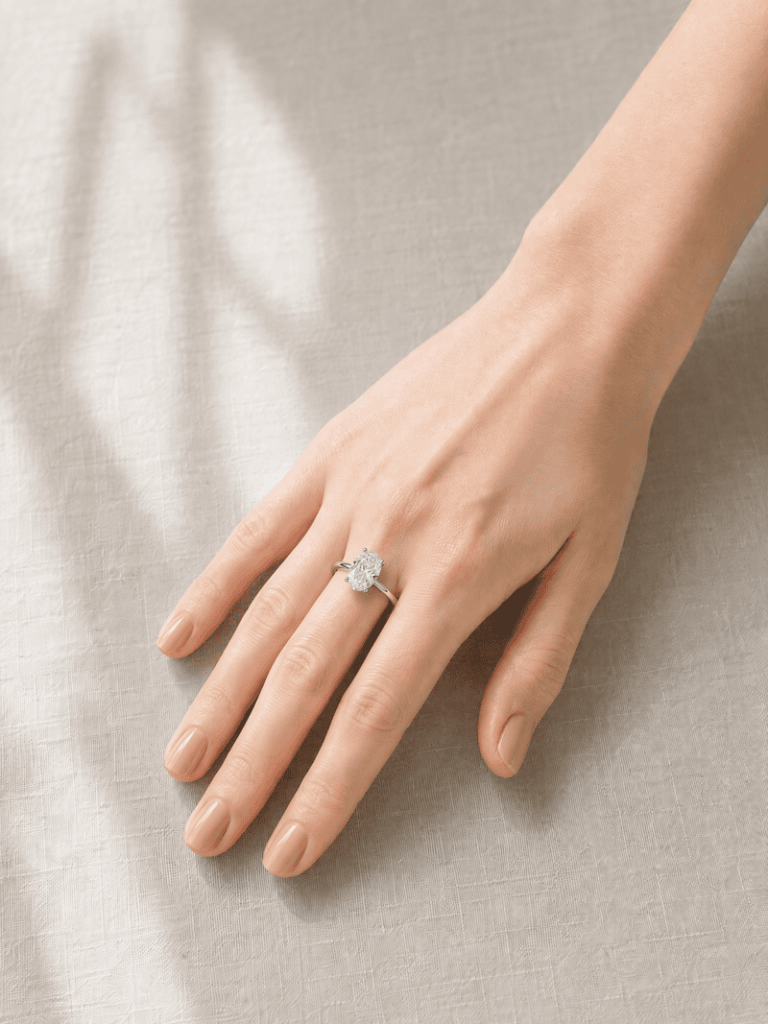
The AI generates the result in seconds. The ring appears at realistic scale, positioned naturally on the finger, with lighting consistent with the hand photo. If the result isn’t what you expected — the ring reads larger or smaller than anticipated, or the metal color isn’t landing right — adjust the input and try again.

Ring try-on effect generated by Fashion Diffusion.
Fashion Diffusion AI-generated

What to Look For in the Result

Generating the engagement ring try on is the first step. Knowing what to evaluate in the result is what makes it useful.

Ring-to-Hand Proportion

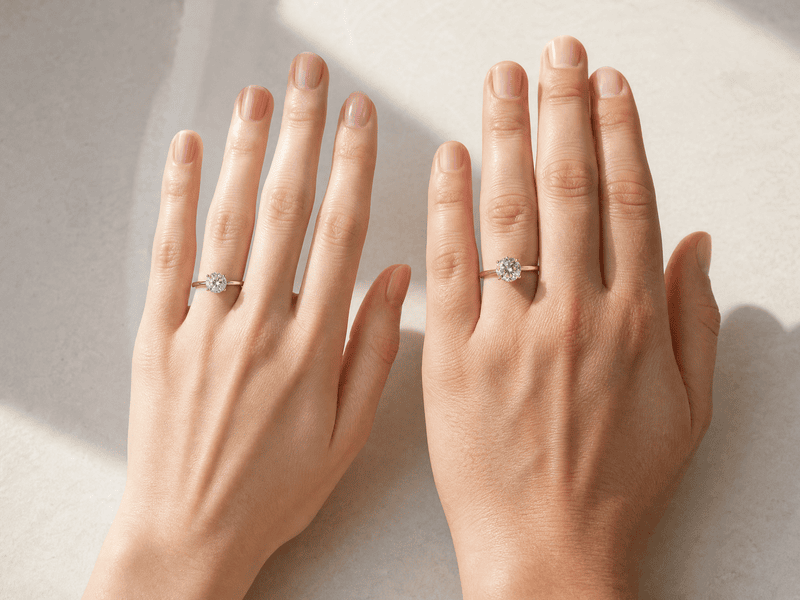
The ratio of the ring’s visual size to the width of the finger is the most important thing to assess. A stone that looks generously sized in a product image can appear modest on a wider finger. And a stone marketed as subtle can look bold on a very narrow one. The try-on shows you this relationship directly — use it to calibrate your expectations before purchasing.

Two hands of different sizes wearing the same ring showcase different proportional effects.
Fashion Diffusion AI-generated

Stone Shape and Visual Presence

Different cuts create different visual footprints on the hand. An oval elongates the finger. A round sits more centrally. A pear points in a direction that draws the eye. A toi et moi creates two focal points across the width of the finger. These are differences you can read in a product image, but seeing them in the context of an actual hand makes the choice much more concrete.

Metal Color Against Skin Tone

Yellow gold, white gold, and rose gold interact with skin tone in ways that are difficult to judge from a product image shot on a white background. Yellow gold reads warmer and more vintage against most skin tones. White gold reads cooler and more contemporary. Rose gold sits between the two, with a softness that works across a wide range. Seeing the metal color against the actual skin tone of the hand you are shopping for is a more reliable guide than any rule of thumb.

Different skin tones complement different ring materials and colors.
Fashion Diffusion AI-generated

Compare Multiple Rings Side by Side

The single most effective use of a virtual try-on tool is systematic comparison. Choose three to five rings that appeal to you, and run each one against the same hand photo. Because the hand is consistent across all comparisons, the differences you see are genuinely about the ring. Not about lighting, model, or camera angle variations between product photos. Save each result, then look at them together. The one that keeps drawing your eye is usually the right answer.

Try On Any Ring Before You Propose with Fashion Diffusion

The decision you are making is one of the most significant purchases of your life, and you are making it with limited information. Fashion Diffusion’s virtual engagement ring try-on puts the ring on the right hand before you commit — any ring, from any jeweler, on any photo you already have.

Propose with the right ring after trying Fashion Diffusion's AI virtual try-on ring tool.
Fashion Diffusion AI-generated

New accounts start with free credits. Upload a ring image and a hand photo and see the result before you make a decision.

FAQ

What is virtual engagement ring try-on?

A tool that places a ring image onto a hand photo using AI, generating a realistic preview of how the ring looks when worn. It shows accurate proportions, metal color, and stone presence on a specific hand, so you can evaluate the ring in context before purchasing.

Can I use a photo of my partner’s hand?

Yes. Use any photo where her hand is clearly visible—a candid shot, a photo cropped from a group picture. The AI doesn’t need a posed photo, just a clear enough view of the finger the ring will sit on.

What if I don’t know her ring size?

Ring size doesn’t affect the virtual try-on. The AI places the ring visually on the hand photo without needing size information. The try-on evaluates style, proportion, and visual fit—you’ll still need to determine her ring size separately before ordering.

Does it work with rings from any jeweler?

Yes. Upload any ring image—a screenshot from a jeweler’s website, a photo from a magazine, a Pinterest save—and the AI uses that image as the input. There’s no requirement to use a specific catalog or brand.

How accurate is the result?

The try-on generates a realistic visualization of the ring’s proportions, metal color, and stone shape on the hand. It accurately answers the questions product photos can’t—how the ring reads in scale, and how it looks against the specific skin tone and finger proportions you are shopping for.

Can I try on engagement rings online for free?

Yes. New Fashion Diffusion accounts start with free credits that can be used on the virtual engagement ring try-on tool.

Avatar photo 通过Ethan Davis

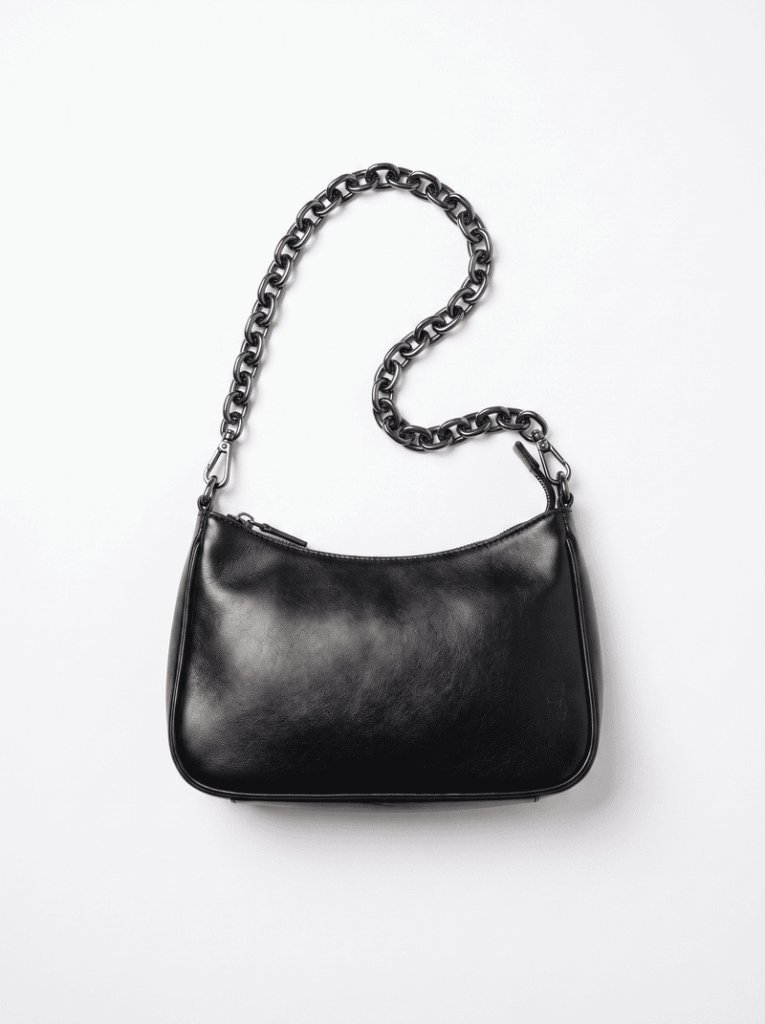
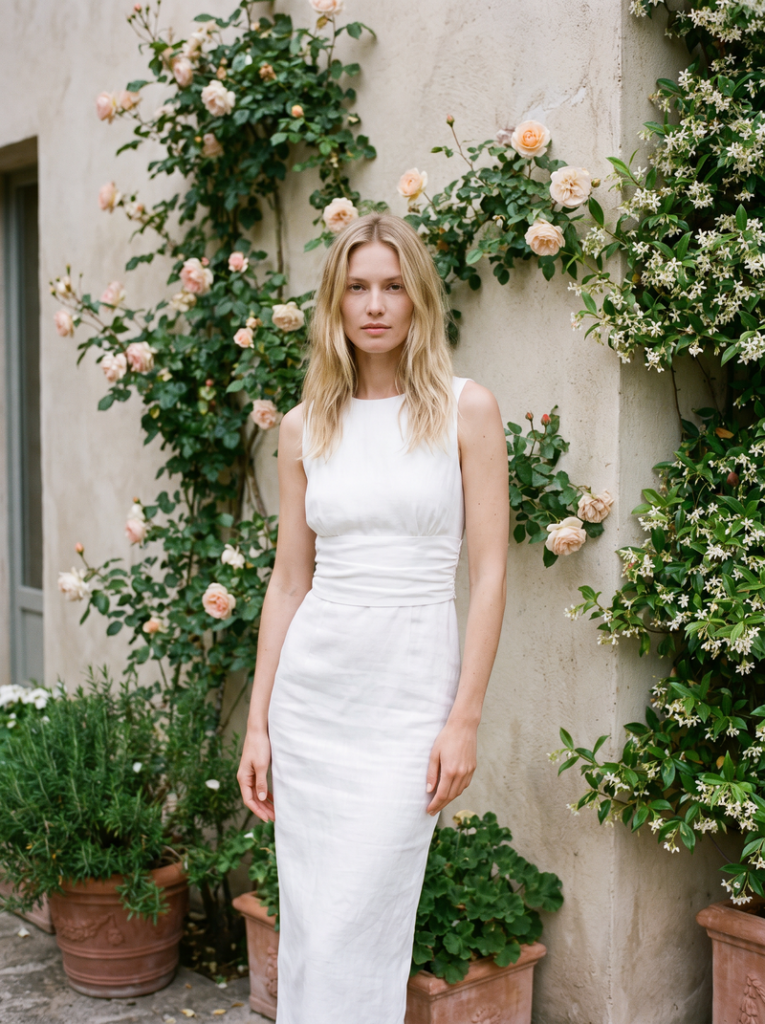
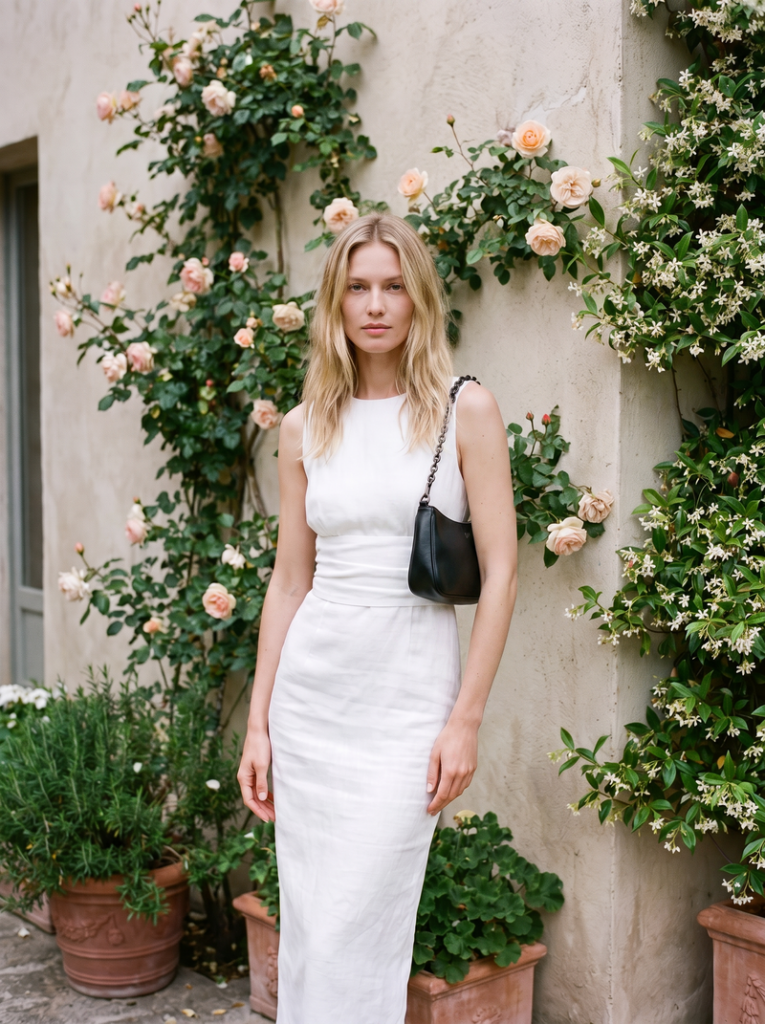
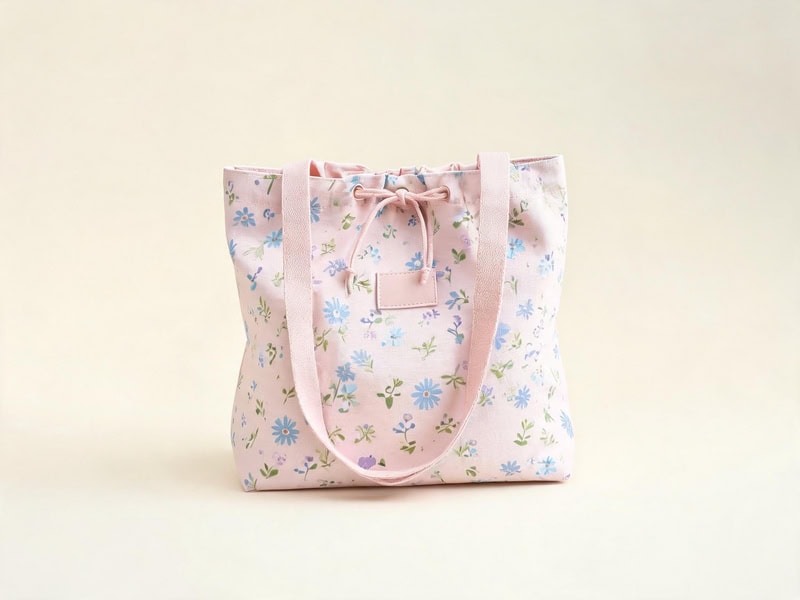
See How a Bag Actually Looks on You Before Buying — AI Try-On Tested

You’ve found a bag you love online. The photos look great. But the model carrying it is six feet tall with a completely different frame than yours. Is it actually the right size? Will it sit at the right height on your shoulder? Does the strap length work for how you carry bags?

These are questions a product photo can’t answer. Now you can try on handbag online with AI — and see exactly how that bag looks on your own photo, before you buy. Fashion Diffusion’s virtual bag try-on makes that possible.

Why Bags Are Harder to Buy Online Than Clothes

Clothing has a built-in reference system. Sizes, measurements, model dimensions — most fashion brands give you enough to make an educated guess about fit. Bags don’t. And that’s exactly why virtual try-on bag tools have become a genuinely useful decision-making tool, not just a novelty.

Product photography makes the problem worse. A bag shot on a marble surface looks different from the same bag on a model. A bag photographed at a slight angle reads smaller or larger than it is. A bag shown on a tall, thin model tells you almost nothing about how it will sit in proportion on a different body.

The questions that matter most can’t be answered by a product image at all. How high does it sit when worn crossbody? Does the drop length work for shoulder carry? Does the structured silhouette feel balanced with your proportions, or does it read as too small? Bags have a 19% online return rate, driven largely by fit uncertainty and the inability to visualize scale before purchasing.

AI virtual bag try-on closes that gap. Upload your photo and the bag’s product image, and you see it on your own body — not on a model, not on a surface, but on you.

What Is a Virtual Bag Try-On

AI bag try-on takes two inputs — a photo of a bag and a photo of a person — and generates a realistic image of that person carrying that bag. This is what makes AI bag try on different from simply browsing product images: the output is specific to your body, not to a brand’s sample model. The AI reads the bag’s shape, strap structure, and hardware detail from the product image, then places it naturally against the body proportions and outfit in the person photo.

The result isn’t a sticker placed on top of a photo. The bag is rendered at accurate proportion relative to the body, in a natural position for the carrying style, with consistent lighting that matches the original photo. Leather grain, chain links, zipper pulls, and hardware finish all carry over from the source image. Try on handbag online with AI and you see the actual product — not a generic bag shape applied to a figure.

Virtual bag try on - two models comparison.
Fashion Diffusion AI-generated

How to Try On a Bag Virtually with Fashion Diffusion

Fashion Diffusion’s AI virtual try-on bags is one of the most straightforward virtual bag try-on tools available — it runs in the browser with no software needed. Upload two images and the result is ready in seconds.

Step 1: Upload a Bag Image

Use any bag product photo — a packshot, a flat lay, or a picture saved from the brand’s website. The AI identifies the bag’s shape, strap structure, and hardware automatically. You don’t need to prepare the image in any specific way.

Upload your bag photo.
Fashion Diffusion AI-generated

Step 2: Upload a Model Photo

Upload a front-facing photo of yourself or a model. Even lighting and a simple background give the most accurate result. Full-body photos show how the bag sits against the full silhouette. Half-body photos work well for shoulder and crossbody carry preview.

Upload your model photo.
Fashion Diffusion AI-generated

Step 3: See the Result and Compare

The AI generates a realistic on-model preview in seconds. The bag appears at accurate scale, in natural position, consistent with the outfit and lighting in your photo. Try the same bag in different carrying positions by uploading different model photos — one for shoulder height, one crossbody, one hand-carried — to see how each carrying style reads before you decide.

Final bag try-on result generated by Fashion Diffusion.
Fashion Diffusion AI-generated

What the Try-On Actually Shows You

This is where AI bag try-on delivers its real value — not just “does the bag look nice,” but the specific questions a product page can’t answer.

Size and Proportion

Scale is the hardest thing to read from a product photo. A bag that looks mid-sized on a tall model may read as clutch-sized on a different frame, or as an oversized tote on another.

The AI places the bag at accurate scale relative to your body. You see immediately whether it reads as the size you thought it was. A structured tote that seemed just right in the product photos may be clearly too large or too small against your actual proportions. That’s useful information to have before purchasing.

Carrying Position and Drop Length

The same bag looks completely different depending on how it’s carried. Drop length is almost impossible to judge from a product listing.

A shoulder bag with a long drop sits at the hip and reads as a casual daytime bag. The same bag with a shorter strap sits at the armpit and reads as more structured and polished. Upload a photo in the carrying position you want to preview, and the AI places the bag accurately for that hold.

Style and Outfit Match

A bag doesn’t exist in isolation — it’s part of a look. Upload a model photo wearing an outfit you’d actually pair with the bag, and the AI shows you how the two work together.

Whether the colors coordinate, whether the bag’s shape suits the silhouette, and whether the overall combination reads the way you want it to. Testing a structured leather bag against tailored clothing versus the same bag against a casual outfit produces a completely different visual result. Seeing both before you buy is more useful than seeing the bag on its own.

Beyond Try-On — Design Your Own Bag with AI

If you’ve tried multiple bags virtually and none of them quite match what you are looking for, Fashion Diffusion’s AI bag design generator takes things a step further. Describe the bag you have in mind — the shape, the hardware, the material, the color — and the AI generates a visual concept.

AI bag design generator output.
Fashion Diffusion AI-generated

It’s a way to explore what you actually want before searching for it, or to visualize a bag that doesn’t exist yet. Useful for shoppers with a specific aesthetic in mind, and for designers and brands looking to concept new styles before sampling.

Try On Any Bag Before You Buy with Fashion Diffusion

The question you are actually asking when you look at a bag online isn’t “does this bag look good?” It’s “does this bag look good on me?” Those are different questions, and only one of them can be answered by a product photo.

Fashion Diffusion’s virtual bag try-on puts any bag on your photo in seconds, free to try. Upload any bag image from any online store, add a photo of yourself, and try on handbag online with AI before you decide. New accounts start with free credits.

FAQ

What is AI bag try-on?

A tool that places a bag product image onto a model photo using AI, producing a realistic preview of how the bag looks when carried. It shows accurate scale, natural positioning, and outfit context — for handbags, totes, shoulder bags, crossbody bags, clutches, and backpacks.

What kind of photo do I need to upload?

A front-facing photo with even lighting and a simple background gives the most accurate result. Full-body photos work best for seeing overall proportion. Half-body photos are useful for shoulder and crossbody carry preview. The bag image can be any product photo — a packshot, a flat lay, or a screenshot from the brand’s website.

Does the AI preserve the bag’s details — logos, hardware, material texture?

Yes. Fashion Diffusion’s AI virtual try-on bags is built for fashion accessories. Logos, metal hardware, chain straps, zipper pulls, and material texture are all preserved in the output. The result reflects the actual product, not a generic bag shape.

Can I try on handbags online for free?

Yes. New Fashion Diffusion accounts start with free credits, which can be used on the AI bag try-on tool. Paid plans are available for higher-volume use.

Can I see the bag in different carrying positions?

Yes. The virtual handbag try-on supports different carrying styles. Use different model photos in different positions — shoulder-carry, crossbody, hand-carry — and the AI places the bag accurately for each hold. This is the most direct way to see how drop length and strap placement actually read on your body.

Avatar photo 通过Ethan Davis

How to Change Body Pose with AI — Results, Uses, and How to Get Started

You have a photo you like — the lighting is good, the outfit works — but the pose is off. Too stiff. Wrong angle. Before you try to fix it with AI, you want to know: will it still look like me? Will it look real? Or will changing the pose mean losing everything else that made the photo worth keeping?

Or maybe you have a model photo and a deadline. You need five angles, not one, and you can’t rebook the studio. You want to know if the clothing details carry over, whether the output is commercial-ready, and whether this actually saves time or just creates more editing work.

Different situations, same underlying question: when you change the pose, what stays?

Learning how to change body pose with AI is the answer to both — take the image you already have and generate the pose you actually need, in under a minute.

What Is an AI Body Pose Changer

An AI body pose changer takes an existing photo and generates a new version with the subject in a different position. You describe the pose you want in plain language and the AI produces a new frame — same model, same outfit, same background, new body position.

The output isn’t a crop or a filter. The AI generates a new rendering of the body in the specified position, which is why the result reads as a real photograph. The face doesn’t change. The clothing doesn’t change. The lighting doesn’t change. When you change body pose with AI, the pose is the only variable.

This is fundamentally different from manually adjusting a pose in Photoshop. Warping a body in post-production distorts the clothing — the fabric stretches unnaturally, the garment proportions shift, and the result looks edited rather than real. AI generates the new pose from scratch based on the original image. The garment drapes correctly for the new position rather than being stretched to fit it.

How to Change Body Pose with AI — Step by Step

Fashion Diffusion’s AI pose changer online runs in the browser. No software to install, no design experience needed.

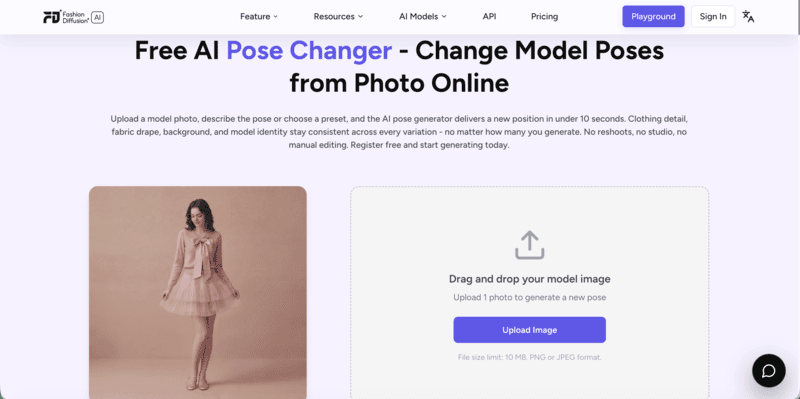
Fashion Diffusion's free AI pose changer page.

Step 1: Upload your photo

Use a clear image where the subject and the full outfit are visible. Sharp focus and even lighting produce the most accurate results. Heavily cropped or blurry photos give the AI less to work with and produce softer outputs.

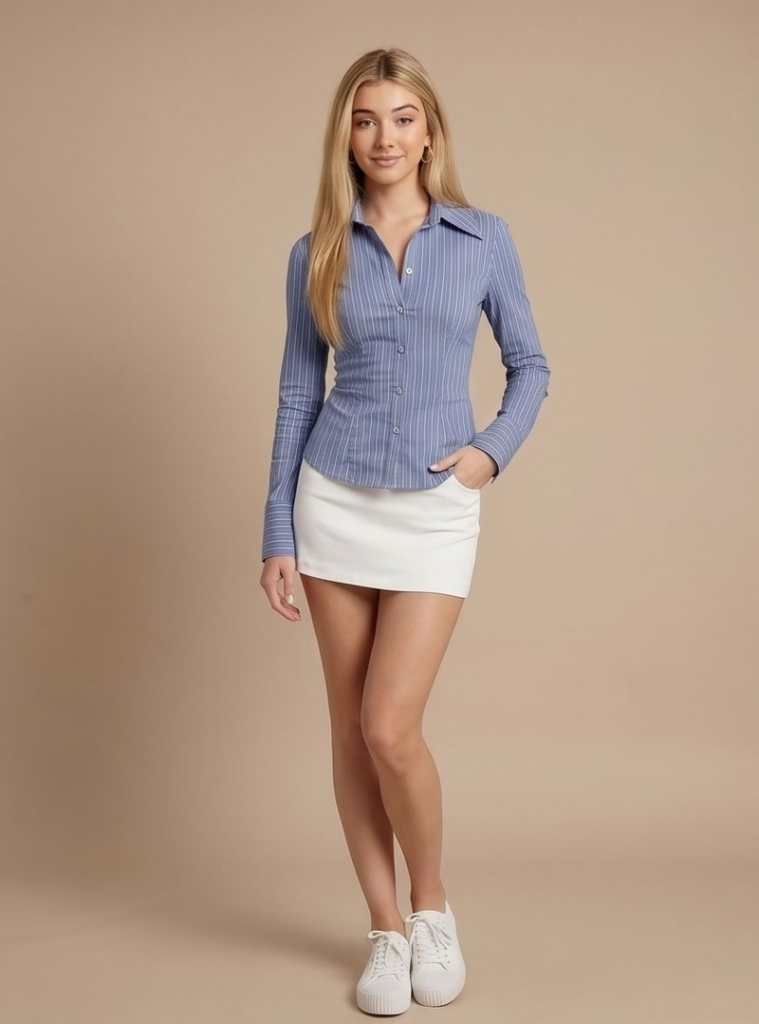
Upload one source model image.
Fashion Diffusion AI-generated

Step 2: Describe the pose you want

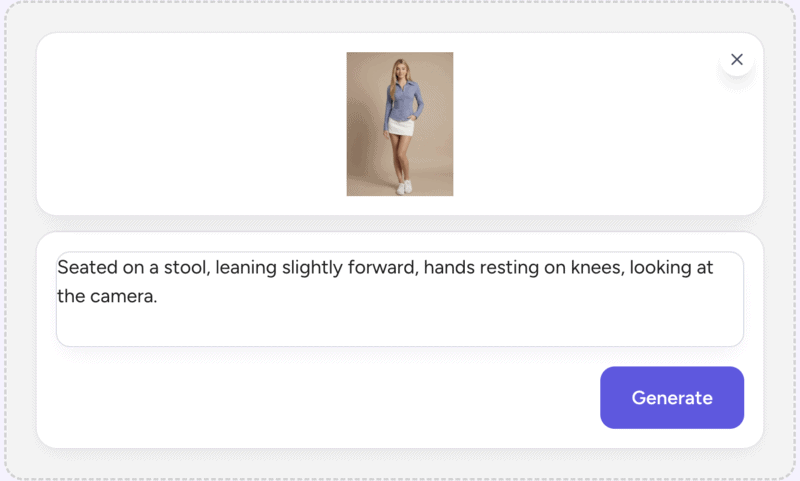
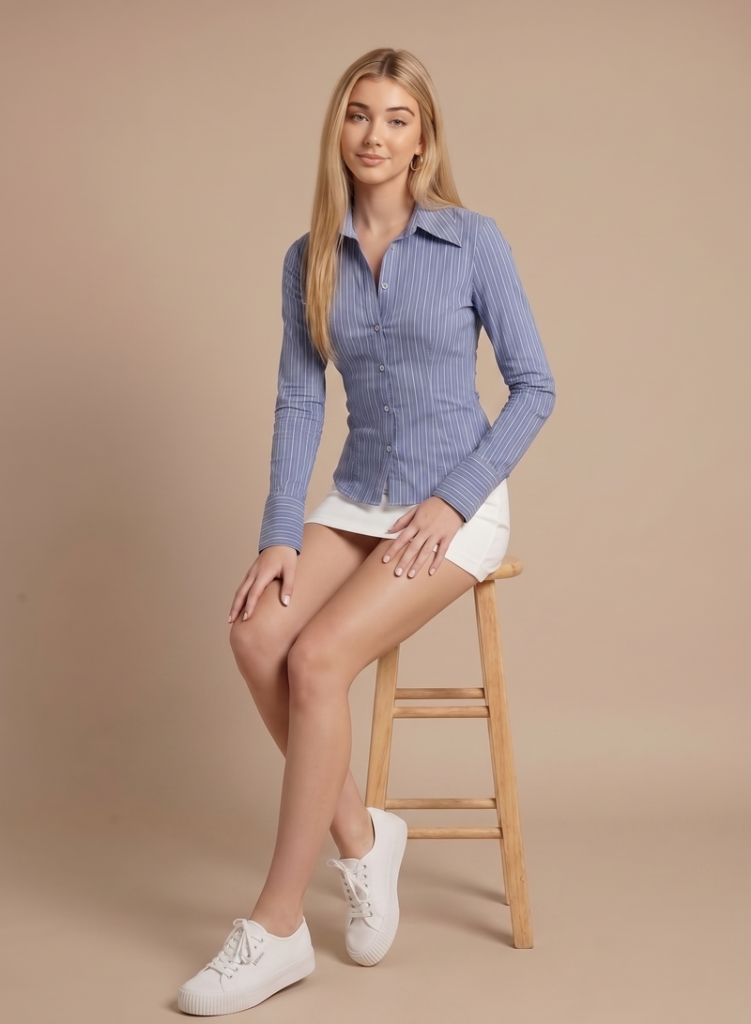
Type the position in plain language. The more specific the description, the more precise the result. A vague instruction like “seated” tells the AI very little — seated how, where, doing what with the hands, facing which direction? A description like “seated on a stool, leaning slightly forward, hands resting on knees, looking directly at the camera” gives the AI clear direction and produces a usable result in fewer attempts.

Small differences in wording produce noticeably different outputs. For example, “Slightly turned” and “full profile” are different frames. “Relaxed arms at sides” and “hands on hips” read differently in the image. When you are generating for catalog or campaign use, specificity here saves regeneration time later.

Enter your prompts to specify the pose you want to adjust.

Step 3: Generate and refine

Results come back in seconds. If the first output isn’t right, adjust the description and try again. Run two or three variations before committing — one phrasing often produces a more natural result than another, and comparing them takes seconds.

Final output by Fashion Diffusion's free AI pose changer online.
Fashion Diffusion AI-generated

Common Body Poses You Can Generate with AI

The AI pose changer handles any pose you can describe in plain language. Here are a few prompt examples across common pose categories to get you started:

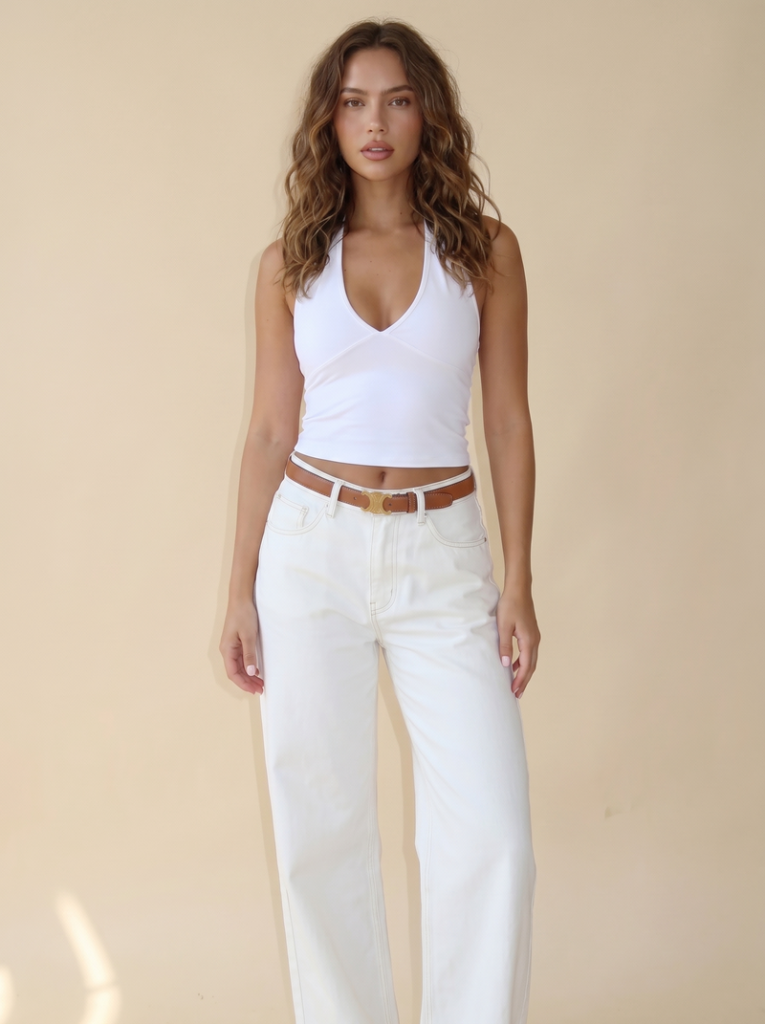
Standing poses: Model standing, facing directly forward, arms relaxed at sides, neutral expression. / Three-quarter angle, weight shifted to one leg, slight turn toward camera. / Full profile, standing straight, looking ahead.

Standing pose.
Fashion Diffusion AI-generated

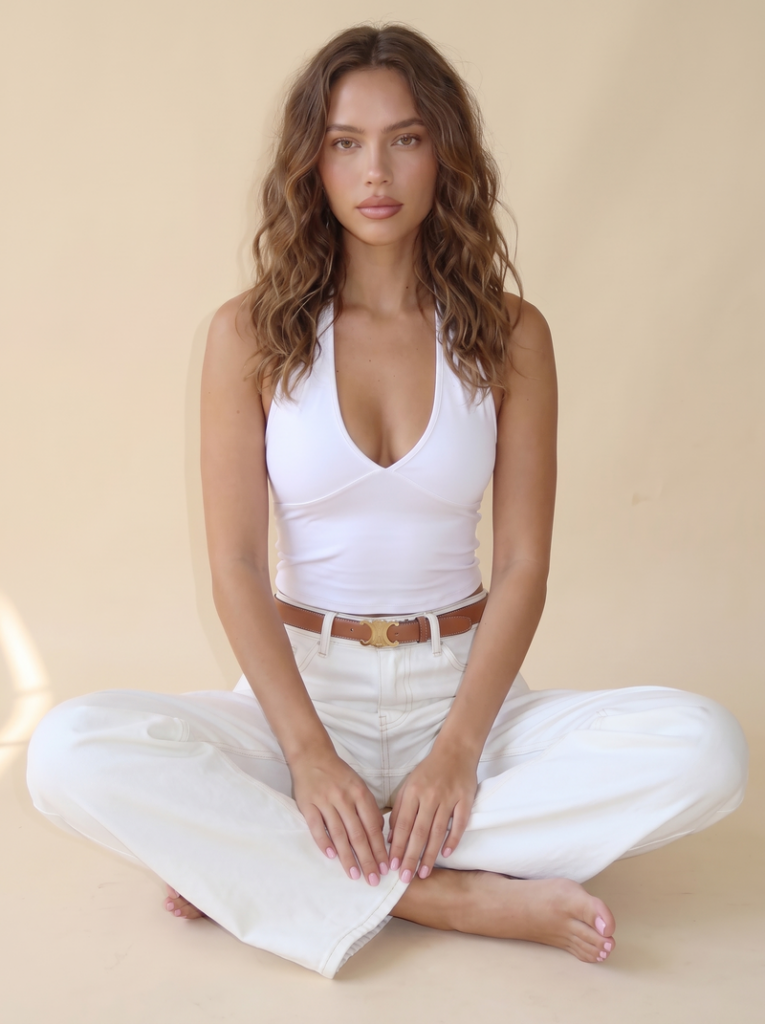
Seated poses: Seated on a stool, leaning slightly forward, hands resting on knees, looking at the camera. / Seated cross-legged on the floor, relaxed posture, hands in lap.

Seated pose.
Fashion Diffusion AI-generated

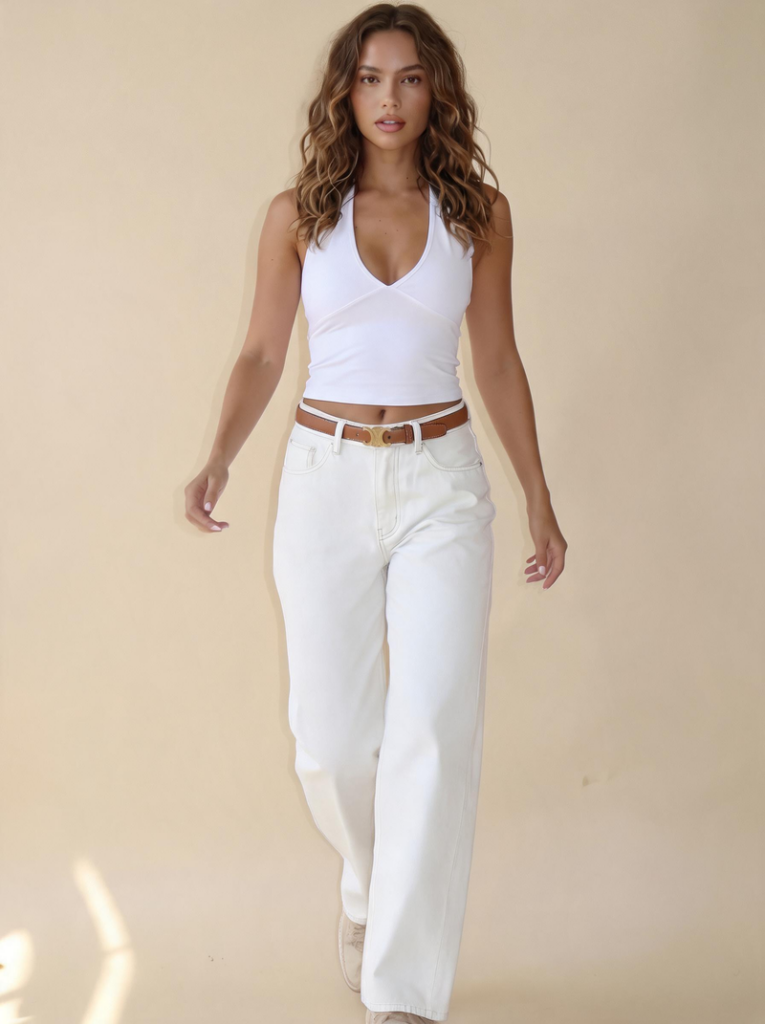
Walking and in-motion poses: Mid-stride, walking toward the camera, natural arm swing, confident posture. / Stepping forward, slight lean, looking slightly off-camera.

Walking pose.
Fashion Diffusion AI-generated

Turned and over-the-shoulder poses: Turned away from the camera, looking back over the left shoulder, relaxed arms. / Three-quarter turn, chin slightly down, eyes toward the camera.

Three-quarter turning pose.
Fashion Diffusion AI-generated

The same source image can generate all of these. Adjust the wording to get closer to the specific frame you have in mind.

From One Photo to a Full Image Set

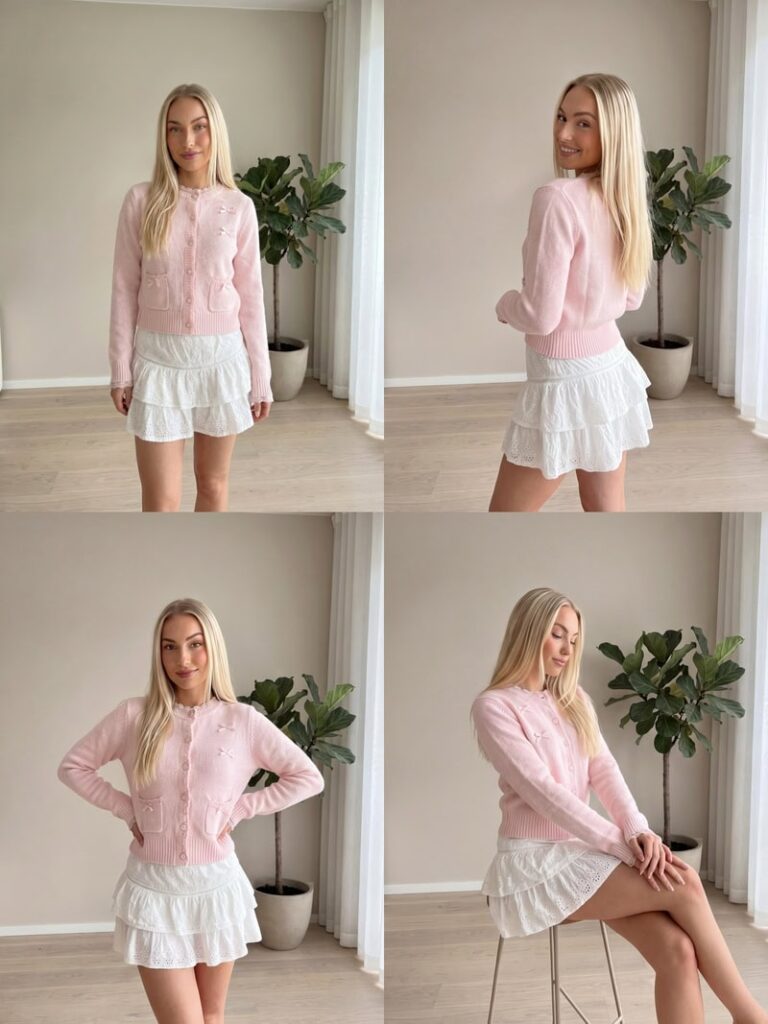
For cases where you need more than one pose, Fashion Diffusion’s AI Lookbook tool handles the full set in one go. Upload your model photo, select the Pose Variations template, and the tool generates a complete set of different poses from that single image — walking, standing, seated, three-quarter — all consistent in model, outfit, and background.

For brands, this changes the economics of catalog production. A single shoot that produces one hero image can now yield the full multi-angle set that product pages and marketplace listings require. The visual consistency across poses — same model, same lighting, same background — makes the output look coordinated rather than assembled from separate attempts.

A few places this gets used:

  • Product catalogs — multiple angles per SKU without rebooking the model.
  • Seasonal lookbooks — full pose variety from a single shoot day.
  • Social media content — a week of distinct frames from one source image.
  • Design review — seeing how a garment sits across different positions before sampling.
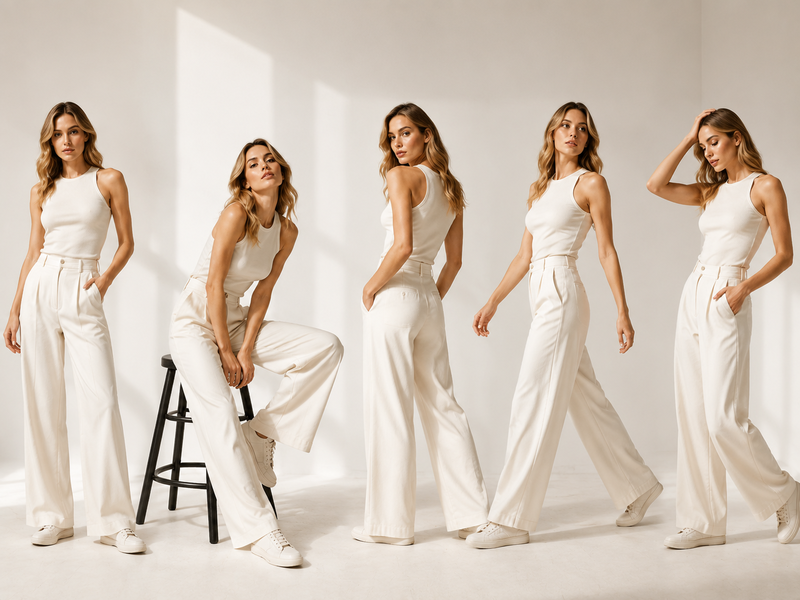
Model with different poses generated by Fashion Diffusion's AI Lookbook tool.
Fashion Diffusion AI-generated

Change Your First Pose with Fashion Diffusion

Most people are surprised by how little the original image changes when the pose does. The face is the same. The outfit is the same. The background is the same. What’s different is the body position — and with it, the energy of the image, the angle of the shot, the story the frame tells.

That’s what makes it useful to change body pose with AI rather than just technically interesting. You are not replacing the photo. You are extending what it can show.

Upload your image to Fashion Diffusion and try it with one frame first. New accounts start with free credits — no commitment needed to see what one photo can become.

FAQ

What is an AI body pose changer?

A tool that shows you how to change body pose with AI — generating a new version of an existing photo with the subject in a different position, while keeping the face, clothing, and background unchanged.

Does the clothing change when I change the pose?

The garment stays the same, but responds naturally to the new position. A dress drapes differently seated than standing; the AI renders that behavior realistically. The outfit itself — color, style, fabric — doesn’t change.

Can I use an AI pose changer free?

Yes. New Fashion Diffusion accounts include free credits for the AI pose changer online. Paid plans are available for higher-volume generation.

How specific does my pose description need to be?

Specific enough to distinguish the pose from similar ones. “Seated” is vague. “Seated, leaning slightly forward, hands on knees, looking at the camera” gives the AI clear direction and produces a more precise result. The more detail, the closer the output to what you have in mind.

Can I generate multiple poses from one photo?

Yes. Run the same source image through the pose changer with different descriptions to build a set. Fashion Diffusion’s AI Lookbook tool is built for this specifically — producing a full, consistently formatted set of pose variations from one model image, ready for lookbooks or product pages.

Avatar photo 通过Ethan Davis

Virtual Wedding Dress Try-On: 8 Styles Tested and What They Look Like on a Real Photo

Most brides arrive at their first boutique appointment with a vague Pinterest board and limited time. You try on six dresses in an hour, the samples are rarely your size, and you leave more uncertain than when you arrived. The styles that looked stunning on the model don’t always translate — because that model has a completely different figure, height, and proportions.

A virtual wedding dress try-on changes the starting point. Upload a photo of yourself and an image of any dress you want to try, and the AI places the gown on your actual figure in seconds. Before booking a single appointment, you can work through every major silhouette and find what suits your shape.

This article walks through 8 wedding dress styles — what each one looks like, who it suits, and what to expect when you try on wedding dresses virtually on your own photo.

What Is a Virtual Wedding Dress Try-On

The traditional dress shopping process works like this: you make an appointment, try on whatever samples are available, and hope one of them gives you a clear enough sense of the style. The problem is that boutique samples are usually one size, on one hanger, and look nothing like the finished gown on your body.

A virtual wedding dress try-on reverses that sequence. You explore styles at home, on your own photo, before any appointment is booked. The AI shows you what different silhouettes actually look like on your figure — your height, your proportions, your specific shape.

No more imagining it from a model who looks nothing like you. By the time you walk into a boutique, you are not starting from zero. You already know which direction you are going.

How to Try On Wedding Dresses Online with AI

Fashion Diffusion’s try on wedding dress online AI doesn’t require a bridal catalog or a specific dress library. Use any image you already have — a screenshot from a designer’s website, a photo saved from Instagram, a picture from a bridal magazine. The process is the same regardless of where the dress image comes from.

Fashion Diffusion's free AI virtual wedding dress try-on interface.

Step 1: Find a Dress Image to Try

Before opening the tool, source the dress images you want to test. Designer websites, bridal blogs, and Pinterest boards all work. Aim for images where the full dress is visible and the fabric details are clear — cropped or partially obscured images produce less accurate results.

Upload a wedding dress image.
Fashion Diffusion AI-generated

Step 2: Prepare Your Own Photo

Your photo matters more than the dress image. Wear something fitted — leggings and a close-fitting top — so the AI can read your actual silhouette. A plain background and even lighting (natural light works well) help the AI separate you from the scene. Full body, front-facing, standing straight.

Prepare your own photo.
Fashion Diffusion AI-generated

Step 3: Generate and Compare Styles

Upload both images and generate your preview. The result shows the dress on your figure — neckline placement, waist fit, skirt proportion. If the first result isn’t quite right, adjust your photo or try a cleaner dress image. The real value is in generating multiple styles on the same photo so you can compare silhouettes directly, side by side, on your own figure.

Final virtual try-on output.
Fashion Diffusion AI-generated

Step 4: Save and Share Before Your Appointment

Save the results that feel right and share them before your boutique visit — with your partner, your bridesmaids, or anyone whose opinion matters. Walking into a fitting with a clear shortlist changes the appointment from exploratory to decisive.

If you want to show the same dress from different angles, Fashion Diffusion’s AI Lookbook generates multiple poses from a single result — useful when you are trying to communicate a silhouette to someone who isn’t in the room with you.

Different angles of the model wearing wedding dress.
Fashion Diffusion AI-generated

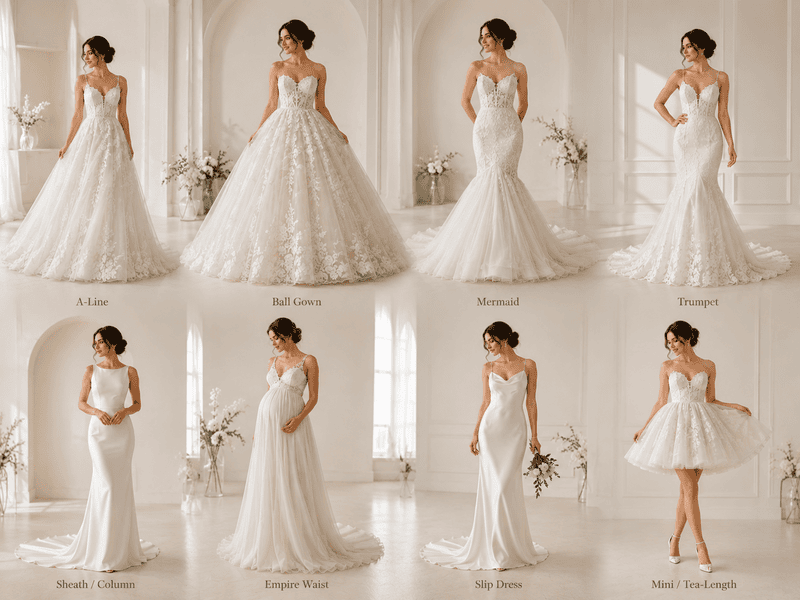
8 Wedding Dress Styles Tested Virtually

Each of the following styles has a distinct silhouette and suits a different combination of body shape, wedding setting, and personal aesthetic. Here’s what to know about each one before you try it on.

A-Line

The A-line is consistently the most popular wedding dress silhouette. It fits at the bodice and gradually flares from the waist downward, creating the shape of the letter A. The skirt flows away from the hips rather than hugging them, which flatters almost every body type by creating visual proportion without restriction.

A-line wedding dress try on.
Fashion Diffusion AI-generated
  • Who it suits: Almost everyone. The A-line balances wider hips on pear shapes, elongates petite frames, and allows full freedom of movement throughout the day.
  • What to expect virtually: The flare starts at the waist, so the transition on your figure reads clearly even in a preview image. Pay attention to where the skirt volume begins relative to your natural waist.

Ball Gown

The ball gown is the most dramatic bridal silhouette — a fitted, structured bodice and an extremely full, voluminous skirt. If the words princess, cathedral, or fairytale are on your mood board, this is the style you are thinking of. The contrast between the cinched waist and the skirt volume creates a strong visual effect.

Ball gown wedding dress try on.
Fashion Diffusion AI-generated
  • Who it suits: Hourglass and rectangle figures benefit most. The full skirt adds volume to the lower half, balancing a broader shoulder or bust. Best suited to formal indoor venues with space for the skirt.
  • What to expect virtually: Ball gown volume is dramatic even in a preview. The key detail to check is how the bodice fits relative to your torso — that fitted upper half is what makes the silhouette work.

Mermaid

The mermaid dress is fitted from the chest all the way down to the knee, then flares out below into a dramatic tail. It’s the most body-conscious silhouette in bridal fashion. The full outline of the figure is visible from shoulders to mid-thigh before the skirt releases into the flare.

Mermaid wedding dress try on.
Fashion Diffusion AI-generated
  • Who it suits: Hourglass figures and brides who are comfortable in a fitted garment throughout the day. The mermaid requires confidence in movement — the skirt limits stride length significantly.
  • What to expect virtually: The virtual try-on will show clearly how the dress sits along your natural curves. This is one of the styles where seeing it on your own photo is most useful — it’s hard to predict from a model how a mermaid will follow your specific proportions.

Trumpet

The trumpet is often described as the mermaid’s more wearable sibling. It’s fitted through the bodice and hips, but the flare begins higher — at mid-thigh rather than the knee. The result is a slightly less restrictive skirt and a smoother overall line.

Trumpet wedding dress try on.
Fashion Diffusion AI-generated
  • Who it suits: Similar to the mermaid but more forgiving in movement. Works particularly well for brides who love the mermaid look but want more ease when walking. Suits hourglass and athletic body types.
  • What to expect virtually: The higher flare point is the key difference from mermaid. In a virtual preview, compare the two directly by uploading the same photo with both styles — the difference in where the skirt opens will be clear.

Sheath / Column

The sheath (also called a column) is the most minimal bridal silhouette. It falls straight from the neckline or bust to the hem, skimming the body without dramatic flare or volume. There’s no defined waist seam — the dress follows the body’s natural line throughout.

Sheath wedding dress try on.
Fashion Diffusion AI-generated
  • Who it suits: Lean frames and athletic body types. Also flattering on hourglass figures looking to show their natural shape without added structure. Well-suited to less formal weddings, civil ceremonies, and smaller or outdoor settings.
  • What to expect virtually: The sheath reads differently on different figures. It elongates a lean frame but can read flat on bodies that need structural contrast. Seeing it on your own photo makes this one of the clearer style decisions to test.

Empire Waist

The empire waist gown has a high seam — usually just below the bust — with the skirt flowing loosely from that point downward. The waist seam sits above the natural waist, which draws the eye upward and lets the skirt fall freely without any emphasis on the hips.

Empire waist wedding dress try on.
Fashion Diffusion AI-generated
  • Who it suits: Petite frames benefit from the elongating effect. Also a practical choice for brides who want a relaxed, unconstructed feel — or who are earlier in pregnancy and prefer a forgiving silhouette.
  • What to expect virtually: The high seam is the defining feature. In a virtual preview, check where the empire seam falls in relation to your bust. Fit and placement at this point determines whether the style reads as elegant or shapeless.

Slip Dress

The slip dress has become increasingly popular at smaller, more intimate weddings. Inspired by lingerie silhouettes, it’s typically minimal in construction — often with spaghetti or thin straps, a bias-cut or straight-cut fabric, and minimal embellishment. It’s the anti-ballgown.

Slip wedding dress try on.
Fashion Diffusion AI-generated
  • Who it suits: Brides going for a modern, understated, or non-traditional aesthetic. Works best on lean or athletic frames where the minimal fabric has a shape to follow. Suits elopements, city hall ceremonies, garden parties, and beach weddings.
  • What to expect virtually: The slip dress lives and dies by its fabric drape. In a preview, pay attention to how the fabric falls from the shoulders and whether the overall line feels balanced on your frame. This is one of the harder styles to evaluate from a model photo.

Mini / Tea-Length

Not every bride wants floor-length. A mini or tea-length wedding dress hits above the knee or at mid-calf. The aesthetic is completely different — more playful, more contemporary, and significantly more practical for dancing.

Mini wedding dress try on.
Fashion Diffusion AI-generated
  • Who it suits: Brides going for a fun, non-traditional look. Particularly effective on petite frames where a full-length dress can feel overwhelming. Also a strong choice for second weddings, elopements, rehearsal dinners, or any setting where comfort and freedom of movement matter.
  • What to expect virtually: The hemline placement is the critical detail. Try the same style at different lengths to see what hits best on your specific frame before committing.

Tips for Getting the Best Results from Your Virtual Try-On

When you try on wedding dresses online with AI, the quality of your result depends more on your input photo than on the dress image. A few habits make the difference:

  • Wear fitted clothing in your photo. Loose or baggy clothes obscure your figure and make it harder for the AI to map the dress accurately. Leggings and a close-fitting top are ideal. Full body, front-facing, even lighting.
  • Generate multiple styles on the same photo. The differences between A-line and trumpet, or sheath and slip, are much clearer when you’re comparing two results side by side on your own figure — not imagining them separately.
  • Treat the result as a shortlisting tool, not a final fitting. The virtual preview shows silhouette and proportion accurately. Fabric drape and exact fit still require a boutique visit — but arriving with a clear shortlist makes that appointment significantly more productive.

Try on Wedding Dresses Virtually with Fashion Diffusion

The boutique appointment isn’t going anywhere — but it works better when you’ve already done the exploratory work at home. Knowing you are an A-line bride, or that mermaid doesn’t suit how you move, or that slip dresses feel most like you — that clarity is worth arriving with.

Fashion Diffusion is where that clarity comes from. Work through all eight styles, compare them on your own photo, and come to your first fitting with a shortlist rather than an open question. New accounts start with free credits.

FAQ

What is a virtual wedding dress try-on?

A virtual wedding dress try-on uses AI to place a wedding dress onto a photo of you, producing a realistic preview of how a specific gown looks on your actual figure. You upload your own photo and a dress image, and the AI generates the result in seconds.

Can I use any wedding dress image, or does it have to come from Fashion Diffusion’s catalog?

You can use any dress image, from a bridal brand’s website, a saved screenshot, a Pinterest save, or your own photo library. There’s no requirement to use a specific catalog, which means you can test any dress you find online.

How accurate is the AI virtual try-on result?

The AI generates a realistic visualization showing the dress’s silhouette, neckline, waist placement, and hem on your figure. Fabric hand feel, exact measurements, and the experience of wearing the dress still require a boutique appointment. The value is in using it to shortlist styles and arrive at your fitting with a clear direction.

Can I see the complete bridal look — dress, veil, and accessories together?

Yes. Virtual try-on shows how the dress looks on your photo. If you want to see multiple pieces together, Fashion Diffusion’s Mix & Match feature lets you layer several items onto your photo at once, giving you a fuller picture of the complete look.

Can I try on wedding dresses online with AI for free?

Yes. Signing up for Fashion Diffusion gives you free credits to try on wedding dresses online with AI. If you need to generate a higher volume of results, paid plans are available.

Avatar photo 通过Ethan Davis

AI Pet Portrait Generator: The Content Format Pet Accounts Are Missing

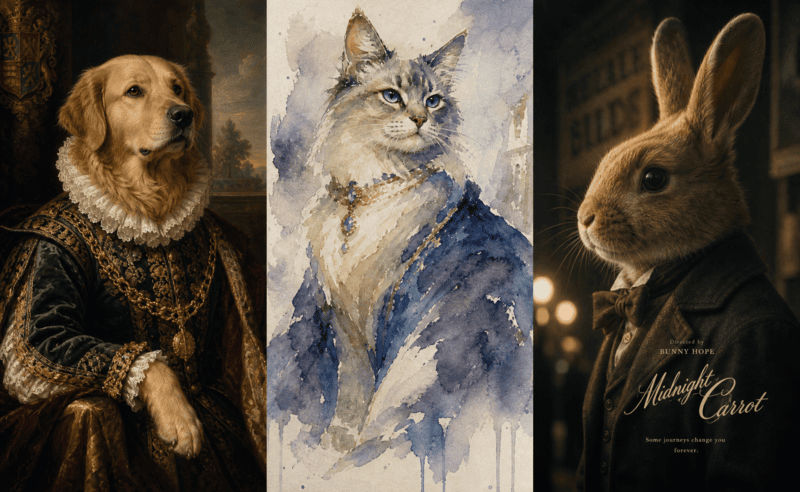
Your dog as a Renaissance duke. Your cat rendered in watercolor, looking insufferably regal. Your rabbit in a cinematic portrait that belongs on a gallery wall.

Pet accounts already have one of the highest engagement rates on social media — around 5% on average, more than double the general benchmark. The audience is there. What most accounts are missing is visual variety. Post the same format long enough and even a devoted audience starts scrolling past. AI pet portraits are the format that breaks that pattern — and the one most pet accounts haven’t tried yet.

This article covers what an AI pet portrait generator produces and who’s using it. It also walks through exactly how to create one with Fashion Diffusion — step by step.

How an AI Pet Portrait Generator Works

Upload a reference photo and describe the style you want — or skip the photo and describe your pet entirely in text. Either way, the AI generates a finished portrait in seconds.

What’s happening under the hood is closer to generation than editing. The AI isn’t applying a filter or adjusting colors on top of your original photo. It reads the visual information — the pet’s face shape, fur texture, distinctive features — and reconstructs it as a new piece of artwork in the style you specified. That’s why the output reads as a finished portrait rather than a processed image.

What AI Pet Portraits Can Look Like

The same pet looks completely different depending on artistic interpretation. A realistic portrait captures your pet exactly as they are. A styled illustration reveals a different side of their personality. A poster-style render makes them campaign-ready. And then there’s everything beyond that.

Realistic Pet Portrait

True-to-life rendering — your pet’s actual coat texture, eye color, and expression, rendered with clarity and detail. This style works best when you want the portrait to feel like a high-quality photograph, just without the photoshoot.

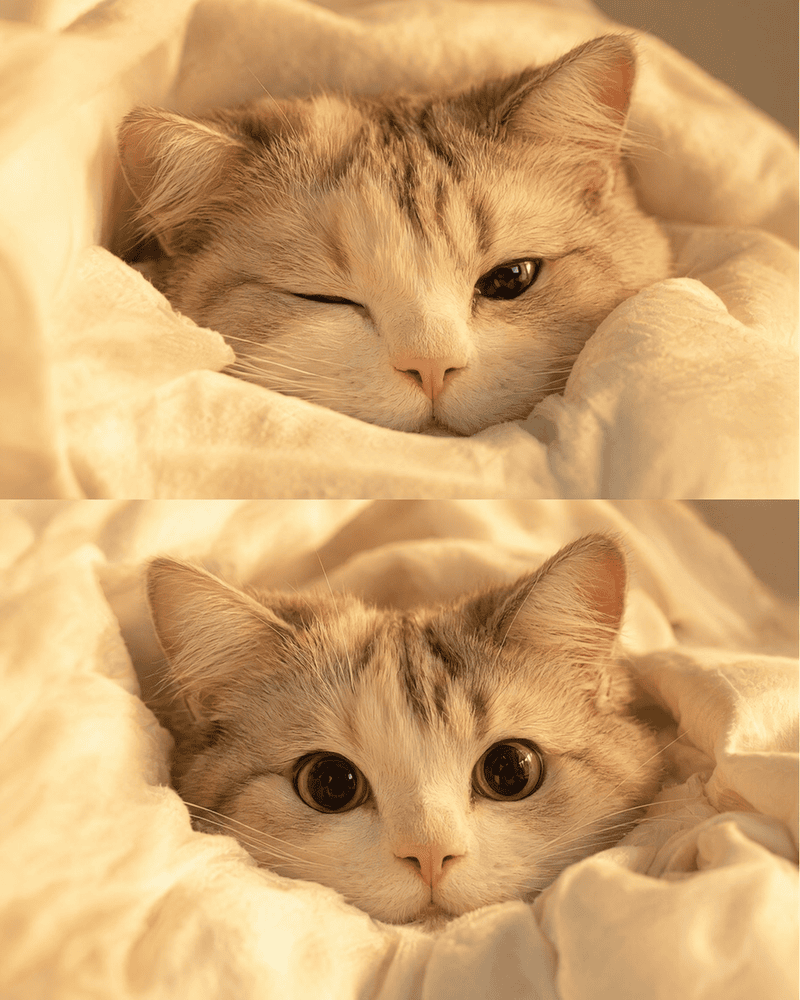
Realistic cat portrait generated by Fashion Diffusion.
Fashion Diffusion AI-generated

Watercolor and Cartoon

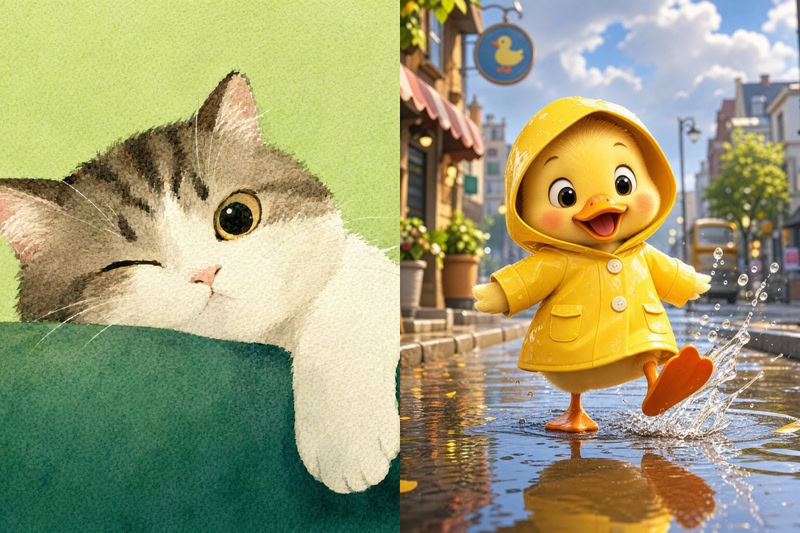
Loose brushwork and soft color for watercolor; bold outlines and flat color for cartoon. Both styles lean into personality over precision — the result feels expressive and immediately shareable, a natural fit for social content.

Watercolor and cartoon portrait generated by Fashion Diffusion.
Fashion Diffusion AI-generated

Poster-Style Portrait

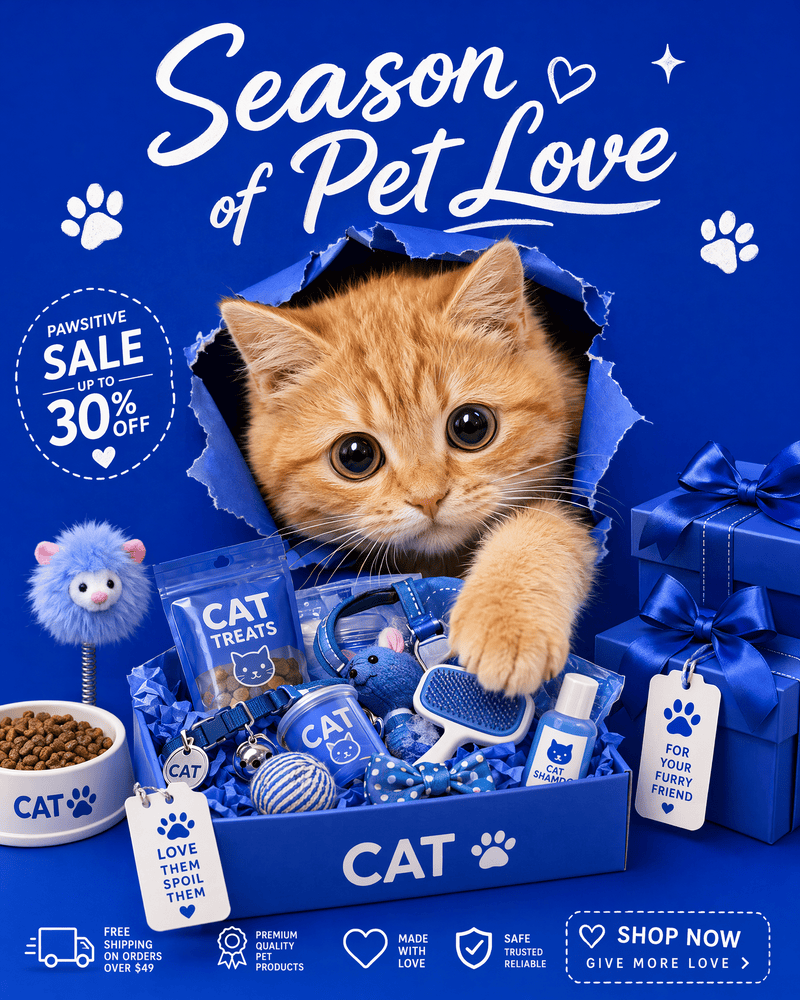
Clean composition, strong contrast, commercial-quality output. This style is designed to be used — on product packaging, e-commerce listings, loyalty cards, or any branded material that needs a pet as its visual centrepiece.

E-commerce poster portrait generated by Fashion Diffusion.
Fashion Diffusion AI-generated

Surreal and Creative

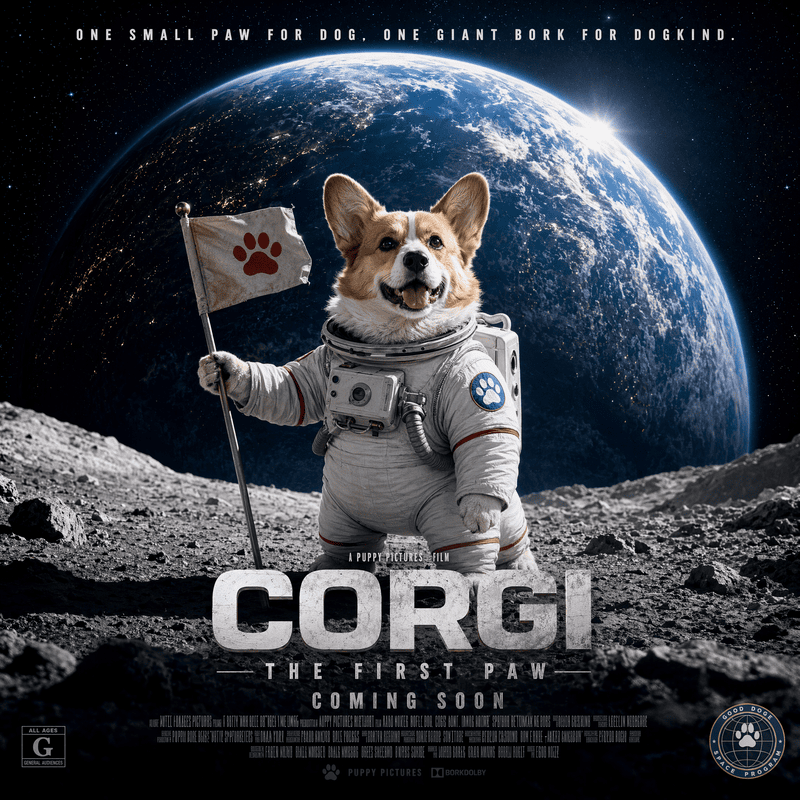
Your pet as a space explorer. A mythical creature. A Renaissance painting subject wearing armour. This category has no rules — describe the concept and the AI renders it. The results tend to be the most surprising, and the most talked-about.

Surreal dog portrait generated by Fashion Diffusion.
Fashion Diffusion AI-generated

The output isn’t a filter on top of a photo. Each portrait is generated as a finished piece of art in the style you specify — which is why it reads differently in a feed than any photograph does.

How to Create an AI Pet Portrait with Fashion Diffusion

Fashion Diffusion’s AI pet portrait generator runs in the browser — no download or design skills required.

Step 1: Upload a reference photo or start with a text description

Start with what you have.

Upload a photo of your pet and describe the style you want — oil painting, watercolor, cartoon, or any artistic direction you have in mind. Or describe your pet and the portrait entirely in text if you don’t have a reference photo to hand.

Step 2: Write a specific style description

The more precise the description, the closer the result. Name the art style, describe the lighting, include details about background, mood, or any accessories you want in the portrait.

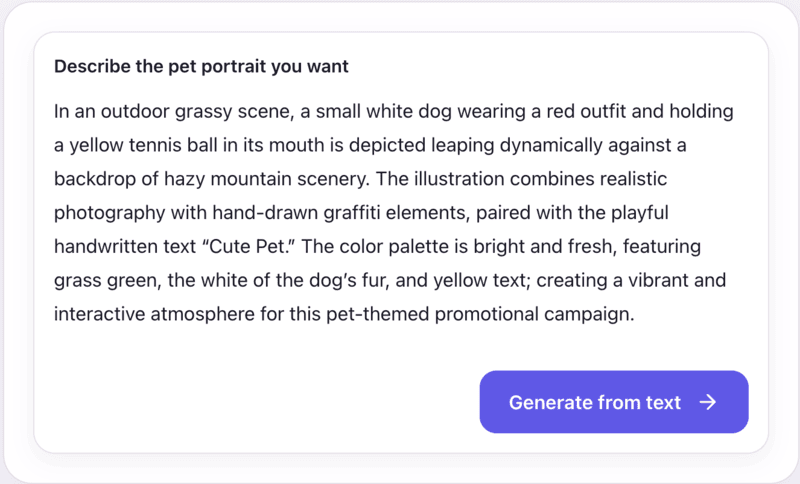
Text prompt sample.

Step 3: Generate and Download

Hit generate. If the first result isn’t right, adjust the description and try again — each attempt takes seconds. Download in high resolution, watermark-free, ready to use for social posts, print, merchandise, or campaign materials.

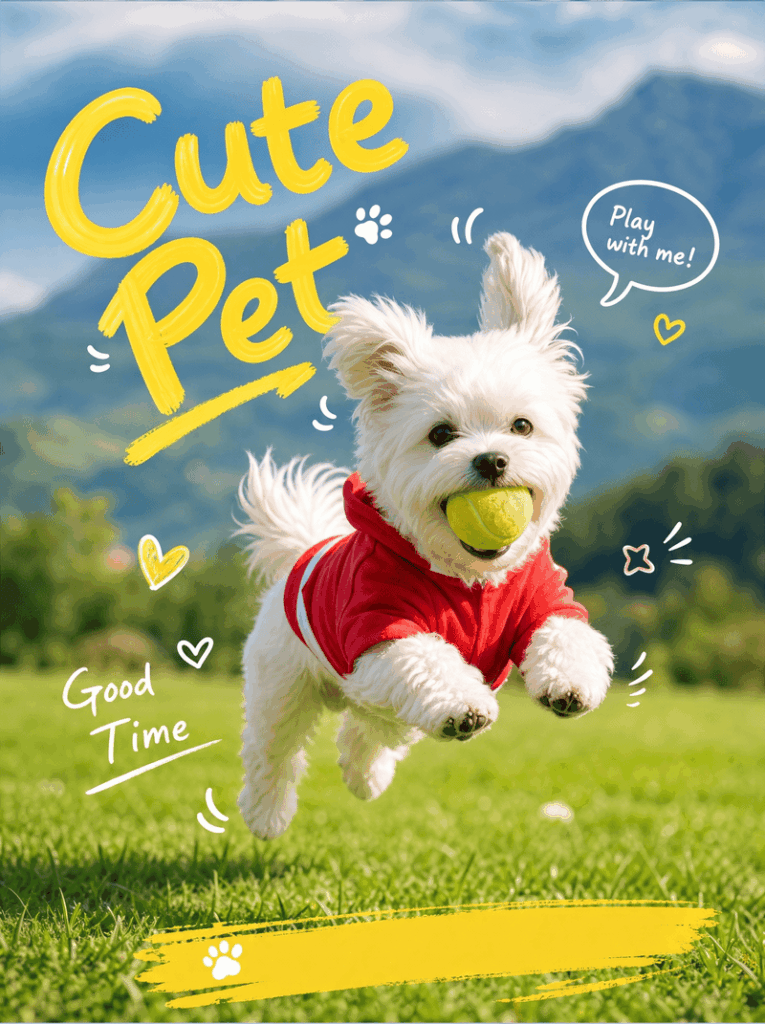
Final dog portrait output generated by Fashion Diffusion.
Fashion Diffusion AI-generated

How Pet Creators Use AI Pet Portraits for Social Media

A pet account posting 4-7 times a week needs up to 28 pieces of content a month. Most of that comes from real-time photography — which means the content output is directly tied to whether the pet is cooperative, the light is good, and the creator has the energy to shoot. AI pet portraits break that dependency.

A format that holds its own in a crowded feed

A styled portrait — oil painting, watercolor, cinematic — stops a scroll in a way a standard photo often doesn’t. It prompts a different kind of reaction: people look longer, comment more, and save more often. For a format that accounts are already producing anyway, that difference in engagement is worth paying attention to.

Seasonal content without the production overhead

Holiday posts, themed content, seasonal campaigns — these drive strong engagement but usually require props, outfits, and a dedicated shoot. A portrait generated from a single reference photo handles all of it. A Christmas card-style portrait, a Halloween illustration, a Valentine’s Day watercolor — none of it needs your cat to sit still in a costume for twenty minutes.

Pet micro-influencers already deliver 10-40% engagement rates compared to 2-5% for macro accounts. Adding a visually distinct content format on top of that audience strength compounds the advantage.

How Pet Brands Use AI Pet Art for Marketing

For brands, the problem isn’t engagement — it’s production. Every campaign, every seasonal launch, every new SKU needs fresh visual assets. A studio shoot with a trained animal, a handler, and a photographer is expensive and slow to schedule. AI pet portraits close that gap.

Campaign assets without a studio booking

A reference photo and a style description produce campaign-ready visuals in minutes. Styled to match the aesthetic of the campaign, ready to use across product pages, social posts, and ads.

For small pet brands running multiple seasonal launches a year, this is the difference between having custom-feeling content for each one and reusing the same images across everything.

UGC campaigns that actually scale

Some of the strongest pet brand campaigns run on user participation: submit a photo of your pet, get a branded portrait back. It gives pet owners something personal and shareable — and every portrait they post extends the campaign’s reach. UGC already earns 8.7x more engagement than branded content in the pet space. A branded portrait campaign puts that multiplier to work with controlled visual quality on both ends.

Tips for Getting the Best Results from Your AI Pet Portrait Generator

AI pet portraits are fast to generate, but a few small decisions upfront make a noticeable difference in the output.

  • Reference photo quality shapes the output. A clean, well-lit photo gives the AI more to work with. Blurry or backlit photos produce portraits with soft edges and muddled detail.
  • Be specific in the style description. Vague prompts produce generic results. Name the art movement, describe the lighting, include mood and background. The more detail you give, the more control you have over the outcome.
  • Use portraits alongside real content, not instead of it. Audiences follow pet accounts for a specific animal. Portraits work best as a recurring format — weekly, seasonal, or tied to campaigns — while real-time photos and video keep the personal connection that drives engagement.

Generate Your Custom AI Pet Portrait with Fashion Diffusion

Pet content already outperforms most other categories on engagement — the audience is there, and it responds. What AI pet portraits add is a format that sits alongside your existing content without competing with it: visually distinct from a standard photo, faster to produce than a commissioned piece, and flexible enough to serve a weekly social post, a seasonal campaign, or a full product line.

For creators, that means a content calendar that doesn’t depend entirely on whether your pet is cooperating today. For brands, it means campaign-ready visuals without the studio booking. And for anyone who just wants to see their dog rendered as a baroque oil painting — that too.

Your pet already has an audience. Fashion Diffusion’s AI pet portrait generator gives you a content format they haven’t seen yet — and one that takes seconds to produce. New accounts start with free credits. Generate your first custom AI pet portrait now and see where it fits!

FAQ

What is an AI pet portrait generator?

An online tool that turns a pet photo, a text description, or both into a finished piece of artwork — oil painting, watercolor, cartoon, poster-style, or any other direction you specify. Fashion Diffusion’s generator produces the portrait in seconds, in high resolution, without any design experience required.

Can I use the pet portraits for commercial purposes?

Yes. Free credits upon registration cover commercial use including e-commerce listings, social media campaigns, and branded materials. Paid plans offer higher volume and additional benefits for brand teams generating across multiple campaigns.

I run a pet account. How often can I realistically use AI portraits without the feed feeling repetitive?

Most creators treat it as a recurring format rather than a one-off — weekly themed portraits, seasonal content drops, or style variations tied to a campaign or collab. Because each portrait looks visually distinct from the last (different style, different mood, different composition), the format holds up across regular use without feeling repetitive the way the same photo filter would.

I’m a pet brand. Can I maintain a consistent visual style across a full campaign?

Yes. If you use the same style description and reference inputs across a campaign, the output stays visually cohesive — same artistic treatment, same mood, same colour register. That consistency is useful for packaging, social feeds, and any branded material where the visual language needs to be recognisable across multiple touchpoints.

How does this compare to commissioning a portrait artist?

A commission typically takes weeks and costs hundreds of dollars — one image, limited revisions, one chance to get it right. An AI portrait is ready in seconds, free to start, and you can generate variations until the result feels right.

Avatar photo 通过Ethan Davis

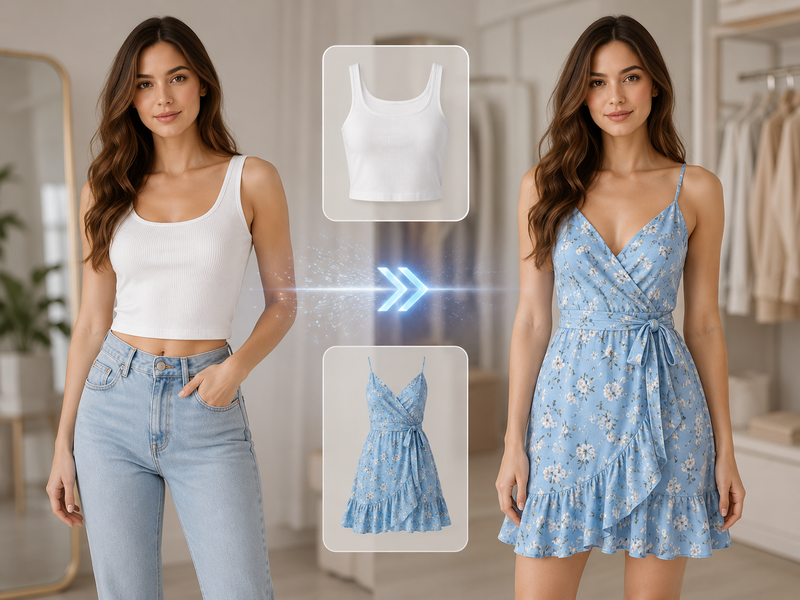
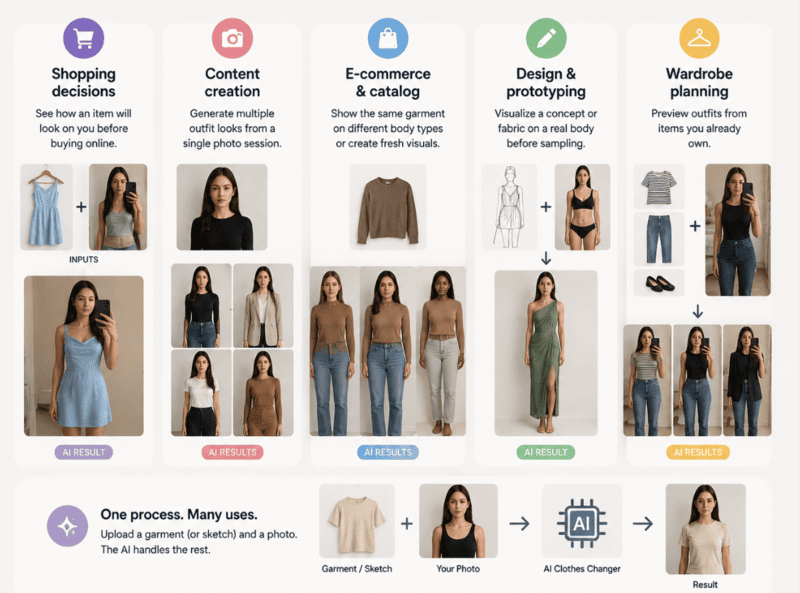
How to Change Clothes in a Photo with AI — Step-by-Step Guide

Changing clothes in a photo used to mean Photoshop layers, manual masking, and a lot of trial and error. Change clothes AI tools like Fashion Diffusion’s clothes swap tool have replaced that entire process with a single upload. You give the AI a photo and a garment, and it puts the two together — matching pose, lighting, and body shape automatically.

This guide walks through exactly how to change clothes in a photo with AI, step by step, including the photo habits that actually affect your results. Most failed outfit swaps don’t come from a weak AI model — they come from a weak input photo. Fix that, and quality jumps immediately.

What Is an AI Clothes Changer

An AI clothes changer is a tool that swaps the outfit in a photo without any manual editing. You upload a photo of a person and a photo of a garment, and the AI generates a new image of that same person wearing the new clothing — keeping the face, pose, and background intact.

This is different from filters or sticker-style overlays, which just paste a flat image on top of a photo. An AI clothes changer actually re-renders the garment to fit the body’s shape, angle, and lighting, which is what makes the result look like a real photo rather than an edited one.

How AI Changes Clothes in a Photo

Knowing the basic process explains most of the tips in this guide. It happens in three steps:

  • Body and pose detection. The AI maps the person’s outline and posture, and separates the existing clothing from skin, hair, and background. A clear, front-facing photo makes this step far more accurate.
  • Garment mapping. The new garment photo is re-rendered to follow the body’s contours and angle, with lighting recalculated to match the original photo.
  • Selective blending. Only the clothing region is regenerated; the face, hands, and background stay untouched. This is why edge areas like collars and cuffs are where issues most often show up.

Who Uses AI Clothes Changers (and What For)

The same tool gets used for fairly different goals depending on who’s behind the upload.

A few common ones:

  • Shopping decisions. Before buying an item online, upload a photo of yourself and the product image to see roughly how it would look, instead of relying only on a model photo with a different body type and skin tone.
  • Content creation. Creators use an AI clothes changer to produce multiple outfit looks from a single photo session — useful for social posts, lookbooks, or testing which styles get better engagement before committing to a real shoot.
  • E-commerce and catalog work. Online sellers and small fashion brands use it to show the same garment on different body types, or to generate fresh product visuals from existing inventory photos without booking a new model or studio session.
  • Design and prototyping. Designers use a rough sketch or sample garment photo to visualize a concept — a fabric, a silhouette, a color combination — on a real body before committing to a sample or photoshoot.
  • Wardrobe planning. Some people use it simply to decide what to wear from items they already own, by quickly previewing combinations on their own photo.
Illustration on who uses AI clothes changer.

None of these require different tools or settings — the underlying process is the same. What changes is the garment photo you choose to upload for the task at hand.

What You Need to Change Clothes in a Photo with AI

Before opening any AI clothes changer online free tool, gather two things:

  • A photo of the person (yourself, a model, or a customer photo) whose outfit you want to change;
  • A photo of the new garment you want to put on them — a flat lay, a product photo, or a photo of someone else wearing it.

That’s it. No design software, no manual cutout work, no layering. The AI handles segmentation, fit, and lighting on its own.

Step 1: Pick a Photo That Works Well for AI Outfit Changes

This is the step most tutorials skip, and it’s the one that decides whether your result looks real or broken. The AI is only as good as what you feed it.

Best Photos for an AI Clothes Changer

  • Front-facing, full body or half body. A straight-on pose gives the AI a clean view of the body outline. Full body is best for dresses, jumpsuits, and pants; half body is fine for tops, shirts, and jackets.
  • Even, natural lighting. Daylight near a window or outdoor shade works better than harsh flash or backlighting, since the AI needs to read shadows correctly to make the new outfit sit naturally.
  • Plain or simple background. A cluttered background doesn’t break the AI, but a clean one helps it separate the person from the scene faster and more accurately.
  • Visible body outline. Arms slightly away from the torso, not crossed or hidden, so the AI can map where the garment edges should fall.
Best photos for an AI clothes changer (sample).

Photos to Avoid When Changing Clothes with AI

  • Side profiles or extreme angles. The AI fits clothing based on what it can see — a side view gives it half the information it needs.
  • Heavily filtered or edited photos. Beauty filters, warped proportions, or heavy color grading confuse the body-mapping step before clothing is even applied.
  • Group photos. The AI needs to lock onto one person. Crop to a single subject first.
  • Low resolution or blurry images. Compressed screenshots or zoomed-in crops lose the detail the AI needs for clean edges around hands, hair, and clothing lines.
Photos to avoid when changing clothes with AI (sample).

A quick rule of thumb: if you can clearly see the person’s outline and posture at a glance, the AI can too.

Step 2: Pick a Clean Garment Photo

The second input matters just as much as the first. Pick a garment image where:

  • The clothing is fully visible and not blocked by bags, hands, or folded fabric;
  • The image is reasonably sharp — a product photo or flat lay works better than a low-res screenshot;
  • The garment isn’t extremely cropped (you want the AI to see the full neckline, hem, or sleeve length).

Product photos from any online store, your own camera roll, or a flat lay you shoot yourself all work. Solid colors and simple patterns convert most reliably; very busy prints or sequins can occasionally render with minor texture loss, which is worth knowing going in rather than discovering after several attempts.

Step 3: Generate the Outfit Change with Fashion Diffusion

Once you have a clear subject photo and a clean garment photo, the actual outfit swap takes under a minute:

Open Fashion Diffusion. Fashion Diffusion’s AI clothes changer tool runs directly in your browser — no install needed.

  • Upload the subject photo — the person whose outfit you want to change.
  • Upload the garment photo — the new clothing you want them wearing.
  • Generate.
  • Review and download. Results are ready in seconds in high resolution.
Fashion Diffusion's AI clothes changer tool interface.

If the first result isn’t quite right, you don’t need to start over — just swap in a sharper version of either input photo and run it again. Small input changes usually fix most issues.

Step 4: Iterate Until the Result Looks Right

Even with two solid input photos, the first result isn’t always perfect — and that’s normal. Instead of treating one generation as final, treat it as a first pass:

  • Generate once, then review closely. Zoom in on the edges — collar, sleeves, where hair meets the shoulder. These are the areas most likely to show small artifacts.
  • Use AI Inpainting for targeted edits. If the outfit looks close but the style, fit, or a specific detail isn’t quite right, refine only the area you want to change with AI Inpainting tool instead of generating the entire image again. You can adjust garment shapes, replace details, or modify the clothing style while keeping the rest of the image consistent.
  • Change one input at a time. If something looks off, swap only the subject photo or only the garment photo, not both. This makes it clear which input actually caused the issue.
  • Keep your best result before trying again. Download each version you are happy with before regenerating, since a new attempt replaces the previous output.
  • Run two or three variations for anything client-facing or commercial. For catalog images, social content, or anything going out publicly, generating a couple of versions and picking the cleanest one takes less time than troubleshooting a single imperfect result after the fact.
Variations generated from Fashion Diffusion's AI clothes changer.

Why AI Clothes Changes Fail (and How to Fix Them)

Even with a good AI clothes changer, small issues can still appear if the input photos aren’t ideal. Most failed results come from a few common mistakes rather than the AI itself. The table below explains the most frequent problems, what usually causes them, and the easiest ways to fix them before generating again.

ProblemLikely CausesFix
Outfit doesn’t match body shapeSide angle or unclear poseUse a front-facing, full-body photo
Blurry or warped clothing edgesLow-resolution inputUpload a sharper, higher-res photo
Wrong garment proportionsCropped or partially hidden garment photoUse a full, unobstructed garment image
Unnatural lighting on new outfitLighting mismatch between the two photosMatch lighting conditions where possible
AI struggles with the patternBusy print, sequins, or laceTry a simpler version first, then the detailed one

Change Clothes in Your Photo with Fashion Diffusion

No design software, no studio, no waiting on edits — just two photos and a few seconds. The process is the same one covered in this guide: upload a clear, front-facing photo of the person, pair it with a clean garment image, and let the AI handle the rest.

Try our free AI clothes changer and see the outfit change generated instantly, in high resolution. Whether you are previewing an outfit before buying, building out product visuals for a store, or putting together content for a shoot, the same upload-and-generate process applies. New accounts start with free credits, so you can try it right now — no commitment, no learning curve, just a result in seconds.

FAQ

How do I change clothes in a photo using AI?

Upload a photo of the person and a photo of the garment you want them to wear into an AI clothes changer like Fashion Diffusion. The AI detects the existing outfit, analyzes pose and body shape, and generates a new image with the new clothing applied — typically in under a minute.

Will the AI change my face or background, not just the outfit?

No. The tool is built to keep everything outside the clothing region untouched — face, pose, skin tone, and background stay exactly as they were in the original photo. Only the garment area is detected and replaced.

Why does my AI-generated outfit look unrealistic?

This almost always comes down to the input photos. Side-angle poses, blurry images, heavy filters, and cropped garment photos are the most common causes. Switching to a clear, front-facing photo with even lighting usually fixes it.

Can I change a specific item, like just a jacket or just pants, instead of the whole outfit?

Yes. The same upload process works whether you are replacing an entire outfit or a single piece. Crop the garment photo to the specific item you want applied, and the AI will focus the swap on that part of the body rather than the full look.

Do I need Photoshop or editing skills to change clothes in a photo?

No. AI clothes changers handle masking, fit, and lighting automatically. You only need to upload the two photos — no manual editing required.

Is there a free AI clothes changer online?

Yes. Signing up for Fashion Diffusion gives you free credits to use on tools including the AI clothes changer, with high-resolution, realistic output. Once those credits run out, continued use requires a paid plan.

Avatar photo 通过Ethan Davis

7 Best Modelia Alternatives for AI Fashion Photography (2026)

AI fashion photography has gone mainstream. According to McKinsey, generative AI could add $150–$275 billion in value to apparel, fashion, and luxury over the next few years. Zalando has also reported significant reductions in image-production costs through AI-generated visuals, reflecting wider adoption across fashion ecommerce workflows.

Modelia helped many brands ship their first on-model image. But as catalogs grow, teams keep hitting the same wall — a watermarked free tier, no real design tools, and credits that drain fast on video.

This guide compares the seven best Modelia alternatives for 2026. You’ll find pricing, features, pros and cons, and recommendations based on different fashion photography workflows.

What Is Modelia AI?

Modelia is an AI fashion imaging platform for apparel and ecommerce brands. It turns garment photos, flat lays, mannequin shots, and sketches into photorealistic on-model visuals, and it produces both images and short videos.

Modelia AI fashion photography tool for generating on-model product images from flat lays and mannequin shots

The platform bundles fashion-specific workflows: flatlay-to-model, mannequin-to-model, model swap, virtual try-on, repose, outfit generation, and accessory tools for hats, bags, glasses, and shoes. A Consistent Character feature reuses the same AI model across an entire catalog. Modelia also ships a native Shopify app, so brands can generate product imagery inside their store workflow.

Its free Starter tier gives 20 credits a month, which is enough to test some tools before paying.

Why Look for a Modelia Alternative?

Modelia covers a lot of ground. But it is a broad image toolkit first and a focused fashion studio second. Several recurring gaps push brands to compare alternatives.

  • The free tier is watermarked and non-commercial. Starter gives 20 credits a month, capped at 10 a day, but every output carries a watermark and can’t be used commercially. You need a paid plan for store-ready images.
  • No design or ideation tools. Modelia generates photos, not concepts. There’s no sketch-to-render, recolor, fabric swap, or text-to-outfit, so design-led teams still reach for a second platform.
  • No dedicated ghost mannequin effect. Brands that lean on clean ghost-mannequin listings won’t find a built-in tool for it.
  • Video burns credits fast. A five-second clip costs 25 credits; ten seconds costs 40. On smaller plans, a handful of videos can wipe out a month’s budget.
  • Tool sprawl. Around 18 tools — including general utilities like image describer, color changer, and facial-expression editor — add interface weight when your day-to-day is catalog production.

None of this makes Modelia a bad tool. It just means a more specialized, better-value, or design-inclusive platform may suit your workflow better.

7 Best Modelia AI Alternatives — A Brief Overview

  • Fashion Diffusion — Best overall for AI fashion design and photography. Combines a full design suite, on-model photography, and 1080p video in one workflow. From $12/month.
  • FASHN AI — Best for virtual try-on quality and developer API. Industry-leading try-on accuracy plus a full REST API for custom integrations. From $19/month.
  • Botika — Best for high-volume on-model photography on Shopify. Turns flat lays and mannequin shots into model imagery, with a built-in human retouching safety net. From $22/month.
  • Veeton — Best for outfit styling and AI photoshoots. Mix-and-match outfits with camera, lighting, and background control. From $29.99/month.
  • Rawshot AI — Best for prompt-free control and compliance. Click-based art direction with provenance logs and full commercial rights. From $9/month.
  • Photoroom — Best for general ecommerce visuals at scale. Class-leading background removal, batch editing, and an image API across every product category. From $12.99/month.
  • Picjam — Best for managed, agency-style production. A self-serve studio plus a fully managed “visual production agent” option with quality assurance. From $3 (3-day trial).
ToolKey StrengthBest ForStarting Price
Fashion DiffusionDesign + photography + video in one platformBrands and designers who need concept-to-campaign in one platform$12/mo
FASHN AIVirtual try-on + full APIEcommerce teams and developers embedding try-on$19/mo
BotikaHigh-volume on-model + human retouchingShopify brands with large SKU counts$22/mo
VeetonOutfit mix-and-match + photoshoot controlsBrands shooting full styled looks$29.99/mo
Rawshot AIClick-based control + compliance/provenanceEU brands and precise art direction$9/mo
PhotoroomBackground removal + batch at scaleMulti-channel sellers across categories$12.99/mo
PicjamManaged visual-production agentEstablished brands wanting hands-off output$3 (trial); $99/mo

These picks draw on each platform’s documented capabilities and pricing, plus aggregated user feedback across G2, Capterra, Trustpilot, and the Shopify App Store. We weighted garment fidelity, fashion-specific features, video support, and value for ecommerce teams.

How the Top Modelia Alternatives Compare on Features

The table below compares core capabilities.

FeatureModeliaFashion DiffusionFASHN AIBotikaVeetonRawshot AIPhotoroomPicjam
Free access20/mo or 10/day (watermarked) Trial available10 signup creditsNo free planTrial available7-day free trialFree tier (watermarked)$3 / 3-day trial
Max resolution4K4K4KUp to 4K (Advanced)Not stated2–4K2K–4KNot stated
Diverse modelsYesYes40 facesYesYes600+YesCustom + branded
Batch processingYes (Basic+)LimitedYesYesYesYesYesYes
Video generationYes (5–10s)Yes (1080p, all plans)YesYes (Pro+)YesYesYesYes
API accessYesNoYesYesNoYesYesNo

The 7 Best Modelia Alternatives, Reviewed

1. Fashion Diffusion — Best Overall for AI Fashion Design and Photography

Fashion Diffusion spans the whole fashion workflow, from first sketch to finished campaign. Where Modelia stops at photography, it adds a full design suite, on-model shoots, model generation, and AI video in one subscription. The models are trained on fashion imagery rather than generic stock, so garment detail tends to hold up better on apparel.

Fashion Diffusion AI interface showing sketch-to-render, virtual try-on, and fashion model generation workflow

Key Features

  • Design studio: AI outfit generator, style innovation, AI Sketch, apply fabric, recolor, AI inpainting, seamless patterns, and print and pattern extraction.
  • Photoshoot tools: virtual try-on, mix & match, AI lookbook, flat lay generator, change background, product detail shots, remove background, and 4K upscale.
  • Models and video: swap to any AI model or face, then animate stills into 1080p fashion clips with motion control.

Best Use Cases

  • Brands and D2C labels that want design prototyping and commercial photography in one place.
  • Designers turning sketches into rendered visuals, then straight into on-model shots.
  • Teams producing editorial and campaign content who need recolor, fabric swaps, and style exploration alongside catalog images.
  • Agencies juggling several fashion clients on a single toolset.

Pricing

  • Starter: $12/mo — 50 credits, all tools, 4K generation and upscaling, 1080p video.
  • Creator: $29/mo — 160 credits (most popular).
  • Pro: $59/mo — 380 credits.
  • Studio: $199/mo — 1,400 credits.

Pros

  • Combines design tools, AI fashion photography, and video generation in a single platform.
  • Fashion-trained models designed for apparel workflows, not generic image generation.
  • 4K image output and 1080p AI video available across all plans, including entry-level tiers.
  • Low-cost starting point at $12/month with a broad feature set.

Cons

  • No managed human-retouching service.
  • Team-collaboration features aren’t detailed in public plans.
  • No permanent free tier — a trial and bonus credits instead.

2. FASHN AI — Best for Virtual Try-On Quality and Developer API

FASHN AI is built around best-in-class virtual try-on. Its diffusion engine wraps garments onto models with strong fabric and print fidelity, and a Face Reference feature keeps the same model identity across a catalog. Beyond the app, it ships a full REST API with TypeScript and Python SDKs, so dev teams can embed try-on and model generation directly into a storefront.

FASHN AI virtual try-on platform with high-accuracy garment rendering and REST API for ecommerce integration

Key Features

  • Virtual try-on, product-to-model, model creation, model swap, and face-to-model, all in one studio.
  • Face Reference for consistent identity, with a 40-face library and custom faces on Agency.
  • AI video up to 1080p, background removal, upscaling, and parallel generations (3 on Basic, up to 11 on Agency).
  • Full developer API with a usage dashboard, plus a chat-based iOS app.

Best Use Cases

  • Ecommerce teams that need the most realistic try-on for shopper-facing product pages.
  • Developers integrating try-on or model generation into their own apps via API.
  • Brands refreshing existing catalogs through model swap, without new shoots.
  • Agencies that need shared credits across a team.

Pricing

  • Basic: $19/mo — 200 credits, 4K images, two seats.
  • Pro: $49/mo — 750 monthly plus 50 daily credits, five seats.
  • Agency: $99/mo — 1,500 monthly plus 100 daily credits, 1080p video, custom faces, ten seats.
  • The developer API is billed separately at $0.075 per credit, dropping at volume. Every account starts with 10 free credits; there’s no permanent free plan.

Pros

  • Among the most realistic virtual try-on on the market.
  • The most complete developer API in this lineup.
  • Daily credits on Pro and Agency ease month-end limits.
  • Commercial rights on all outputs.

Cons

  • No design tools and no dedicated ghost mannequin.
  • Base try-on resolution is modest, so you’ll often upscale for Amazon or large listings.
  • No native Shopify app — integration is via API.
  • No free tier; $19 is the floor.

3. Botika — Best for High-Volume On-Model Photography on Shopify

Botika turns flat-lay, mannequin, and packshot photos into professional on-model images, built for brands that need volume. Its model library spans ethnicities, body types, and ages, and credits roll over while you stay subscribed.

The standout is a built-in human retouching service. On paid plans, Botika’s team fixes images that miss the mark, at no extra cost.

Botika AI fashion photography tool for Shopify converting flat lays and mannequins into on-model product images with retouching support

Key Features

  • On-model generation from flat lays, mannequins, or packshots.
  • A wide, diverse AI model library, with full access on Pro and Advanced.
  • Human retouching: two rounds within 48 hours on Pro, three within 24 hours on Advanced.
  • AI video on Pro and above, plus a native Shopify app and credit rollover.

Best Use Cases

  • Mid-to-large Shopify brands with high SKU counts needing consistent model imagery.
  • Teams that want a human-reviewed quality safety net built into the plan.
  • Brands prioritizing model diversity for inclusive presentation.

Pricing

  • Lite: $22/mo — limited model and background selection.
  • Pro: $35/mo — all models and backgrounds, 2K, video, and retouching.
  • Advanced: $230/mo — 4K, team collaboration, and custom background colors.
  • Enterprise: custom. Annual billing lowers the effective rate.

Pros

  • Strong on-model quality with one of the widest model libraries.
  • Built-in human retouching — unique in this list.
  • Credit rollover while subscribed.
  • Native Shopify app.

Cons

  • No design tools or text-to-model creation.
  • 4K only on the top consumer plan.
  • Some users report delivery delays and slow support during demand spikes.

4. Veeton — Best for Outfit Styling and AI Photoshoots

Veeton is an AI photoshoot studio built around full-outfit styling. You mix and match tops, bottoms, and accessories, then control camera angle, lighting, and background like a virtual studio. It also cleans up rough product shots into flat-lay or ghost-mannequin visuals, and it exports without a watermark, even on the entry plan.

Veeton AI fashion photoshoot tool for outfit styling with adjustable lighting, camera angles, and background control

Key Features

  • AI photoshoot with mix-and-match outfit styling.
  • Custom AI models or a ready-made portfolio, plus model swapping.
  • Dedicated visuals for shoes and eyewear.
  • Batch generation from 2 to 100+ SKUs, AI video, and product recoloring.

Best Use Cases

  • Brands that routinely shoot full styled looks rather than single garments.
  • Teams wanting photoshoot-style controls at the generation step.
  • Footwear and eyewear sellers needing category-specific shots.

Pricing

  • Starter: $29.99/mo — 30 credits, no watermark, AI editing, recoloring, model swap, and video.
  • Pro: $69.99/mo — 70 credits, unlimited team members, and a custom model generator.
  • Studio: custom, for large volumes. No credit card needed to start.

Pros

  • Outfit mix-and-match with real photoshoot controls.
  • No watermark, even on Starter.
  • Footwear and eyewear specialization.
  • Unlimited team members on Pro.

Cons

  • Low monthly credit allowance on Starter.
  • No design tools.
  • No public API.

5. Rawshot AI — Best for Prompt-Free Control and Compliance

Rawshot AI replaces text prompts with direct, click-based control. You set camera, pose, lighting, and background through buttons and presets, which suits teams that want repeatable art direction over prompt roulette.

Rawshot AI prompt-free fashion generation tool with click-based control, provenance tracking, and commercial usage rights

Built in the EU, it adds provenance logs, AI labeling, and full commercial rights — useful for brands with compliance requirements.

Key Features

  • Click-driven control over camera, pose, lighting, and background.
  • 600+ synthetic models and 1,500+ backgrounds, across fashion, plus-size, lingerie, and jewelry.
  • Shoot types from lookbook and catalog to editorial and campaign.
  • Video and ad formats — shorts, commercials, UGC — at 2–4K, with API access.

Best Use Cases

  • Teams that prefer sliders and presets to writing prompts.
  • Brands needing audit-ready imagery with provenance and clear AI labeling.
  • EU brands prioritizing GDPR compliance and commercial-rights clarity.

Pricing

  • Starter: $9/mo — 80 tokens (about 16 images).
  • Growth: $39/mo — 400 tokens (about 80 images).
  • Pro: $89/mo — 960 tokens (about 192 images).
  • Business: $179/mo — 2,000 tokens (about 400 images). All plans include video, full commercial rights, and GDPR compliance.

Pros

  • Prompt-free, click-based art direction.
  • Strong garment fidelity and catalog-consistency focus.
  • Compliance and provenance built in.
  • Low $9 entry with commercial rights on every plan.

Cons

  • The token model is tight on Starter — about 16 images.
  • No design ideation tools.
  • No Shopify-native app.

6. Photoroom — Best for General Ecommerce Visuals at Scale

Photoroom is a broad ecommerce visual editor, not a fashion-only tool. Its background removal is among the fastest and most accurate anywhere, and batch processing handles hundreds of images in one pass. A Virtual Model feature adds AI fashion try-on, but it sits inside a wider product-photography suite rather than a design platform.

Photoroom ecommerce image editing tool for batch background removal and multi-category product photo optimization

Key Features

  • Industry-leading background removal, AI shadows, recolor, and product staging.
  • AI Virtual Model for fashion, plus ghost mannequin, at 2K and 4K.
  • Batch processing, brand kit, instant resize, and video templates for Reels and TikTok.
  • Image API, Shopify publishing, and marketplace feeds.

Best Use Cases

  • Multi-channel sellers managing visuals across fashion, beauty, home, and more.
  • Teams that need background removal and listing-ready images at high volume.
  • Sellers wanting white-background or marketplace-spec images fast.

Pricing

  • Free: watermarked exports for testing.
  • Pro: $12.99/mo — advanced AI tools, 500 batch exports, and 1,000+ templates.
  • Max: $34.99/mo — better models, 1,500 batch exports, and Shopify publishing.
  • Ultra: $99/mo — 5,000 batch exports and the fastest processing. Enterprise adds API access and SOC 2.

Pros

  • Best-in-class background removal.
  • Deep batch processing and a flexible image API.
  • A huge template and format library with instant resize.

Cons

  • General-purpose, not a fashion design suite — the virtual model is one feature.
  • Less specialized garment control than dedicated fashion tools.
  • Some users report frustration with billing and mid-plan credit changes.

7. Picjam — Best for Managed, Agency-Style Production

Picjam positions itself as a visual production agent for established brands. You can run it self-serve or hand the work to Picjam’s team through a managed Concierge tier with a four-point quality check. The toolkit covers AI models, fashion photography, ghost-mannequin removal, lifestyle and listing shots, poses, video, and UGC.

Managed AI visual production platform offering self-serve tools and agency-style content creation with quality assurance

Key Features

  • AI virtual model, fashion photography, and ghost-mannequin removal.
  • Lifestyle and listing photos, pose adjustment, and product close-ups.
  • Video and UGC generation, plus StyleWith for styling garments together.
  • Batch generation, clean-up, upscaling, background removal, and SEO keyword tools.

Best Use Cases

  • Established brands wanting a hands-off, managed production option.
  • High-volume SKU catalogs needing batch output with human QA.
  • Teams that want listing visuals and SEO support in one place.

Pricing

  • Studio Trial: $3 for 3 days — 400 one-time credits, full Studio access, commercial license.
  • Studio: $99/mo — 2,000 credits, custom and branded models, video, and UGC.
  • Concierge: custom — fully managed by Picjam, with QA and high-volume processing.

Pros

  • Low-risk $3 three-day trial.
  • A managed Concierge option with a four-point QA system.
  • Video and UGC included, plus SEO keyword tooling.

Cons

  • No permanent free tier — trial only.
  • Self-serve jumps to $99/mo.
  • No design ideation tools, and Concierge is custom-priced.

How to Choose the Right Modelia Alternative

Start with one question: do you need fashion design tools alongside photography, or photography alone?

  • If you need design and photography in one platform, Fashion Diffusion covers sketch-to-render, recolor, outfit generation, and on-model photography without a second subscription.
  • If you need on-model imagery at scale, Botika and Veeton are strong options. Botika is well suited to ecommerce catalogs that benefit from credit rollover and optional human retouching, while Veeton offers more control over styling, camera angles, and lighting.
  • If virtual try-on quality or API access is your priority, FASHN AI stands out for garment preservation and developer-friendly integrations, including a REST API.
  • If you need broader ecommerce content tools or a more managed workflow, Photoroom supports multi-category batch editing and background removal, while Picjam includes built-in quality review processes.
  • If budget is the main factor, Rawshot AI starts at $9/month, includes commercial usage rights and provenance tracking, and requires minimal setup.

Switching from Modelia: AI Fashion Workflow Setup

Start with clean inputs — well-lit flat lays or ghost-mannequin shots on a plain background give the AI more to work with and reduce re-rolls. Be specific upfront: define body type, pose, lighting, and background before generating to keep outputs consistent without wasting credits.

Stage your workflow before committing. Use a short trial or free tier to test concepts, then move final assets into a fashion-trained platform for production output. Upscale only the images you plan to publish.

If you want design, photography, and video in one place, Fashion Diffusion starts at $12/month with a free trial. Upload a garment, generate on-model images, and export a 1080p reel — no separate tools or subscriptions needed.

FAQ

What is the best Modelia alternative for fashion brands?

Fashion Diffusion is the strongest all-round Modelia AI alternative — it pairs AI photography with a full design suite from $12 a month, which Modelia doesn’t offer. For pure virtual try-on precision, FASHN AI is the specialist pick. For Shopify brands needing high-volume on-model imagery with human QA built in, Botika is worth a direct comparison.

Modelia vs Fashion Diffusion — which is better for ecommerce brands?

Depends on what you need. Modelia is stronger for consistent-character catalog production and has a native Shopify app. Fashion Diffusion is the broader platform: it adds a full design suite — sketch-to-render, outfit generation, style innovation— alongside AI photography and 1080p video on every plan.

How do I turn flat-lay photos into on-model images with AI?

Upload the flat-lay or ghost-mannequin photo, choose an AI model, set a background and pose, and the platform maps the garment onto the model automatically. Fashion Diffusion, FASHN AI, Botika, and Rawshot AI all support this workflow natively. Clean, well-lit flat lays on a plain background produce the most accurate garment fidelity with the fewest re-rolls.

Can I use AI-generated fashion model images commercially?

Yes, on any paid plan. Fashion Diffusion, FASHN AI, Botika, Veeton, Rawshot AI, Photoroom, and Picjam all grant commercial rights on their subscriptions. The exception is Modelia’s free Starter tier, which outputs watermarked, non-commercial images. Always confirm the license terms for the specific plan you’re on before publishing.

Which Modelia alternatives support AI fashion video and reel generation?

Most do. Fashion Diffusion generates 1080p fashion video on every plan, including the $12 Starter. FASHN AI, Veeton, Rawshot AI, and Picjam all produce video or UGC-style clips. Botika adds video on Pro and above. Photoroom offers branded video templates for Reels and TikTok. Modelia generates video too, but clips cost 25–40 credits each.

Which Modelia alternative is best for Shopify sellers?

Botika is well suited for Shopify-based fashion catalogs, offering a native integration, credit rollover, and optional human retouching for high-volume product workflows. Photoroom may be a better fit if you also sell across marketplaces like Amazon or Etsy, since it supports batch background removal and multi-category product editing beyond fashion.

How much does AI fashion photography cost compared with a traditional photoshoot?

AI fashion photography is dramatically cheaper. A standard shoot runs $5,000–$15,000 per session; AI tools generate comparable on-model images for a few cents to around $1 per image — a potential 90% or greater cost reduction. Complex garments like sheer fabrics and fine embroidery still benefit from a manual quality check.

Avatar photo 通过Ethan Davis

Rita Vinieris × Fashion Diffusion AI: How a Bridal Brand Turns Sketches Into Photorealistic Gown Renderings

From hand-drawn sketch to photorealistic rendering — how one of North America’s most celebrated bridal designers brought AI into the heart of the creative process with Fashion Diffusion AI.

What Is Rita Vinieris?

rita vinieris webshop

Rita Vinieris is a luxury bridal designer who launched her signature label Rivini in 1995. Over the past three decades, the brand has built a reputation as one of the most respected names in North American bridal fashion. The collection is presented seasonally at Bridal Fashion Week to international buyers and editors, and carried by leading bridal boutiques across North America.

Every Rita Vinieris gown begins as a hand drawing. The design process is rooted in couture tradition: sketches that capture silhouette, construction, and fabric intent before a single piece of cloth is cut. The collection is defined by fluid silhouettes, refined structure, and meticulous attention to detail — a design language that takes shape on paper long before it reaches the atelier floor.

The Challenge: The Gap Between a Sketch and a Finished Gown

In bridal fashion, the design process runs far ahead of production. A sketch approved today may not be sampled for weeks and not photographed for months. In the time between a designer drawing a gown and a bride seeing it in a boutique, the vision exists primarily on paper — and paper has limits.

Why Fashion Sketches Can’t Show How a Bridal Gown Really Looks

A hand-drawn sketch captures proportion, structure, and intent — but it is also an abstraction. It shows how a gown is constructed — not how it looks when light passes through layers of tulle. Not how hand-beaded lace reads at full scale. Not how a fluid silk charmeuse drapes when worn. For a designer like Rita Vinieris, whose work is defined by fabric behaviour and surface detail, that gap is where much of the creative judgment happens — and it has traditionally been bridged by experience alone.

Communicating Gown Intent to Buyers Without a Finished Sample

Bridal collections are presented to buyers before sampling is complete. The traditional tools — sketches, fabric swatches, mood boards — communicate well between experienced professionals, but leave much to interpretation. When a buyer needs to decide which fabric reads better at scale, or whether a structural detail resolves correctly at the neckline, the only reliable answer has traditionally been to make the sample. And samples take time and money.

Bridal Design Iteration Requires Costly Physical Prototypes

Bridal design involves significant iteration. A gown that looks right in sketch may need adjustment once the fabric is cut. A detail that works in one material may not translate to another. Each round of iteration traditionally requires a new physical prototype — a slow, expensive loop that constrains how many design directions a team can explore before committing to a final direction.

How Rita Vinieris Uses Fashion Diffusion AI in the Design Process

Rita Vinieris uses Fashion Diffusion AI’s Sketch to Render feature to convert hand-drawn design sketches into photorealistic gown renderings. This compresses the gap between a drawn concept and a finished visual — and enables design iteration without physical prototyping.

Sketch to Render — From Line Drawing to Photorealistic Gown

Sketch to Render takes a hand-drawn fashion sketch and generates a photorealistic rendering of the finished garment. Fabric texture, drape, surface detail, and light behaviour are all rendered from the original line drawing — producing an image that shows how the gown will actually look, not just how it is constructed.

For a bridal designer working in couture-level materials — silk organza, Chantilly lace, hand-beaded tulle — the ability to see fabric behaviour rendered accurately from a sketch changes what the design process can explore. Details that would previously require a physical sample to evaluate can be assessed visually before any fabric is cut.

Wedding dress brands use the Sketch to Render tool to turn hand-drawn sketches into rendered photos

Visualising Design Decisions Before Committing to a Sample

In bridal design, many of the most consequential decisions happen before a sample is made. Which fabric reads better at full scale? How does a structural detail resolve at the neckline? Does a particular silhouette work in a heavy versus a light material? These are questions that experienced designers have traditionally answered through instinct — or by cutting a sample to find out.

Sketch to Render gives those decisions a visual anchor. A sketch rendered in the intended fabric shows how the gown will actually behave. The way a silk organza overlay diffuses light. The way a structured bodice holds its shape. The way a full skirt falls. Design choices that would otherwise wait for a physical prototype can be made earlier, with more visual information and less material waste.

Presenting the Collection Before Samples Are Ready

Bridal collections are shown to buyers at Bridal Fashion Week and in showroom appointments, often before physical samples are complete. A rendered image communicates silhouette, fabric choice, and styling direction with a precision that a sketch cannot. Buyers can assess a collection visually without projecting from a line drawing — and that confidence at the ordering stage reduces ambiguity between designer intent and buyer expectation.

Presenting the Collection Before Samples Are Ready

Strengthening the Custom Bridal Consultation

For brides commissioning custom or semi-custom gowns, the design conversation typically begins with sketches and fabric swatches — and asks a lot of the bride’s imagination. A rendered image of the proposed gown, in the intended fabric and silhouette, removes that ask. The bride sees how the gown will look, not just how it is constructed — and that clarity early in the process reduces revision cycles and builds confidence on both sides before the first fitting.

The bride can see how the wedding dress looks on model

Virtual Try-On — Showcase Finished Gowns on an AI Model Without a Studio Shoot

Once a gown moves from design into production, it needs to be shown on a body — for website listings, lookbooks, buyer presentations, and showroom materials. Traditional model photography requires studio booking, model fitting, and post-production before a single image is ready.

Virtual Try-On places a finished gown on a realistic AI model, generating on-model imagery without any of that overhead. For a bridal brand managing multiple collections and styles, this means product imagery can be produced and updated on demand — keeping every gown correctly represented across every channel, without waiting on a photography schedule.

Virtual Try-On places a finished gown on a realistic AI model
Fashion Diffusion AI-generated

The Results: Faster Bridal Design Decisions, Fewer Physical Samples

The impact of Sketch to Render on a bridal design workflow is felt at two levels: within the creative process, and in how the collection is communicated externally.

More Design Directions Explored Before Production Begins

When rendering from a sketch takes minutes rather than days, the number of design directions a team can explore before committing to sampling increases significantly. Fabric choices, structural details, silhouette variations — each can be assessed visually without cutting a sample. The result is a more informed set of decisions entering production, and fewer costly revisions after the fact.

AI Rendering Aligns Design Intent Across Atelier, Buyers, and Brides

A photorealistic rendering communicates the designer’s intent with a precision that a sketch cannot. For the atelier team, the boutique buyers, and the bridal stylists working with clients — a rendered image removes ambiguity. Each party spends less time interpreting, and more time moving forward.

The best bridal design is already fully realised in the designer’s mind. Sketch to Render gives that vision somewhere to live before the fabric exists.

Fewer Physical Samples, Less Material Waste

Every sample that doesn’t need to be made represents fabric, labour, and time saved. When design decisions that previously required a physical prototype can be made from a rendered image, the number of samples needed to reach a final direction decreases. For luxury bridal brands working with expensive couture materials — silk, hand-beaded lace, layered organza — that reduction has a direct impact on both production costs and material waste. It is a more sustainable way to design, and a more economical one.

Bring AI Into Your Bridal Design Process

Rita Vinieris is one of a growing number of luxury bridal designers using Fashion Diffusion AI to accelerate the journey from sketch to finished visual.

If your design process starts with hand drawings and ends with couture gowns, Sketch to Render gives you a way to see the gown before it’s made. Iterate on the design before a single sample is cut. Once the gown is ready to be shown, Virtual Try-On places it on an AI model for on-demand product imagery. And Apply Fabric lets you visualise different fabric options on a finished silhouette.

Try Fashion Diffusion AI free →

Some details have been presented as representative of typical use patterns and may not reflect the full scope of Rita Vinieris’s operations. If you have questions about the content of this article or would like to clarify any information, please contact us at support@fashiondiffusion.ai.