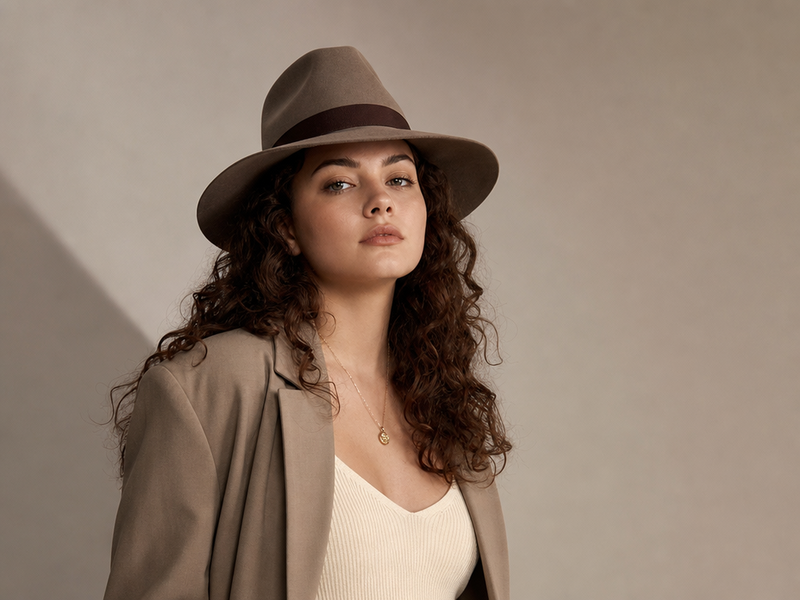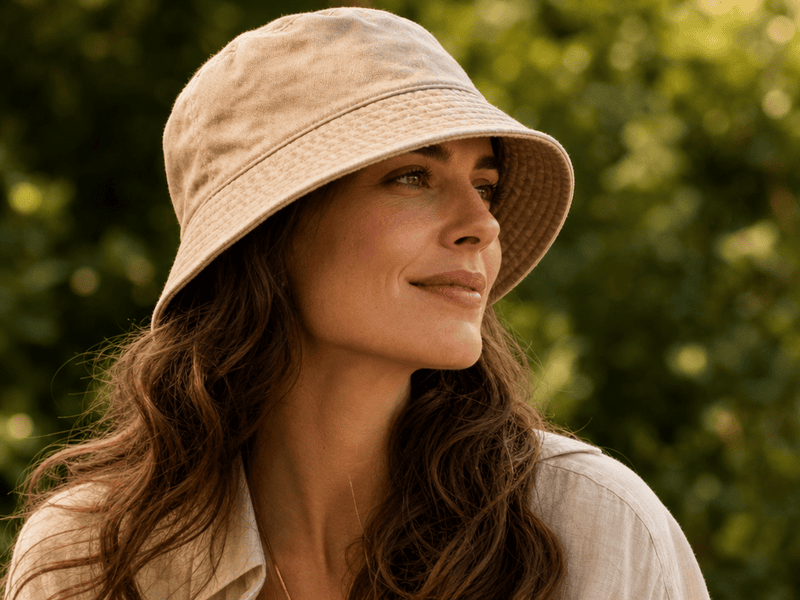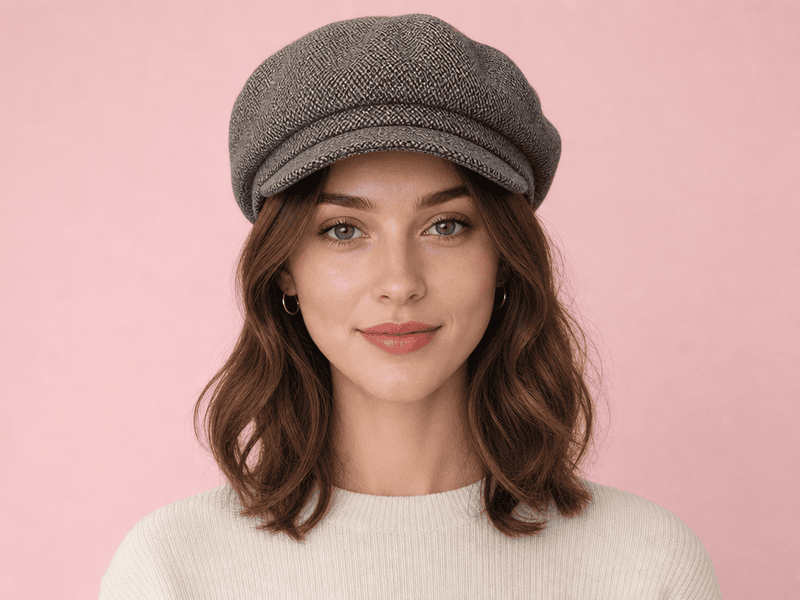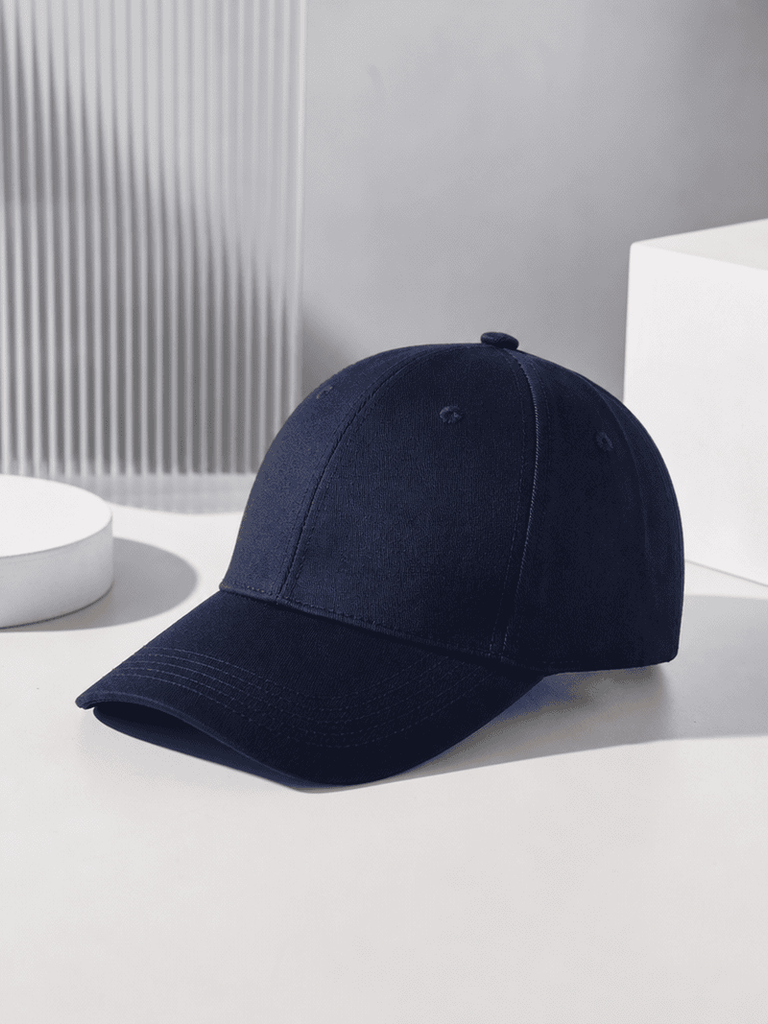
分类归档 未分类

Avatar photo 通过Sophia Mille

Best Gemini AI Photo Prompts for Fashion and Portraits in 2026

Over 30 ready-to-use prompts. That’s what this guide gives you. If you just want to copy a Gemini AI photo prompt, drop it into your generator, and get a realistic model shot, skip straight to the list below.If you want to know why some prompts produce high-end fashion shots while others give you a plastic-looking mannequin, the quick breakdown below will show you how to structure every line.

Gemini has gotten insanely good at real human features, natural skin textures, and fabric details. But to get studio-quality results, you need the right words.

Below, you’ll find copy-and-paste prompts for streetwear, editorial portraits, and vintage aesthetics. Planning a summer campaign? Check out our dedicated Gemini AI prompt for bikini library for instant beachwear visuals.

From reading to your first generated fashion photo: about two minutes. Let’s dive in.

The Secret Formula for a Perfect Gemini AI Photo Prompt

Copying prompts works, but knowing how to build them gives you full control. When a generated photo looks off, it is usually because one core element is missing from the text.

A commercial-grade Gemini photo prompt relies on four basic building blocks:

  • Subject & Pose: Define the model clearly. Specify ethnicity, hair style, expression, and action (e.g., “A 25-year-old East Asian female model, slight smile, candid relaxed stance, hands in pockets”).
  • Clothing & Texture: Name the garments and their materials. AI needs texture cues to avoid a flat look (e.g., “Oversized heavy-wool coat, ribbed knit turtleneck, raw denim jeans with visible stitching”).
  • Lighting & Environment: Set the mood and light source. Light shapes the face and fabrics (e.g., “Golden hour sun, soft golden glow, subtle rim light, muted minimalist urban alley background”).
  • Camera & Film Type: Instruct the engine to shoot like a camera, not a 3D renderer (e.g., “Shot on 35mm lens, f/1.8 aperture, Kodak Portra 400 film grain, subtle depth of field”).

Combine these four pieces into a simple paragraph, and Gemini will yield clean, photorealistic visuals every time.

Top Gemini AI Photo Prompts for Realistic Fashion & Portraits


Here is the ultimate lookbook. Each section below features a ready-to-use prompt designed around specific lighting, styling, and camera settings. Copy them, tweak the details, and drop them into Gemini to generate instant fashion visuals.

1. High-Fashion & Editorial Studio Shots

For high-end fashion brands, clean contrast and dramatic studio lighting are essential. Using the best Gemini AI photo prompts for high-end fashion helps you skip synthetic renders and achieve a polished, magazine-cover aesthetic.

Prompt: High-fashion editorial portrait of a tall female model wearing an asymmetrical avant-garde black satin blazer and tailored trousers. Sharp studio lighting, dramatic softbox shadow on one side, clean off-white background. Model standing with a confident, calm gaze looking directly at the camera. Shot on 85mm lens, f/2.8, hyper-detailed fabric sheen and crisp tailoring, sharp focus.
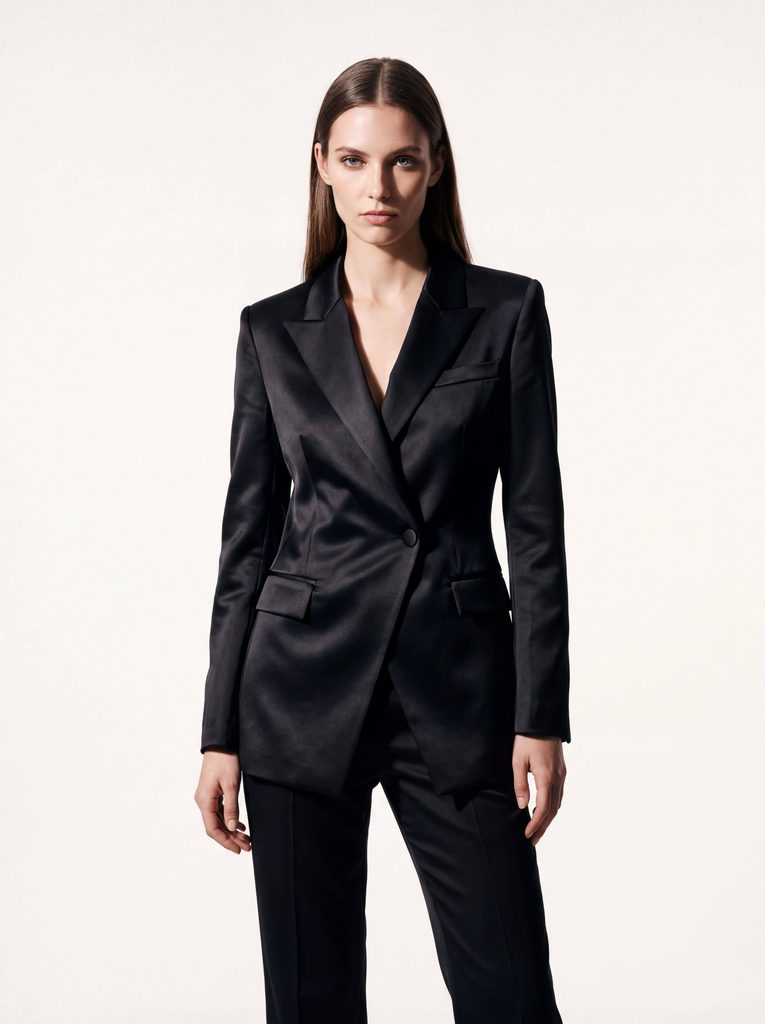
A female model wearing a tailored black suit, generated by Fashion Diffusion.

2. Summer Vacation & Swimwear Photography

Natural sunlight, ocean reflections, and light fabrics require precise prompt engineering to keep textures realistic and skin tones warm without looking over-processed. If you are specifically building summer campaigns, explore our curated bikini prompts for Gemini AI to quickly generate high-converting swimwear visuals.

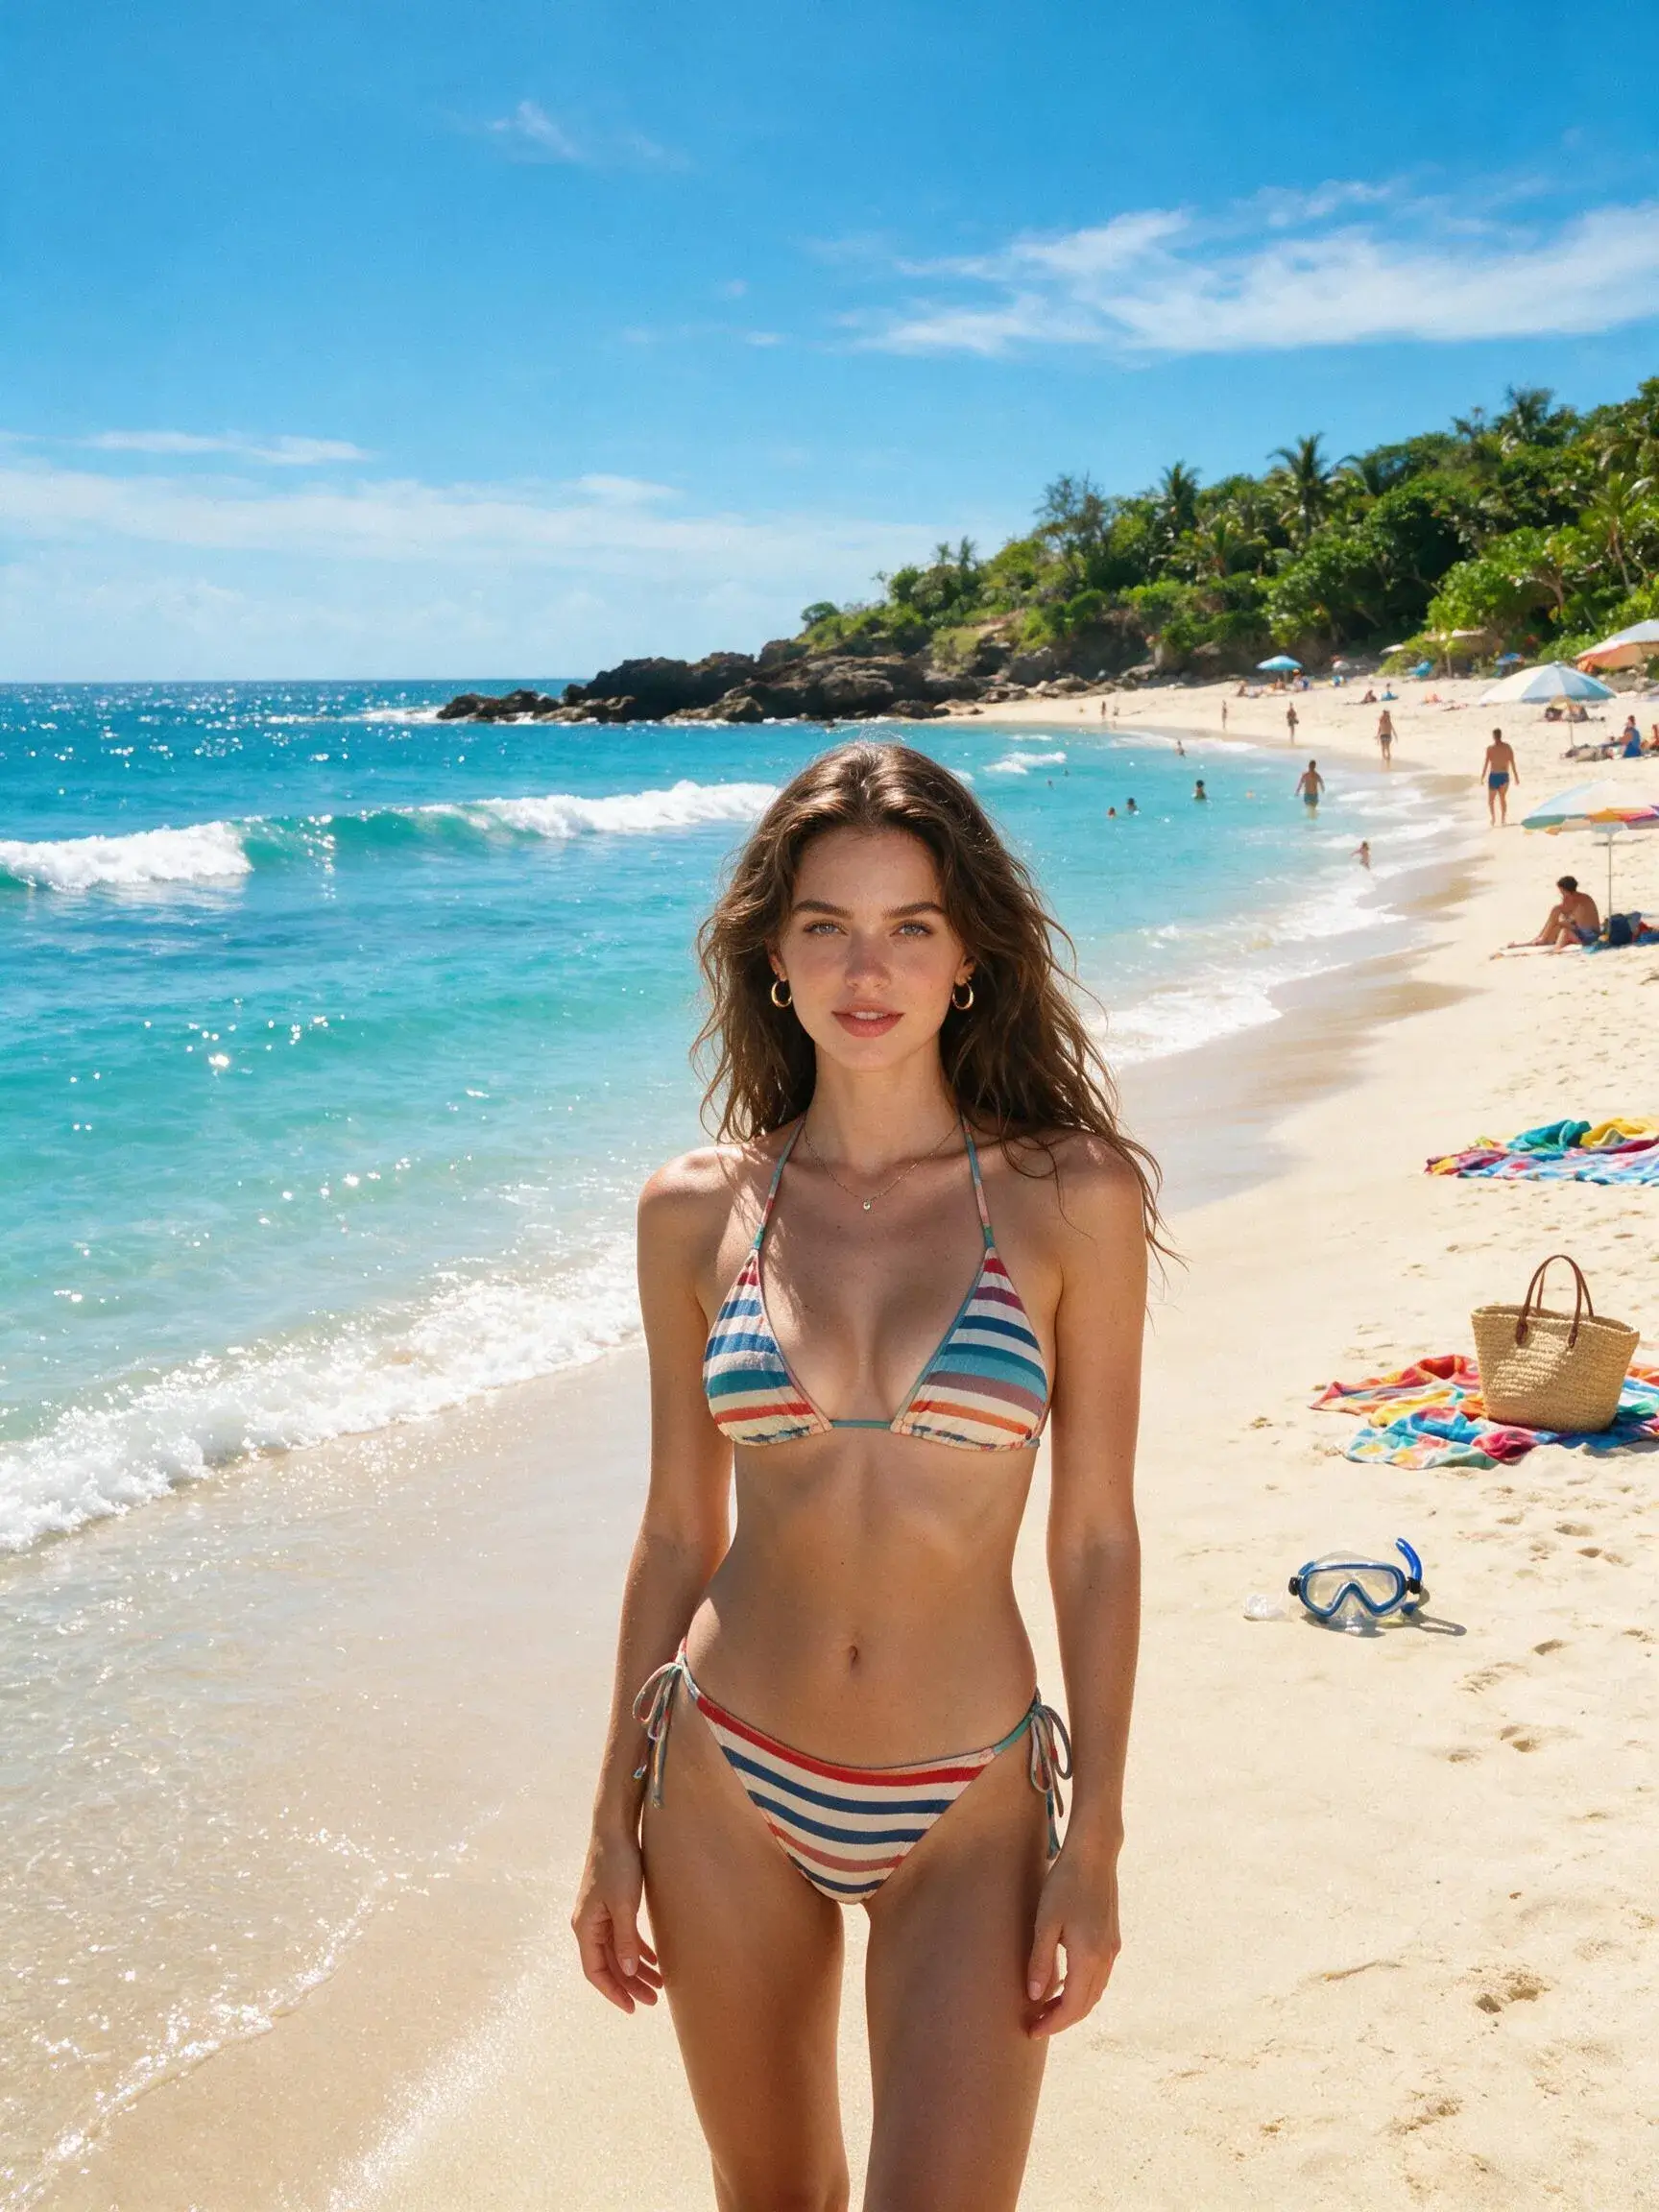
Prompt: Full-body beach photo of a female model on a sun-drenched tropical shore at golden hour. Warm sunlight reflecting off gentle ocean waves, soft lens flare. Candid relaxed pose standing near shoreline. Shot on 35mm lens, natural skin texture with subtle water droplets, vibrant yet natural color grading, Kodak Portra 400 warmth.
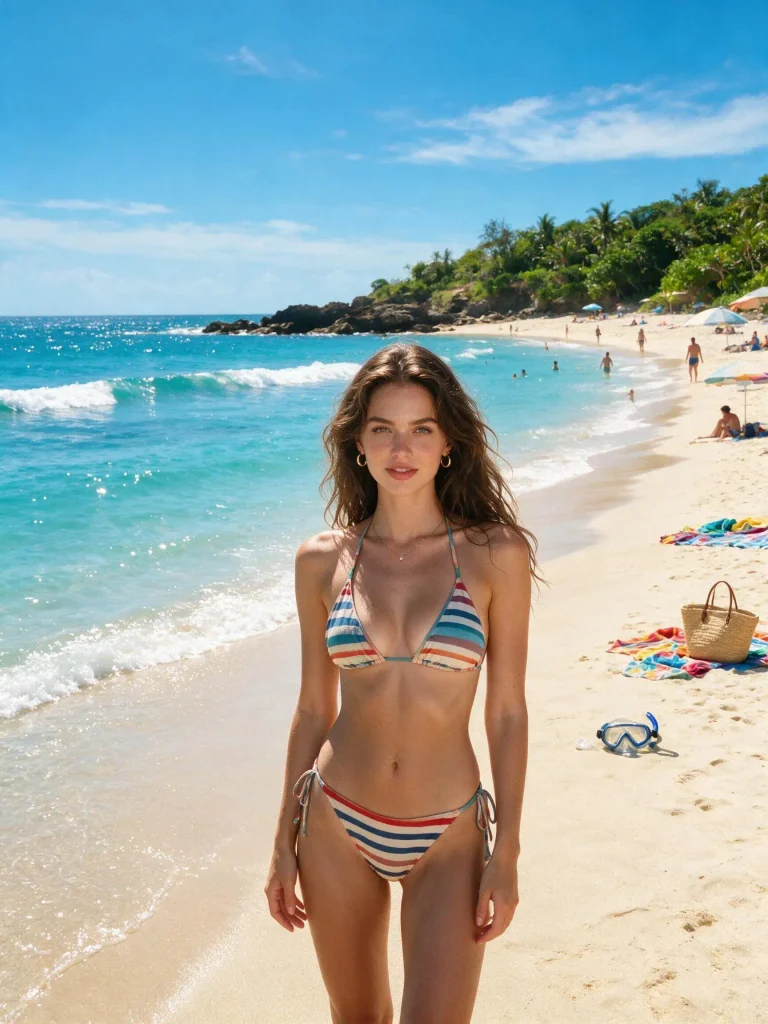
A beautiful woman in a colorful bikini standing on a sunny beach, generated by Fashion Diffusion.

3. Street Style & Urban OOTD

Urban photography thrives on movement and real-world background blur. Capturing motion blur and authentic streetwear textures gives your e-commerce lookbooks an organic, social-first vibe.

Prompt: Candid street style photography of a male model walking across a SoHo crosswalk in New York City. Wearing an oversized vintage bomber jacket, dark relaxed cargo pants, and retro sneakers. Subtle background motion blur of city traffic and blurred pedestrian neon signs. Natural cloudy daylight, shot on 50mm lens, f/1.8 aperture, realistic street texture.
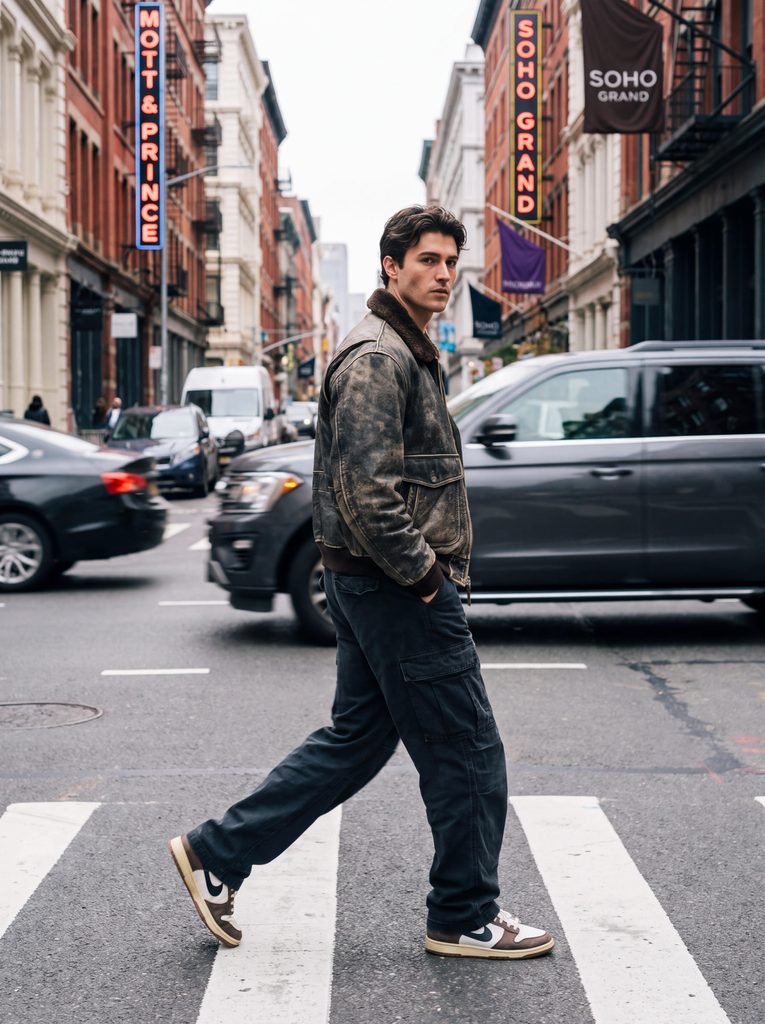
A man wearing a stylish brown jacket walking down the middle of a street, generated by Fashion Diffusion.

4. Extreme Close-Up Beauty Portraits

Close-up beauty shots leave no room for AI hallucinations or smooth “plastic” filters. Gemini excels at hyper-detailed skin textures, pores, and cosmetic details when prompted correctly.

Prompt: Extreme macro beauty portrait of a female model showcasing glossy nude lip color and subtle golden shimmer eyeshadow. Soft ring light reflection in the eyes, ultra-realistic skin texture showing fine pores and natural freckles, clean studio background. Shot on 100mm macro lens, sharp focus on eyes and lips, f/4 aperture, crystal clear detail.
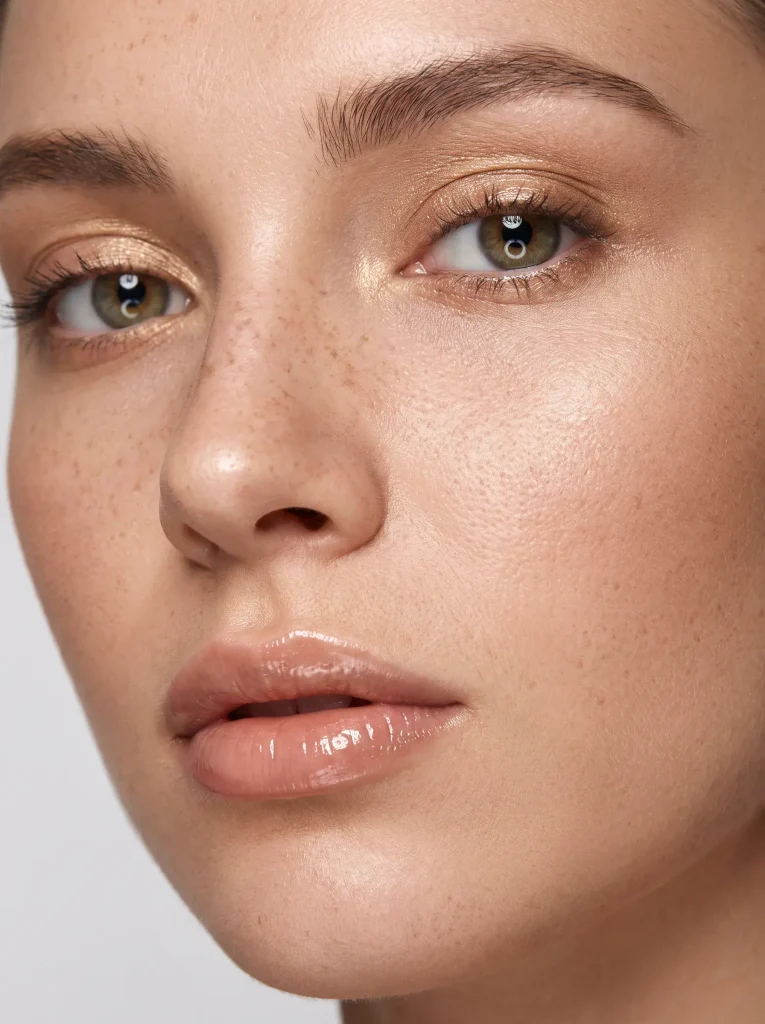
A close-up portrait highlighting detailed beauty makeup, generated by Fashion Diffusion.

5. Cozy Autumn/Winter & Layered Outerwear

Winter collection campaigns rely heavily on tactile materials—chunky wools, matte leathers, and soft knits. Warm lighting against cold, natural backgrounds creates an instant seasonal contrast.

Prompt: Medium shot of a model wearing a heavy cream turtleneck sweater layered under a thick wool trench coat. Standing in a park during late autumn, fallen golden leaves blurred in the background. Soft diffused afternoon light, subtle wind blowing hair strands, shot on 85mm lens, f/2.0, detailed knit weave and coat texture.
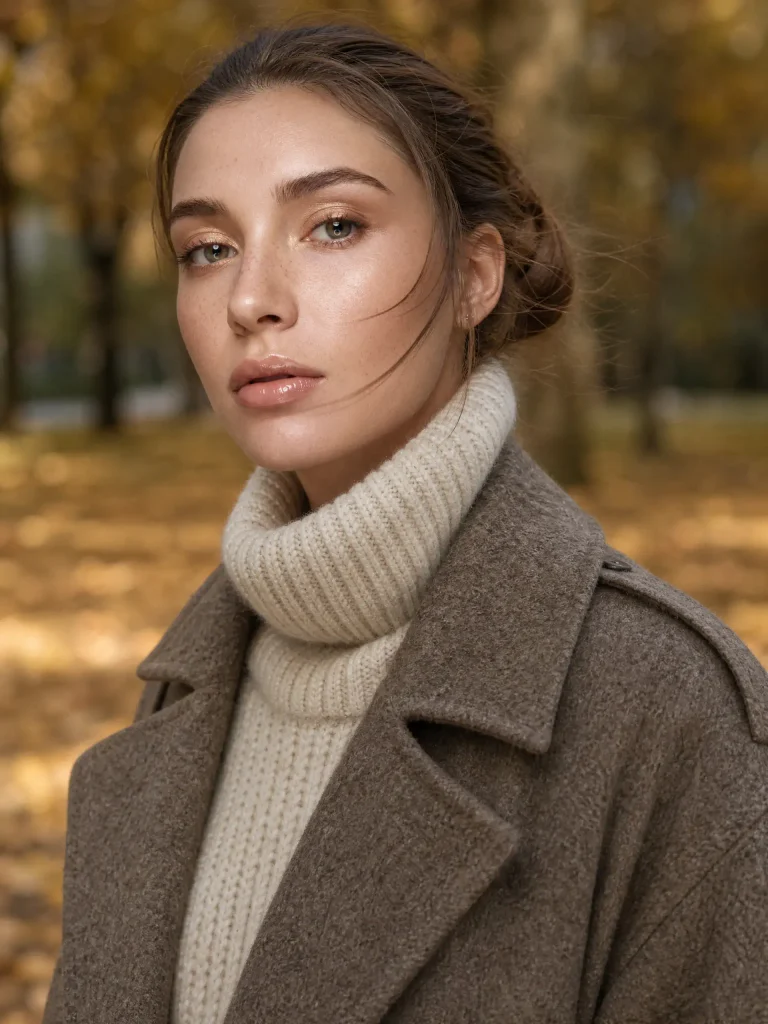
An autumn fashion outfit featuring a wool coat, generated by Fashion Diffusion.

6. Activewear & Fitness Lifestyle Shots

Dynamic motion and athletic energy require prompts that emphasize action, crisp highlights, and realistic sweat or muscle definition without looking exaggerated.

Prompt: Action shot of a female athlete tied in mid-stride on an outdoor track during early morning sunrise. Wearing a sleek slate-grey activewear matching top and leggings set. Low-angle shot, side rim light highlighting athletic form and fine beads of sweat, soft atmospheric morning mist. Shot on 70-200mm lens, 1/2000s shutter speed, tack-sharp freeze frame.
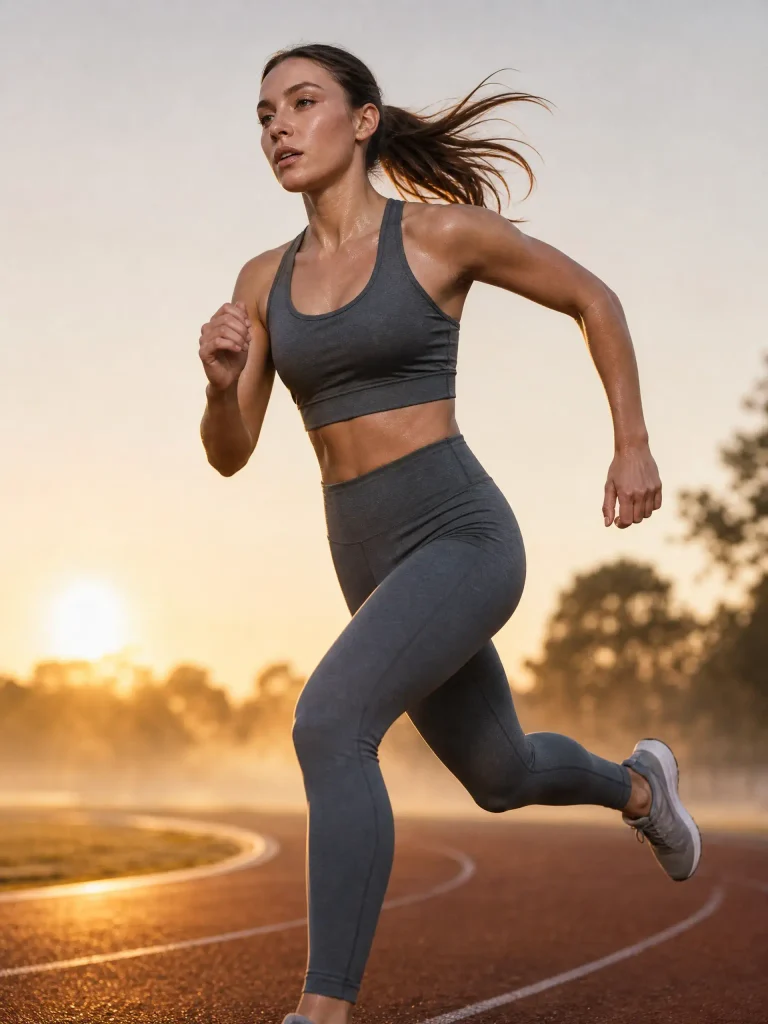
A woman running while wearing a grey sports tank top and yoga pants, generated by Fashion Diffusion.

7. Hot Girl Aesthetic

Capturing high-energy, flattering glamour shots requires a balance of vibrant contrast, warm highlights, and confident posing. If you are looking for even more trending portrait styles, explore our curated list of AI hot prompts to generate viral, social-ready visuals in seconds.

Prompt: A captivating woman, dressed in a bunny girl outfit and wearing a headband adorned with black plush bunny ears, is photographed from the waist up while wearing tight black stockings. She stands seductively in a bar, with a vintage liquor cabinet in the background. Captured in a natural, confident pose, the photo was taken with a 50mm lens at an aperture of f/1.4, creating a creamy bokeh effect in the background and a strong, cinematic contrast.
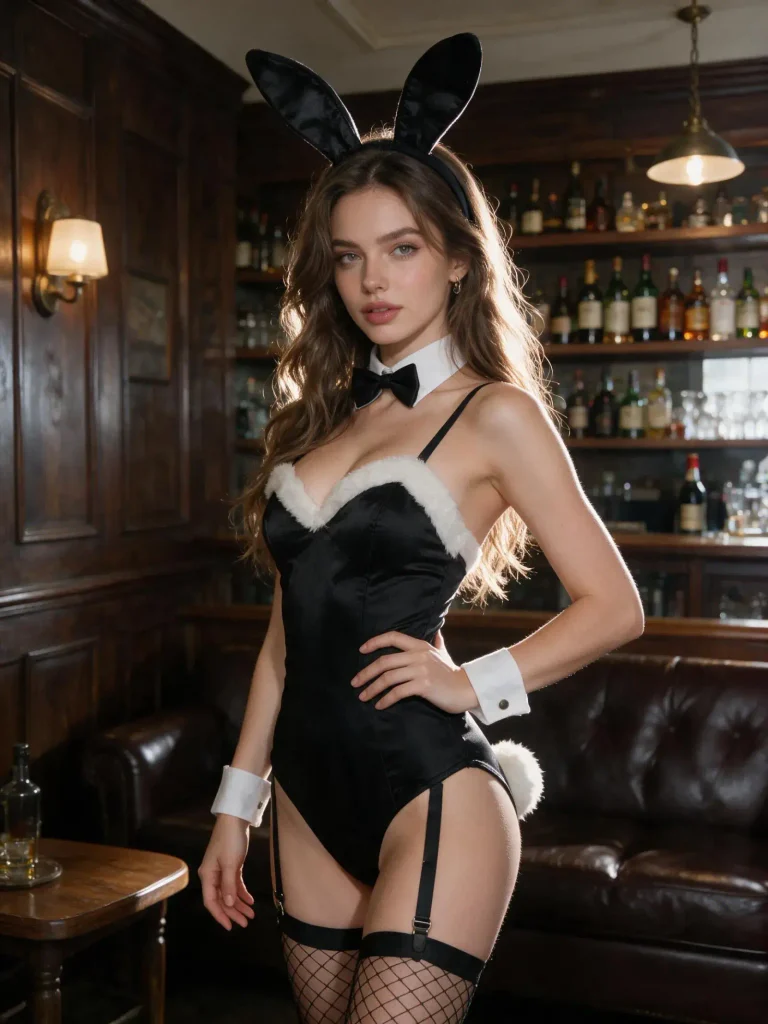
A model in a sexy bunny girl costume, generated by Fashion Diffusion.

Common Mistakes When Writing Gemini Image Prompts

Even with a strong prompt formula, minor oversights can turn a promising generated portrait into an awkward synthetic mess. Avoid these three frequent pitfalls to keep your fashion renders photorealistic:

  • Keyword Stuffing & Buzzword Overload: Avoid piling on vague quality buzzwords like “ultra-realistic, 8k resolution, trending on ArtStation, masterpiece.” Gemini responds far better to specific visual descriptions—such as “visible skin pores,” “subtle fabric weave,” or “shallow depth of field”—than to generic hype words that clutter the prompt.
  • Contradictory Lighting & Style Cues: Mixing conflicting instructions confuses the image generator. For instance, prompting “soft morning haze with harsh studio directional shadows” or “vintage film grain on a clean modern vector background” forces Gemini to blend opposing physics, often resulting in unnatural lighting artifacts. Stick to one cohesive lighting atmosphere per render.
  • Ignoring Hand and Limb Distortion: While Gemini handles anatomy better than earlier generations, hands and awkward posture folds can still glitch when relying purely on text. Instead of lengthening your prompt with massive negative prompt lists, keep it simple: specify clean poses like “hands in jacket pockets” or “relaxed arms at side.” If you want guaranteed, production-ready body proportions without prompt wrestling, using a modern AI fashion generator like Fashion Diffusion bypasses these text-to-image limitations completely.

FAQs

Can Gemini AI generate realistic human faces?

Yes. Gemini has significantly upgraded its ability to render human anatomy and facial features. By specifying details like “natural skin pores,” “subtle freckles,” and exact lighting in your prompt, you can bypass the smoothed-out, plastic look and generate faces that look entirely photorealistic.

How do I make Gemini AI photos look less fake?

Drop overused buzzwords like “8k resolution” or “CGI.” Instead, talk to the AI like a photographer. Add real film types (such as Kodak Portra 400), specify camera lenses (like an 85mm or 35mm lens), and include natural visual imperfections like “subtle film grain” or “soft background motion blur.”

Are Gemini generated images free for commercial use?

In most cases, images generated through Google’s paid AI tiers (like Gemini Advanced or Workspace) allow for commercial use. However, policies vary depending on your specific account type.

What is the difference between standard Gemini prompts and FashionDiffusion?

Standard Gemini prompts rely purely on text to generate randomized clothing on randomized models. If you are an e-commerce brand or fashion seller who needs to showcase your actual garment inventory, text prompts cannot reliably replicate your physical apparel. Using a dedicated AI fashion workflow like Fashion Diffusion allows you to upload flat-lay photos of your real products and seamlessly map them onto realistic AI models, preserving exact textures, cuts, and brand aesthetics without trial-and-error prompt writing.

Can I generate specific clothing patterns or exact brand logos in Gemini?

Text-to-image prompts in Gemini are ideal for generating general styles, aesthetics, and garment textures (e.g., “ribbed knit cardigan” or “distressed denim”). However, standard text generators struggle to replicate precise, complex brand logos, unique custom graphics, or exact pattern placements consistently across multiple renders.
Avatar photo 通过Alexander Wilson

How to Visualize Fabric on a Garment Before Ordering a Single Sample

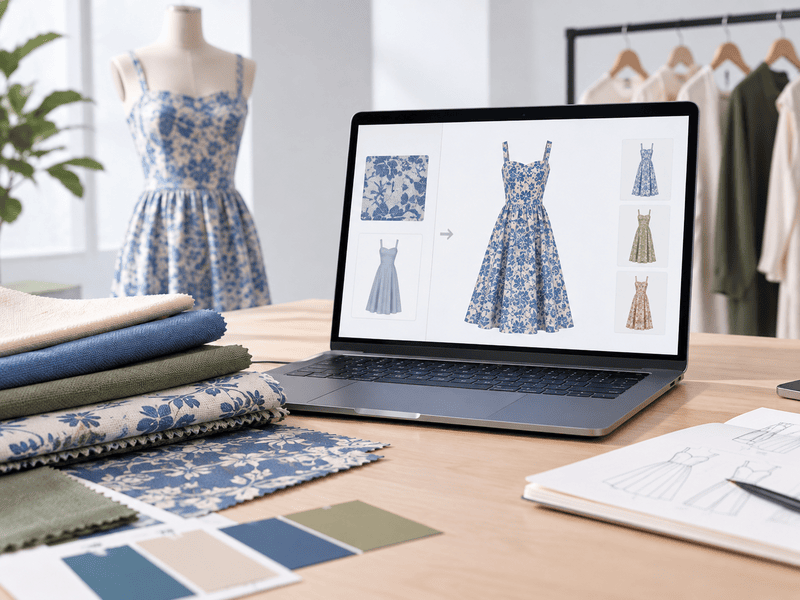
A fabric can look perfect as a flat swatch and still surprise you once it is cut and sewn into an actual garment. Color shifts under different lighting. Drape changes completely on a bias-cut skirt versus a structured blazer. A print that looked balanced on a swatch card can stretch or compress once it wraps around a real silhouette. That gap between swatch and garment is why so many fashion samples get reordered.

Fabric to garment AI is built to close that gap before a single sample goes into production. Instead of guessing from a flat swatch, you can apply fabric directly onto a garment photo with AI. The result comes back in seconds, well before any cutting, sewing, or shipping happens.

This guide covers what AI fabric visualization can help you evaluate, how to use it step by step, and where it fits alongside physical sampling.

AI Visualization vs Physical Fabric Sampling

Physical sample costs vary widely depending on the garment, fabric, construction, and sampling location. What makes the difference is not just any single step, but how many steps and rounds happen before a decision gets made. Laying the two processes side by side against each other shows where the time actually goes.

StepTraditional Sampling ProcessAI Visualization Process
1Order a fabric swatch and wait for it to arrive, typically a few days to over a weekUpload a photo of the fabric and a reference garment
2Evaluate color and hand feel from the swatch alone, without seeing it on the garmentGenerate a preview of the fabric on the garment in seconds
3Order a full physical sample and wait, commonly one to three weeks or more per roundCompare multiple fabrics or colorways on the same garment instantly
4Review the sample and request revisions, often across two or more roundsNarrow the options down to the fabrics worth ordering as a physical sample
TotalDays to several weeks before the first full sample is even reviewedMinutes to preview and compare, with physical sampling reserved for a short list

The traditional process only shows you the finished result after fabric has already been ordered and a garment has already been sewn. The AI process moves that same decision earlier, so the fabrics that clearly will not work get filtered out before any material or labor is spent on them.

What AI Fabric Visualization Can Help You Evaluate

Before getting into the steps, it helps to know what this kind of tool is actually good at showing you. AI fabric visualization is not a lab test. It is a fast way to preview how a material choice will read on a garment. That way you can rule out options that clearly will not work before spending time and money on a physical sample.

Color and Colorways

The same garment can look completely different in five colorways, and judging that from a swatch card alone is unreliable. Applying each color option to the same garment reference makes it easier to compare how a shade reads on the actual silhouette rather than on a small flat piece of fabric.

Print Scale and Placement

A print that looks balanced on a small swatch can look oversized or cramped once it repeats across a full garment. Fabric to garment AI can preview how a print scales and lands on seams and panels, so you catch scale problems before fabric goes to print. If the print itself still needs to be designed, Fashion Diffusion’s seamless pattern generator can turn a reference image or text description into a repeat-ready fabric pattern. You can then preview that pattern on a garment.

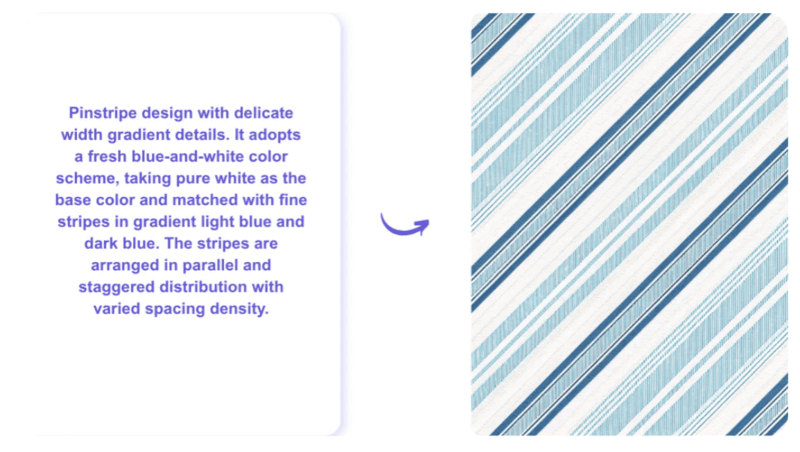
Fashion Diffusion's seamless pattern generator can turn text description into a fabric pattern.

Texture and Surface Appearance

Sheen, weight, and surface texture all affect how a fabric photographs on a finished garment. Visualizing a fabric on a garment reference gives a sense of how a shiny satin or a matte cotton will read visually. That makes it useful for deciding between similar-looking fabric options before committing to one.

Fabric and Garment Compatibility

Not every fabric suits every silhouette. A heavy brocade on a fitted slip dress and a lightweight chiffon on a structured coat both tend to look off. Previewing the combination on a garment reference makes that mismatch obvious early, instead of after a sample has already been cut.

How to Visualize Fabric on a Garment With AI

The process behind fabric to garment AI is simpler than most people expect. You do not need 3D modeling software, a photography studio, or design experience. You need two images and a few seconds of processing time.

Step 1: Upload a Fabric Reference

Start with a clear photo of the fabric itself. This can be a textile sample, a scanned swatch, a printed pattern, or any material reference you already have on hand. Fashion Diffusion’s Apply Fabric accepts PNG, JPG, and WebP files. It also includes a built-in library of sample fabrics if you want to test the tool before uploading your own material.

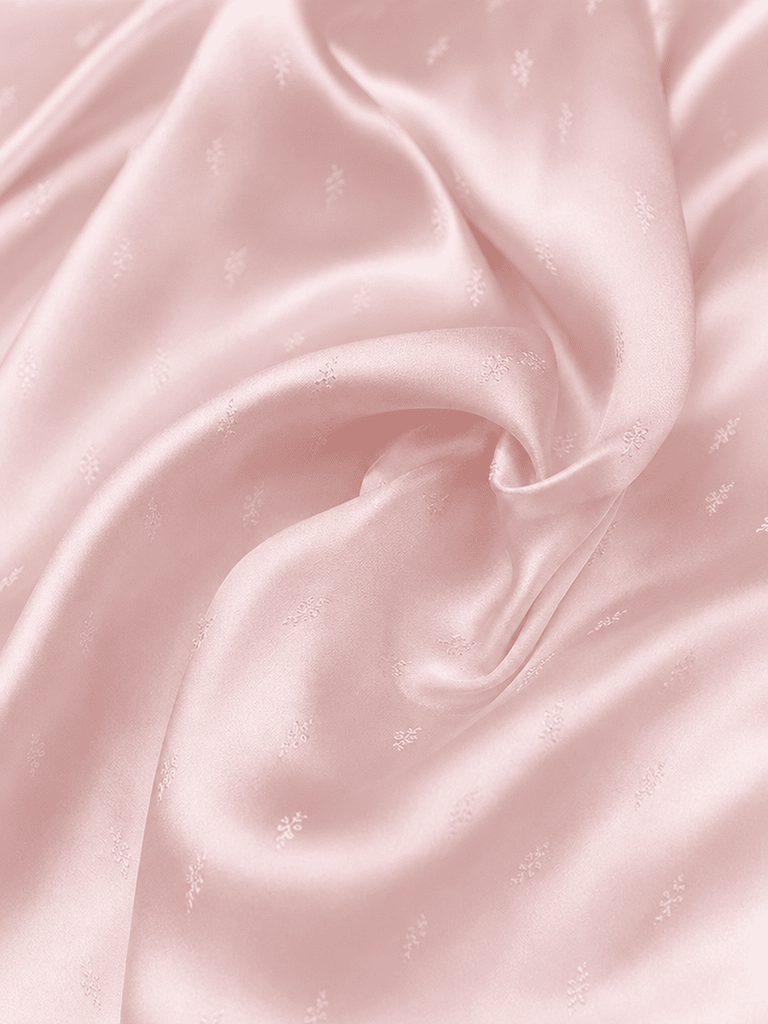
Upload a fabric photo.
Fashion Diffusion AI-generated

Step 2: Upload a Garment Reference

Next, upload a photo of the garment you want to visualize the fabric on. This can be a flat lay, a product photo, or a sketch-style reference. The tool uses the garment reference to preserve its silhouette, seams, folds, and overall structure while applying the new fabric on top of it.

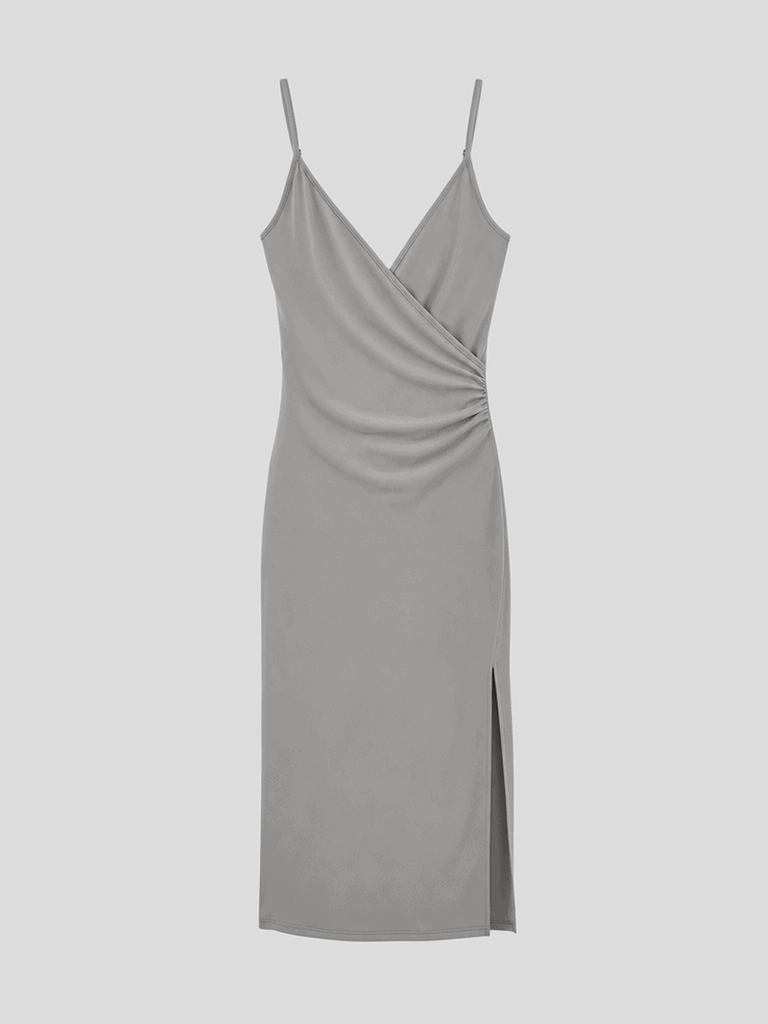
Upload a garment photo.
Fashion Diffusion AI-generated

Step 3: Generate and Compare the Results

Once both images are uploaded, the AI generates a realistic preview of the fabric’s texture, color, pattern scale, and overall appearance on the garment. From here you can compare multiple fabric options on the same garment shape. You can also test the same fabric across several silhouettes, all without producing a single physical piece.

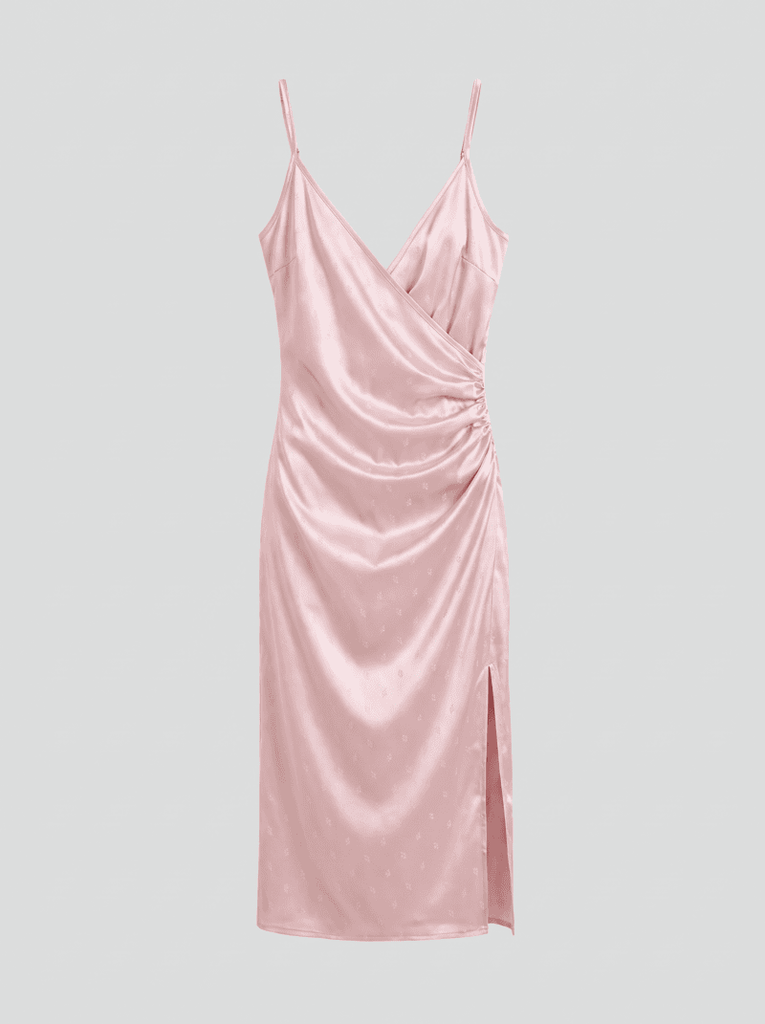
Generate a realistic preview of the fabric's appearance on the garment.
Fashion Diffusion AI-generated

To take the result further, feed the fabric-applied garment into Fashion Diffusion’s virtual try-on tool. That lets you see how the finished piece looks worn by a model before making a final call.

See how the finished piece looks worn by a model.
Fashion Diffusion AI-generated

Who Uses Fabric to Garment AI

Fabric visualization is not limited to one type of fashion business. The people who benefit most tend to fall into four groups, each using the same core workflow for a different purpose.

Independent Designers

For a designer working alone or with a small team, sampling budgets are tight and every wasted round matters. Testing how silk drapes on a slip dress or how a bold print scales on a t-shirt before ordering fabric helps designers commit to a direction with more confidence. It also frees up physical sampling budget for the options that already look right.

Brand Buyers and Merchandisers

Buyers often need to evaluate several fabric options across a season’s line before committing to a purchase order. Seeing a fabric applied to the actual garment shape, instead of judging it from a swatch card, makes it easier to compare options. It also helps the whole team move faster toward a final decision.

Fabric Suppliers

Suppliers traditionally rely on physical sample books to show buyers and design teams how a new textile performs. Applying a new fabric to several garment styles digitally lets suppliers demonstrate range and versatility without producing and shipping physical books for every account.

E-commerce Sellers

Offering a garment in multiple fabric or colorway options usually means ordering and photographing a separate sample for each variation. Generating fabric variations digitally from a single garment reference lets sellers expand their product listings without multiplying production and photography costs. Sellers who also need to show a garment styled as a full outfit, rather than just a fabric change, can pair this with Fashion Diffusion’s AI clothes changer. It swaps entire looks on the same model photo.

When You Still Need a Physical Sample

AI fabric visualization shows how a material may look on a garment. It does not measure the fabric’s physical properties or guarantee how it will behave in production. Fit, stretch recovery, colorfastness, wash performance, and durability still require an actual sample in hand before a style moves into production.

The value of visualizing fabric on a garment first is that it narrows the field. Instead of ordering several physical samples to compare several fabric options, a brand can visualize them digitally and eliminate the ones that clearly do not work. That leaves physical sampling for the options that are genuinely worth the time and cost.

See Your Fabric on a Garment Before You Sample

Guessing from a flat swatch is no longer the only option. With Fashion Diffusion‘s Apply Fabric, you can upload a fabric photo and a garment reference and see a preview in seconds instead of waiting weeks for a physical sample. Compare fabric options digitally before deciding which ones are worth sampling. Free to start!

FAQ

Can AI accurately show how a fabric will drape on a garment?

AI fabric visualization gives a strong visual estimate of how a fabric will appear on a garment, including how heavier and lighter materials tend to fall differently. It previews appearance rather than measuring physical properties, so final fit and hand feel still need a physical sample.

Does fabric visualization work for prints and patterns, not just solid fabrics?

Yes. AI fabric tools can map printed textiles, allover patterns, and placement prints onto a garment with estimated scale and placement. That makes it useful for spotting scale issues before a print goes to production.

Can I visualize different fabrics on the same garment?

Yes. Using the same garment reference, you can test multiple fabrics and compare color, texture, print scale, and overall appearance side by side.

Can I preview a print or pattern on a garment before it goes into production?

Yes. You can generate or upload a pattern and apply it to a garment reference to see how the repeat and scale look before committing to yardage.

Is AI fabric visualization free to use?

Fashion Diffusion offers free credits to get started with Apply Fabric. Therefore, you can test the workflow before committing to a paid plan for higher volume use.

Does this replace working with a fabric mill or manufacturer?

No. It replaces some of the guesswork in the early decision-making stage. Sourcing, fabric testing, and final production sampling still go through your usual suppliers and manufacturers.

Avatar photo 通过Ethan Davis

The Best Modern Dress Prompts for Women: 15 Examples & Writing Techniques

Generating the perfect AI fashion image starts long before you hit “create” — it starts with the prompt. If you’ve ever typed “woman in a modern dress” and gotten something flat, generic, or off-brand, the problem usually isn’t the AI model. It’s the prompt.

This guide breaks down what makes a great modern dress prompt for women, with real example prompts you can copy, tweak, and use to generate the outfit right away, plus the underlying structure and techniques that make them work.

15 Modern Dress Prompts You Can Use Today

Here are 15 ready-to-use prompts spanning everyday, going-out, trending-material, and editorial styles, so there’s something to copy no matter the look you’re after.

1. Minimalist Office Wear

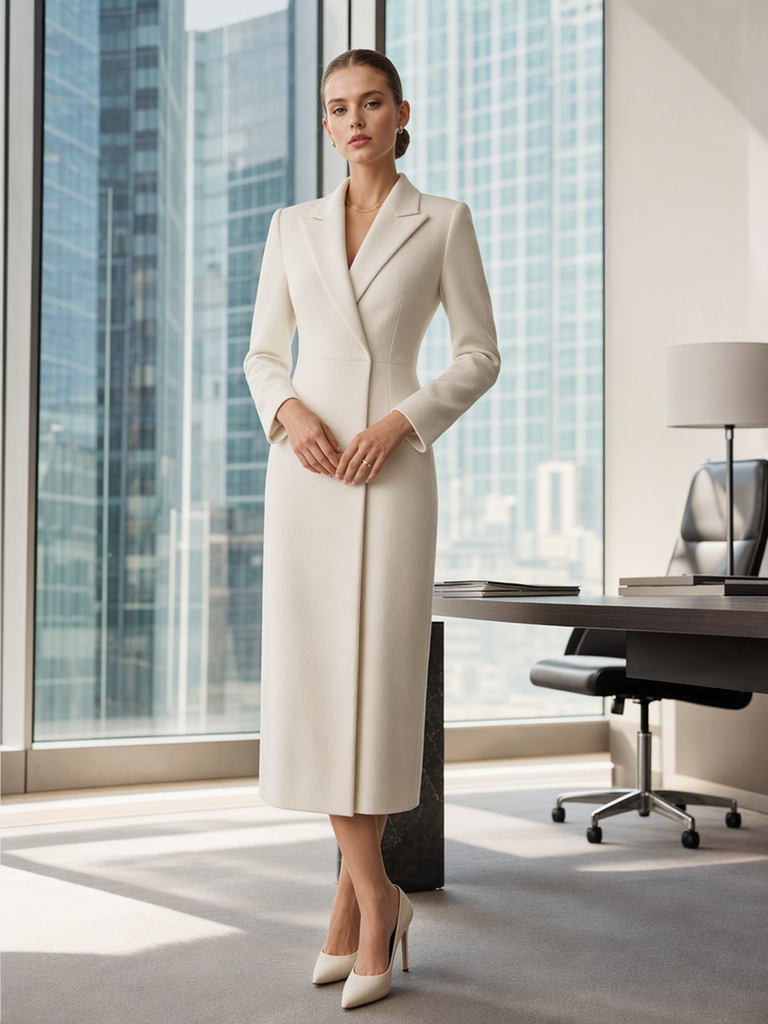
Prompt: Young woman standing confidently in a tailored midi dress with a structured blazer collar, ivory color, straight silhouette, subtle wool texture, minimal gold jewelry, sleek low bun. Standing in a bright modern office with floor-to-ceiling windows, soft natural daylight, shot on 50mm lens, editorial fashion photography style.

Minimalist Office Wear
Fashion Diffusion AI-generated

Why it works: It defines a clear silhouette, a specific fabric cue, and pairs the minimalist mood with a matching environment instead of leaving the setting generic.

2. Flowy Summer Dress

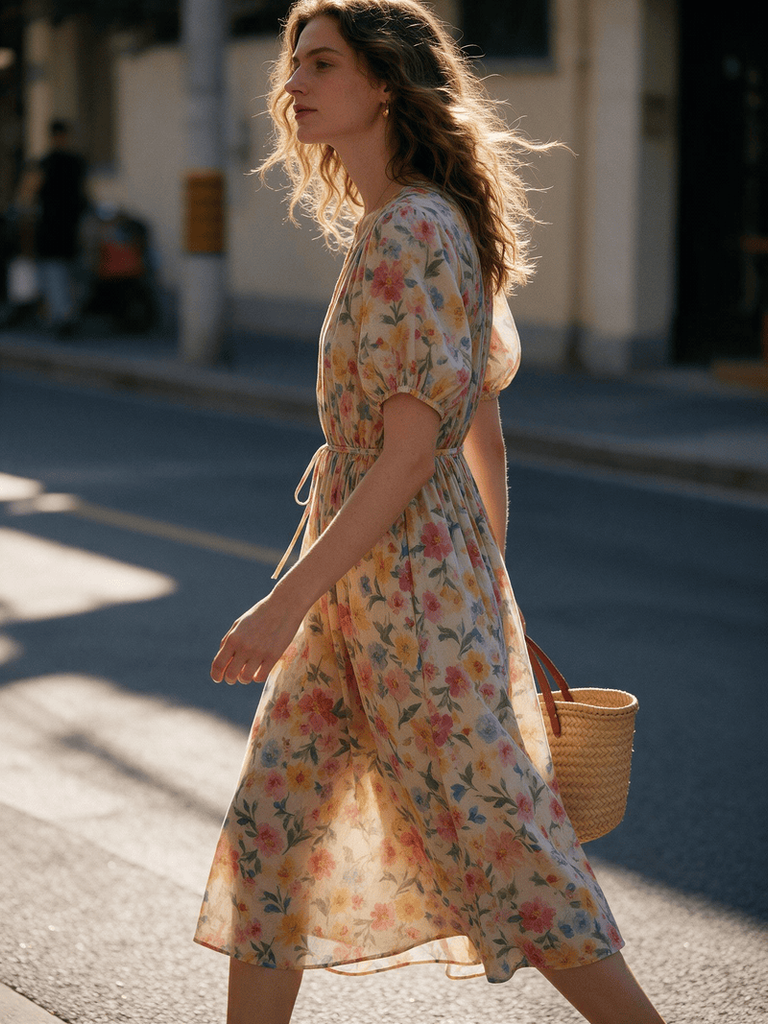
Prompt: Woman walking along a sunlit street in a flowing floral midi dress. Lightweight cotton fabric, cinched waist, short puff sleeves, wavy loose hair, straw tote bag, golden hour lighting, warm tones. Candid street style photography, shallow depth of field.

Flowy Summer Dress
Fashion Diffusion AI-generated

Why it works: Movement words like “walking” and “flowing” tell the model to render fabric with motion, which is essential for lightweight materials.

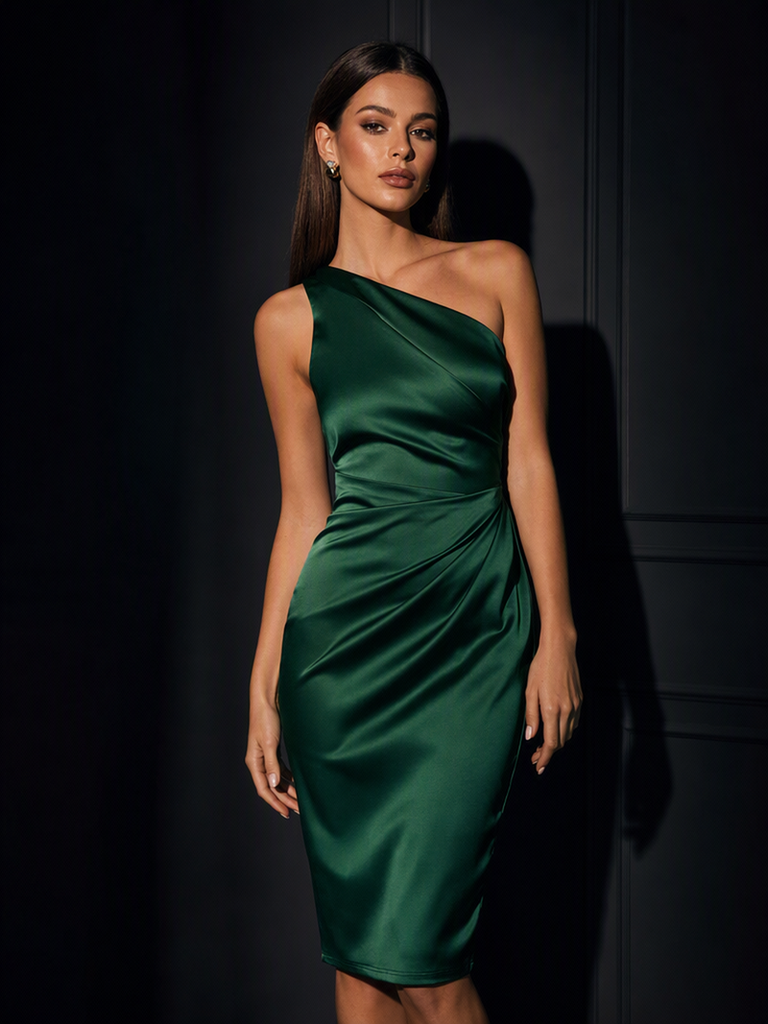
3. Evening Cocktail Dress

Prompt: Elegant woman in a fitted satin cocktail dress. Deep emerald green, one-shoulder design, knee-length hem, soft glam makeup, sleek straight hair, standing against a dark moody background with dramatic side lighting, high-fashion studio photography, glossy finish.

Evening Cocktail Dress
Fashion Diffusion AI-generated

Why it works: Color and fabric are named together since sheen and color interact visually, and the lighting direction is specified because studio shots depend heavily on it.

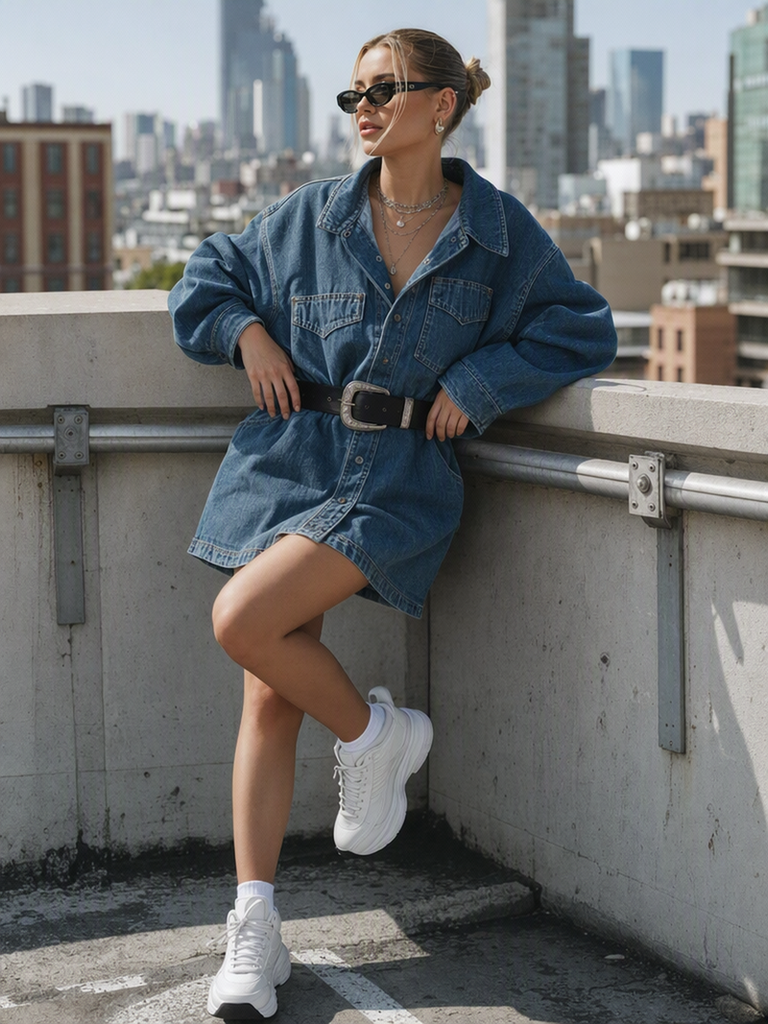
4. Streetwear-Inspired Dress

Prompt: Confident woman wearing an oversized denim shirt dress, cinched with a wide belt, chunky white sneakers, layered necklaces, urban rooftop background, city skyline in soft focus, natural daylight, casual editorial photography, Gen Z fashion aesthetic.

Streetwear-Inspired Dress
Fashion Diffusion AI-generated

Why it works: Naming an aesthetic category helps the model pull from a consistent visual vocabulary rather than mixing unrelated style cues.

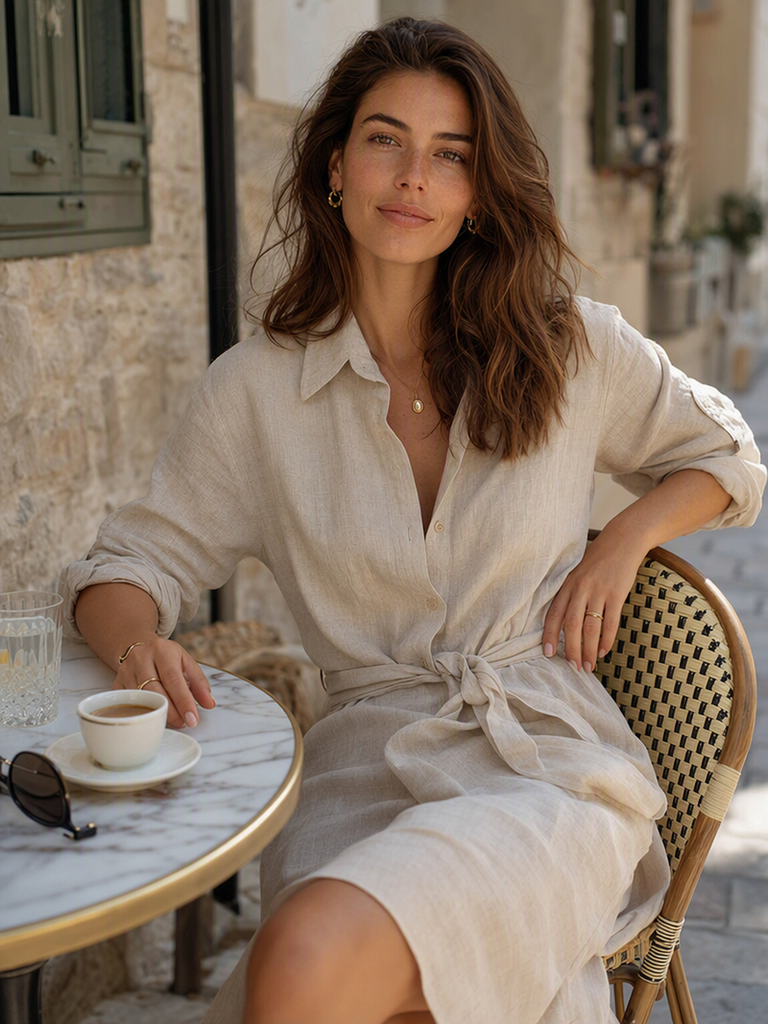
5. Quiet Luxury Brunch Dress

Prompt: Woman seated at a sunlit outdoor café table, wearing a relaxed linen shirt dress in a soft oatmeal tone, oversized collar, rolled sleeves, tied waist, minimal gold jewelry, natural loose waves, soft neutral makeup, warm morning light, shallow depth of field, quiet luxury lifestyle photography, calm and understated mood.

Quiet Luxury Brunch Dress
Fashion Diffusion AI-generated

Why it works: Naming the “quiet luxury” aesthetic directly steers the model away from logos or flashy details, while pairing “linen” with a specific tone (“oatmeal”) keeps the fabric read as relaxed rather than stiff.

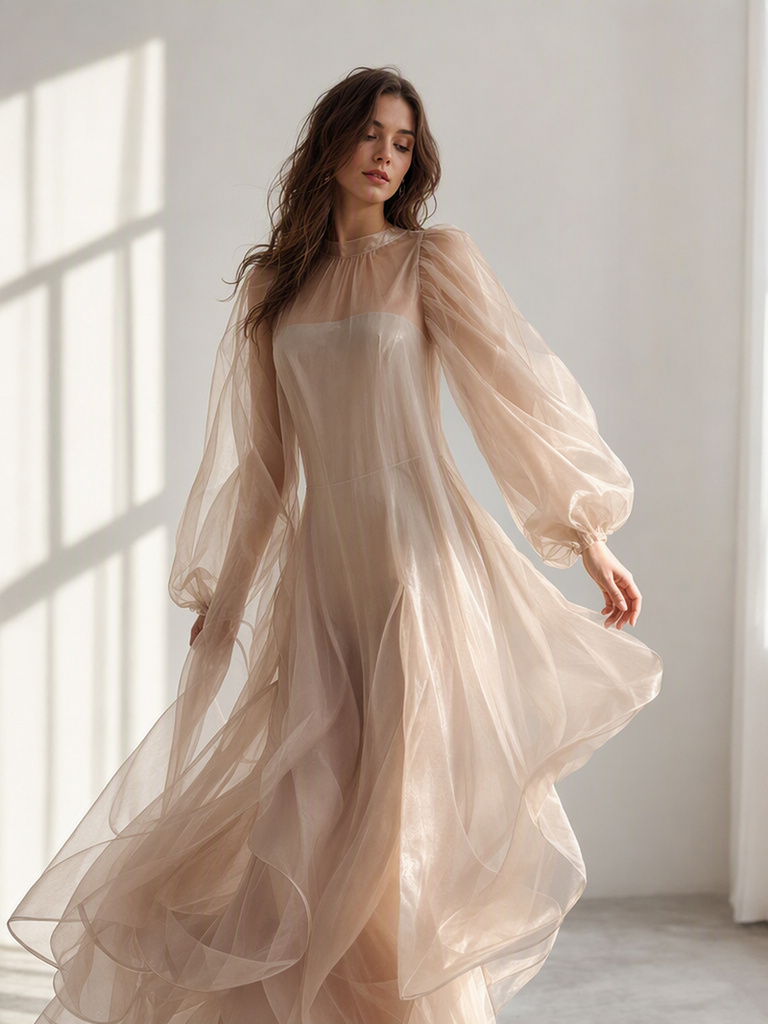
6. Sheer Organza Dress

Prompt: Elegant woman in a sheer silk organza dress, beige nude tone, voluminous puffed sleeves, layered translucent fabric with a subtle sheen, delicate slip lining underneath, soft romantic makeup, loose waves. Standing in a light-filled minimalist studio, diffused window light, high-fashion editorial photography, dreamy and airy mood.

Sheer Organza Dress
Fashion Diffusion AI-generated

Why it works: Sheer fabric is tricky to render, so the prompt separates the translucent outer layer from the slip lining underneath instead of describing one ambiguous garment.

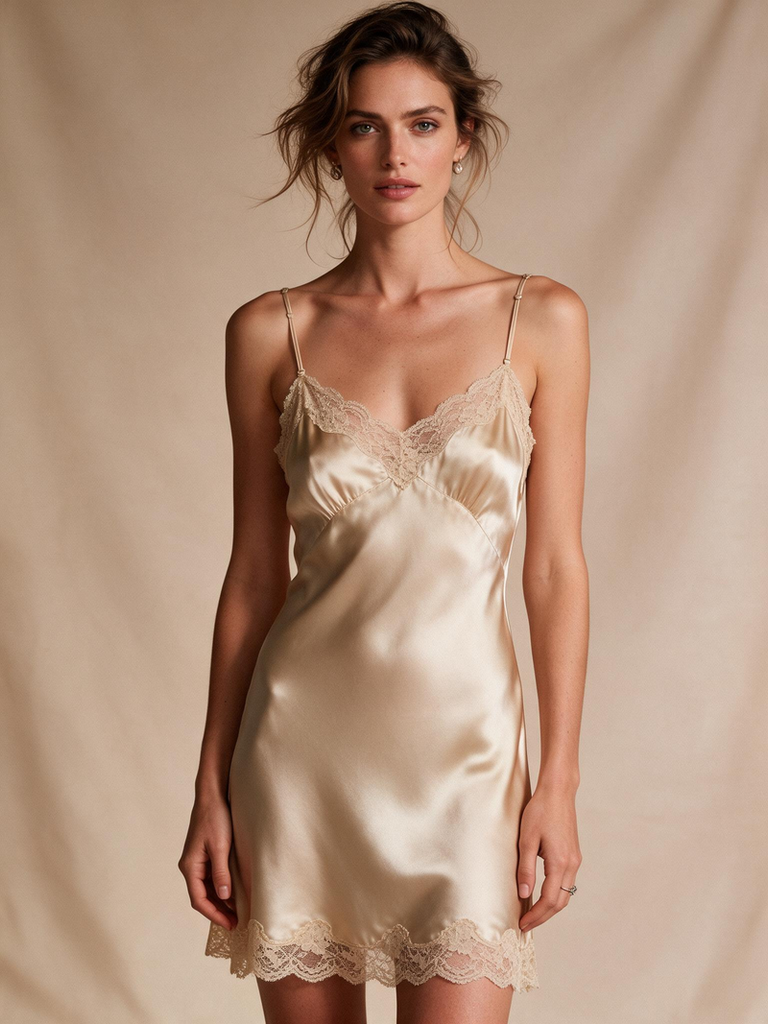
7. Lace-Trim Silk Slip Dress

Prompt: Woman in a vintage-inspired silk slip dress, champagne color, delicate lace trim along the neckline and hem, bias-cut silhouette, thin adjustable straps, soft glossy finish, natural tousled hair, minimal jewelry. Standing against a warm beige backdrop, soft diffused lighting, retro-glam editorial photography.

Lace-Trim Silk Slip Dress
Fashion Diffusion AI-generated

Why it works: Naming the construction detail “bias-cut” tells the model how the fabric should fall and cling, which gives slip dresses their signature drape.

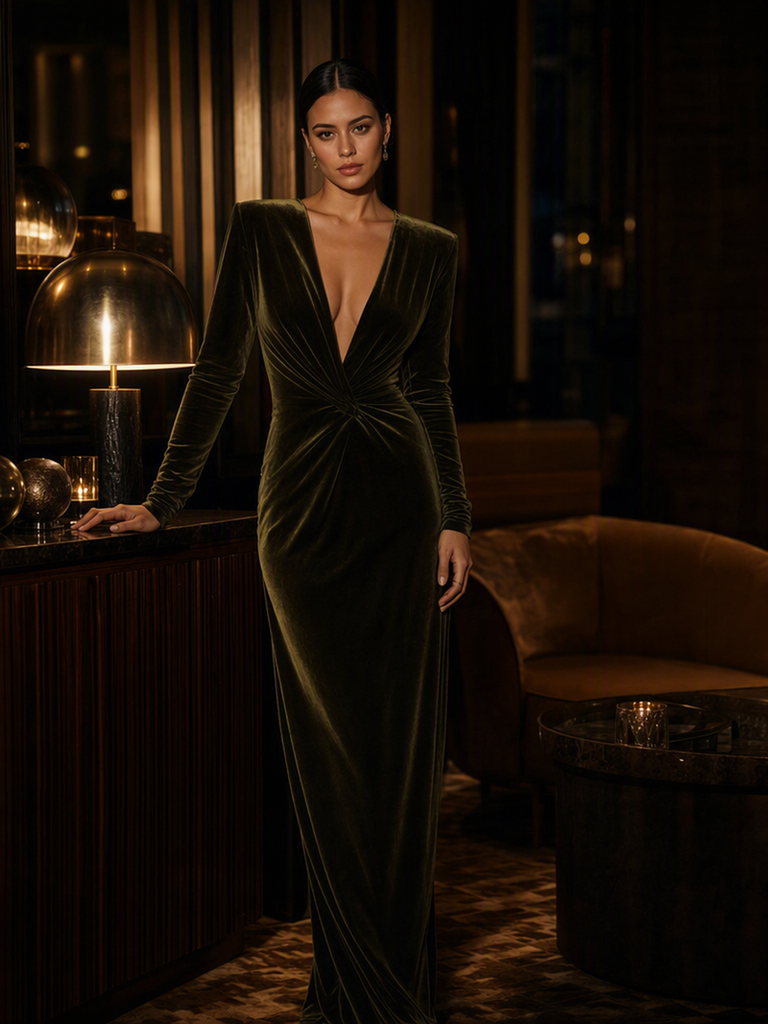
8. Velvet Evening Dress

Prompt: Woman in a deep olive green velvet dress, fitted long sleeves, plunging V-neckline, floor-length column silhouette, rich matte-to-shadow texture, sultry smoky-eye makeup, sleek center-part hair. Standing in a dimly lit lounge setting, warm ambient lighting with deep shadows, luxury editorial photography, moody atmosphere.

Velvet Evening Dress
Fashion Diffusion AI-generated

Why it works: Describing velvet’s matte-to-shadow texture and pairing it with deep shadows helps the model render the fabric’s light absorption instead of defaulting to a shiny finish.

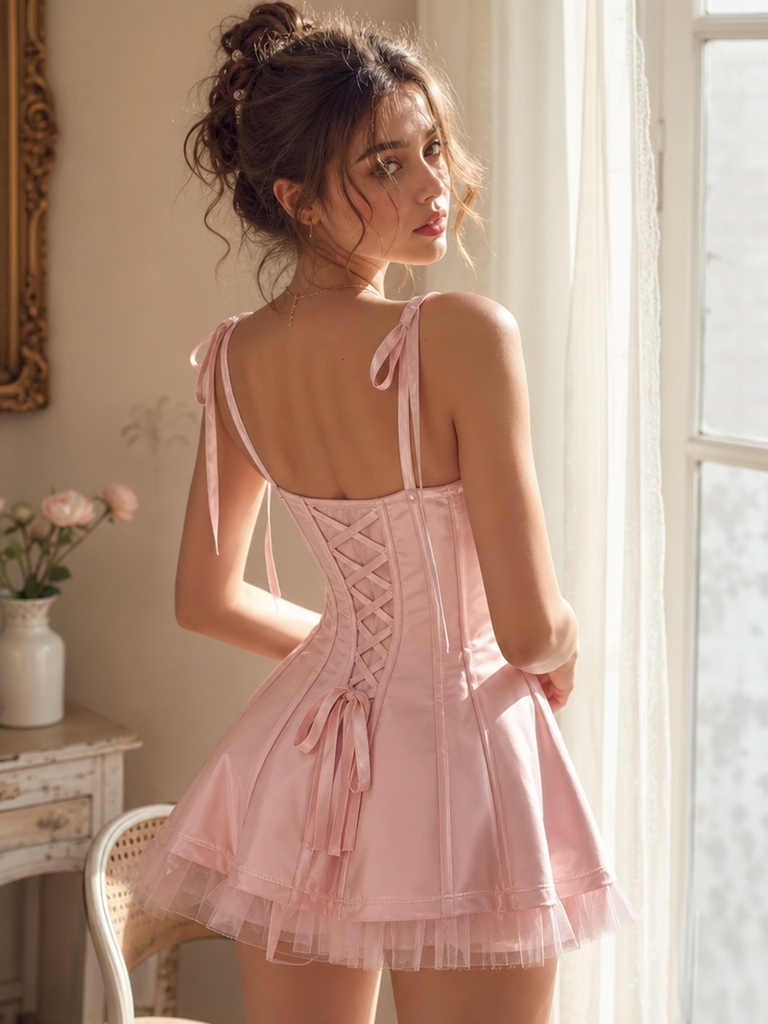
9. Balletcore Corset Mini Dress

Prompt: Young woman in a soft pink balletcore corset mini dress, structured bodice with visible boning seams, ribbon lace-up back detail, a sheer tulle underlay peeking beneath the hem, delicate ribbon straps, soft glowing skin, loose face-framing curls. Standing in a sunlit room with sheer curtains, warm soft natural light, dreamy Pinterest-aesthetic photography, high-detail fabric texture, youthful and romantic mood.

Balletcore Corset Mini Dress
Fashion Diffusion AI-generated

Why it works: Naming precise construction details like “visible boning seams” and “ribbon lace-up back” gives the model concrete garment structure to render instead of a generic “corset dress,” while the soft natural light keeps the mood dreamy and youthful rather than harsh or clinical.

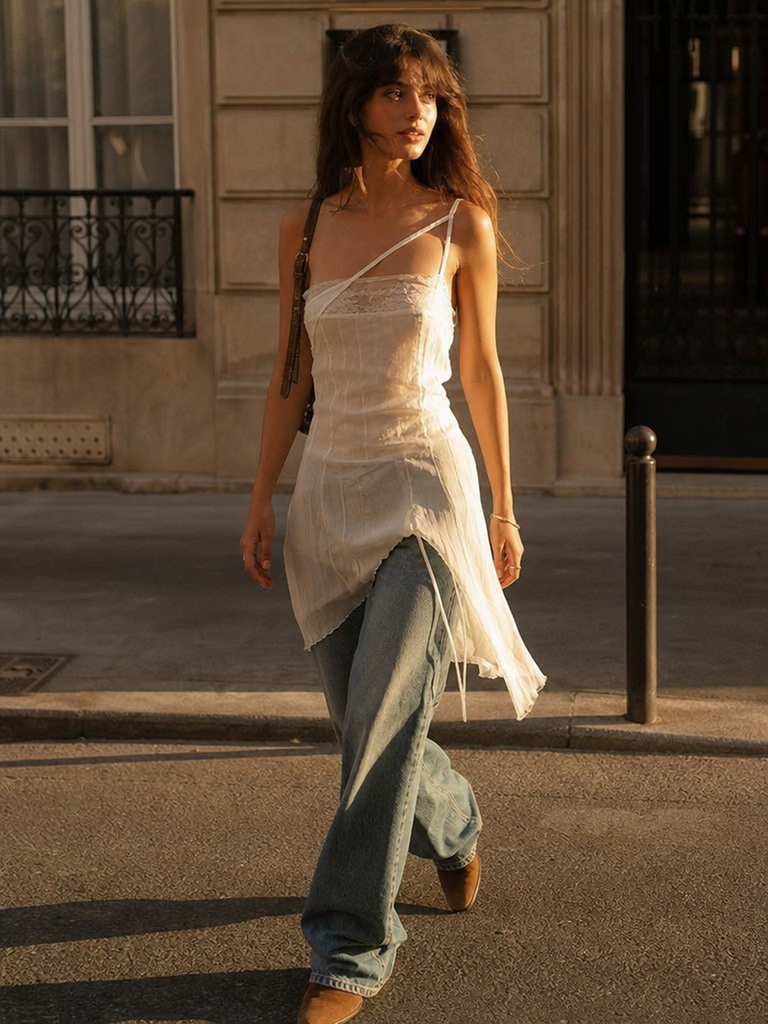
10. Sheer Slip Dress Over Denim

Prompt: Sheer ivory slip dress with an uneven asymmetric strap, layered over wide-leg jeans with a loose stacked pooling effect, tucked into brown suede ankle boots. Walking down a sunlit city sidewalk, tousled beachy waves, soft dewy makeup, golden hour light, candid Pinterest-style photography, effortless youthful mood.

Sheer Slip Dress Over Denim
Fashion Diffusion AI-generated

Why it works: Naming the dress-over-jeans pairing directly, rather than just describing the dress alone, tells the model this is an intentional styling combination and keeps the sheer fabric from getting lost against denim.

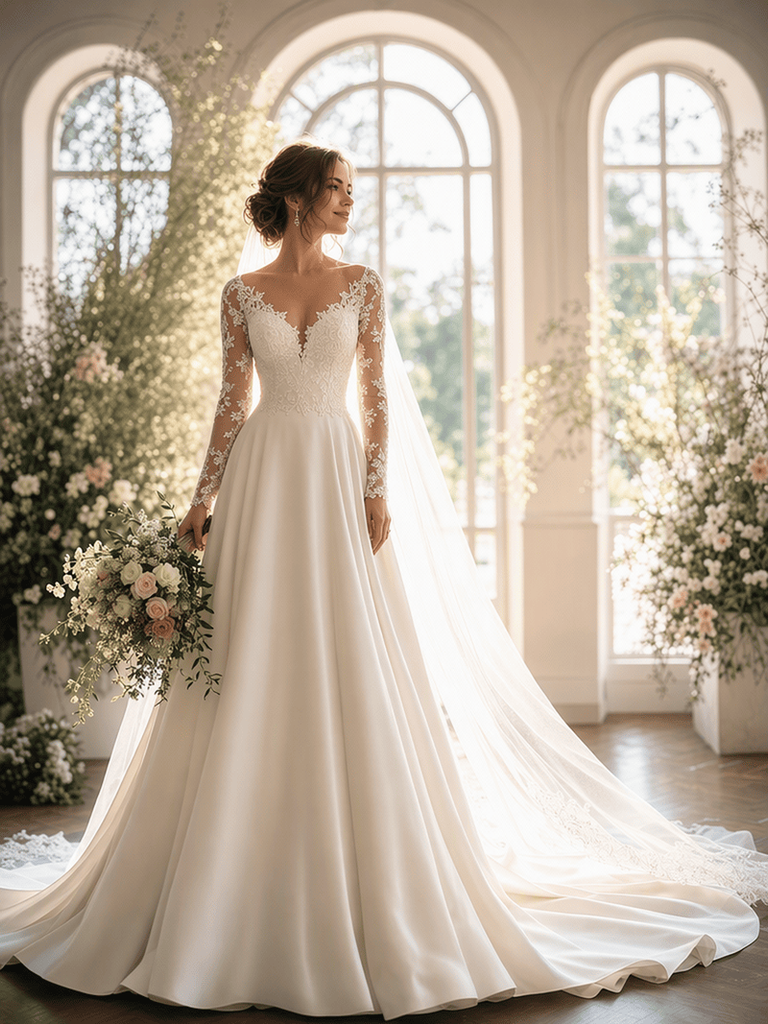
11. Wedding Dress

Prompt: Bride in an elegant modern wedding dress, ivory silk with a fitted bodice and flowing A-line skirt, delicate lace appliqué along the neckline, sheer long sleeves, soft cathedral-length veil, natural bridal makeup, loose romantic updo, standing in a light-filled venue with large arched windows, soft golden backlighting, romantic bridal editorial photography, dreamy and elegant mood.

Wedding Dress
Fashion Diffusion AI-generated

Why it works: Separating structural elements like the fitted bodice from decorative ones like the lace appliqué keeps the model from blending them into one vague “lacy dress.” Want more wedding-specific styling combinations? Check out our full guide on virtual wedding dress try-on styles.

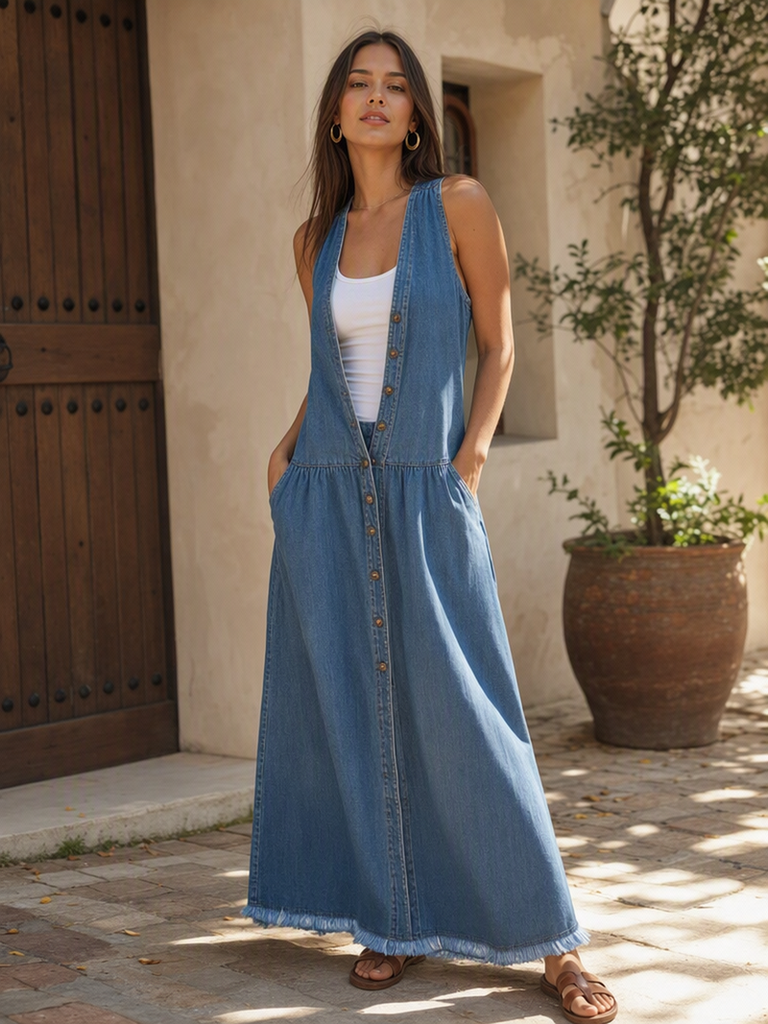
12. Denim Maxi Dress

Prompt: Woman in a relaxed denim maxi dress, medium-wash blue, drop-waist silhouette, button-front detailing, frayed hem, tucked-in fitted white tank underneath, gold hoop earrings, straight center-part hair. Standing in a sunlit outdoor courtyard, warm natural daylight, laid-back editorial photography, effortless everyday-luxury mood.

Denim Maxi Dress
Fashion Diffusion AI-generated

Why it works: Naming construction details like “button-front” and “frayed hem” gives the model concrete cues instead of leaving “denim” to be interpreted as a flat color block.

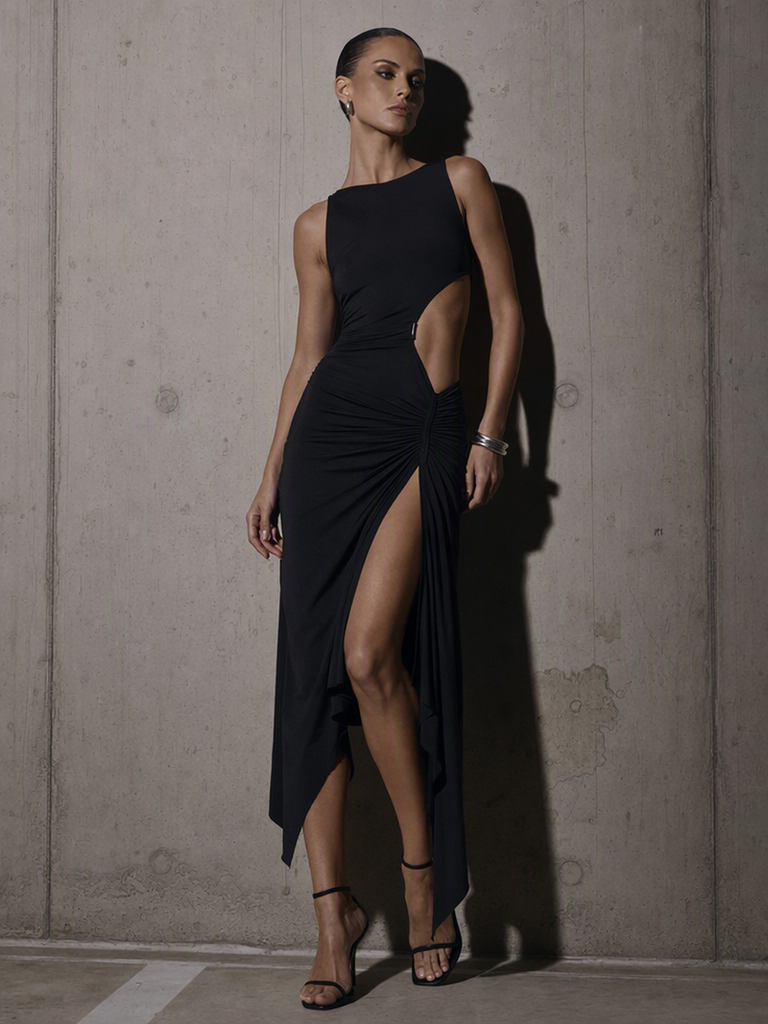
13. Asymmetric Cut-Out Dress

Prompt: A sculptural black cut-out dress with an asymmetric hem and a single waist cut-out, worn by a confident woman with slicked-back hair, minimal silver jewelry, sharp contour makeup, standing against a raw concrete wall, hard directional lighting, high-contrast fashion photography, avant-garde mood.

Asymmetric Cut-Out Dress
Fashion Diffusion AI-generated

Why it works: Leading with the garment instead of the subject puts the design detail front and center, which helps when the cut-out or asymmetry is the whole point of the look.

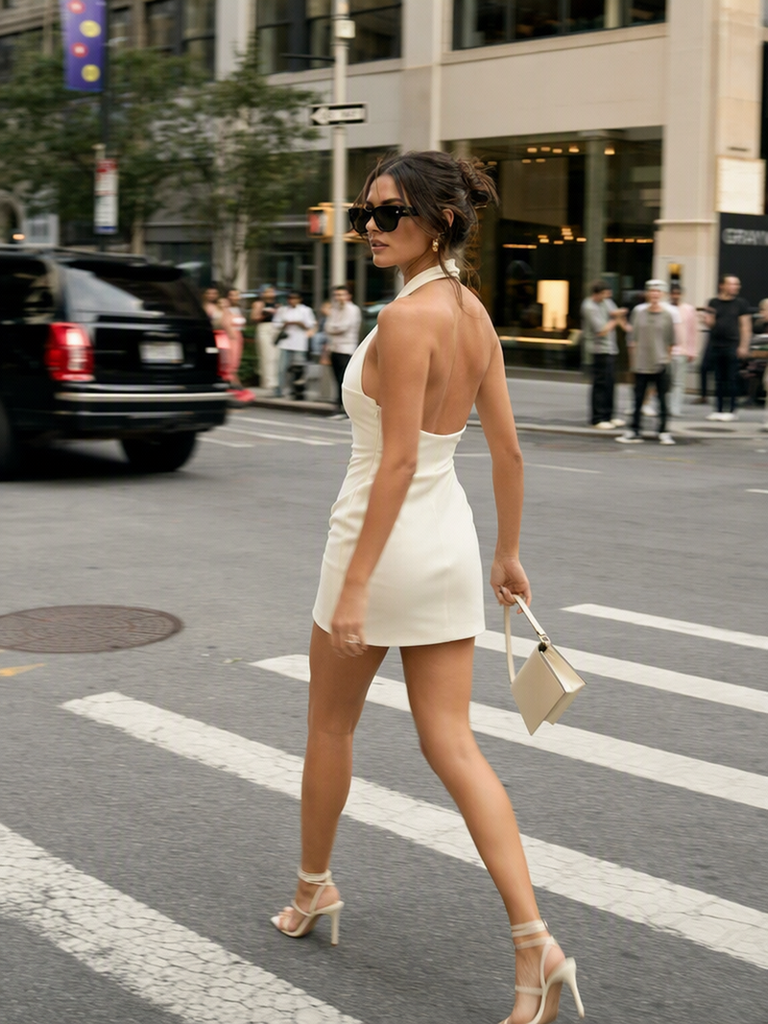
14. Modern Halter Mini Dress

Prompt: Candid street-style photograph of a woman crossing a city intersection in a fitted ivory halter mini dress with a low back, structured neckline, strappy heels, oversized sunglasses, soft afternoon light, slight motion blur in the background, downtown fashion week energy.

Modern Halter Mini Dress
Fashion Diffusion AI-generated

Why it works: Opening with the photography style and scene rather than the subject sets the energy of the whole shot before a single garment detail is introduced.

15. Sculptural Editorial Column Dress

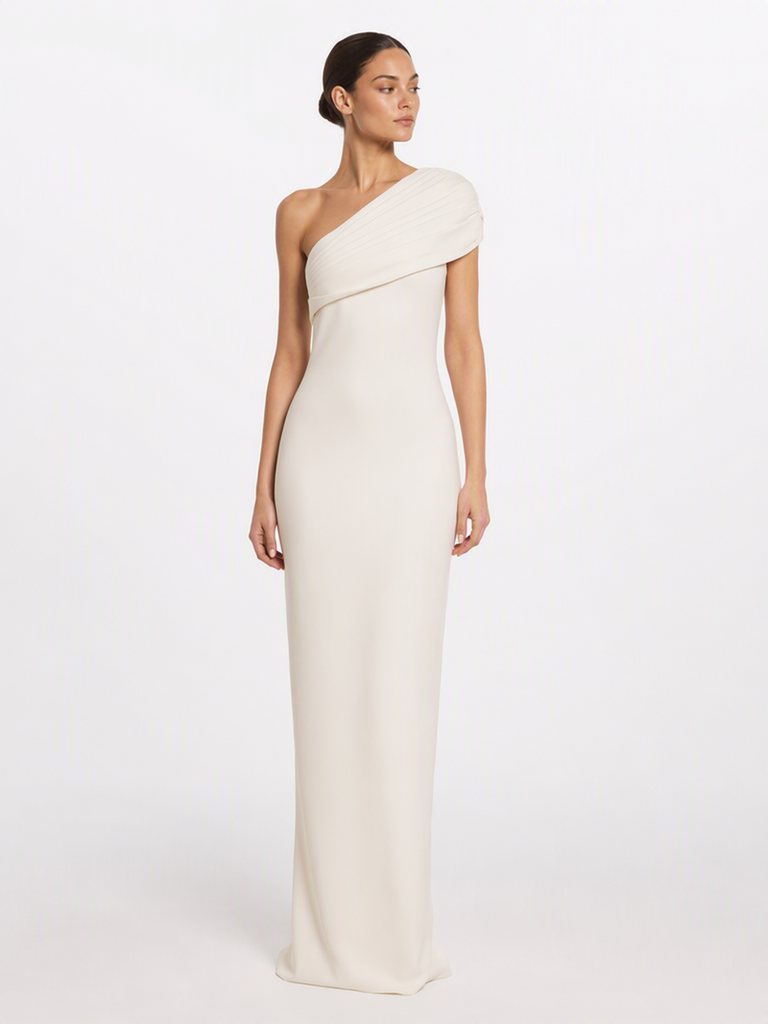
Prompt: Full-body fashion photograph showcasing a contemporary ivory column dress with architectural pleating along one shoulder, worn by a poised model with a slicked-back ponytail and no visible jewelry, set against a plain white cyclorama background, bright even studio lighting, minimalist quiet-luxury aesthetic.

Sculptural Editorial Column Dress
Fashion Diffusion AI-generated

Why it works: Framing the prompt as a “photograph showcasing” the dress, rather than a woman wearing it, shifts focus toward the garment’s construction, which suits product-style editorial shots.

How to Write a Modern Dress Prompt

Not every well-written prompt reads as current. Modern results tend to favor clean silhouettes, asymmetric or sculptural details, understated colors, minimal styling, and an editorial photography style over busy, predictable ones. The steps below turn that idea into a repeatable process, from structure to vocabulary to a ready-to-use template.

Layer your prompt in the right order

A strong dress prompt usually layers information in a consistent order, which makes it easier to edit later without rewriting the whole thing:

  1. Subject & pose — who, and what they’re doing
  2. Garment details — silhouette, fabric, color, construction
  3. Styling — hair, accessories, makeup
  4. Setting & lighting — where the shot takes place and how it’s lit
  5. Camera & photographic style — lens, angle, mood, reference aesthetic

You don’t have to start with the subject every time. As examples 13 to 15 show, leading with the garment or the scene instead can work just as well, especially when the design detail or the setting is the main point of the image.

Apply a few key techniques

Once that order feels familiar, a handful of techniques separate a decent prompt from one that reads as modern and editorial:

  • Anchor with a photography style. Terms like “editorial fashion photography,” “studio photography,” or “candid street style” do more work than any single adjective. They tell the model how to frame, light, and compose the whole image at once.
  • Be specific about fabric behavior, not just fabric name. “Satin” alone is ambiguous. “Satin with a glossy finish” or “lightweight cotton with natural drape” gives the model a texture and movement cue to work from.
  • Pair color with material. Color reads differently on different fabrics. Specifying both, such as “deep emerald satin” instead of “deep emerald” alone, produces more predictable results.
  • Use silhouette vocabulary deliberately. Words like “fitted,” “A-line,” “straight,” “oversized,” and “cinched waist” define shape far more reliably than vague terms like “flattering” or “stylish.”
  • Match lighting to mood, not just to time of day. “Golden hour” suggests warmth and softness, while “dramatic side lighting” suggests contrast and edge. Choose lighting language that supports the emotional tone you want.
  • Keep one clear focal point. Avoid stacking too many competing style keywords, such as minimalist and boho and streetwear at once. One dominant aesthetic per prompt produces a cleaner, more coherent result.

Pull from a modern vocabulary

With the order and techniques in place, building new prompts is mostly a matter of swapping in different descriptive words within each category below.

CategoryExamples
Silhouettefitted, column, A-line, oversized
Necklinesquare, halter, asymmetric
Fabricsatin, silk, linen, organza
Detailsdraping, pleats, cut-outs
Colorivory, burgundy, chocolate brown
Aestheticminimalist, editorial, quiet luxury, balletcore, Pinterest-aesthetic

Put it all together with a template

[Subject + pose], wearing a [silhouette] [dress type] in [color], made of [fabric/texture], with [notable design detail]. [Hair/makeup/accessories]. Set in [location/background], with [lighting description]. Shot in [photography style], [camera/lens detail if desired].

Fill in each bracket using the vocabulary above, and you’ll consistently produce prompts with the structure that modern dress generation responds to best. For more ready-to-use ideas beyond dresses, our trending prompt collection is also worth a look.

Create Your Own Modern Dress Designs

Reading through prompt examples is a great starting point, but the fastest way to find your own style is to experiment directly. Take any of the prompts above, swap in your own colors, fabrics, or settings, and see how small wording changes shift the final look.

Ready to turn these prompts into real images? Head over to Fashion Diffusion and start generating your own modern dress looks today.

FAQ

What are the best modern dress prompts for women?

The strongest ones pair a clear silhouette and fabric with a defined color and a specific photography style, covering looks like sculptural editorial dresses, halter minis, and structured column silhouettes rather than relying on vague style words alone.

How do I create a modern dress design with AI?

Start with the garment’s silhouette and fabric, add one strong design detail such as a cut-out or pleating, then specify lighting and a photography style. This structure consistently produces sharper, more editorial-looking results.

What makes a dress prompt “modern” rather than generic?

A modern dress prompt combines a clear silhouette, a named fabric with texture cues, and a specific photography style instead of vague words like “trendy” or “stylish.”

Do I need to specify a camera or lens in every prompt?

Not always. Lens details help with close-up portraits, but for full-body looks, naming a photography style like “editorial fashion photography” is usually enough.

Why do my dress prompts sometimes produce the wrong fabric texture?

This usually happens when fabric behavior isn’t described. Adding a texture cue, such as “glossy finish” for satin or “soft drape” for chiffon, gives the model a clearer target.

Can I combine multiple dress styles in one prompt?

It’s best to keep one dominant aesthetic per prompt. Mixing several strong style keywords together tends to produce a less coherent image than focusing on one clear direction.

How specific should color descriptions be?

Pairing a color with its material, such as “deep emerald satin” instead of just “green dress,” produces more predictable results, since the same color reads differently on different fabrics.

Avatar photo 通过Sophia Mille

Which Hat Style Suits Your Face Shape Best — AI Try-On

Not sure which hat suits your face shape? The right crown height, brim width, and overall silhouette can make a noticeable difference in how a hat looks on you.

An oval face may work with almost any hat style, while a round face can benefit from extra height and structure. Square faces often pair well with softer, curved shapes, and heart-shaped faces can look balanced with medium-width brims.

But face shape is only a starting point. Your hairstyle, hat proportions, and the way you wear a hat can all change the final look. This guide breaks down the best hats for oval, round, square, and heart-shaped faces—and shows how to use an AI virtual try-on tool to test different styles on your own photo.

How to Choose the Best Hat for Your Face Shape

Choosing a hat is less about following strict fashion rules and more about understanding proportions. Three details can make the biggest difference: crown height, brim width, and the overall shape of the hat.

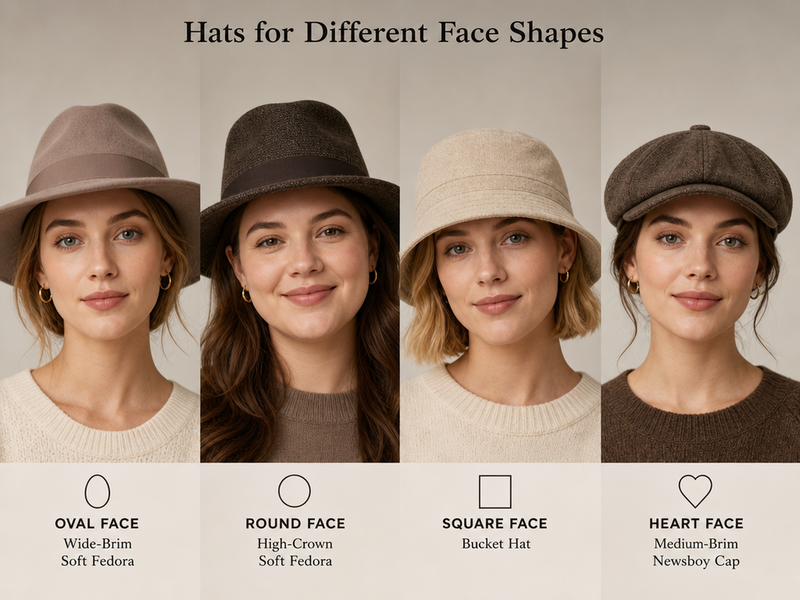
Hats for different face shapes.
Fashion Diffusion AI-generated

Crown Height

The crown is the part of the hat that sits above your head. Its height can change the perceived proportions of your face. A taller crown adds vertical height and can make the overall silhouette appear longer. A low crown creates a more compact look, while a medium crown tends to work across a wide range of face shapes.

For example, adding some crown height can be useful when you want to create more vertical balance with a round face.

Brim Width

The brim changes how much horizontal space the hat creates around your face. Narrow brims tend to create a more streamlined look, while medium and wide brims create more visual width. The best choice depends on both your face shape and the size of the hat relative to your features.

A brim that is too small can sometimes make a wider face appear more prominent, while an oversized brim can overwhelm smaller features.

Shape, Structure, and Angle

The shape of the crown and brim matters just as much as their size. Structured, angular hats can add definition to softer facial contours. Rounded crowns and curved brims can create contrast with a strong jawline. Even the angle at which you wear a hat can change the overall effect.

Instead of looking for one universally best hat, think about whether the hat adds the kind of proportion and contrast you want. AI virtual try-on is especially useful when you want to compare specific products rather than general hat styles.

Best Hat Styles for Oval Faces

Some styles to experiment with include:

  • Fedora
  • Wide-brim hat
  • Baseball cap
  • Bucket hat
  • Beret
  • Panama hat

There is no need to limit yourself to one specific silhouette. Different crown heights and brim widths can work well on an oval face, making it one of the easiest face shapes for experimenting with hats.

Best hat styles for oval faces.
Fashion Diffusion AI-generated

Why These Hats Work

The natural balance of an oval face gives you more freedom to change the proportions of the hat. A classic fedora can add structure without making the face look overly long. A bucket hat creates a softer, casual silhouette, while a wide-brim hat can give the outfit a more dramatic fashion look.

If you are looking for the best hat for an oval face, the most useful approach is to experiment with different proportions rather than following a single rule.

Hat Styles to Experiment With

Oval faces are particularly suitable for statement styles. Try comparing a structured fedora, an oversized bucket hat, and a wide-brim hat to see which one fits your personal style best.

The difference can be surprisingly noticeable even when the face and outfit remain exactly the same.

Best Hat for a Round Face

A round face tends to have similar width and length, with softer contours and a less angular jawline. When choosing a hat for a round face, adding some vertical height or structure can help create more definition.

Best Hat Styles for Round Faces

Good styles to experiment with include:

  • Fedora
  • Trilby
  • Structured baseball cap
  • Cowboy hat
  • Baker boy or newsboy cap
  • Panama hat

The exact effect depends on the proportions of the individual hat, so the same style can look quite different from one person to another.

Best hat styles for round faces.
Fashion Diffusion AI-generated

Why Height and Structure Work

A taller crown can add verticality to the overall silhouette, while a structured shape introduces more definition. 

For example, a fedora with a medium or taller crown can create a longer visual line. A structured baseball cap can provide a more defined shape than a very soft, low-profile cap. A medium or slightly wider brim can also create useful contrast with the rounded contours of the face.

Hat Styles to Be Careful With

Very low-profile, tightly fitted, or extremely rounded hats may emphasize the natural roundness of the face.

That doesn’t mean you need to avoid these styles completely. If you like a low-profile cap or beanie, hairstyle, color, and how high you wear the hat can all change the result. The goal is to understand the effect rather than follow a strict list of rules.

Best Hat for a Square Face

Square faces are typically characterized by a defined jawline, broader proportions, and more angular facial contours. If you want to create a softer overall look, rounded and curved hat shapes can provide useful contrast.

Consider trying:

  • Bucket hat
  • Beret
  • Cloche
  • Rounded-crown fedora
  • Soft floppy hat
  • Newsboy cap

These styles introduce curves and softer lines around the face.

Best hat styles for square faces.
Fashion Diffusion AI-generated

Why Rounded Shapes Work

A rounded crown or curved brim can create a visual counterpoint to a strong jawline.

For example, a bucket hat can soften the overall silhouette, while a beret creates a relaxed shape without adding too much height. A rounded-crown fedora can provide structure while keeping the silhouette from looking overly angular.

If you are searching for the best hat for a square face, look beyond the name of the hat and pay attention to the actual shape of the crown and brim.

What to Watch Out For

Very boxy crowns, flat geometric shapes, and extremely sharp angles can emphasize the angular quality of a square face.

However, structured hats are not automatically a bad choice. A structured hat with a curved brim or rounded crown can still create a balanced result.

Best Hat for a Heart-Shaped Face

A heart-shaped face is typically wider around the forehead and cheekbones and becomes narrower toward the chin. The goal when choosing a hat is often to create a balanced relationship between the upper and lower parts of the face.

Some styles worth trying include:

  • Medium-brim fedora
  • Trilby
  • Newsboy cap
  • Cloche
  • Baseball cap
  • Panama hat

Medium proportions are often a useful starting point because they can add definition without making the upper part of the face feel disproportionately wide.

Best hat styles for heart-shaped faces.
Fashion Diffusion AI-generated

Why Medium Brims Work

A medium-width brim can help create balance between a wider forehead and a narrower chin. A fedora with a moderate brim can add structure without overwhelming the face. A newsboy cap or cloche can create a softer silhouette, while a classic baseball cap offers a more casual option.

When choosing a hat for a heart-shaped face, consider the entire silhouette rather than focusing only on the brim.

Hat Styles to Experiment With Carefully

Extremely wide brims or very tall crowns can sometimes draw additional attention to the upper part of the face.

Again, these are guidelines rather than strict rules. The right size, hairstyle, color, and styling can make a significant difference.

Hat for Face Shape: Quick Comparison Chart

Use this chart as a starting point, then consider how the actual hat proportions work with your hairstyle and overall look.

Face ShapeWhat to Look ForHat Styles to Try
OvalBalanced proportions and flexible silhouettesFedora, bucket hat, beret, wide-brim hat
RoundHeight, structure, and definitionFedora, trilby, cowboy hat, structured cap
SquareCurved and softer shapesBucket hat, beret, cloche, rounded fedora
HeartBalanced, medium proportionsMedium-brim fedora, newsboy cap, cloche

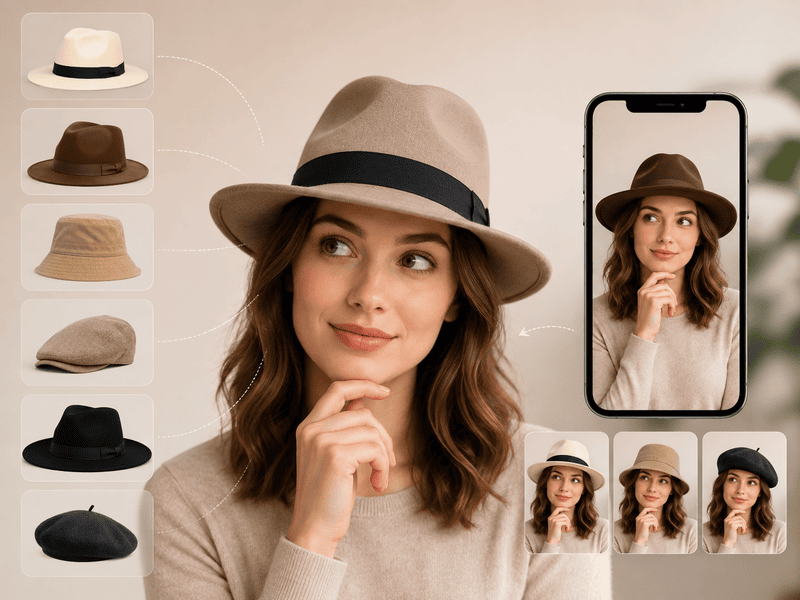
How to Try On Hats for Your Face Shape with AI

Fashion Diffusion’s virtual hat try-on lets you test any hat on your own photo in seconds. No app to download, no account required to start.

Step 1: Find the Hat You Want to Try

Save any product image from a brand’s website, Pinterest, or anywhere online. A clean product shot works best — the AI reads the hat’s shape, crown height, and brim width automatically from the image.

Upload your hat image.
Fashion Diffusion AI-generated

Step 2: Upload Your Photo

Use a well-lit, face-forward photo with the top of your head clearly visible. The AI uses your actual face proportions to place the hat at accurate scale — which is exactly what the written guidelines are trying to approximate. Using your own photo rather than a model’s removes the guesswork entirely.

Upload your own photo.
Fashion Diffusion AI-generated

Step 3: Generate and Compare Styles on the Same Photo

Upload the same photo with different hat images to compare how each style reads on your face. A bucket hat versus a fedora on the same photo tells you more than any written guide. Because the proportions are consistent across comparisons, the differences you see are genuinely about the hat — not about lighting, model choice, or photography angle.

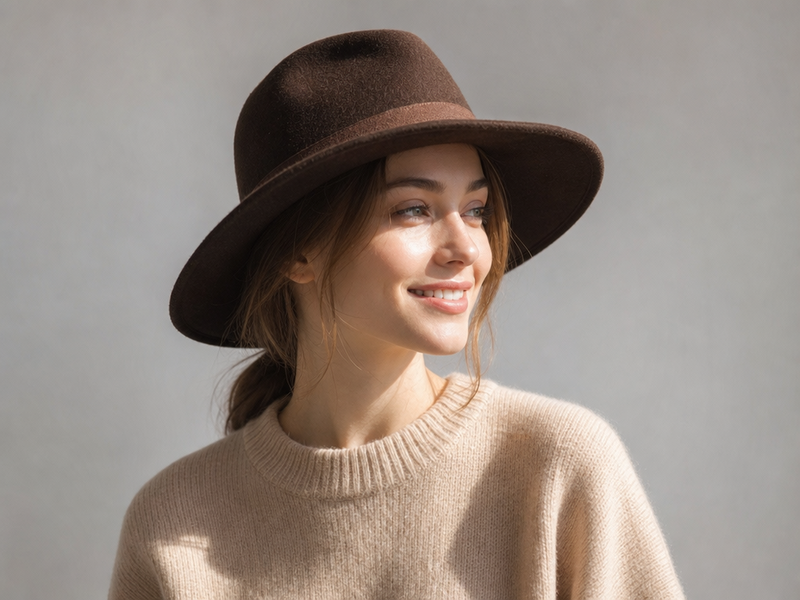
Final hat try-on effect generated by Fashion Diffusion.
Fashion Diffusion AI-generated

What Else Affects How a Hat Looks on You

Face shape is useful, but it isn’t the only factor that determines whether a hat looks good.

Hairstyle

Your hairstyle can change how much of your face and head is visible around the hat.

Long, voluminous hair can create a very different silhouette from short hair. Bangs, curls, and layered hairstyles can also change how a hat frames the face.

That’s why a hat that looks ideal on a face-shape chart may still look different when paired with your actual hairstyle.

Hat Size and Proportion

A hat should also make sense in relation to your overall proportions.

A very large wide-brim hat can overwhelm a smaller frame, while a tiny hat may look visually insignificant on someone with a larger frame or fuller hairstyle.

When testing hats, compare the size of the hat with your head, face, hair, and outfit—not just the face shape itself.

Outfit and Personal Style

A hat should also work with the rest of the outfit.

A structured fedora might suit a tailored outfit, while a bucket hat can feel more natural with casual streetwear. A wide-brim hat can create a stronger fashion statement with a flowing dress or minimalist resort look.

If you want to confirm the pairing before committing, you can use the same photo to change clothes in a photo with AI and see how a hat sits against a different top, jacket, or dress before deciding on the final look.

Find Your Best Hat by Trying, Not Guessing

Face-shape guides are a useful starting point, but there is no single hat that automatically works for everyone with the same face shape. Use face shape to narrow down your options, then compare different crown heights, brim widths, and silhouettes on your own photo — the guidelines here are meant to point you in a direction, not lock you into one.

Try different hats with Fashion Diffusion and see which style actually fits your look. New accounts start with free credits.

FAQ

Which hat style suits most face shapes?

The fedora is the most versatile option—it works well on oval, round, and heart-shaped faces, with crown height and brim width determining the exact effect. A medium-crown, medium-brim fedora is the safest starting point for most people.

Can I try on hats virtually before buying?

Yes. Fashion Diffusion’s virtual hat try-on lets you upload any hat product image alongside a photo of yourself to see how it looks on your face before you buy. New accounts start with free credits.

Does hair type affect how a hat looks?

Yes, significantly. Thick hair adds volume under the hat and can change how it sits. Fine hair may cause some hats to slide. Your hairstyle—up, down, or pulled back—also changes the overall effect, which is why using a photo with your actual hair is more useful than any written guideline.

What if I don’t know my face shape?

Look at your face straight-on in a mirror or a photo. If the width and length are similar, likely round. If it’s longer than wide with balanced proportions, likely oval. If the jawline is strongly defined and wide, likely square. If the forehead and cheekbones are wider than the chin, likely heart-shaped. When in doubt, try on a few styles virtually and trust what you see.

Are face shape rules strict?

No. Face shape guidelines are a starting point for understanding proportion and contrast—not rules to follow rigidly. Hairstyle, hat size, angle, and personal style all affect the result. The most useful thing you can do is try options on your own photo and see what actually works.

Avatar photo 通过Alexander Wilson

8 Best Apps to Remove Background for Selling Clothes in 2026

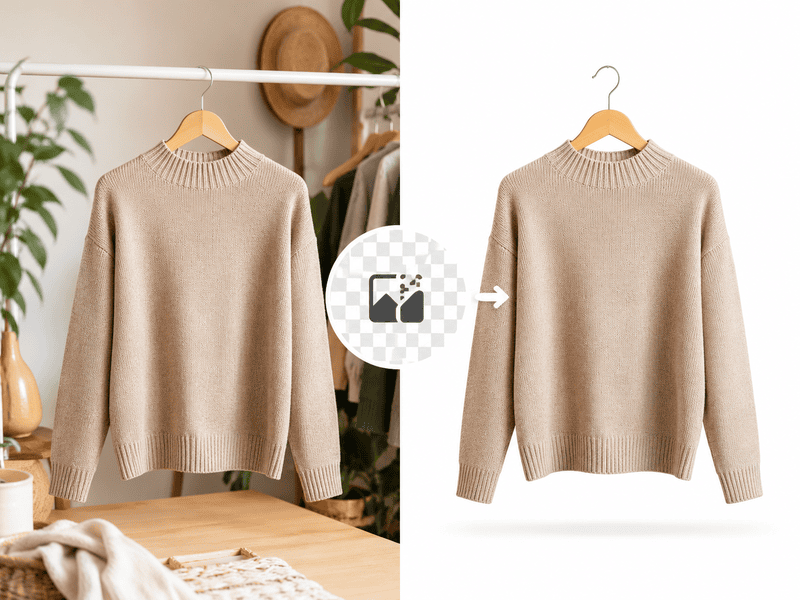
Most people selling clothes online are photographing items at home — not in a studio. The background is usually a bedroom floor, a chair, or a wall. A background remover turns that into a clean, professional listing image in seconds. The problem is that clothing is one of the harder categories for AI background removal: lace, sheer fabric, knit texture, and fringe all create edges that generic tools tend to blur or cut into.

This guide covers eight of the best background remover apps for selling clothes, evaluated specifically for how well they handle clothing — not just simple hard-edged products.

What a Clean Background Actually Does for Your Listings

Removing the background from a clothing photo isn’t just about aesthetics — it directly affects whether your listing sells. On resale platforms, listings with clean white or neutral backgrounds consistently outperform photos taken against cluttered home backgrounds, even when the item is identical.

Platform requirements reinforce this. Amazon requires pure white backgrounds for main product images. Poshmark added native background removal because the conversion data supports it. On Depop, where aesthetic matters most, a clean flat lay or cutout signals that the seller takes their listings seriously.

For sellers who want to go beyond white — swapping in lifestyle scenes or studio settings — changing clothing backgrounds with AI has become a practical alternative to reshooting.

What to Look For in a Background Remover for Clothing

Clothing has more edge complexity than most product categories. These three factors separate the tools that handle it well from the ones that don’t.

  • Edge accuracy on fabric: Lace, sheer layers, knit edges, and fringe need precise handling. Generic tools leave blurred edges or cut into the garment.
  • Output resolution: Some free tiers cap resolution or add watermarks. Check what you actually get before committing.
  • Workflow integration: The best tools let you replace the background immediately after removing it, producing a finished listing image in one place.

8 Best Background Remover Apps for Selling Clothes

The tools below range from free mobile apps to professional e-commerce workflows. Each one is assessed on edge accuracy with clothing, pricing, and which type of seller it actually suits.

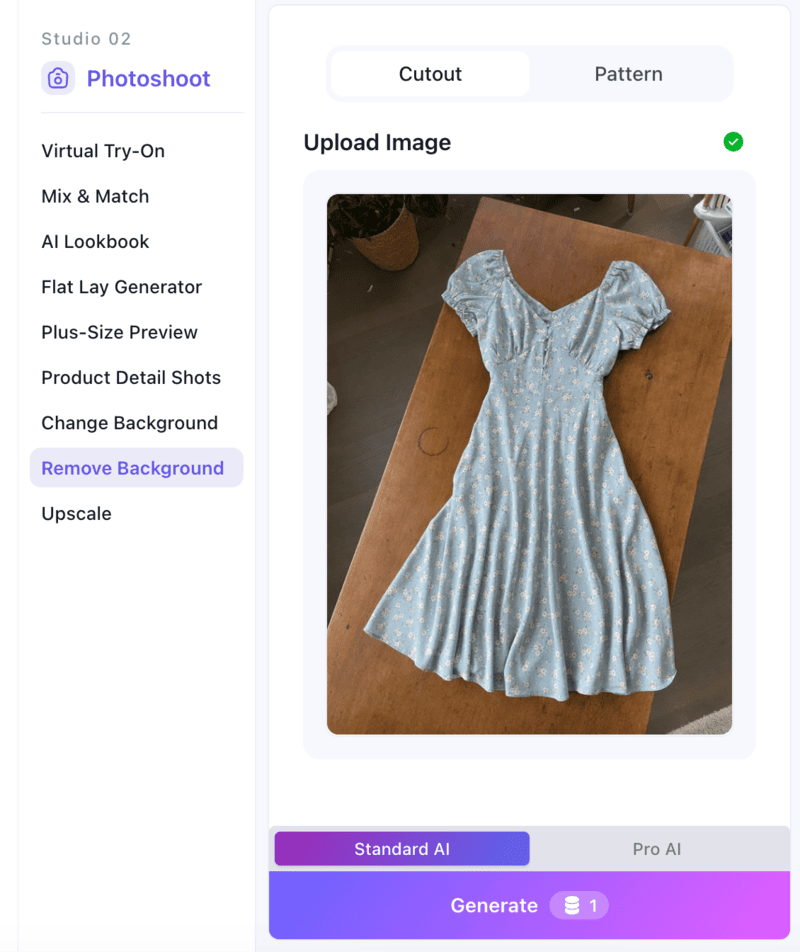
1. Fashion Diffusion

Fashion Diffusion’s background remover is built for fashion and clothing photography. It handles sheer fabrics, knit textures, fringe, and lace with accuracy that general-purpose tools tend to miss, which is where most clothing sellers run into trouble with other options.

Fashion Diffusion's background remover interface.

Unlike standalone background removal tools, Fashion Diffusion is a full fashion image platform. The background remover sits alongside virtual try-on, AI model generation, flat-lay creation, and AI fashion video — meaning sellers and brands that grow beyond basic background removal don’t need to piece together separate tools. Everything is in one place.

Pricing: Free credits on signup; paid plans for higher volume.

2. Photoroom

Photoroom started as a mobile-first background remover and has grown into a broader product photography toolkit. The background removal is fast and accurate, batch processing works well for large catalogs, and the app includes AI background generation and product staging. 

Photoroom's background remover interface.

The mobile app experience is among the best available — useful for sellers who photograph, edit, and list from their phone in one session.

Pricing: Free plan available; Pro from $12.99/month (or $7.50/month billed annually).

3. Remove.bg

Remove.bg is one of the oldest and most recognized AI background removal tools, built for upload-and-done simplicity with strong API coverage. 

Remove.bg's background remover interface.

Edge quality on hair and fine textile detail is among the best available — it handles complex fabric boundaries reliably. The free tier gives a low-resolution preview; full resolution requires credits.

Pricing: Free low-resolution preview; full resolution from ~$0.39/image.

4. Canva

Canva‘s background remover lives inside its familiar design editor — you remove the background and immediately drop the cutout into templates for social media or listings. 

Canva's background remover interface.

The removal itself is solid for most clothing items. The real value is the workflow: sellers already living in Canva don’t need to switch tools to get a finished asset. Background removal is Pro-only, so it only makes sense if you’re already paying for Canva.

Pricing: Pro plan required — $18/month or $119.99/year.

5. Pixelcut

Pixelcut offers unlimited HD background removal with no watermark on its free tier, which makes it the most accessible genuinely free option on this list.

Pixelcut's background remover interface.

It’s mobile-first and clean, suited to casual resellers who need basic removal without a subscription. Edge quality is good on most clothing but can struggle with very fine details like lace or sheer fabric.

Pricing: Free — unlimited HD removal, no watermark. Paid plans add extra features.

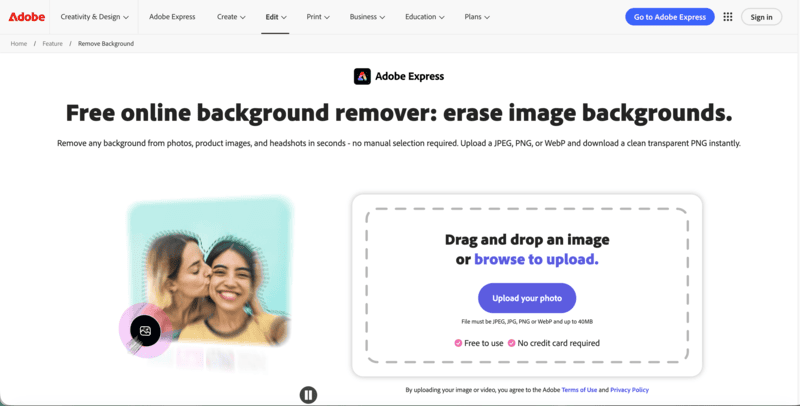
6. Adobe Express

Adobe Express fits neatly into existing Adobe workflows — background removal connects directly to Photoshop, Illustrator, and Creative Cloud assets. 

Adobe Express's background remover interface.

For pixel-precise API access and developer integrations, the accuracy on detail edges is exceptional. For sellers already in the Adobe ecosystem, it removes the need for an additional tool. For anyone not already in Adobe’s world, the tools above are simpler starting points.

Pricing: Free plan with limited access; Premium from $9.99/month.

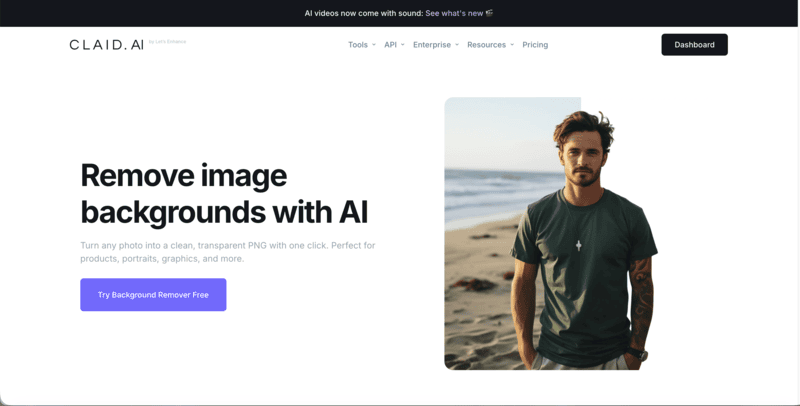
7. Claid

Claid is suited to e-commerce teams that need background removal followed by resizing, padding, background generation, and upscaling through one workflow or API.

Claid's background remover interface.

It’s the most automation-friendly tool here, built for consistent, high-volume processing rather than individual one-off edits. Not the right fit for a casual reseller, but well-suited to a small clothing brand managing catalog photography at scale.

Pricing: Free trial credits on signup; paid from $9/month.

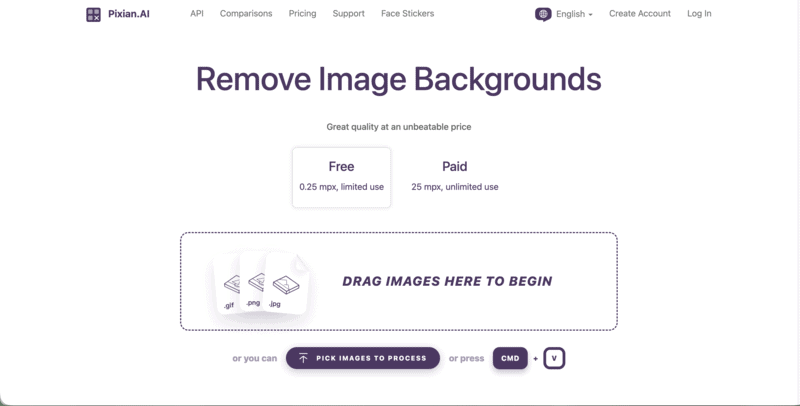
8. Pixian

Pixian.ai keeps the pitch simple: clean background removal at a low price, with no subscription — pay as you go, with a free tier at 0.25 megapixels.

Pixian's background remover interface.

For sellers who only need occasional cutouts and don’t want a monthly commitment, this is the most cost-efficient option. It stops at the cutout though — no staging, no replacement backgrounds, no batch workflow.

Pricing: Free at 0.25MP; full resolution from $0.05–0.10/image, pay-as-you-go.

How to Remove a Background with Fashion Diffusion

If Fashion Diffusion is the right fit for your workflow, here’s how the process works. Everything runs in the browser — no software to install, no manual selection or masking.

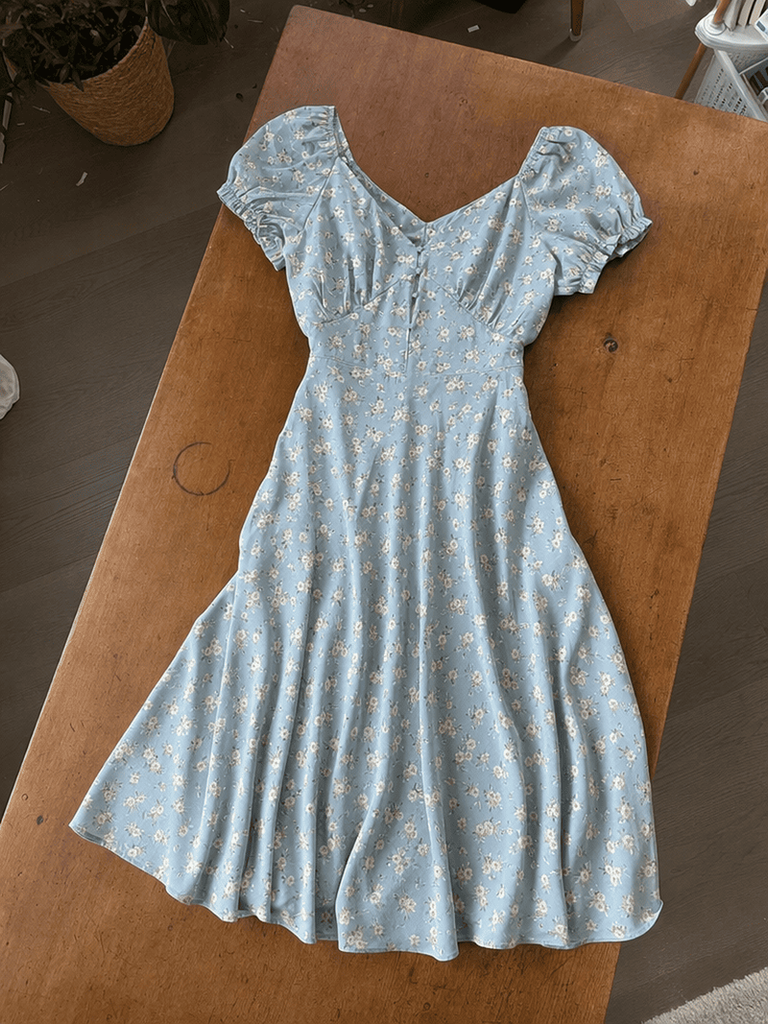
Step 1: Upload Your Clothing Photo

Use any photo of the garment — flat lay, on a hanger, or on a model. The cleaner the original photo, the more accurate the edge removal. A well-lit image with the garment clearly separated from the background gives the AI the most to work with.

Upload your clothing image.
Fashion Diffusion AI-generated

Step 2: Let the AI Process

The tool identifies the garment and removes the background automatically. Sheer fabrics, lace, knit edges, and fringe are all handled without manual adjustment.

Let the AI process.

Step 3: Download the Result

Export the cutout in high resolution. The output is ready for direct upload to any selling platform — Poshmark, Depop, Vinted, Amazon, Shopify, or your own store.

Final output generated by Fashion Diffusion's AI background remover.
Fashion Diffusion AI-generated

What to Do After You Remove the Background

A transparent PNG is the starting point, not the finish line. What you put behind the clothing determines whether the final image looks like a professional listing or just a slightly cleaner home photo.

For resale platforms, a plain white background meets most marketplace requirements and is often the fastest path to a clean listing. For sellers building a brand or running their own store, a lifestyle setting — a clean interior, a styled surface, an outdoor scene — adds context that a white background can’t provide and signals brand quality to buyers.

Fashion Diffusion’s background changer handles both. After removing the background, you can replace it with a white studio setting for marketplace listings, or generate a lifestyle scene matched to the garment’s aesthetic — all without a separate shoot. The result is a finished product image rather than a plain cutout.

Comparison photo by Fashion Diffusion's background changer.
Fashion Diffusion AI-generated

The Right Tool Starts with the Right Fit

The right background remover for selling clothes depends on your volume, your platforms, and how finished you need the output to be. For casual resellers, Pixelcut’s free plan handles most situations. For sellers who need fabric-accurate removal and a complete image — cutout, background, listing-ready — Fashion Diffusion is the most complete workflow available.

New accounts start with free credits. Upload a clothing photo and see how the background removal app handles clothes like yours — free to try.

FAQ

What is the best free app to remove background for selling clothes?

Pixelcut offers unlimited HD background removal with no watermark on its free plan. Fashion Diffusion includes free credits on signup. Remove.bg offers a free low-resolution preview. For sellers already paying for Canva Pro, its built-in remover is also solid.

Which background remover works best on clothing with fine details like lace or sheer fabric?

Fashion Diffusion’s remover is built specifically for clothing and handles fine fabric edges more accurately than general-purpose tools. Remove.bg also performs well on complex edges.

Do I need to remove the background before selling clothes online?

Not always, but it improves listing performance significantly. Amazon requires white backgrounds for main product images. On Depop and Poshmark, clean backgrounds consistently outperform cluttered home photos.

Can I replace the background after removing it?

Yes. Fashion Diffusion lets you remove the background and replace it with a white studio setting or a lifestyle scene. Photoroom and Canva also offer background replacement after removal.

Is Fashion Diffusion’s background remover free to try?

Yes. New Fashion Diffusion accounts start with free credits that can be used on the background remover tool—no payment required to get started.

Avatar photo 通过Ethan Davis

How to Generate a Fashion Sketch from Text — Step-by-Step (No Drawing Skills)

Most design ideas start as words. A floaty midi dress with wide sleeves. A structured blazer with an oversized lapel. A low-rise cargo skirt paired with a cropped halter top. The gap between having that idea and seeing it visually has always required either drawing skills or an illustrator on call.

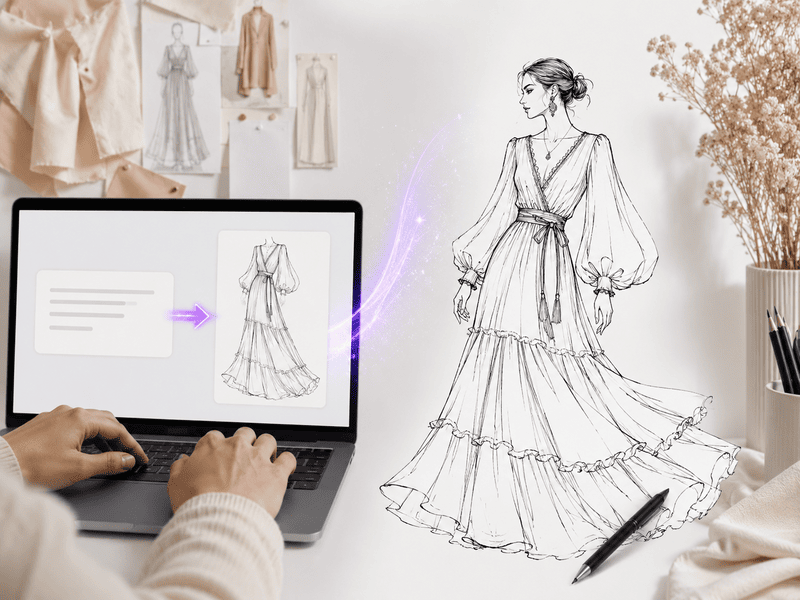
An AI fashion sketch generator closes that gap. Type a description of any garment and get a clean fashion sketch in seconds — line art or colored illustration, no drawing skills required, no software to learn. 

This guide walks through the full process: how the tool works, how to write prompts that produce accurate results, and what to do with the sketches once you have them. If you are still exploring which AI sketch tool is right for you, that’s a good place to start.

What Is an AI Fashion Sketch Generator

An AI fashion sketch generator takes a written description of a garment and converts it into a fashion sketch automatically. Unlike general-purpose image generators, a fashion-specific tool understands the vocabulary designers actually use — A-line, drop shoulder, cowl neck, raglan sleeve, bias cut — and translates those terms into accurate garment drawings.

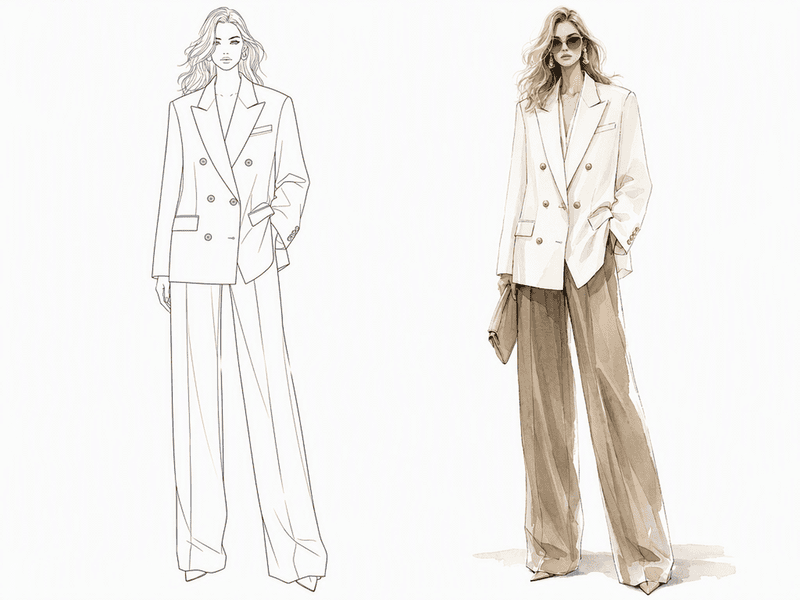
Output style varies by tool. Fashion Diffusion, for example, offers two modes: Line art for clean, minimal technical drawings suited for production briefs and tech packs, and Colored sketches for illustrated fashion visuals with color and texture, suited for mood boards and client proposals.

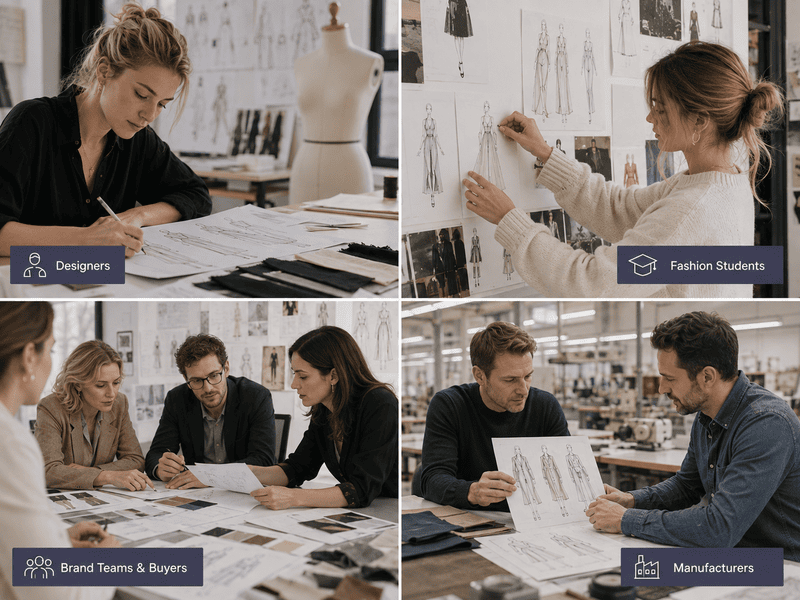
Who Uses Text to Fashion Sketch Online

The tool serves different people for different reasons — understanding where it fits your workflow is the first step.

Designers who have ideas but not the time or confidence to sketch by hand use it to generate concept drawings they can hand directly to pattern makers or present to clients. The output quality is good enough for production briefs without additional refinement.

Fashion students use it to populate portfolio boards quickly — exploring more silhouettes, garment categories, and design directions in the time it would normally take to produce one hand-drawn sketch.

Brand teams and buyers use it during range planning and buying meetings to visualize trend descriptions from market reports. Converting a written trend direction into a rough garment illustration on the spot is faster than waiting days for a designer to produce visuals.

Manufacturers use it to align on design intent before production starts. A shared visual generated from a client’s written brief reduces the misunderstandings that cause costly revisions.

Who uses text to fashion sketch online

How to Generate a Fashion Sketch from Text Online — Step by Step

Fashion Diffusion’s AI text to sketch tool runs in the browser. No software installation, no design background required.

Step 1: Open the Text to Sketch Tool

Go to Fashion Diffusion’s Text to Sketch tool and sign in. New accounts start with free credits — no payment required to try it. The interface is a text input field with two options above it: Line Art and Colored Sketch.

Fashion Diffusion's AI fashion sketch generator interface.

Step 2: Choose Your Sketch Style

Select the output type before writing your prompt.

Line Art produces black-and-white line drawings — clean outlines, minimal detail, no fill. This is the right choice when you need the sketch for a tech pack, a production brief, or a presentation where the garment construction needs to read clearly.

Colored Sketch produces illustrated fashion visuals with color, texture, and stylized figure rendering. This works better for portfolio boards, mood boards, client proposals, and any context where visual appeal matters as much as technical accuracy.

Two sketch styles.
Fashion Diffusion AI-generated

Step 3: Write Your Text Prompt

This is where the quality of your output is determined. The more specific the description, the more accurate the result. A prompt that says “a dress” gives the AI very little to work with. A prompt that describes silhouette, neckline, sleeve, fabric, length, and mood produces a result that reflects an actual design intent.

Prompt structure that works well:

[garment type] + [silhouette/fit] + [neckline] + [sleeve] + [fabric/texture] + [length] + [details] + [style/mood]

Examples across garment categories:

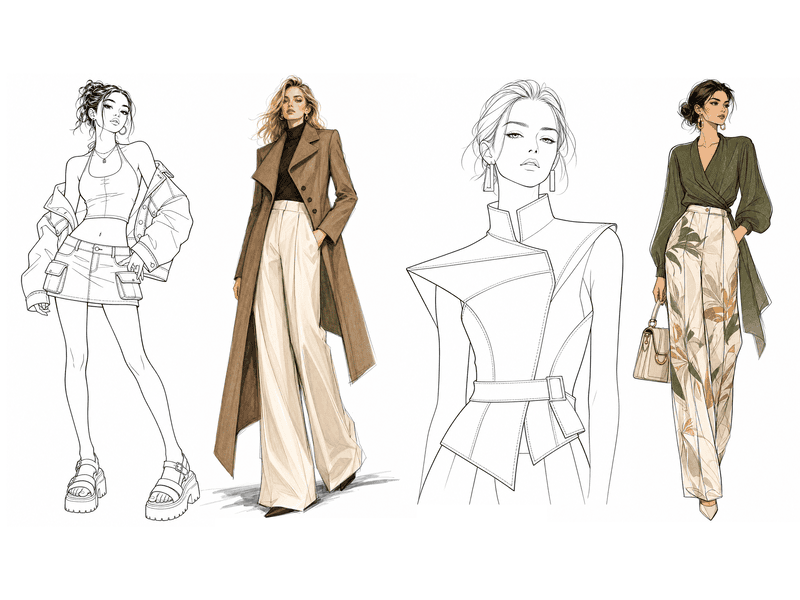
  • Dress: “Loose flowy tunic dress, wide flared long sleeves, lace trim details on cuffs, high-waisted tiered long skirt, layered ruffled sections, plenty of soft fabric gathers, thin waist belt”
  • Outerwear: “Long-length asymmetrical coat, single-breasted buttons, wide lapels and long sleeves, paired with high-waisted wide-leg trousers featuring side pockets and floor-grazing length, simple and elegant, European and American female model”
  • Streetwear: “Low-rise mini cargo skirt with big flap side pockets, fitted halter neck crop top, open back design, oversized lightweight cropped denim jacket draped over shoulders, platform chunky sandals, youthful retro 2000s silhouette, sharp clothing outlines, line art without fill”
  • Editorial: “Fashion illustration, full body female model, wearing elegant designer outfit, clean bold outlines, flat color blocks, soft grain texture, minimalist fashion editorial style, muted high-end color palette, simple solid background”
  • Croquis: “Fashion croquis sketch, black-and-white line art, female fashion figure, half-body, avant-garde structured garment, clear clothing silhouette and seam details, only outline lines, no color, minimal hatching, white background”
Sketch examples generated by Fashion Diffusion.
Fashion Diffusion AI-generated

Step 4: Generate and Refine

Click Generate. The AI produces the sketch in seconds. Review it against your original intent — does the silhouette read correctly? Is the neckline accurate? Does the overall proportion feel right?

If the result isn’t quite there, adjust the prompt rather than accepting a near-miss. Small changes in wording produce meaningfully different results: “structured” versus “relaxed,” “midi” versus “maxi,” “fitted” versus “boxy” all shift the output noticeably. Generate two or three variations before deciding on a direction.

How to Write Better Prompts for Fashion Sketches

Prompt quality is the single biggest factor in output quality. Here’s what makes a prompt work.

Be specific about silhouette. Words like “A-line,” “straight,” “fitted,” “oversized,” “balloon,” and “wrap” give the AI clear structural information. “Nice dress” gives it almost nothing.

Name the fabric or texture. “Silk,” “denim,” “linen,” “knit,” “sheer,” “velvet” all produce different visual textures in the output. Without a fabric term, the AI defaults to a generic surface that may not match your intent.

Specify construction details. Seam placement, collar type, pocket style, closure type — the more construction detail you include, the more the output resembles an actual garment rather than a generic shape.

Add a style reference. Terms like “minimalist,” “editorial,” “Megan Hess style,” “1990s tailoring,” or “avant-garde” influence the overall aesthetic of the illustration beyond just the garment. They’re especially useful for colored sketches where mood matters.

What to Do with Your Fashion Sketch

Once you have a sketch you are happy with, here’s where it can go:

  • Mood board: Import into Milanote or Canva alongside fabric swatches, color references, and trend imagery to build a coherent design direction;
  • Client brief: Present the sketch during a consultation to get immediate visual feedback rather than waiting days for a hand-drawn version;
  • Production handoff: Line art output is clear enough to communicate construction intent to a pattern maker or production team before formal tech packs are produced;
  • Design exploration: Run the same prompt with small variations (different neckline, sleeve, or length) to generate a set of options and compare them side by side.

Start Generating Fashion Sketches with Fashion Diffusion

The prompt examples and techniques in this guide cover most of what you need to get useful results quickly. The rest comes from trying things — a prompt that produces exactly what you had in mind in one attempt, or one that takes three iterations to get right. Both are part of how the tool works, and each attempt produces something you can evaluate and build on.

The design idea in your head doesn’t have to wait for someone who can draw it. Fashion Diffusion‘s AI fashion sketch generator converts any garment description into a professional fashion sketch in seconds — line art or colored illustration, free to try.

New accounts start with free credits. Write a description of the garment in your head and see what the AI produces.

FAQ

What is an AI fashion sketch generator?

A tool that generates fashion sketches from text descriptions using AI. You type a description of a garment — silhouette, neckline, sleeve, fabric, length — and the AI produces a clean fashion illustration or flat drawing in seconds, without any drawing skills required.

Do I need drawing skills to use the text to fashion sketch tool?

No. The entire workflow is text-based. You describe what you want and the AI generates the visual. No tablet, no stylus, no art background required.

What types of garments can I generate fashion sketches for?

All fashion categories — dresses, tops, trousers, outerwear, eveningwear, casualwear, streetwear, and accessories. The AI understands fashion-specific terminology including silhouette types, neckline styles, sleeve constructions, and fabric names.

Can I use AI-generated fashion sketches commercially?

Yes. Downloaded sketches from Fashion Diffusion can be used in client presentations, production briefs, portfolio work, and marketing materials.

Is the AI fashion sketch generator free?

Yes. New Fashion Diffusion accounts start with free credits that can be used on the text to fashion sketch tool. Additional credits are available on paid plans.

Avatar photo 通过Sophia Mille

10 Best Websites to Design Clothes in 2026 — From AI to Print-on-Demand

The category of clothing design websites has expanded significantly. A few years ago, the answer was mostly Adobe Illustrator for technical work and a handful of pattern-making tools. In 2026, the category spans AI image generators, 3D simulation platforms, custom print-on-demand services, and mood board tools — each solving a different part of the design process.

The best website to design clothes depends entirely on what you are trying to produce. A fashion brand building campaign imagery has different needs from a designer drafting tech packs, and both are different from a creator launching a custom merch line.

This guide covers ten of the best websites to design clothes in 2026, with enough detail to help you pick the right one for your workflow, budget, and output goals.

What to Look for in a Clothing Design Website

Before choosing a tool, it’s worth being clear on what kind of output you need. A few questions narrow the field quickly.

What is the deliverable? AI-generated fashion images for social media are a different deliverable from factory-ready tech packs, and both are different from a printed hoodie. Most tools are built for one of these, not all three.

What’s the learning curve? CLO 3D produces remarkable output but takes months to learn properly. Fashion Diffusion or Canva produce useful results in minutes. The right tool is one you’ll actually use consistently.

Does it need to connect to production? If the output is going to a manufacturer, the tool needs to export in formats factories can use — tech packs, flat sketches, specification sheets. AI image generators produce visuals, not production files. This distinction matters.

What’s the budget? Pricing ranges from free to enterprise-level annual contracts. Most workflows can be covered for under $100/month with the right combination of tools.

Types of Clothing Design Websites

Understanding the four main categories makes it easier to identify which tool or combination of tools fits a specific workflow.

TypeWhat It DoesOutputRepresentative Tools
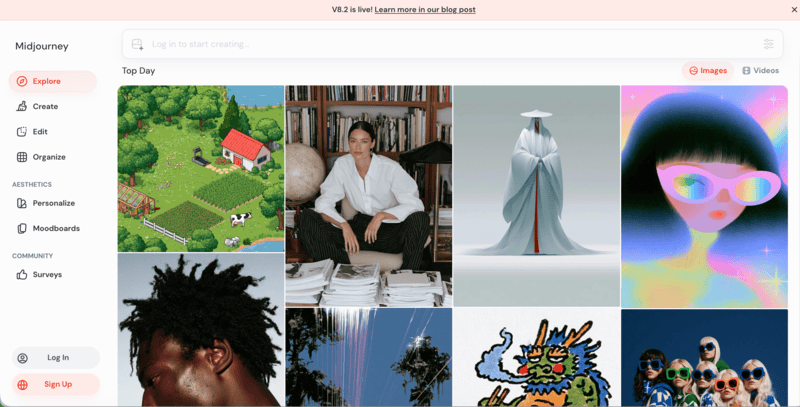
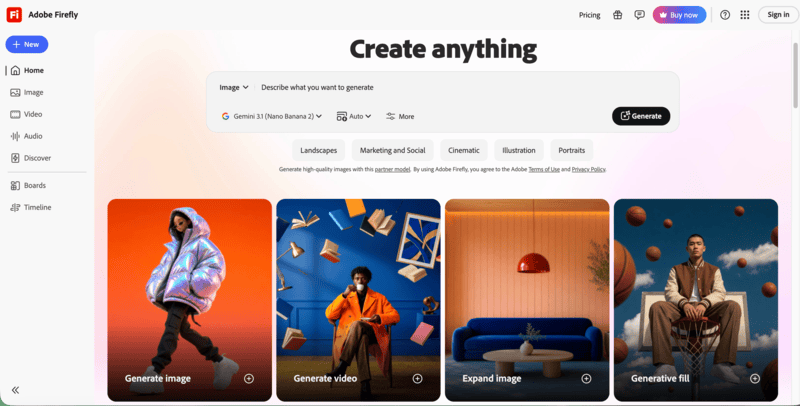
AI fashion image generationGenerates photorealistic fashion visuals from product images or text promptsCampaign photos, on-model images, social contentFashion Diffusion, Adobe Firefly, Midjourney
Technical design and pattern makingCreates production-ready technical drawings, patterns, and spec filesVector flats, tech packs, 3D garment simulationsAdobe Illustrator, CLO 3D, Procreate
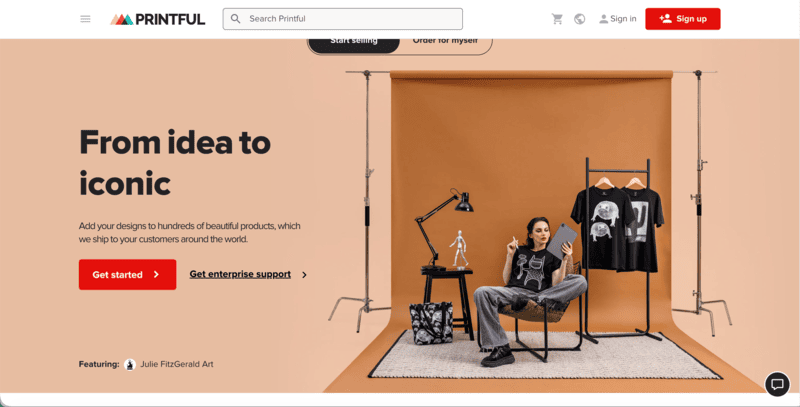
Custom apparel and print-on-demandDesigns and produces physical clothing without inventory or minimum ordersPrinted T-shirts, hoodies, hats — fulfilled on demandPrintful, Canva
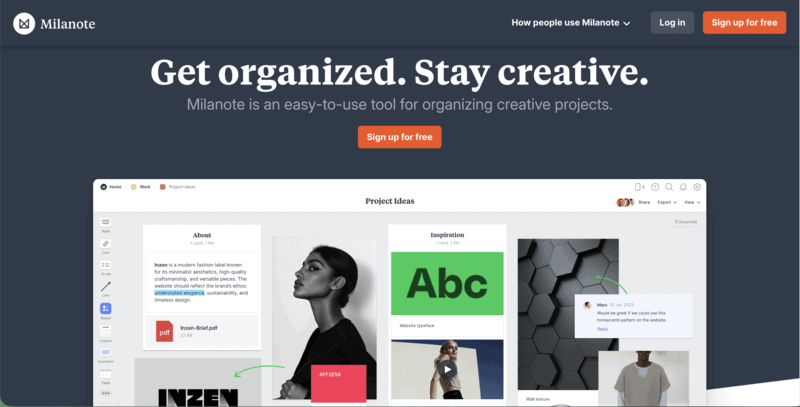
Mood board and trend toolsSupports research and concept development before design work beginsVisual reference boards, collection direction, trend reportsPinterest, Milanote

The 10 Best Clothing Design Websites — Full Breakdown

Each tool below is reviewed on what it actually does, who it suits, and what makes it worth considering over alternatives in the same category.

1. Fashion Diffusion

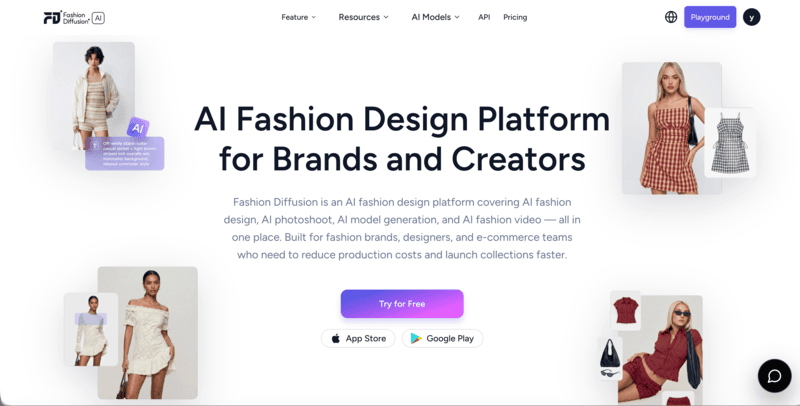
Fashion Diffusion is an AI fashion design and photoshoot platform built specifically for fashion brands and content creators. It generates on-model campaign images, editorial visuals, and product photography from existing garment photos or text prompts — producing results in seconds without a studio, a model, or a photographer.

Fashion Diffusion's home page.

The platform covers virtual try-on for clothing, shoes, jewelry, wedding dresses, and lingerie, alongside tools for AI model generation, background changing, AI Lookbook, flat-lay generation, and AI fashion video. For brands that need consistent, high-quality fashion imagery at scale — product catalog images, social content, campaign visuals — it’s the most purpose-built option in this category.

Best for: Fashion brands and creators who need campaign-ready fashion imagery, on-model product photos, and visual content without a studio shoot.

Pricing: Free credits on signup; $12/month for starter.

Key strength: Fashion-specific AI training produces garment-accurate, campaign-ready output across apparel, accessories, and footwear.

2. Adobe Illustrator

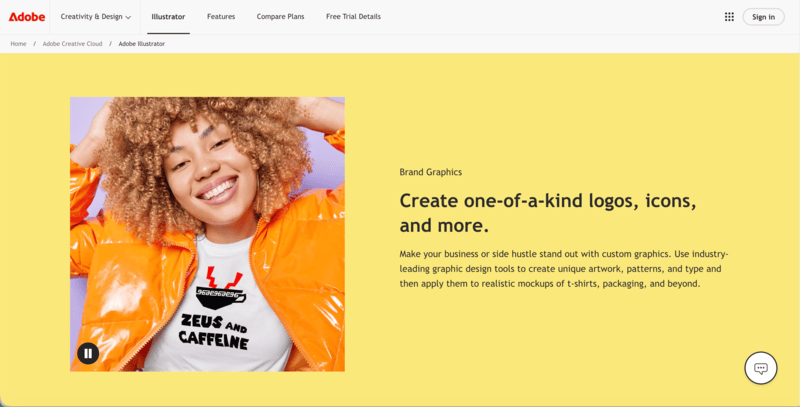
Adobe Illustrator remains the industry standard for technical clothing design. Its vector tools produce precise flat sketches, garment illustrations, and technical drawings that scale without quality loss — the format factories and production teams expect. Pattern callouts, construction details, and spec illustrations are all handled in Illustrator before being assembled into tech packs.

Abode Illustrator's home page.

Best for: Fashion designers and product development teams who need production-ready technical drawings and garment flats.

Pricing: Free 7-day trial available; $22.99/month or $34.49/month (Creative Cloud Pro).

Key strength: Industry-standard vector tools for technical flats and garment illustration — the format manufacturers expect.

3. CLO 3D

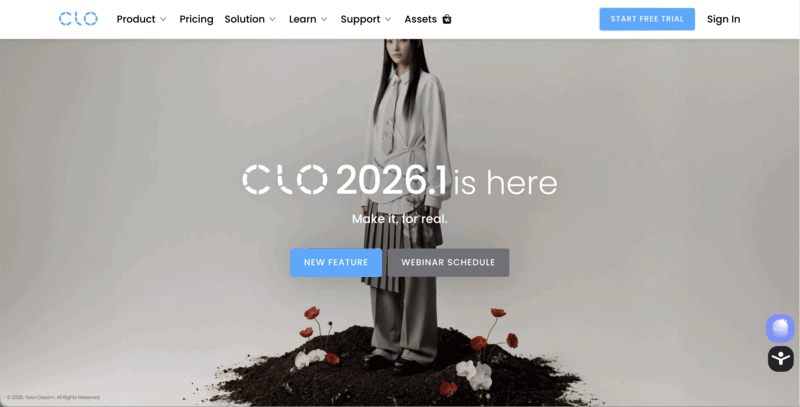
CLO 3D is a garment simulation platform that lets designers build clothing digitally, drape virtual fabrics over avatars, and test fit before any physical sample is made. It simulates how different fabrics behave — how silk drapes versus denim, how a seam sits, how a garment moves.

CLO 3D's home page.

The learning curve is significant — CLO 3D takes time to master. But for brands doing serious product development, the ability to review fit digitally before sampling is one of the highest-ROI investments available.

Best for: Fashion brands and designers who want to reduce physical sampling rounds through digital garment simulation and fit testing.

Pricing: Free 14-day trial; $25/month (student); $37.50/month billed annually or $50/month billed monthly (individual).

Key strength: Realistic fabric physics simulation — the closest thing to a physical sample without producing one.

4. Canva

Canva is the most accessible design tool in this list and the most versatile for non-technical users. It doesn’t replace professional fashion CAD software, but it covers a wide range of tasks that fashion brands and creators actually need: mood boards, social media content, product mockups, presentation decks, and custom apparel graphics for print-on-demand.

Canva's home page.

Best for: Creators, small brands, and anyone who needs polished visual output — mood boards, social content, print-on-demand graphics — without a steep learning curve.

Pricing: Free; Pro at $18/month.

Key strength: Broad template library and zero learning curve — usable from day one for a wide range of fashion visual tasks.

5. Printful

Printful is a print-on-demand and fulfillment platform that handles production and shipping of custom clothing — T-shirts, hoodies, hats, tote bags — on demand, without minimum orders. Designers upload artwork, set prices, and connect their store. Printful handles the rest.
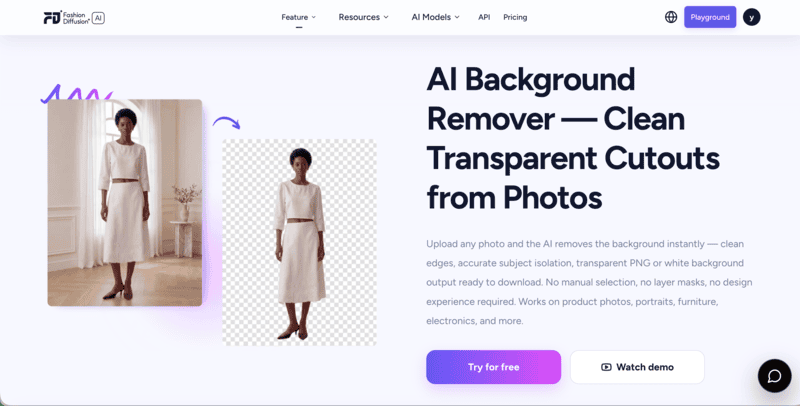
Printful's home page.

The built-in design tool lets users place artwork on garment mockups, preview placement, and export files ready for production. It integrates directly with Shopify, Etsy, WooCommerce, and other platforms, which makes it the standard setup for creators and small brands launching custom apparel lines.

Best for: Creators and small brands who want to sell custom apparel without managing inventory or production logistics.

Pricing: Free to use; cost is per order produced and fulfilled.

Key strength: No upfront cost, no minimum orders, and direct integration with major e-commerce platforms.

6. Milanote

Milanote is a visual workspace used by fashion designers and creative teams for mood boards, collection planning, and concept presentation. It’s not a garment design tool — it’s a research and organization layer that sits before the actual design work begins.

Milanote's home page.

What makes Milanote useful in a fashion context is its flexibility: images, color palettes, fabric swatches, reference photos, and text notes can all coexist in one board, shareable with collaborators. It’s used by brands during trend research, collection direction setting, and creative brief development.

Best for: Designers and creative directors who need a structured workspace for mood boards, trend research, and collection concept development.

Pricing: Free for basic use; Pro at $12.50/month.

Key strength: Visual and flexible — designed for creative thinking, not rigid document formats.

7. Procreate

Procreate is a tablet-based illustration app widely used by fashion designers for garment sketching, fashion illustration, and concept art. It runs on iPad and produces high-quality hand-drawn fashion illustrations with a natural feel that vector tools don’t replicate.

Procreate's home page.

It doesn’t produce tech packs or production files, but for the concept and ideation phase — getting ideas out of your head and onto paper before technical development begins — Procreate is one of the most creatively satisfying tools in the category.

Best for: Designers who prefer hand-drawn garment sketches and fashion illustrations over vector-based technical drawings.

Pricing: One-time purchase of $12.99 on the App Store.

Key strength: Natural drawing feel on iPad — the closest digital equivalent to traditional fashion sketching.

8. Midjourney

Midjourney is one of the most widely used AI image generation platforms, producing high-quality visuals from text prompts across a wide range of styles — photorealistic, editorial, painterly, and abstract. For fashion brands and creators, it’s useful for generating concept imagery, mood board visuals, print pattern ideas, and campaign-style photography that doesn’t require a specific garment as input.

Midjourney's home page.

Where Midjourney differs from fashion-specific tools like Fashion Diffusion is the lack of garment accuracy — it generates fashion imagery from descriptions, but doesn’t place a specific product onto a specific model. It suits the concept and ideation phase more than the product photography phase, and works well alongside fashion-specific tools in a broader creative workflow.

Best for: Fashion brands and creative teams who need high-quality concept imagery, mood board visuals, and editorial-style photography from text prompts.

Pricing: No free trial; Basic at $10/month, Standard at $30/month, Pro at $60/month, Mega at $120/month. Annual billing is 20% cheaper.

Key strength: Consistently high visual quality across diverse styles — strong for concept development and editorial imagery.

9. Adobe Firefly

Adobe Firefly is Adobe’s generative AI image tool, integrated across Creative Cloud. For fashion teams already in the Adobe ecosystem, it’s the most accessible AI image generation option — available inside Photoshop and Illustrator without switching platforms.

Adobe Firefly's home page.

Firefly is trained on licensed content and is commercially safe by design, which matters for brands publishing AI-generated imagery at scale. It’s less fashion-specific than Fashion Diffusion, but useful for generating fabric patterns, print designs, background variations, and concept imagery within existing Adobe workflows.

Best for: Fashion teams already using Adobe Creative Cloud who want AI image generation integrated into their existing workflow.

Pricing: Included with Creative Cloud; standalone at $9.99/month for 2,000 credits.

Key strength: Commercially safe AI generation built into Adobe’s design tools — no platform switching required.

10. Pinterest

Pinterest is the most widely used research tool in fashion design — used by designers, brands, and stylists to collect reference images, track trends, and build visual direction boards. It’s not a design tool in the technical sense, but it’s the platform most fashion professionals use before any design work begins.

Pinterest's home page.

Collections (boards) are shareable, searchable, and organized visually, making Pinterest the default starting point for trend research, mood boarding, and aesthetic direction setting at every level of the industry.

Best for: Anyone in fashion who needs a visual research and inspiration tool — from student designers to senior creative directors.

Pricing: Free.

Key strength: The largest visual fashion reference library in existence, free to access and organize.

How to Use AI to Design Clothes — A Quick Workflow

Here’s a practical end-to-end workflow that moves from initial inspiration to campaign-ready output. This workflow replaces several traditionally expensive or time-consuming stages — physical samples for colorway review, separate shoots for campaign imagery — with AI-generated outputs that can be produced in a single session.

Step 1: Gather References on Pinterest

Start with research. Pinterest is the most efficient tool for collecting visual references — silhouettes, color palettes, styling direction, trend imagery. Build a board that defines the aesthetic direction before any design work begins. The clearer the reference, the more useful it is as a prompt input in the next step.

Step 2: Generate Initial Concepts

Take the mood and direction from your Pinterest board and use Fashion Diffusion’s AI Outfit Generator to generate initial clothing concepts. Describe the silhouette, fabric, mood, and styling, and the AI produces a range of visual options. This replaces the early-stage sketching process with something faster and more immediately visual — useful for exploring directions before committing to one.

Text to image effect generated by Fashion Diffusion's AI outfit generator.
Fashion Diffusion AI-generated

Step 3: Build a Direction Board in Milanote

Pull the AI-generated concepts alongside Pinterest references, color swatches, and fabric inspiration into a Milanote board. A structured visual board at this stage aligns the team on creative direction before any production resources are committed — and gives clients or collaborators something concrete to react to.

Step 4: Design the Print or Fabric

For garments with surface design, Fashion Diffusion’s Seamless Pattern Generator creates repeating print patterns from a prompt or reference image. Once a pattern is ready, Apply Fabric maps it onto the garment to show how the print will actually look at scale on the finished piece — a step that traditionally requires a physical sample or complex rendering software.

Pattern variations generated by Fashion Diffusion's seamless pattern generator.
Fashion Diffusion AI-generated

Step 5: Produce Technical Flats in Adobe Illustrator

Translate the approved direction into production-ready technical drawings. Adobe Illustrator produces the vector flats — front, back, and detail views — that form the foundation of a tech pack. This is the step where the garment moves from a visual concept to a specification that a factory can actually use.

Step 6: Generate On-Model Campaign Visuals

With the final design confirmed, use virtual try-on tools to place the garment on a model and generate on-model imagery ready for product pages, social content, and campaign materials. Use Canva to format the outputs for specific platforms — Instagram posts, Stories, marketing decks, lookbook layouts.

On-model visuals generated by Fashion Diffusion's virtual try-on tool.
Fashion Diffusion AI-generated

Skip the Shoot — Design Fashion Content with AI

Fashion Diffusion is the AI fashion platform built specifically for brands and creators who need high-quality fashion imagery at speed. From concept visualization to campaign-ready on-model photography, it handles the visual side of fashion design without a studio or a production budget.

New accounts start with free credits. Upload a garment image or describe the look you want, and see what the AI produces.

FAQ

What is the best website to design clothes?

It depends on what you need to produce. For AI-generated fashion imagery and on-model campaign photos, Fashion Diffusion is the most purpose-built option. For technical drawings and production files, Adobe Illustrator is the industry standard. For custom printed apparel without inventory, Printful is the most practical choice.

Can I design clothes online for free?

Yes. Canva, Pinterest, and Printful’s design tool are all free to use. Fashion Diffusion offers free credits on signup. Adobe Illustrator and CLO 3D require paid subscriptions, though both offer trial access.

What’s the difference between AI clothing design tools and traditional clothing design software?

AI fashion design tools like Fashion Diffusion generate photorealistic fashion imagery from prompts or product images — they produce visuals, not production files. Traditional tools like Adobe Illustrator and CLO 3D produce technical drawings, patterns, and spec sheets that factories can use to manufacture garments. Most professional workflows use both at different stages.

Which clothing design website is right for me?

If you are a creator or brand needing campaign imagery and social content, start with Fashion Diffusion. If you are a designer producing tech packs and production files, Adobe Illustrator is essential. If you are launching custom merch without inventory, Printful handles production and fulfillment. If you are in the concept and research phase, Milanote or Pinterest support mood boarding and trend research.

Avatar photo 通过Alexander Wilson

Try On Necklaces, Earrings & Bracelets Virtually — Full AI Try-On Guide

Jewelry is one of the hardest product categories to shop online. A necklace in a product photo tells you almost nothing about how it will actually sit on your neckline. Earrings that look delicate in isolation can overwhelm a face — or disappear entirely. A bracelet that reads as bold on a model’s wrist can look understated on a different one.

Virtual jewelry try-on changes what’s possible before you buy. Upload any jewelry image alongside a photo, and the AI generates a realistic preview showing how the piece actually looks when worn.

This guide covers everything: how the technology works, how to get the best results from each jewelry type, and how to use virtual try-on to make faster, more confident decisions whether you’re shopping or sourcing.

What Is Virtual Jewelry Try-On

Virtual jewelry try-on uses AI to place a jewelry image onto a photo of a person, generating a realistic preview of how that piece looks when worn. You upload two inputs — a jewelry product image and a person photo — and the AI renders the piece at accurate scale, correctly positioned for the jewelry type: at the neckline for necklaces, at the earlobe for earrings, at the wrist for bracelets.

The output isn’t a sticker overlay. The jewelry is rendered with proportional accuracy relative to the body, with lighting consistent with the source photo. Metal finish, gemstone detail, and chain structure all carry over from the product image.

How Does AI Jewelry Try-On Work

The AI reads two things: the jewelry’s physical characteristics from the product image, and the relevant body landmarks from the person photo. It then renders the piece at accurate scale with natural positioning — at the neckline for necklaces, at the earlobe for earrings, at the wrist for bracelets. The result reflects the specific proportions in your photo, not a generic model’s. That’s the difference between seeing whether a piece looks good, and seeing whether it looks good on you.

How to Try On Jewelry Online with AI

Now that you know what the technology does, here’s how to actually use it. The process is straightforward — two inputs, one result, ready in seconds. Fashion Diffusion’s virtual jewelry try-on handles necklaces, earrings, bracelets, and rings, all in the browser with no software to install.

Step 1: Find and upload your jewelry image

Start with a clean product photo — a packshot on a plain background, a brand site image, or a screenshot from anywhere online. The clearer the image, the more accurately the AI reads the jewelry’s details. Fashion Diffusion accepts PNG, JPG, JPEG, and WebP files up to 10MB.

Upload your jewelry image.
Fashion Diffusion AI-generated

Step 2: Upload your model or personal photo

Upload a photo of yourself or a model. For necklaces, use a photo that shows the neckline clearly — a slight neckline exposure works better than a high collar. For earrings, use a face-forward photo with ears visible and hair pulled back or to one side. For bracelets, use a photo with the wrist clearly visible, ideally in a neutral, relaxed position.

Upload your model image.
Fashion Diffusion AI-generated

Step 3: Generate and compare

The AI processes both images and generates the result in seconds. The jewelry appears at accurate scale, correctly positioned, consistent with the lighting in the person photo. For the most useful session, run the same person photo with multiple jewelry images — chain lengths, pendant sizes, earring styles, bracelet widths. Because the person is consistent across all comparisons, what you are evaluating is genuinely the jewelry, not lighting or model differences.

Final jewelry try-on effect.
Fashion Diffusion AI-generated

How to Get Better AI Jewelry Try-On Results

The quality of the output depends on the quality of the inputs. These four adjustments make the most consistent difference.

  • Use even, diffused lighting. Harsh shadows make it harder for the AI to place jewelry accurately. Natural window light works best.
  • Match the photo to the jewelry type. Face-forward for earrings, neckline visible for necklaces, wrist in frame for bracelets.
  • Use clean product images. Plain-background product shots give the AI the most to work with. Avoid heavily styled or cluttered images.
  • Compare on the same photo. Run three or four pieces against one person photo — the consistent background makes the differences genuinely comparable.

Try On Different Jewelry Styles with AI

Each jewelry type has its own visual logic — what makes a necklace work on one person doesn’t apply to earrings, and bracelets have different proportion relationships altogether. Here’s what to look for when you try on each type.

If you are shopping for rings specifically, we have a dedicated guide to virtual engagement ring try-on that covers the ring-buying process in depth.

Necklaces

Of the three jewelry types, necklaces have the most direct relationship with outfit. The same chain looks completely different depending on what neckline it’s worn with — a long pendant disappears under a crew-neck, and a choker that reads as elegant with a V-neck can feel tight with a collared shirt. Drop length is the variable that changes everything: a choker creates a high, defined horizontal line; a princess length (around 18 inches) sits just below the collarbone; an opera or rope length falls dramatically lower and reads as maximalist or layered.

What to check in the try-on:

  • Where the pendant or chain falls relative to the outfit neckline — this is the single most useful thing the try-on reveals that a product photo can’t.
  • Whether the chain weight reads as proportional to the face and frame, or disappears against it.
  • How the metal color interacts with the skin tone in the photo — warm gold reads very differently against cool or warm skin undertones.
AI necklaces try-on comparison.
Fashion Diffusion AI-generated

Try on necklace online AI tools like Fashion Diffusion accept any saved product image from a brand site or Pinterest save. The AI places it at accurate drop length based on the person photo.

Earrings

Earrings are the only jewelry type that frames the face directly — which makes them uniquely hard to evaluate without trying them on. A product image shows you the earring in isolation. What it doesn’t show is whether that earring makes your face look longer, wider, more balanced, or more crowded. A drop earring that photographs as delicate can visually shorten a round face. A bold hoop that reads as confident on one face shape can read as overwhelming on a narrower one.

What to check in the try-on:

  • Whether the earring extends below the jawline — length below the jaw elongates, length above it adds width, and the difference is only visible when you see it on an actual face.
  • How the earring width relates to the face width — wider than the cheekbone reads as statement; narrower reads as accent.
  • Whether the hair interferes — the same earring reads completely differently with hair up versus hair framing the face; try-on with the hairstyle you’d actually wear.
AI earrings try-on comparison.
Fashion Diffusion AI-generated

Try on earrings online AI — use a face-forward photo with visible ears. Pull hair back or to one side to get the most useful result. The AI positions the earring at the earlobe with accurate scale.

Bracelets

Bracelets have a dynamic quality that necklaces and earrings don’t — they move with the wrist, and they’re often worn in stacks. That makes proportion and combination the two things most worth evaluating before buying. A wide cuff that reads as sculptural on a wider wrist can look costume-heavy on a narrower one. A delicate chain that reads as understated can almost disappear. And with stacking, the visual weight compounds quickly — two or three bracelets that look good individually can read as cluttered together, or can look perfectly considered.

What to check in the try-on:

  • Whether the width reads as proportional to the wrist — this is harder to judge than it sounds, and the try-on makes it immediate.
  • For stacking: whether the combination feels intentional — layering different textures, metals, and widths is harder to visualize than a single piece.
  • The gap between the bracelet and the wrist edge — a bracelet that fits loosely reads differently from one that sits closer; the try-on shows how much visual presence the piece has at rest.
AI bracelets try-on comparison.
Fashion Diffusion AI-generated

Try on bracelet online AI tools work best with a wrist photo in a relaxed, neutral position. The AI places the bracelet at accurate width and position based on the wrist in the photo.

AI Jewelry Try-On for Shoppers and Jewelry Brands

The same tool serves two different workflows depending on who’s using it.

For shoppers, virtual jewelry try-on answers the questions product pages can’t. Does this necklace length work with how I dress? Do these earrings suit my face? Is this bracelet too wide for my wrist? Seeing the answer before purchasing reduces uncertainty and the returns that come from it.

For jewelry brands and e-commerce sellers, the tool generates on-model product visuals. No photoshoot needed. Upload a product image, choose or upload a model photo, and the AI produces a realistic on-model image ready for product pages, social content, or campaign materials. The same piece can appear on multiple models with different skin tones and proportions, without booking additional sessions.

Try On Any Jewelry with Fashion Diffusion

Knowing how a piece looks in a product photo and knowing how it looks on you are two different things. Fashion Diffusion‘s virtual jewelry try-on puts any necklace, earring, or bracelet on your photo in seconds — upload a product image from any source, add a person photo, and see the result before you decide.

New accounts start with free credits. Try the first piece and see whether the result changes how you shop for jewelry.

FAQ

What is virtual jewelry try-on?

A tool that places a jewelry product image onto a person photo using AI, generating a realistic preview of how the piece looks when worn. It shows accurate scale, natural positioning, and realistic rendering of metal finish and gemstone detail.

Does it work for necklaces, earrings, and bracelets?

Yes. Fashion Diffusion’s virtual jewelry try-on supports necklaces, earrings, bracelets, rings, and layered combinations. The AI positions each jewelry type correctly based on the person photo — at the neckline, earlobe, or wrist as appropriate.

What kind of photo gives the best result?

A well-lit photo where the relevant body area is clearly visible. For necklaces, a photo showing the neckline. For earrings, a face-forward photo with ears visible. For bracelets, a wrist photo in a relaxed position. Even, diffused lighting produces the most accurate AI rendering.

Can jewelry brands use this for product photography?

Yes. Brands and e-commerce sellers use Fashion Diffusion’s virtual jewelry try-on to create on-model product images without a photoshoot — placing pieces on AI models or uploaded photos to generate catalog and campaign visuals at scale.

Can I use it to try on jewelry for free?

Yes. New Fashion Diffusion accounts start with free credits that can be used on the virtual jewelry try-on tool.

Avatar photo 通过Ethan Davis

Try On Engagement Rings Virtually Before You Propose — Here’s How

Choosing an engagement ring is harder than it looks. You are not shopping for yourself. You are trying to picture a ring on someone else’s hand, in a size you may not know, in a style you hope she’ll love. The ring in the display case — or on a model’s hand in a product photo — tells you almost nothing about how it will look on the person you are proposing to.

That gap is exactly what a virtual engagement ring try on closes. Try on ring online lets you do exactly that. Upload a photo of the ring and a photo of her hand. The AI shows you how the ring looks on her — before you buy, before you propose.

Why the Ring Looks Different on a Hand Than in a Display Case

Product photography is designed to show a ring at its absolute best. Studio lighting maximizes diamond brilliance. The angle is chosen to flatter the setting. A white or velvet background removes all visual competition.

Professional jewelry photography uses LED lighting and controlled setups specifically to enhance sparkle in ways that natural daylight doesn’t replicate. The stone in the product image is showing you its best-case performance, not its everyday appearance on an actual hand.

Proportion is the other variable that photos don’t convey. The same ring reads completely differently depending on the width of the finger wearing it. A stone that looks confidently sized in isolation can appear modest on a wider finger, or unexpectedly bold on a very narrow one. There’s no way to know which side of that equation you are on without seeing the ring in context, which is exactly what a virtual try-on provides.

What Is Virtual Engagement Ring Try-On

Virtual engagement ring try-on uses AI to place a ring onto a photo of a hand, generating a realistic preview of how that specific ring looks when worn. You upload two inputs: an image of the ring and a photo of a hand. The AI renders the ring at accurate scale, with natural light behavior and realistic positioning on the finger.

Unlike AR try-on tools built into specific jeweler websites, virtual try on engagement ring online tool works with any ring image from any source — a screenshot from a jeweler’s website, a Pinterest save, a photo from a magazine. And from any hand photo you already have, including a photo of your partner’s hand.

A Note on the Photo You Use

The quality of the try-on result depends significantly on the hand photo. A few things make a meaningful difference.

For your own hand: Take a photo in natural daylight, palm facing down, fingers relaxed and slightly spread. A plain, neutral background removes distractions. Avoid heavy shadow across the fingers.
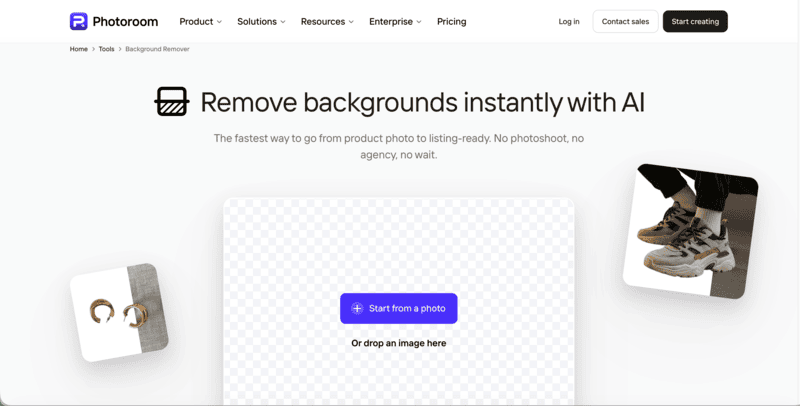
For your partner’s hand: You probably have more photos than you think. A photo where her hand is clearly visible, can be cropped to isolate the hand. If the background is cluttered, run it through an AI background remover before uploading to get a cleaner result. The AI doesn’t need a posed hand photo to produce a useful result. What it needs is a clear view of the finger the ring will sit on, with enough detail to read skin tone, finger width, and natural positioning.

If the photo is taken at an angle, the ring preview will reflect that perspective. A straight-on, slightly downward angle produces the most useful result for judging proportions.

How to Try On an Engagement Ring Virtually

With your ring image and hand photo ready, the process takes less than a minute. Fashion Diffusion’s AI virtual try-on ring tool runs entirely in the browser — nothing to install, free to start.

Step 1: Find and Save the Ring Image

Start by saving the ring image you want to try. This can be a screenshot from any jeweler’s website — James Allen, Brilliant Earth, Blue Nile, a local jeweler, anywhere. It can also be an image you’ve saved from Pinterest, a magazine, or a ring you’ve photographed in a store. The AI reads the ring’s setting, stone shape, band width, and metal from the product image, so a clear, well-lit product photo gives the most accurate result.

Upload your ring photo.
Fashion Diffusion AI-generated

Step 2: Upload the Hand Photo

Upload the hand photo alongside the ring image. The AI uses the hand photo to determine finger proportions and skin tone, then places the ring at accurate scale on the ring finger. See the section above for guidance on what makes a good hand photo — the same advice applies whether you are using your own hand or your partner’s.

Upload your hand image.
Fashion Diffusion AI-generated

Step 3: Generate and Compare

The AI generates the result in seconds. The ring appears at realistic scale, positioned naturally on the finger, with lighting consistent with the hand photo. If the result isn’t what you expected — the ring reads larger or smaller than anticipated, or the metal color isn’t landing right — adjust the input and try again.

Ring try-on effect generated by Fashion Diffusion.
Fashion Diffusion AI-generated

What to Look For in the Result

Generating the engagement ring try on is the first step. Knowing what to evaluate in the result is what makes it useful.

Ring-to-Hand Proportion

The ratio of the ring’s visual size to the width of the finger is the most important thing to assess. A stone that looks generously sized in a product image can appear modest on a wider finger. And a stone marketed as subtle can look bold on a very narrow one. The try-on shows you this relationship directly — use it to calibrate your expectations before purchasing.

Two hands of different sizes wearing the same ring showcase different proportional effects.
Fashion Diffusion AI-generated

Stone Shape and Visual Presence

Different cuts create different visual footprints on the hand. An oval elongates the finger. A round sits more centrally. A pear points in a direction that draws the eye. A toi et moi creates two focal points across the width of the finger. These are differences you can read in a product image, but seeing them in the context of an actual hand makes the choice much more concrete.

Metal Color Against Skin Tone

Yellow gold, white gold, and rose gold interact with skin tone in ways that are difficult to judge from a product image shot on a white background. Yellow gold reads warmer and more vintage against most skin tones. White gold reads cooler and more contemporary. Rose gold sits between the two, with a softness that works across a wide range. Seeing the metal color against the actual skin tone of the hand you are shopping for is a more reliable guide than any rule of thumb.

Different skin tones complement different ring materials and colors.

Fashion Diffusion AI-generated

Compare Multiple Rings Side by Side

The single most effective use of a virtual try-on tool is systematic comparison. Choose three to five rings that appeal to you, and run each one against the same hand photo. Because the hand is consistent across all comparisons, the differences you see are genuinely about the ring. Not about lighting, model, or camera angle variations between product photos. Save each result, then look at them together. The one that keeps drawing your eye is usually the right answer.
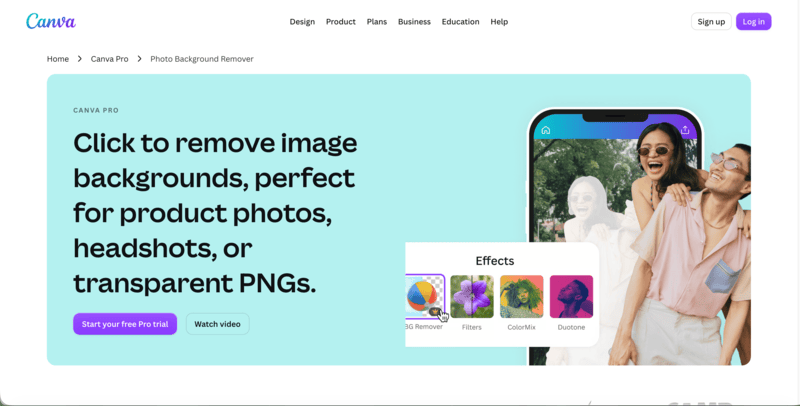
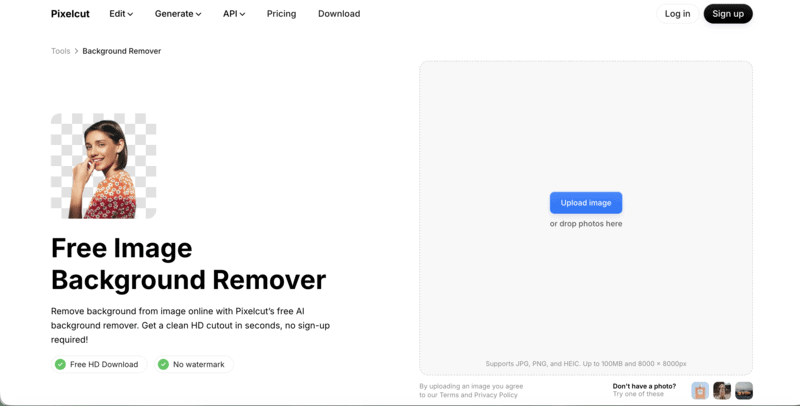
Try On Any Ring Before You Propose with Fashion Diffusion

The decision you are making is one of the most significant purchases of your life, and you are making it with limited information. Fashion Diffusion’s virtual engagement ring try-on puts the ring on the right hand before you commit — any ring, from any jeweler, on any photo you already have.

Propose with the right ring after trying Fashion Diffusion's AI virtual try-on ring tool.
Fashion Diffusion AI-generated

New accounts start with free credits. Upload a ring image and a hand photo and see the result before you make a decision.

FAQ

What is virtual engagement ring try-on?

A tool that places a ring image onto a hand photo using AI, generating a realistic preview of how the ring looks when worn. It shows accurate proportions, metal color, and stone presence on a specific hand, so you can evaluate the ring in context before purchasing.

Can I use a photo of my partner’s hand?

Yes. Use any photo where her hand is clearly visible—a candid shot, a photo cropped from a group picture. The AI doesn’t need a posed photo, just a clear enough view of the finger the ring will sit on.

What if I don’t know her ring size?

Ring size doesn’t affect the virtual try-on. The AI places the ring visually on the hand photo without needing size information. The try-on evaluates style, proportion, and visual fit—you’ll still need to determine her ring size separately before ordering.

Does it work with rings from any jeweler?

Yes. Upload any ring image—a screenshot from a jeweler’s website, a photo from a magazine, a Pinterest save—and the AI uses that image as the input. There’s no requirement to use a specific catalog or brand.

How accurate is the result?

The try-on generates a realistic visualization of the ring’s proportions, metal color, and stone shape on the hand. It accurately answers the questions product photos can’t—how the ring reads in scale, and how it looks against the specific skin tone and finger proportions you are shopping for.

Can I try on engagement rings online for free?

Yes. New Fashion Diffusion accounts start with free credits that can be used on the virtual engagement ring try-on tool.

Avatar photo 通过Alexander Wilson

Virtual Sneaker Try-On: See How 8 Popular Styles Look Before You Buy

Buying sneakers online means making a decision from a product photo. The shoe looks great flat on a white background. Then it arrives, you put it on, and something is off — the proportion isn’t what you expected, the colorway reads differently in real light, or it just doesn’t work with the way you actually dress.

Try your shoes on before you buy them — upload a photo of yourself and a photo of the sneakers, and see how they actually look on your feet, on your outfit, before you spend anything.

Why Sneakers Are Surprisingly Hard to Buy Online

Footwear has an 18% online return rate — the second-highest return category in e-commerce, after apparel. A significant portion of that is down to one problem: the shoe on a flat white background looks nothing like the shoe on an actual foot, in an actual outfit.

Sneaker product photography is deliberately idealized. The angle is chosen to show the shoe at its most flattering. The colorway is shot under optimal lighting. The scale is set by the photographer, not by a body. None of that tells you whether the chunky trainer that looks so good in the product image will overwhelm your frame, or whether the low-profile runner that seems subtle online will disappear into an outfit.

And the question product photos can’t answer at all: does this work with how you actually dress? A sneaker doesn’t exist on a white background. It exists with jeans, with a dress, with the specific proportions of your body. A virtual sneaker try on closes that gap — showing you the shoe on your own body, your own outfit, before you buy. That’s the core value of being able to try on shoes online with AI.

What Is AI Virtual Sneaker Try-On

AI sneaker try-on takes two inputs — a photo of a sneaker and a photo of a person — and generates a realistic image of that person wearing that shoe. The AI reads the sneaker’s shape, sole height, colorway, and construction from the product image, then places it naturally on the feet in the person photo, consistent with the outfit and proportions in the original.

The result isn’t a sticker dropped on top of a photo. The shoe is rendered at accurate scale relative to the body, in natural position, with lighting consistent with the source image. Try on shoes online with AI and you see the actual sneaker integrated into a real-looking scene.

How to Try On Sneakers Virtually with Fashion Diffusion

Fashion Diffusion’s free AI virtual try-on shoes tool runs in the browser. No app to download, no account required to get started.

Step 1: Upload a Sneaker Image

Use any sneaker product photo — a brand site image, a screenshot, or a saved photo from your wishlist. The AI reads the shoe’s shape, sole, colorway, and details automatically.

Upload your sneaker image.
Fashion Diffusion AI-generated

Step 2: Upload Your Photo

Upload a full-body or three-quarter photo of yourself. Even lighting and a clear background give the best result. The AI uses your proportions to place the shoe at accurate scale — which is where the useful information comes from.

Upload your model image.
Fashion Diffusion AI-generated

Step 3: See the Result

The AI generates a realistic on-foot preview in seconds. You see the sneaker at real scale, on your actual proportions, against your outfit. If you want to compare styles, upload the same personal photo with different sneaker images — the consistency makes the comparison useful.

Virtual sneaker try-on result generated by Fashion Diffusion.
Fashion Diffusion AI-generated

8 Sneaker Styles to Try On Virtually

These are the eight styles making the most noise in 2026 — and the things worth checking in a virtual try-on before you commit to buying.

Low-Profile / Skinny Sneakers

Low-profile, slim silhouettes are dominating 2026 — a deliberate move away from the chunky sneakers of recent years, with flat soles, quiet branding, and sleek materials leading the charge. Brands like Puma Speedcat, adidas Tokyo, and New Balance 204 are the reference points.

Low-Profile / Skinny Sneakers try-on result.
Fashion Diffusion AI-generated

What to check in the try-on: Low-profile sneakers look very different depending on the height of the person wearing them. On a taller frame, the flat, minimal silhouette reads as intentionally understated. On a shorter frame, they can disappear into the outfit. See how the proportions read against your actual height before buying.

Retro Runners

Retro sneakers are in their main character era — throwback silhouettes and worn-in finishes leading the charge in the fashion space, with just enough nostalgia to make even the simplest outfit feel styled.

Retro runners try-on result.
Fashion Diffusion AI-generated

What to check in the try-on: Retro runners often have more sole height and bulk than they appear in product photos. The worn-in colorways also read differently against different outfit tones — a cream-and-gum sole can look warm and intentional with neutrals, or slightly muddy against cooler tones. A try-on against your actual wardrobe tells you which.

Sneakerinas / Ballet Sneakers

The breakout trend of 2026: sneakers that split the difference between a ballet flat and a traditional trainer. Skinny sneakers were all over the spring and summer runways — at Dries Van Noten in prints of pool blue, banana yellow, and turquoise, as well as solid cherry red and juicy pink, often styled with slouchy socks.

Sneakerinas / Ballet Sneakers try-on result.
Fashion Diffusion AI-generated

What to check in the try-on: The slim, pointed silhouette of a sneakerina reads very differently depending on outfit length. Against cropped trousers or a midi skirt, the proportions are elegant. Against full-length wide-leg trousers, the shoe can get lost. Try it against the specific outfit you are planning to wear it with.

Trail / Hiking Sneakers

The Salomon XT-6 has become the cool girl sneaker of the season — trail runners crossing over from fitness into everyday fashion, and expected to get more popular into 2026. The chunky, technical sole is the defining visual.

Hiking sneakers try-on result.
Fashion Diffusion AI-generated

What to check in the try-on: Trail sneakers carry significant visual weight. The thick sole and technical construction that looks sharp in a product image can overwhelm a delicate outfit — but pair perfectly with tailored shorts, relaxed trousers, or a long skirt. See the contrast before you buy.

Satin / Luxury Finish Sneakers

Iridescent finishes, satin uppers, and materials borrowed from eveningwear are having a moment. Who What Wear flagged satin sneakers as a key summer 2026 trend, with It girls styling them with dresses and skirts.

Satin sneakers try-on result.
Fashion Diffusion AI-generated

What to check in the try-on: Satin and iridescent finishes catch light in a way that reads completely differently in a product photo versus in real wear. The reflective surface also interacts with outfit color in ways that are hard to predict. A try-on against the actual outfits you’d wear them with is particularly useful here.

Mixed Media / Colorblock Sneakers

Bold colorways and material combinations — nylon with suede, leopard print with bright-green accents — are where 2026 sneaker design is getting interesting. Business Insider’s stylist panel called out mixed-media sneakers as a major 2026 trend, driven by a desire for something expressive after years of quiet luxury.

Colorblock sneakers try-on result.
Fashion Diffusion AI-generated

What to check in the try-on: The statement is the point — but a bold colorblock sneaker needs to work with your wardrobe, not against it. A try-on shows you immediately whether the color combination reads as intentional and pulled-together, or like it’s competing with everything else in the outfit.

Canvas Low-Top Sneakers

The Row, Jacquemus, and Veja have all brought the everyday canvas sneaker back onto serious fashion radars. Canvas sneakers are putting the everyday silhouette back on the radar this season — defined by a low-profile, lace-up look, these are the everyday pairs you can wear with just about everything.

Canvas low-top sneakers try-on result.
Fashion Diffusion AI-generated

What to check in the try-on: Canvas low-tops look clean and versatile in product photos. In wear, the visual effect depends heavily on the specific canvas color and outfit pairing. An off-white canvas toe reads very differently from a natural ecru against denim. The try-on is most useful here for color matching.

Cutout / Platform Athletic Sneakers

Sculptural soles, cutout details, and airy foam construction give this style a distinctive silhouette. Cutout kicks with airy, foamy soles and exposed socks are one of 2026’s more playful and irreverent sneaker directions — bold but still genuinely wearable.

Cutout athletic sneakers try-on result.
Fashion Diffusion AI-generated

What to check in the try-on: The platform adds height, which changes how proportions read across the whole outfit. The cutout details also vary significantly in how bold they look depending on the specific model — some read as subtle and architectural, others as very statement-forward. See how the sole height works with your actual height before committing.

Try On Any Sneaker Before You Buy with Fashion Diffusion

The question you are really asking when you look at a sneaker online isn’t whether the shoe looks good in the photo. It’s whether it looks good on you, with the clothes you actually wear.

Fashion Diffusion’s AI sneaker try-on tool puts any shoe on your photo in seconds — upload a sneaker image from any brand or retailer, add a photo of yourself, and see the result before you decide. New accounts start with free credits.

FAQ

What is a virtual sneaker try-on?

An AI sneaker try on tool that places a sneaker product image onto a photo of a person using AI, generating a realistic preview of how the shoe looks when worn. It shows accurate scale and proportion relative to your body, so you can see whether the silhouette, colorway, and sole height actually work for you before buying.

What kind of photo do I need?

A full-body or three-quarter photo with even lighting and a simple background gives the most accurate result. The AI uses your proportions to place the sneaker at accurate scale, which is where the useful visual information comes from.

Can I try on shoes online with AI for free?

Yes. New Fashion Diffusion accounts start with free credits that can be used on the AI sneaker try-on tool.

How accurate is the AI try-on result?

The tool generates a realistic visualization showing the sneaker’s silhouette, sole height, colorway, and proportion relative to your body. It’s a visual preview, not a physical fitting — but it answers the questions product photos can’t, including how the shoe reads against your outfit and proportions.

Does it work for all sneaker types?

Yes. The AI shoe try-on supports sneakers, trainers, retro runners, platform sneakers, canvas low-tops, and other footwear styles — any sneaker image you can save or screenshot from a brand site works as an input.