作者归档 Alexander Wilson

Avatar photo 通过Alexander Wilson

How to Visualize Fabric on a Garment Before Ordering a Single Sample

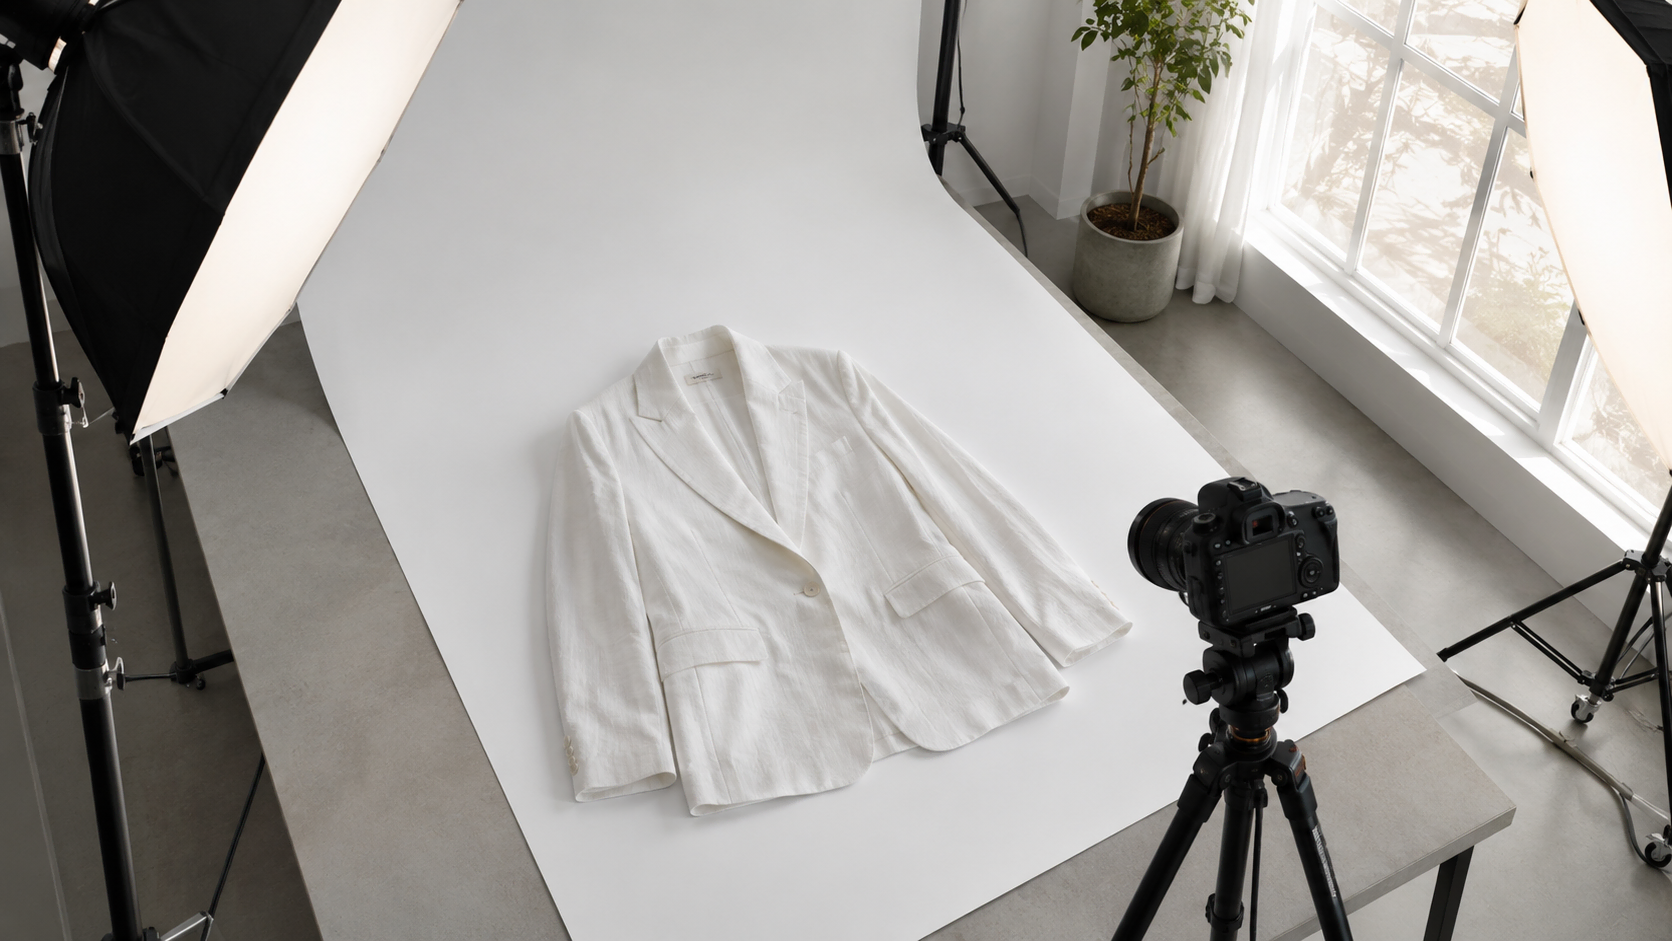
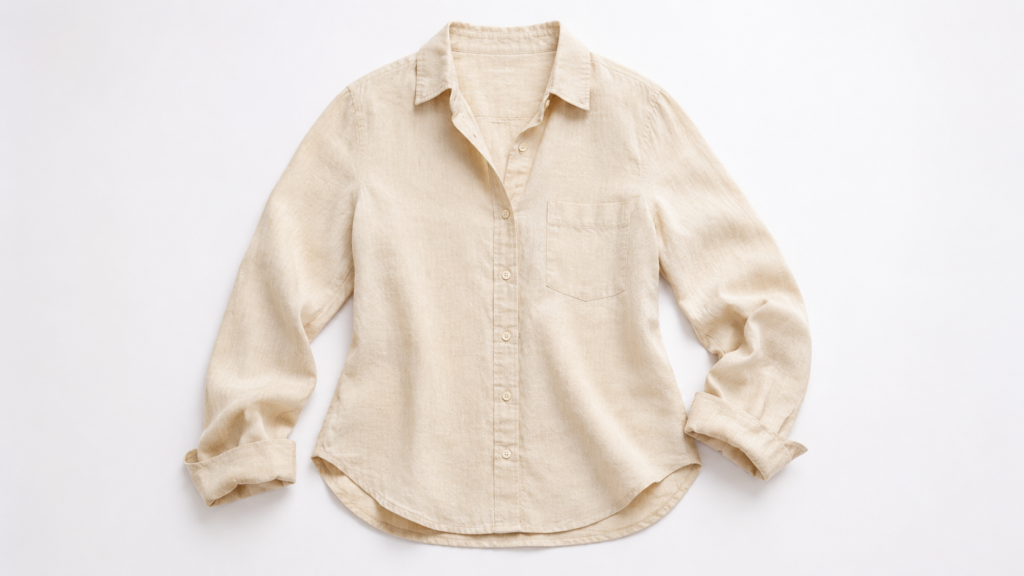
A fabric can look perfect as a flat swatch and still surprise you once it is cut and sewn into an actual garment. Color shifts under different lighting. Drape changes completely on a bias-cut skirt versus a structured blazer. A print that looked balanced on a swatch card can stretch or compress once it wraps around a real silhouette. That gap between swatch and garment is why so many fashion samples get reordered.

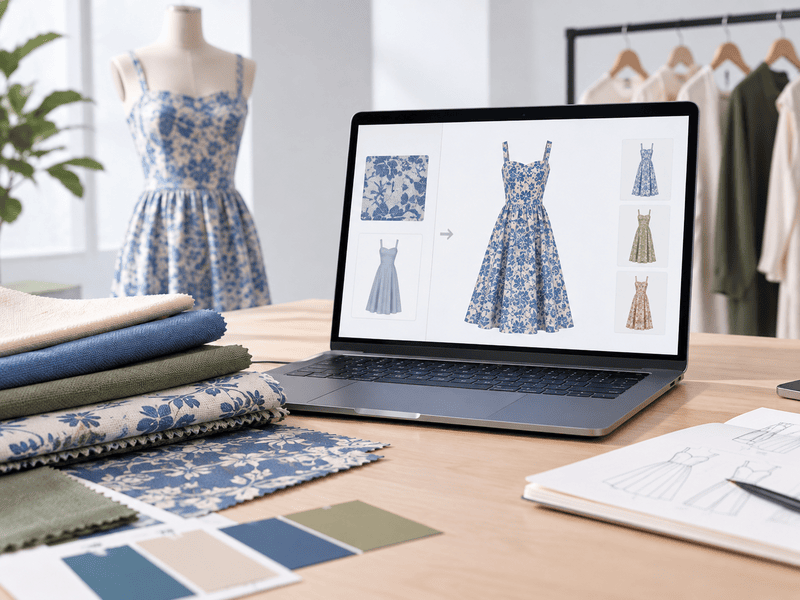
Fabric to garment AI is built to close that gap before a single sample goes into production. Instead of guessing from a flat swatch, you can apply fabric directly onto a garment photo with AI. The result comes back in seconds, well before any cutting, sewing, or shipping happens.

This guide covers what AI fabric visualization can help you evaluate, how to use it step by step, and where it fits alongside physical sampling.

AI Visualization vs Physical Fabric Sampling

Physical sample costs vary widely depending on the garment, fabric, construction, and sampling location. What makes the difference is not just any single step, but how many steps and rounds happen before a decision gets made. Laying the two processes side by side against each other shows where the time actually goes.

StepTraditional Sampling ProcessAI Visualization Process
1Order a fabric swatch and wait for it to arrive, typically a few days to over a weekUpload a photo of the fabric and a reference garment
2Evaluate color and hand feel from the swatch alone, without seeing it on the garmentGenerate a preview of the fabric on the garment in seconds
3Order a full physical sample and wait, commonly one to three weeks or more per roundCompare multiple fabrics or colorways on the same garment instantly
4Review the sample and request revisions, often across two or more roundsNarrow the options down to the fabrics worth ordering as a physical sample
TotalDays to several weeks before the first full sample is even reviewedMinutes to preview and compare, with physical sampling reserved for a short list

The traditional process only shows you the finished result after fabric has already been ordered and a garment has already been sewn. The AI process moves that same decision earlier, so the fabrics that clearly will not work get filtered out before any material or labor is spent on them.

What AI Fabric Visualization Can Help You Evaluate

Before getting into the steps, it helps to know what this kind of tool is actually good at showing you. AI fabric visualization is not a lab test. It is a fast way to preview how a material choice will read on a garment. That way you can rule out options that clearly will not work before spending time and money on a physical sample.

Color and Colorways

The same garment can look completely different in five colorways, and judging that from a swatch card alone is unreliable. Applying each color option to the same garment reference makes it easier to compare how a shade reads on the actual silhouette rather than on a small flat piece of fabric.

Print Scale and Placement

A print that looks balanced on a small swatch can look oversized or cramped once it repeats across a full garment. Fabric to garment AI can preview how a print scales and lands on seams and panels, so you catch scale problems before fabric goes to print. If the print itself still needs to be designed, Fashion Diffusion’s seamless pattern generator can turn a reference image or text description into a repeat-ready fabric pattern. You can then preview that pattern on a garment.
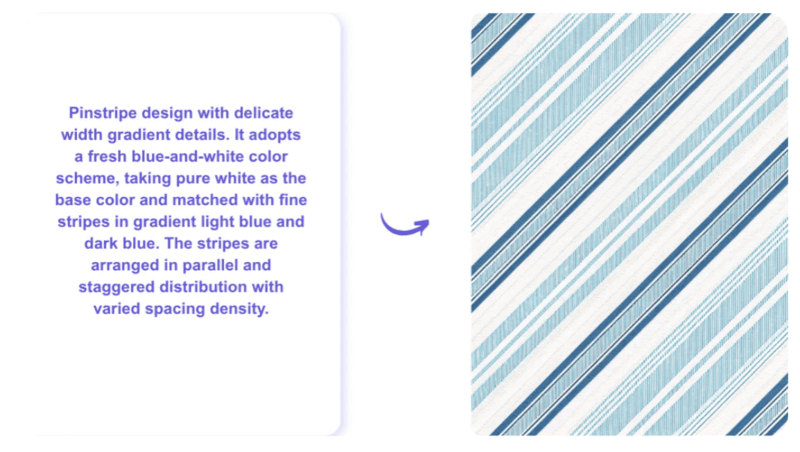
Fashion Diffusion's seamless pattern generator can turn text description into a fabric pattern.

Texture and Surface Appearance

Sheen, weight, and surface texture all affect how a fabric photographs on a finished garment. Visualizing a fabric on a garment reference gives a sense of how a shiny satin or a matte cotton will read visually. That makes it useful for deciding between similar-looking fabric options before committing to one.

Fabric and Garment Compatibility

Not every fabric suits every silhouette. A heavy brocade on a fitted slip dress and a lightweight chiffon on a structured coat both tend to look off. Previewing the combination on a garment reference makes that mismatch obvious early, instead of after a sample has already been cut.

How to Visualize Fabric on a Garment With AI

The process behind fabric to garment AI is simpler than most people expect. You do not need 3D modeling software, a photography studio, or design experience. You need two images and a few seconds of processing time.

Step 1: Upload a Fabric Reference

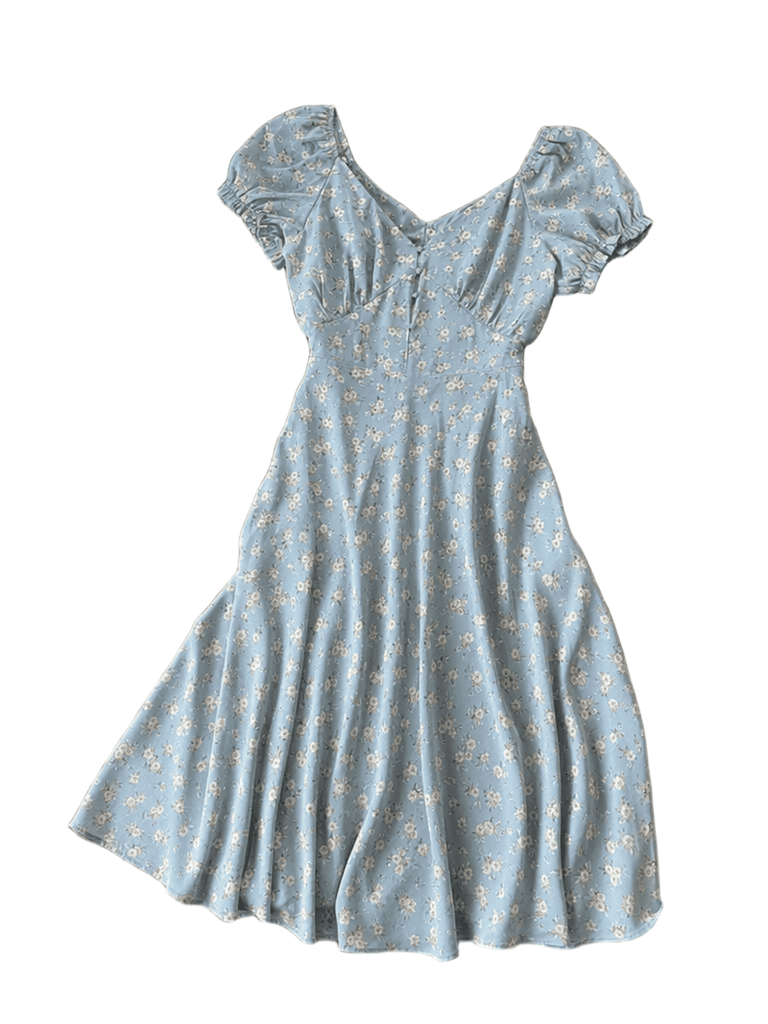
Start with a clear photo of the fabric itself. This can be a textile sample, a scanned swatch, a printed pattern, or any material reference you already have on hand. Fashion Diffusion’s Apply Fabric accepts PNG, JPG, and WebP files. It also includes a built-in library of sample fabrics if you want to test the tool before uploading your own material.
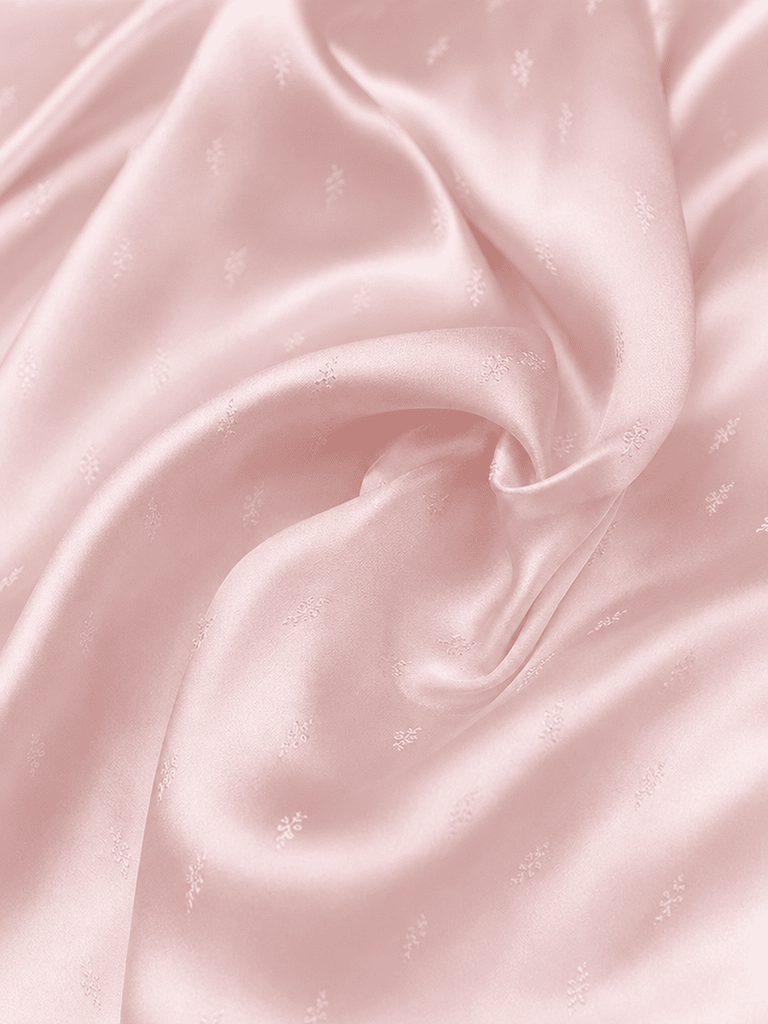
Upload a fabric photo.
Fashion Diffusion AI-generated

Step 2: Upload a Garment Reference

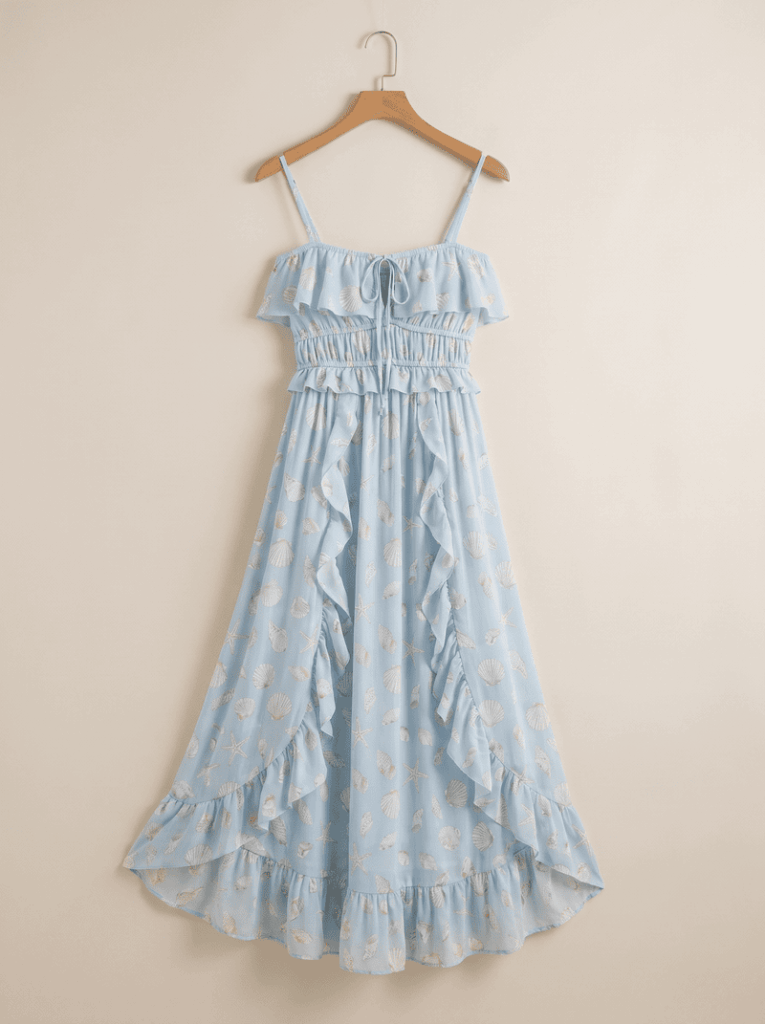
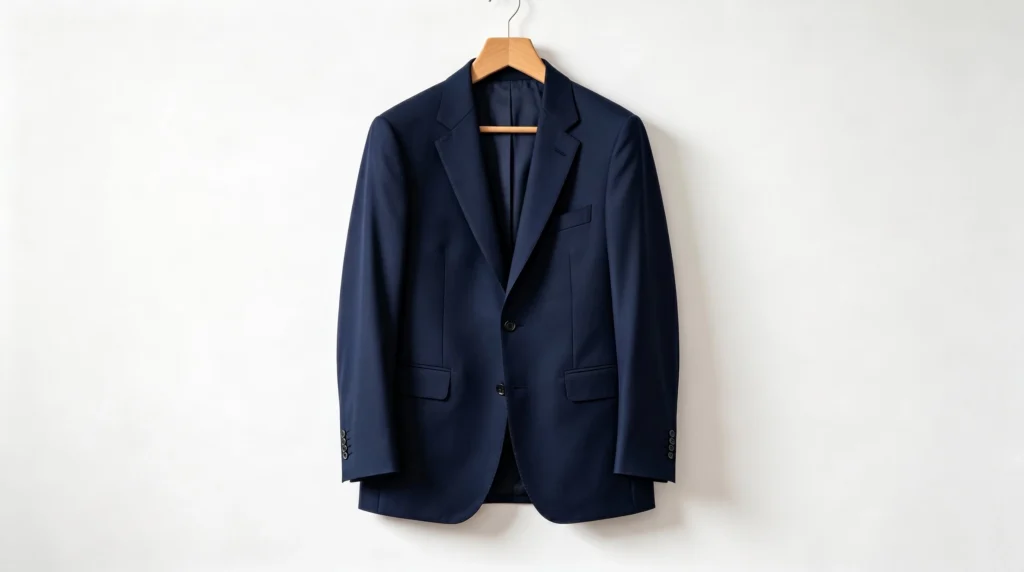
Next, upload a photo of the garment you want to visualize the fabric on. This can be a flat lay, a product photo, or a sketch-style reference. The tool uses the garment reference to preserve its silhouette, seams, folds, and overall structure while applying the new fabric on top of it.
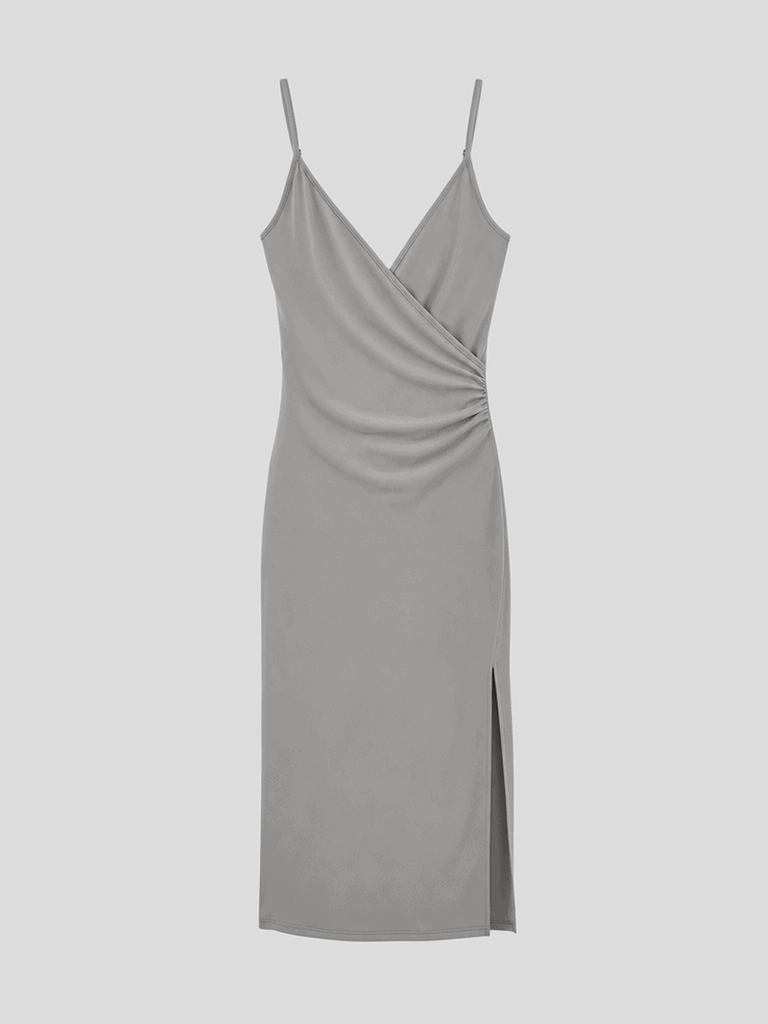
Upload a garment photo.
Fashion Diffusion AI-generated

Step 3: Generate and Compare the Results

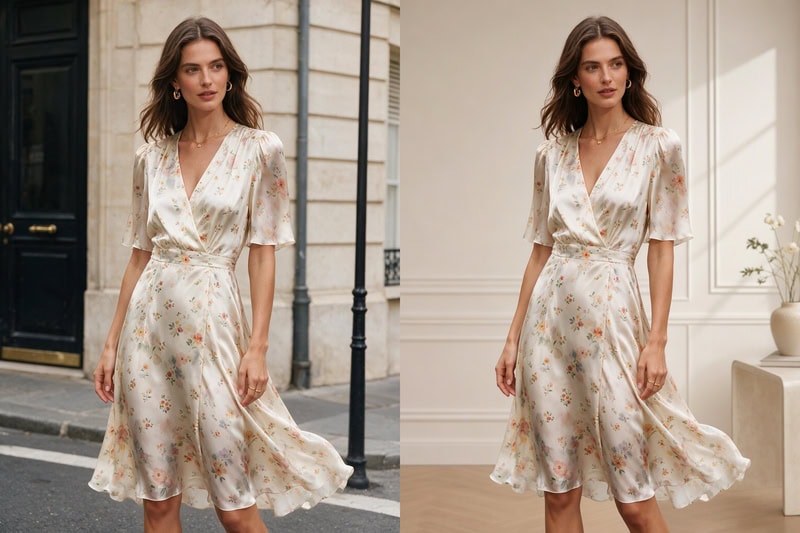
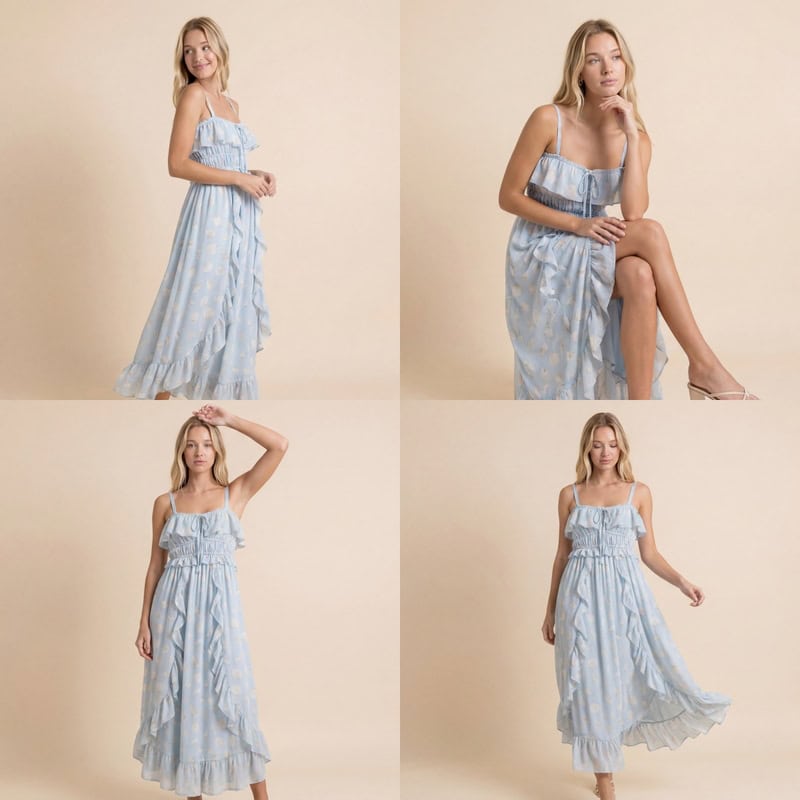
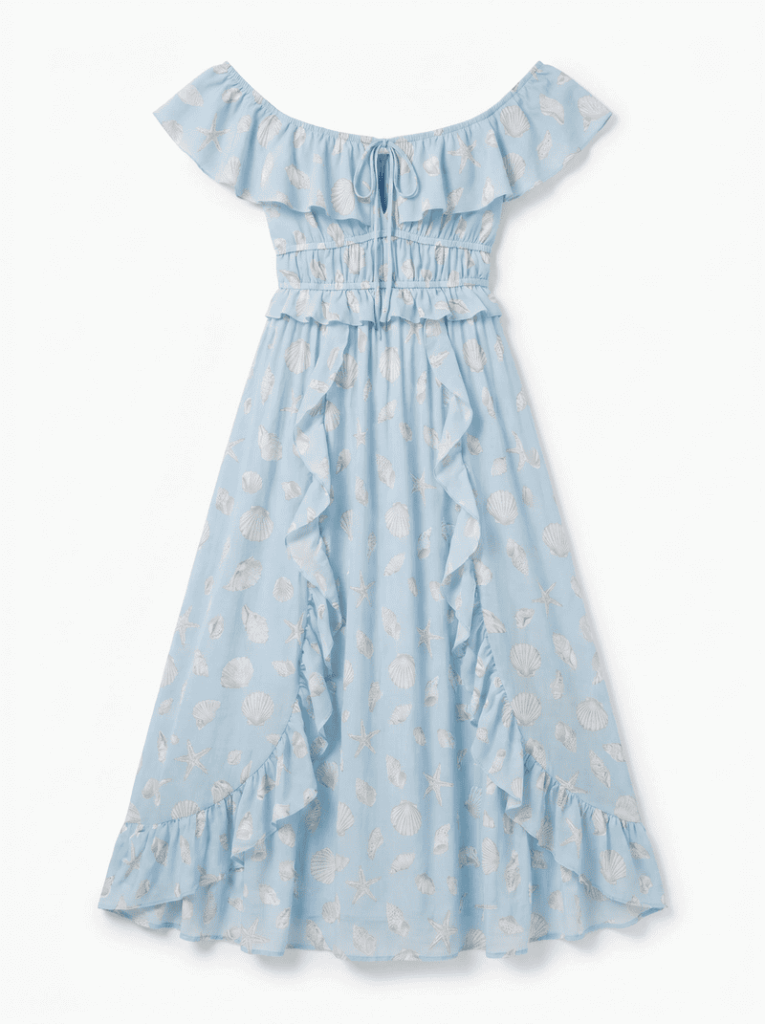
Once both images are uploaded, the AI generates a realistic preview of the fabric’s texture, color, pattern scale, and overall appearance on the garment. From here you can compare multiple fabric options on the same garment shape. You can also test the same fabric across several silhouettes, all without producing a single physical piece.
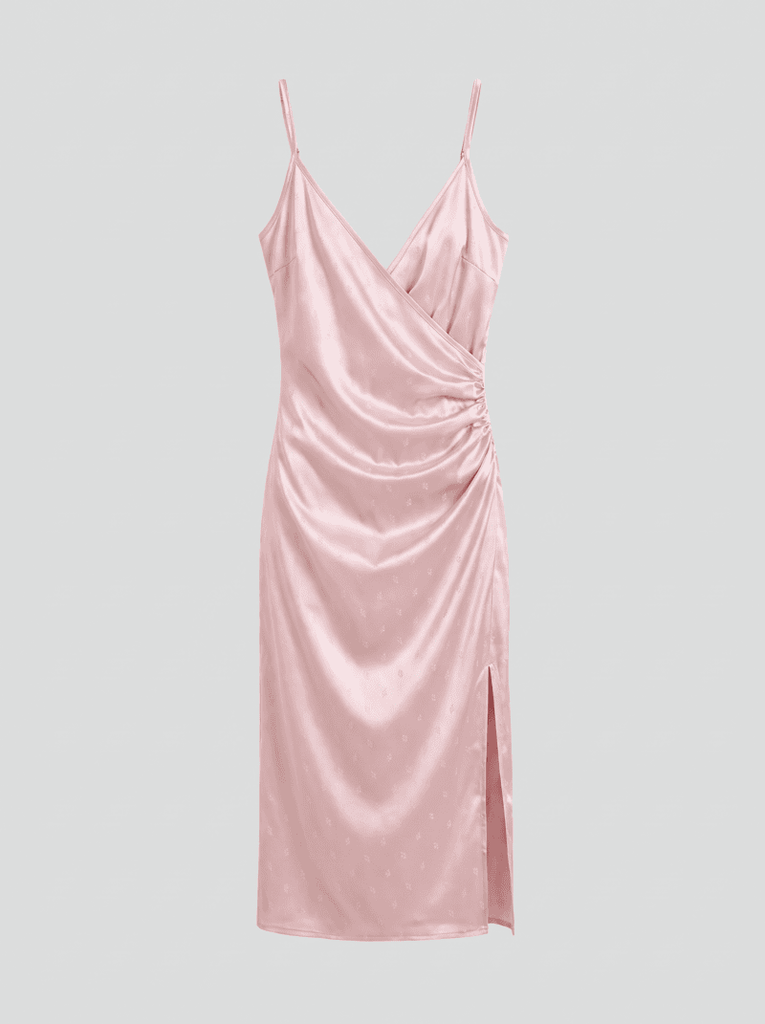
Generate a realistic preview of the fabric's appearance on the garment.
Fashion Diffusion AI-generated

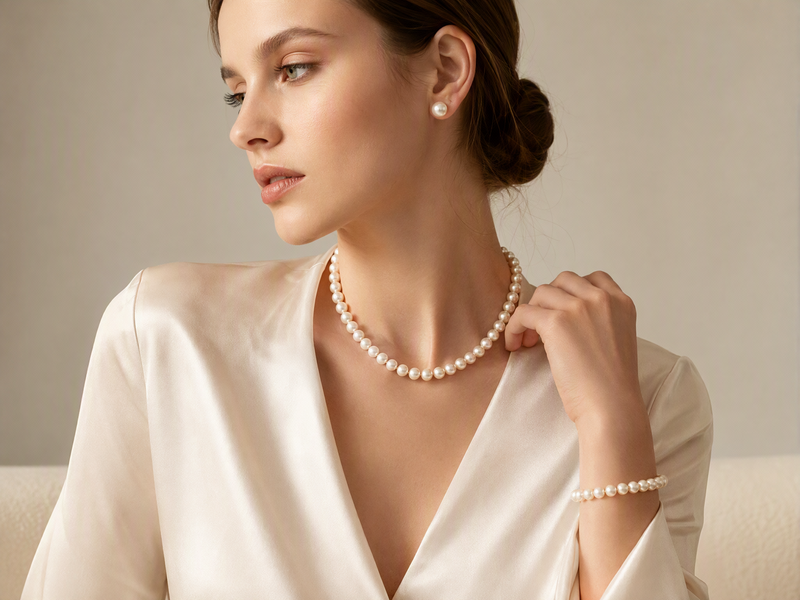
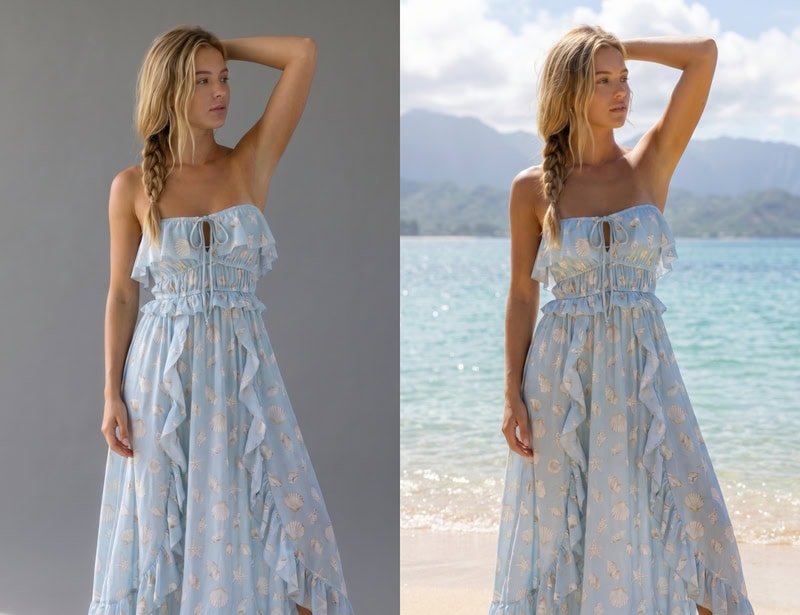
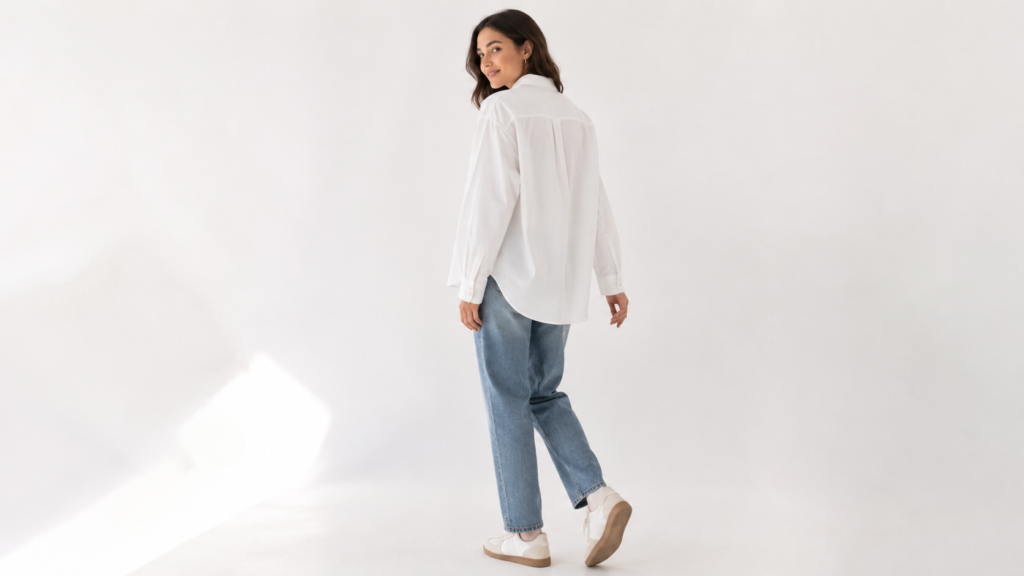
To take the result further, feed the fabric-applied garment into Fashion Diffusion’s virtual try-on tool. That lets you see how the finished piece looks worn by a model before making a final call.
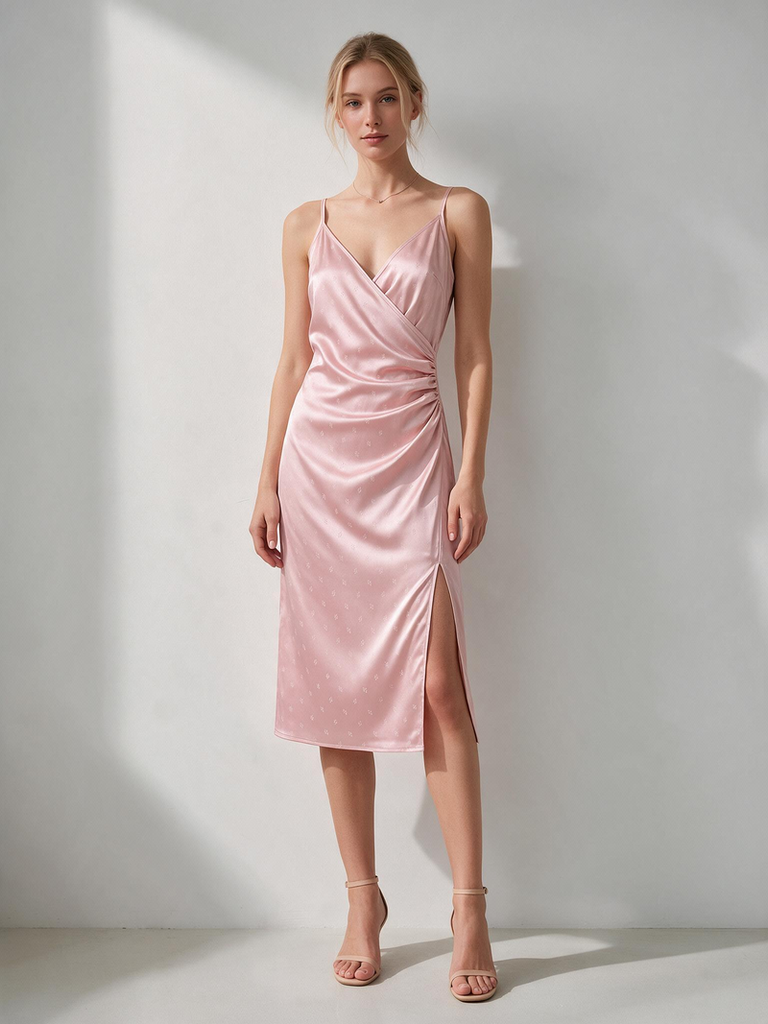
See how the finished piece looks worn by a model.
Fashion Diffusion AI-generated

Who Uses Fabric to Garment AI

Fabric visualization is not limited to one type of fashion business. The people who benefit most tend to fall into four groups, each using the same core workflow for a different purpose.

Independent Designers

For a designer working alone or with a small team, sampling budgets are tight and every wasted round matters. Testing how silk drapes on a slip dress or how a bold print scales on a t-shirt before ordering fabric helps designers commit to a direction with more confidence. It also frees up physical sampling budget for the options that already look right.

Brand Buyers and Merchandisers

Buyers often need to evaluate several fabric options across a season’s line before committing to a purchase order. Seeing a fabric applied to the actual garment shape, instead of judging it from a swatch card, makes it easier to compare options. It also helps the whole team move faster toward a final decision.

Fabric Suppliers

Suppliers traditionally rely on physical sample books to show buyers and design teams how a new textile performs. Applying a new fabric to several garment styles digitally lets suppliers demonstrate range and versatility without producing and shipping physical books for every account.

E-commerce Sellers

Offering a garment in multiple fabric or colorway options usually means ordering and photographing a separate sample for each variation. Generating fabric variations digitally from a single garment reference lets sellers expand their product listings without multiplying production and photography costs. Sellers who also need to show a garment styled as a full outfit, rather than just a fabric change, can pair this with Fashion Diffusion’s AI clothes changer. It swaps entire looks on the same model photo.

When You Still Need a Physical Sample

AI fabric visualization shows how a material may look on a garment. It does not measure the fabric’s physical properties or guarantee how it will behave in production. Fit, stretch recovery, colorfastness, wash performance, and durability still require an actual sample in hand before a style moves into production.

The value of visualizing fabric on a garment first is that it narrows the field. Instead of ordering several physical samples to compare several fabric options, a brand can visualize them digitally and eliminate the ones that clearly do not work. That leaves physical sampling for the options that are genuinely worth the time and cost.

See Your Fabric on a Garment Before You Sample

Guessing from a flat swatch is no longer the only option. With Fashion Diffusion‘s Apply Fabric, you can upload a fabric photo and a garment reference and see a preview in seconds instead of waiting weeks for a physical sample. Compare fabric options digitally before deciding which ones are worth sampling. Free to start!

FAQ

Can AI accurately show how a fabric will drape on a garment?

AI fabric visualization gives a strong visual estimate of how a fabric will appear on a garment, including how heavier and lighter materials tend to fall differently. It previews appearance rather than measuring physical properties, so final fit and hand feel still need a physical sample.

Does fabric visualization work for prints and patterns, not just solid fabrics?

Yes. AI fabric tools can map printed textiles, allover patterns, and placement prints onto a garment with estimated scale and placement. That makes it useful for spotting scale issues before a print goes to production.

Can I visualize different fabrics on the same garment?

Yes. Using the same garment reference, you can test multiple fabrics and compare color, texture, print scale, and overall appearance side by side.

Can I preview a print or pattern on a garment before it goes into production?

Yes. You can generate or upload a pattern and apply it to a garment reference to see how the repeat and scale look before committing to yardage.

Is AI fabric visualization free to use?

Fashion Diffusion offers free credits to get started with Apply Fabric. Therefore, you can test the workflow before committing to a paid plan for higher volume use.

Does this replace working with a fabric mill or manufacturer?

No. It replaces some of the guesswork in the early decision-making stage. Sourcing, fabric testing, and final production sampling still go through your usual suppliers and manufacturers.
Avatar photo 通过Alexander Wilson

8 Best Apps to Remove Background for Selling Clothes in 2026

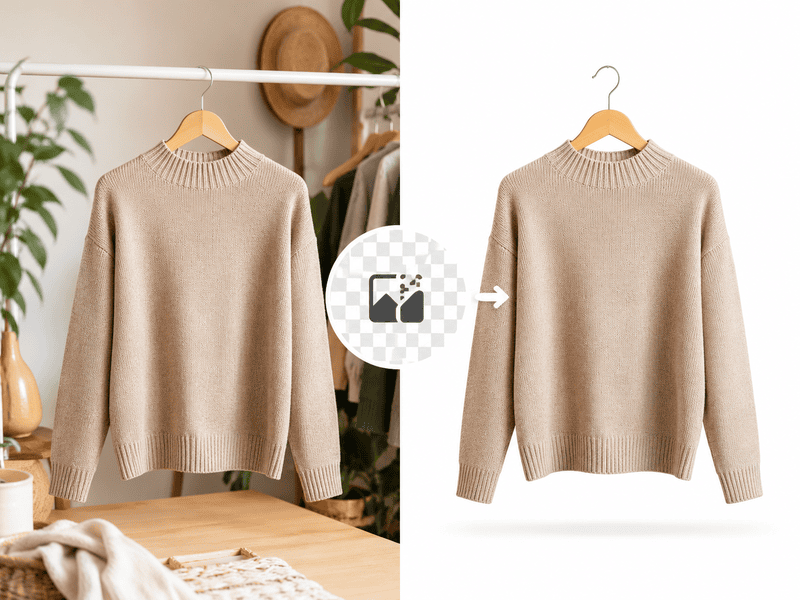
Most people selling clothes online are photographing items at home — not in a studio. The background is usually a bedroom floor, a chair, or a wall. A background remover turns that into a clean, professional listing image in seconds. The problem is that clothing is one of the harder categories for AI background removal: lace, sheer fabric, knit texture, and fringe all create edges that generic tools tend to blur or cut into.

This guide covers eight of the best background remover apps for selling clothes, evaluated specifically for how well they handle clothing — not just simple hard-edged products.

What a Clean Background Actually Does for Your Listings

Removing the background from a clothing photo isn’t just about aesthetics — it directly affects whether your listing sells. On resale platforms, listings with clean white or neutral backgrounds consistently outperform photos taken against cluttered home backgrounds, even when the item is identical.

Platform requirements reinforce this. Amazon requires pure white backgrounds for main product images. Poshmark added native background removal because the conversion data supports it. On Depop, where aesthetic matters most, a clean flat lay or cutout signals that the seller takes their listings seriously.

For sellers who want to go beyond white — swapping in lifestyle scenes or studio settings — changing clothing backgrounds with AI has become a practical alternative to reshooting.

What to Look For in a Background Remover for Clothing

Clothing has more edge complexity than most product categories. These three factors separate the tools that handle it well from the ones that don’t.

  • Edge accuracy on fabric: Lace, sheer layers, knit edges, and fringe need precise handling. Generic tools leave blurred edges or cut into the garment.
  • Output resolution: Some free tiers cap resolution or add watermarks. Check what you actually get before committing.
  • Workflow integration: The best tools let you replace the background immediately after removing it, producing a finished listing image in one place.

8 Best Background Remover Apps for Selling Clothes

The tools below range from free mobile apps to professional e-commerce workflows. Each one is assessed on edge accuracy with clothing, pricing, and which type of seller it actually suits.

1. Fashion Diffusion

Fashion Diffusion’s background remover is built for fashion and clothing photography. It handles sheer fabrics, knit textures, fringe, and lace with accuracy that general-purpose tools tend to miss, which is where most clothing sellers run into trouble with other options.

Fashion Diffusion's background remover interface.

Unlike standalone background removal tools, Fashion Diffusion is a full fashion image platform. The background remover sits alongside virtual try-on, AI model generation, flat-lay creation, and AI fashion video — meaning sellers and brands that grow beyond basic background removal don’t need to piece together separate tools. Everything is in one place.

Pricing: Free credits on signup; paid plans for higher volume.

2. Photoroom

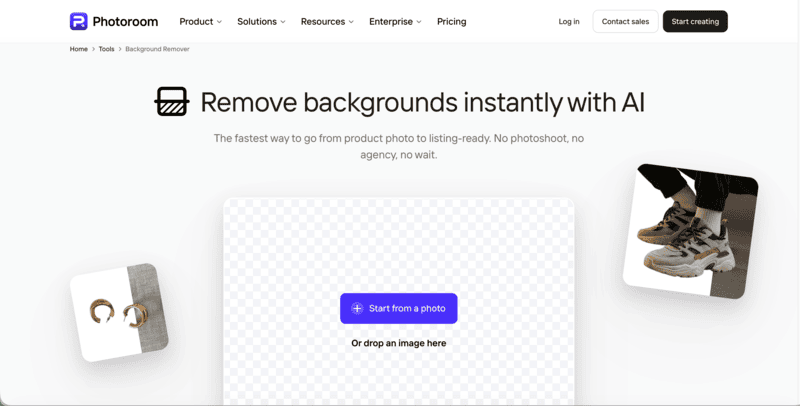
Photoroom started as a mobile-first background remover and has grown into a broader product photography toolkit. The background removal is fast and accurate, batch processing works well for large catalogs, and the app includes AI background generation and product staging. 

Photoroom's background remover interface.

The mobile app experience is among the best available — useful for sellers who photograph, edit, and list from their phone in one session.

Pricing: Free plan available; Pro from $12.99/month (or $7.50/month billed annually).

3. Remove.bg

Remove.bg is one of the oldest and most recognized AI background removal tools, built for upload-and-done simplicity with strong API coverage. 

Remove.bg's background remover interface.

Edge quality on hair and fine textile detail is among the best available — it handles complex fabric boundaries reliably. The free tier gives a low-resolution preview; full resolution requires credits.

Pricing: Free low-resolution preview; full resolution from ~$0.39/image.

4. Canva

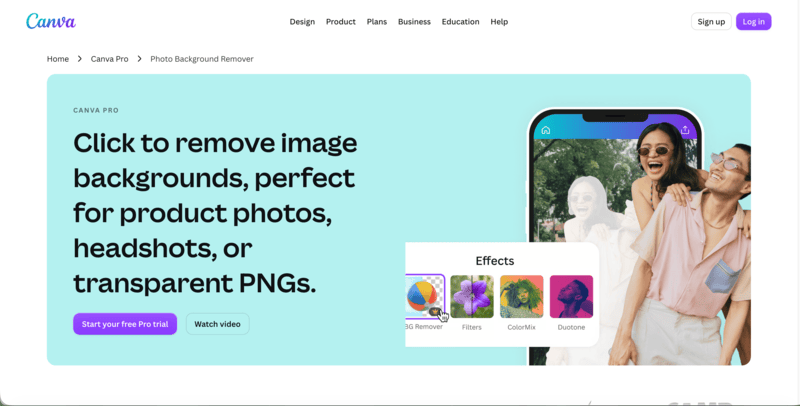
Canva‘s background remover lives inside its familiar design editor — you remove the background and immediately drop the cutout into templates for social media or listings. 

Canva's background remover interface.

The removal itself is solid for most clothing items. The real value is the workflow: sellers already living in Canva don’t need to switch tools to get a finished asset. Background removal is Pro-only, so it only makes sense if you’re already paying for Canva.

Pricing: Pro plan required — $18/month or $119.99/year.

5. Pixelcut

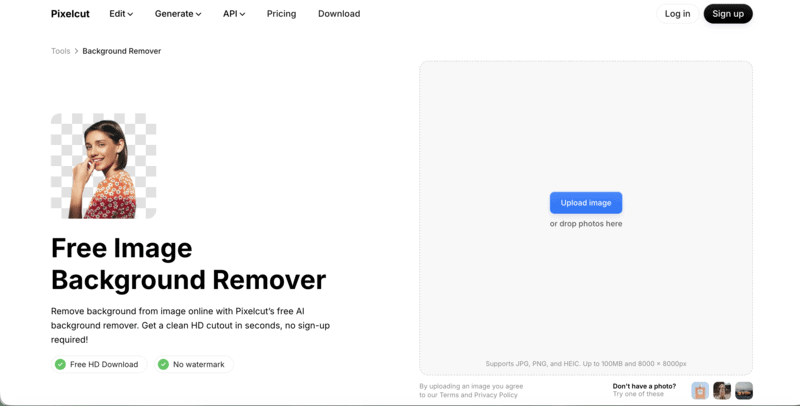
Pixelcut offers unlimited HD background removal with no watermark on its free tier, which makes it the most accessible genuinely free option on this list.

Pixelcut's background remover interface.

It’s mobile-first and clean, suited to casual resellers who need basic removal without a subscription. Edge quality is good on most clothing but can struggle with very fine details like lace or sheer fabric.

Pricing: Free — unlimited HD removal, no watermark. Paid plans add extra features.

6. Adobe Express

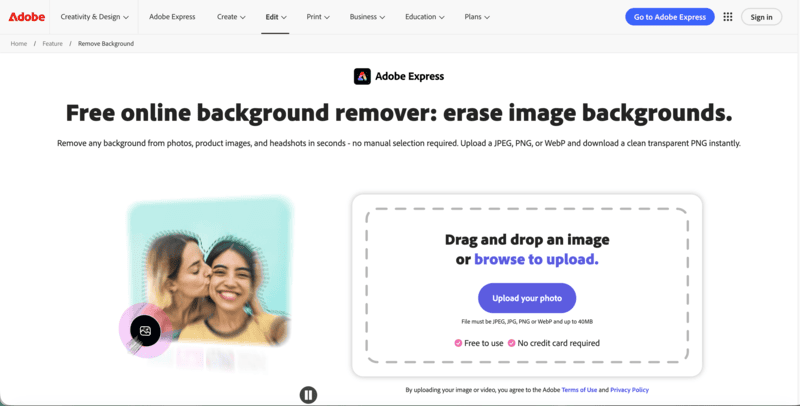
Adobe Express fits neatly into existing Adobe workflows — background removal connects directly to Photoshop, Illustrator, and Creative Cloud assets. 

Adobe Express's background remover interface.

For pixel-precise API access and developer integrations, the accuracy on detail edges is exceptional. For sellers already in the Adobe ecosystem, it removes the need for an additional tool. For anyone not already in Adobe’s world, the tools above are simpler starting points.

Pricing: Free plan with limited access; Premium from $9.99/month.

7. Claid

Claid is suited to e-commerce teams that need background removal followed by resizing, padding, background generation, and upscaling through one workflow or API.

Claid's background remover interface.

It’s the most automation-friendly tool here, built for consistent, high-volume processing rather than individual one-off edits. Not the right fit for a casual reseller, but well-suited to a small clothing brand managing catalog photography at scale.

Pricing: Free trial credits on signup; paid from $9/month.

8. Pixian

Pixian.ai keeps the pitch simple: clean background removal at a low price, with no subscription — pay as you go, with a free tier at 0.25 megapixels.

Pixian's background remover interface.

For sellers who only need occasional cutouts and don’t want a monthly commitment, this is the most cost-efficient option. It stops at the cutout though — no staging, no replacement backgrounds, no batch workflow.

Pricing: Free at 0.25MP; full resolution from $0.05–0.10/image, pay-as-you-go.

How to Remove a Background with Fashion Diffusion

If Fashion Diffusion is the right fit for your workflow, here’s how the process works. Everything runs in the browser — no software to install, no manual selection or masking.

Step 1: Upload Your Clothing Photo

Use any photo of the garment — flat lay, on a hanger, or on a model. The cleaner the original photo, the more accurate the edge removal. A well-lit image with the garment clearly separated from the background gives the AI the most to work with.

Upload your clothing image.
Fashion Diffusion AI-generated

Step 2: Let the AI Process

The tool identifies the garment and removes the background automatically. Sheer fabrics, lace, knit edges, and fringe are all handled without manual adjustment.

Let the AI process.

Step 3: Download the Result

Export the cutout in high resolution. The output is ready for direct upload to any selling platform — Poshmark, Depop, Vinted, Amazon, Shopify, or your own store.

Final output generated by Fashion Diffusion's AI background remover.
Fashion Diffusion AI-generated

What to Do After You Remove the Background

A transparent PNG is the starting point, not the finish line. What you put behind the clothing determines whether the final image looks like a professional listing or just a slightly cleaner home photo.

For resale platforms, a plain white background meets most marketplace requirements and is often the fastest path to a clean listing. For sellers building a brand or running their own store, a lifestyle setting — a clean interior, a styled surface, an outdoor scene — adds context that a white background can’t provide and signals brand quality to buyers.
Fashion Diffusion’s background changer handles both. After removing the background, you can replace it with a white studio setting for marketplace listings, or generate a lifestyle scene matched to the garment’s aesthetic — all without a separate shoot. The result is a finished product image rather than a plain cutout.

Comparison photo by Fashion Diffusion's background changer.
Fashion Diffusion AI-generated

The Right Tool Starts with the Right Fit

The right background remover for selling clothes depends on your volume, your platforms, and how finished you need the output to be. For casual resellers, Pixelcut’s free plan handles most situations. For sellers who need fabric-accurate removal and a complete image — cutout, background, listing-ready — Fashion Diffusion is the most complete workflow available.

New accounts start with free credits. Upload a clothing photo and see how the background removal app handles clothes like yours — free to try.

FAQ

What is the best free app to remove background for selling clothes?

Pixelcut offers unlimited HD background removal with no watermark on its free plan. Fashion Diffusion includes free credits on signup. Remove.bg offers a free low-resolution preview. For sellers already paying for Canva Pro, its built-in remover is also solid.

Which background remover works best on clothing with fine details like lace or sheer fabric?

Fashion Diffusion’s remover is built specifically for clothing and handles fine fabric edges more accurately than general-purpose tools. Remove.bg also performs well on complex edges.

Do I need to remove the background before selling clothes online?

Not always, but it improves listing performance significantly. Amazon requires white backgrounds for main product images. On Depop and Poshmark, clean backgrounds consistently outperform cluttered home photos.

Can I replace the background after removing it?

Yes. Fashion Diffusion lets you remove the background and replace it with a white studio setting or a lifestyle scene. Photoroom and Canva also offer background replacement after removal.

Is Fashion Diffusion’s background remover free to try?

Yes. New Fashion Diffusion accounts start with free credits that can be used on the background remover tool—no payment required to get started.

Avatar photo 通过Alexander Wilson

Try On Necklaces, Earrings & Bracelets Virtually — Full AI Try-On Guide

Jewelry is one of the hardest product categories to shop online. A necklace in a product photo tells you almost nothing about how it will actually sit on your neckline. Earrings that look delicate in isolation can overwhelm a face — or disappear entirely. A bracelet that reads as bold on a model’s wrist can look understated on a different one.

Virtual jewelry try-on changes what’s possible before you buy. Upload any jewelry image alongside a photo, and the AI generates a realistic preview showing how the piece actually looks when worn.

This guide covers everything: how the technology works, how to get the best results from each jewelry type, and how to use virtual try-on to make faster, more confident decisions whether you’re shopping or sourcing.

What Is Virtual Jewelry Try-On

Virtual jewelry try-on uses AI to place a jewelry image onto a photo of a person, generating a realistic preview of how that piece looks when worn. You upload two inputs — a jewelry product image and a person photo — and the AI renders the piece at accurate scale, correctly positioned for the jewelry type: at the neckline for necklaces, at the earlobe for earrings, at the wrist for bracelets.

The output isn’t a sticker overlay. The jewelry is rendered with proportional accuracy relative to the body, with lighting consistent with the source photo. Metal finish, gemstone detail, and chain structure all carry over from the product image.

How Does AI Jewelry Try-On Work

The AI reads two things: the jewelry’s physical characteristics from the product image, and the relevant body landmarks from the person photo. It then renders the piece at accurate scale with natural positioning — at the neckline for necklaces, at the earlobe for earrings, at the wrist for bracelets. The result reflects the specific proportions in your photo, not a generic model’s. That’s the difference between seeing whether a piece looks good, and seeing whether it looks good on you.

How to Try On Jewelry Online with AI

Now that you know what the technology does, here’s how to actually use it. The process is straightforward — two inputs, one result, ready in seconds. Fashion Diffusion’s virtual jewelry try-on handles necklaces, earrings, bracelets, and rings, all in the browser with no software to install.

Step 1: Find and upload your jewelry image

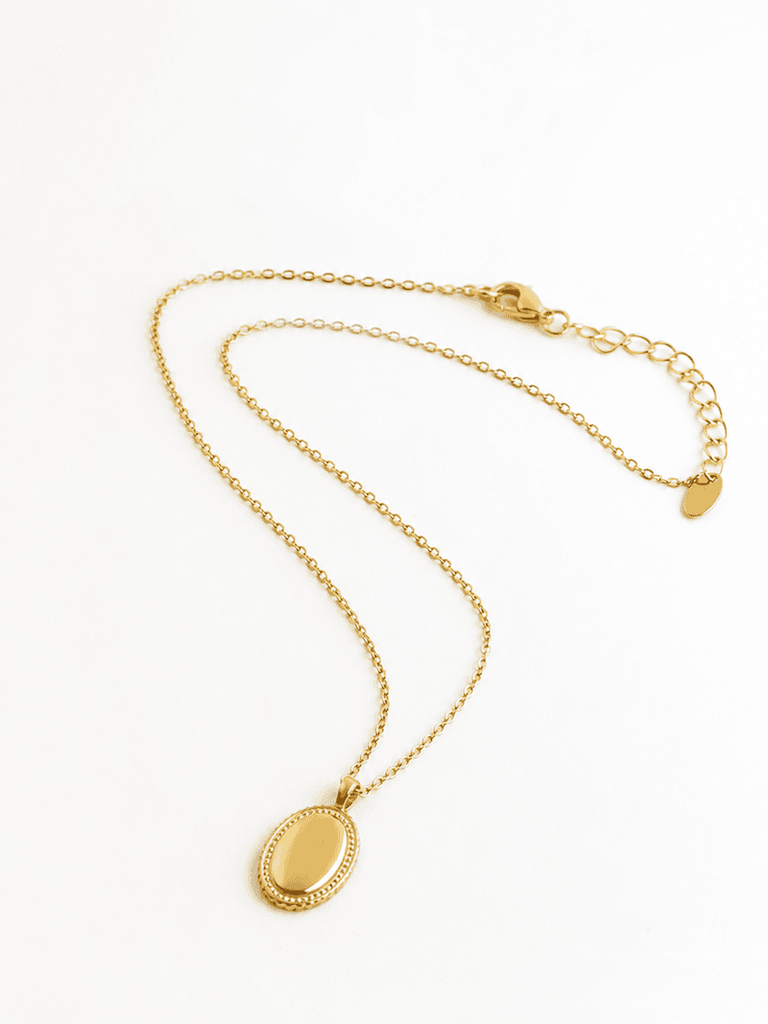
Start with a clean product photo — a packshot on a plain background, a brand site image, or a screenshot from anywhere online. The clearer the image, the more accurately the AI reads the jewelry’s details. Fashion Diffusion accepts PNG, JPG, JPEG, and WebP files up to 10MB.

Upload your jewelry image.
Fashion Diffusion AI-generated

Step 2: Upload your model or personal photo

Upload a photo of yourself or a model. For necklaces, use a photo that shows the neckline clearly — a slight neckline exposure works better than a high collar. For earrings, use a face-forward photo with ears visible and hair pulled back or to one side. For bracelets, use a photo with the wrist clearly visible, ideally in a neutral, relaxed position.

Upload your model image.
Fashion Diffusion AI-generated

Step 3: Generate and compare

The AI processes both images and generates the result in seconds. The jewelry appears at accurate scale, correctly positioned, consistent with the lighting in the person photo. For the most useful session, run the same person photo with multiple jewelry images — chain lengths, pendant sizes, earring styles, bracelet widths. Because the person is consistent across all comparisons, what you are evaluating is genuinely the jewelry, not lighting or model differences.

Final jewelry try-on effect.
Fashion Diffusion AI-generated

How to Get Better AI Jewelry Try-On Results

The quality of the output depends on the quality of the inputs. These four adjustments make the most consistent difference.

  • Use even, diffused lighting. Harsh shadows make it harder for the AI to place jewelry accurately. Natural window light works best.
  • Match the photo to the jewelry type. Face-forward for earrings, neckline visible for necklaces, wrist in frame for bracelets.
  • Use clean product images. Plain-background product shots give the AI the most to work with. Avoid heavily styled or cluttered images.
  • Compare on the same photo. Run three or four pieces against one person photo — the consistent background makes the differences genuinely comparable.

Try On Different Jewelry Styles with AI

Each jewelry type has its own visual logic — what makes a necklace work on one person doesn’t apply to earrings, and bracelets have different proportion relationships altogether. Here’s what to look for when you try on each type.

If you are shopping for rings specifically, we have a dedicated guide to virtual engagement ring try-on that covers the ring-buying process in depth.

Necklaces

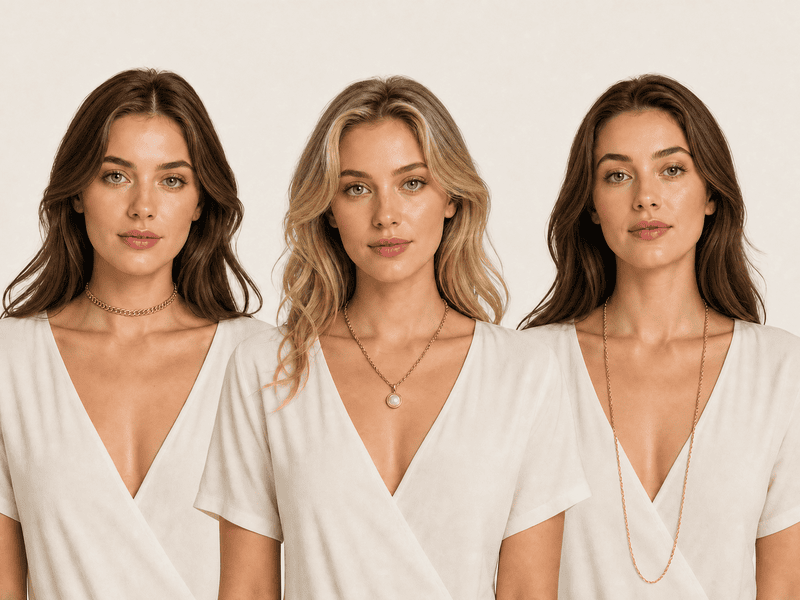
Of the three jewelry types, necklaces have the most direct relationship with outfit. The same chain looks completely different depending on what neckline it’s worn with — a long pendant disappears under a crew-neck, and a choker that reads as elegant with a V-neck can feel tight with a collared shirt. Drop length is the variable that changes everything: a choker creates a high, defined horizontal line; a princess length (around 18 inches) sits just below the collarbone; an opera or rope length falls dramatically lower and reads as maximalist or layered.

What to check in the try-on:

  • Where the pendant or chain falls relative to the outfit neckline — this is the single most useful thing the try-on reveals that a product photo can’t.
  • Whether the chain weight reads as proportional to the face and frame, or disappears against it.
  • How the metal color interacts with the skin tone in the photo — warm gold reads very differently against cool or warm skin undertones.
AI necklaces try-on comparison.
Fashion Diffusion AI-generated

Try on necklace online AI tools like Fashion Diffusion accept any saved product image from a brand site or Pinterest save. The AI places it at accurate drop length based on the person photo.

Earrings

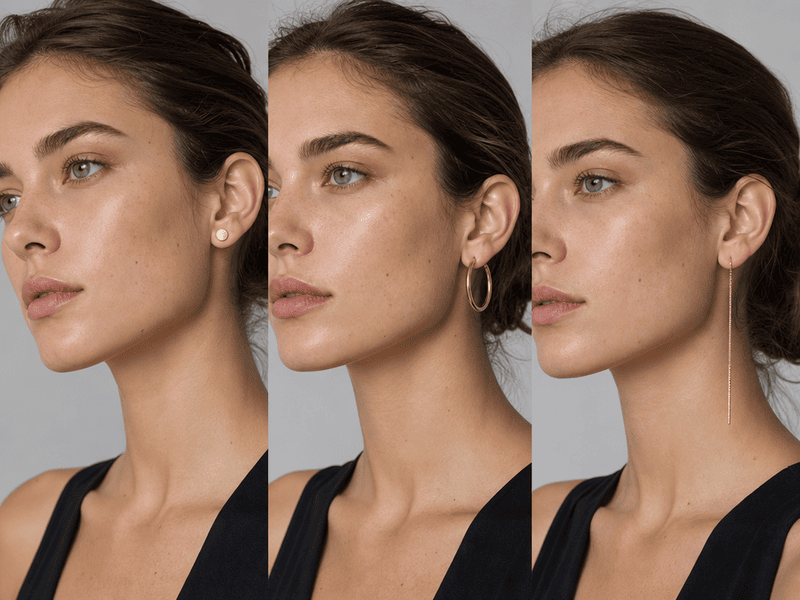
Earrings are the only jewelry type that frames the face directly — which makes them uniquely hard to evaluate without trying them on. A product image shows you the earring in isolation. What it doesn’t show is whether that earring makes your face look longer, wider, more balanced, or more crowded. A drop earring that photographs as delicate can visually shorten a round face. A bold hoop that reads as confident on one face shape can read as overwhelming on a narrower one.

What to check in the try-on:

  • Whether the earring extends below the jawline — length below the jaw elongates, length above it adds width, and the difference is only visible when you see it on an actual face.
  • How the earring width relates to the face width — wider than the cheekbone reads as statement; narrower reads as accent.
  • Whether the hair interferes — the same earring reads completely differently with hair up versus hair framing the face; try-on with the hairstyle you’d actually wear.
AI earrings try-on comparison.
Fashion Diffusion AI-generated

Try on earrings online AI — use a face-forward photo with visible ears. Pull hair back or to one side to get the most useful result. The AI positions the earring at the earlobe with accurate scale.
Bracelets

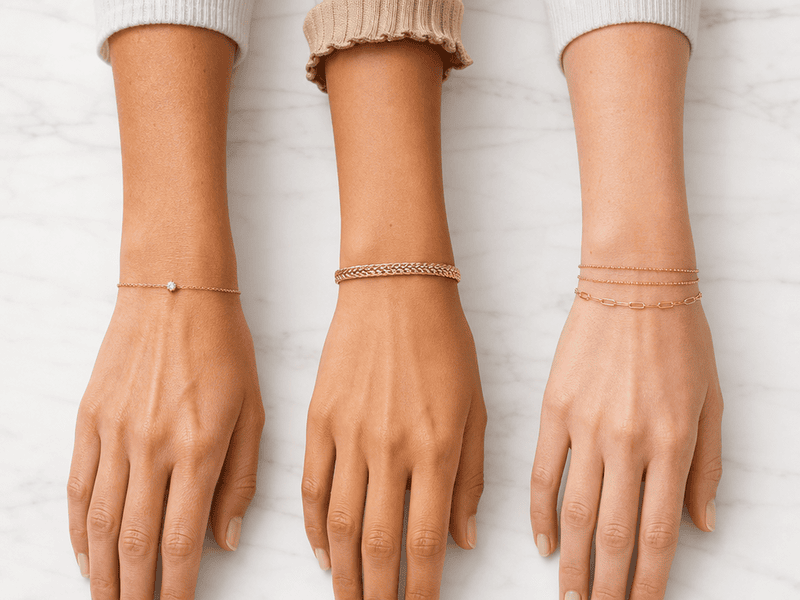
Bracelets have a dynamic quality that necklaces and earrings don’t — they move with the wrist, and they’re often worn in stacks. That makes proportion and combination the two things most worth evaluating before buying. A wide cuff that reads as sculptural on a wider wrist can look costume-heavy on a narrower one. A delicate chain that reads as understated can almost disappear. And with stacking, the visual weight compounds quickly — two or three bracelets that look good individually can read as cluttered together, or can look perfectly considered.
What to check in the try-on:

  • Whether the width reads as proportional to the wrist — this is harder to judge than it sounds, and the try-on makes it immediate.
  • For stacking: whether the combination feels intentional — layering different textures, metals, and widths is harder to visualize than a single piece.
  • The gap between the bracelet and the wrist edge — a bracelet that fits loosely reads differently from one that sits closer; the try-on shows how much visual presence the piece has at rest.
AI bracelets try-on comparison.
Fashion Diffusion AI-generated

Try on bracelet online AI tools work best with a wrist photo in a relaxed, neutral position. The AI places the bracelet at accurate width and position based on the wrist in the photo.

AI Jewelry Try-On for Shoppers and Jewelry Brands

The same tool serves two different workflows depending on who’s using it.

For shoppers, virtual jewelry try-on answers the questions product pages can’t. Does this necklace length work with how I dress? Do these earrings suit my face? Is this bracelet too wide for my wrist? Seeing the answer before purchasing reduces uncertainty and the returns that come from it.

For jewelry brands and e-commerce sellers, the tool generates on-model product visuals. No photoshoot needed. Upload a product image, choose or upload a model photo, and the AI produces a realistic on-model image ready for product pages, social content, or campaign materials. The same piece can appear on multiple models with different skin tones and proportions, without booking additional sessions.

Try On Any Jewelry with Fashion Diffusion

Knowing how a piece looks in a product photo and knowing how it looks on you are two different things. Fashion Diffusion‘s virtual jewelry try-on puts any necklace, earring, or bracelet on your photo in seconds — upload a product image from any source, add a person photo, and see the result before you decide.

New accounts start with free credits. Try the first piece and see whether the result changes how you shop for jewelry.

FAQ

What is virtual jewelry try-on?

A tool that places a jewelry product image onto a person photo using AI, generating a realistic preview of how the piece looks when worn. It shows accurate scale, natural positioning, and realistic rendering of metal finish and gemstone detail.

Does it work for necklaces, earrings, and bracelets?

Yes. Fashion Diffusion’s virtual jewelry try-on supports necklaces, earrings, bracelets, rings, and layered combinations. The AI positions each jewelry type correctly based on the person photo — at the neckline, earlobe, or wrist as appropriate.

What kind of photo gives the best result?

A well-lit photo where the relevant body area is clearly visible. For necklaces, a photo showing the neckline. For earrings, a face-forward photo with ears visible. For bracelets, a wrist photo in a relaxed position. Even, diffused lighting produces the most accurate AI rendering.

Can jewelry brands use this for product photography?

Yes. Brands and e-commerce sellers use Fashion Diffusion’s virtual jewelry try-on to create on-model product images without a photoshoot — placing pieces on AI models or uploaded photos to generate catalog and campaign visuals at scale.

Can I use it to try on jewelry for free?

Yes. New Fashion Diffusion accounts start with free credits that can be used on the virtual jewelry try-on tool.

Avatar photo 通过Alexander Wilson

Virtual Sneaker Try-On: See How 8 Popular Styles Look Before You Buy

Buying sneakers online means making a decision from a product photo. The shoe looks great flat on a white background. Then it arrives, you put it on, and something is off — the proportion isn’t what you expected, the colorway reads differently in real light, or it just doesn’t work with the way you actually dress.

Try your shoes on before you buy them — upload a photo of yourself and a photo of the sneakers, and see how they actually look on your feet, on your outfit, before you spend anything.

Why Sneakers Are Surprisingly Hard to Buy Online

Footwear has an 18% online return rate — the second-highest return category in e-commerce, after apparel. A significant portion of that is down to one problem: the shoe on a flat white background looks nothing like the shoe on an actual foot, in an actual outfit.

Sneaker product photography is deliberately idealized. The angle is chosen to show the shoe at its most flattering. The colorway is shot under optimal lighting. The scale is set by the photographer, not by a body. None of that tells you whether the chunky trainer that looks so good in the product image will overwhelm your frame, or whether the low-profile runner that seems subtle online will disappear into an outfit.

And the question product photos can’t answer at all: does this work with how you actually dress? A sneaker doesn’t exist on a white background. It exists with jeans, with a dress, with the specific proportions of your body. A virtual sneaker try on closes that gap — showing you the shoe on your own body, your own outfit, before you buy. That’s the core value of being able to try on shoes online with AI.

What Is AI Virtual Sneaker Try-On

AI sneaker try-on takes two inputs — a photo of a sneaker and a photo of a person — and generates a realistic image of that person wearing that shoe. The AI reads the sneaker’s shape, sole height, colorway, and construction from the product image, then places it naturally on the feet in the person photo, consistent with the outfit and proportions in the original.

The result isn’t a sticker dropped on top of a photo. The shoe is rendered at accurate scale relative to the body, in natural position, with lighting consistent with the source image. Try on shoes online with AI and you see the actual sneaker integrated into a real-looking scene.

How to Try On Sneakers Virtually with Fashion Diffusion

Fashion Diffusion’s free AI virtual try-on shoes tool runs in the browser. No app to download, no account required to get started.

Step 1: Upload a Sneaker Image

Use any sneaker product photo — a brand site image, a screenshot, or a saved photo from your wishlist. The AI reads the shoe’s shape, sole, colorway, and details automatically.

Upload your sneaker image.
Fashion Diffusion AI-generated

Step 2: Upload Your Photo

Upload a full-body or three-quarter photo of yourself. Even lighting and a clear background give the best result. The AI uses your proportions to place the shoe at accurate scale — which is where the useful information comes from.

Upload your model image.
Fashion Diffusion AI-generated

Step 3: See the Result

The AI generates a realistic on-foot preview in seconds. You see the sneaker at real scale, on your actual proportions, against your outfit. If you want to compare styles, upload the same personal photo with different sneaker images — the consistency makes the comparison useful.

Virtual sneaker try-on result generated by Fashion Diffusion.
Fashion Diffusion AI-generated

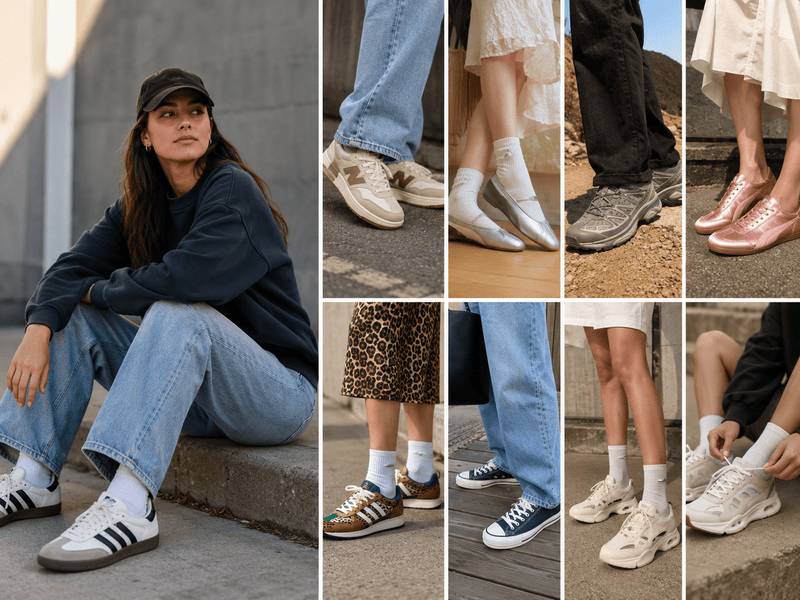
8 Sneaker Styles to Try On Virtually

These are the eight styles making the most noise in 2026 — and the things worth checking in a virtual try-on before you commit to buying.

Low-Profile / Skinny Sneakers

Low-profile, slim silhouettes are dominating 2026 — a deliberate move away from the chunky sneakers of recent years, with flat soles, quiet branding, and sleek materials leading the charge. Brands like Puma Speedcat, adidas Tokyo, and New Balance 204 are the reference points.

Low-Profile / Skinny Sneakers try-on result.
Fashion Diffusion AI-generated

What to check in the try-on: Low-profile sneakers look very different depending on the height of the person wearing them. On a taller frame, the flat, minimal silhouette reads as intentionally understated. On a shorter frame, they can disappear into the outfit. See how the proportions read against your actual height before buying.

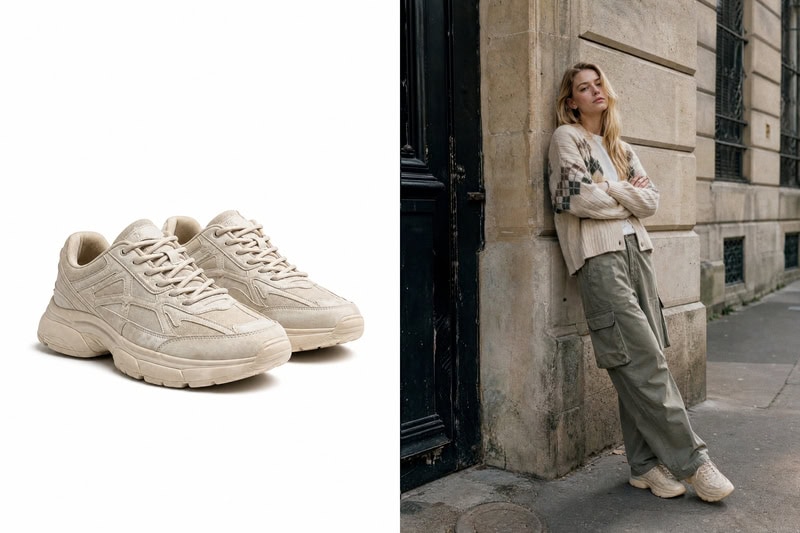
Retro Runners

Retro sneakers are in their main character era — throwback silhouettes and worn-in finishes leading the charge in the fashion space, with just enough nostalgia to make even the simplest outfit feel styled.

Retro runners try-on result.
Fashion Diffusion AI-generated

What to check in the try-on: Retro runners often have more sole height and bulk than they appear in product photos. The worn-in colorways also read differently against different outfit tones — a cream-and-gum sole can look warm and intentional with neutrals, or slightly muddy against cooler tones. A try-on against your actual wardrobe tells you which.

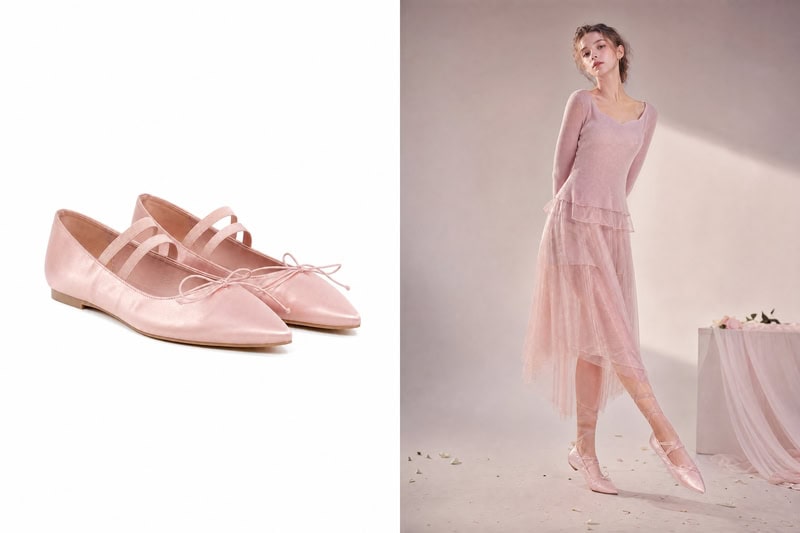
Sneakerinas / Ballet Sneakers

The breakout trend of 2026: sneakers that split the difference between a ballet flat and a traditional trainer. Skinny sneakers were all over the spring and summer runways — at Dries Van Noten in prints of pool blue, banana yellow, and turquoise, as well as solid cherry red and juicy pink, often styled with slouchy socks.

Sneakerinas / Ballet Sneakers try-on result.
Fashion Diffusion AI-generated

What to check in the try-on: The slim, pointed silhouette of a sneakerina reads very differently depending on outfit length. Against cropped trousers or a midi skirt, the proportions are elegant. Against full-length wide-leg trousers, the shoe can get lost. Try it against the specific outfit you are planning to wear it with.

Trail / Hiking Sneakers

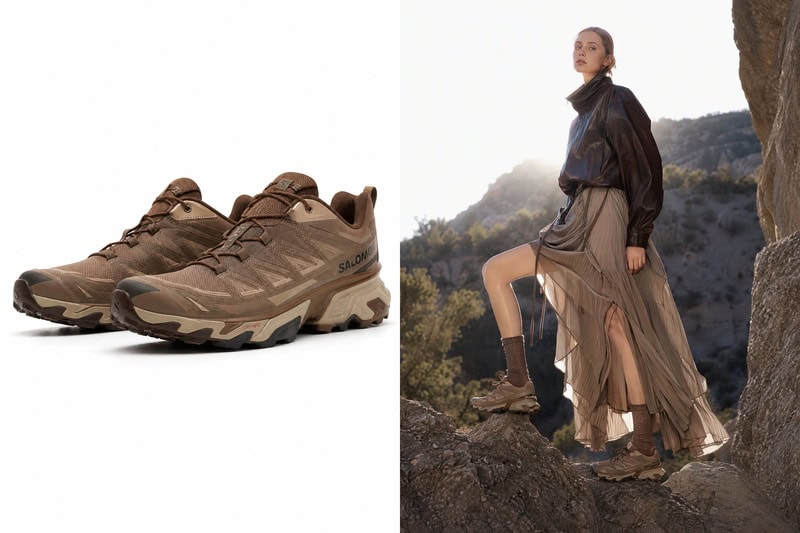
The Salomon XT-6 has become the cool girl sneaker of the season — trail runners crossing over from fitness into everyday fashion, and expected to get more popular into 2026. The chunky, technical sole is the defining visual.

Hiking sneakers try-on result.
Fashion Diffusion AI-generated

What to check in the try-on: Trail sneakers carry significant visual weight. The thick sole and technical construction that looks sharp in a product image can overwhelm a delicate outfit — but pair perfectly with tailored shorts, relaxed trousers, or a long skirt. See the contrast before you buy.

Satin / Luxury Finish Sneakers

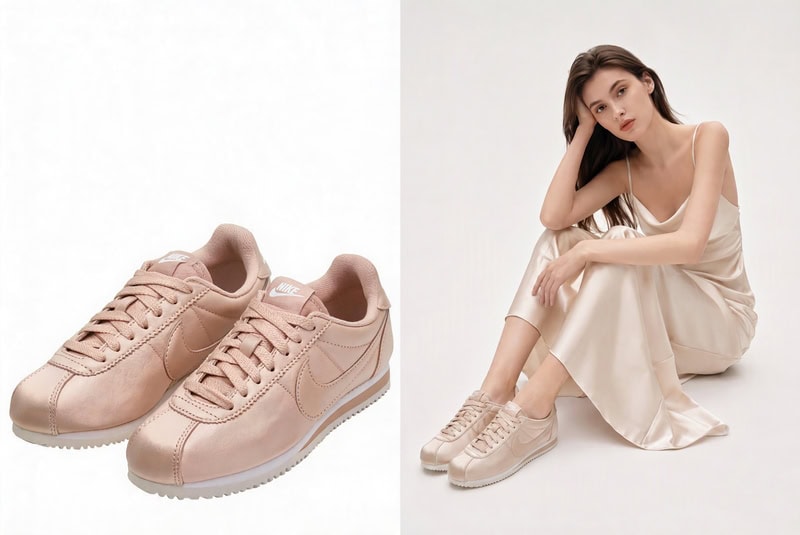
Iridescent finishes, satin uppers, and materials borrowed from eveningwear are having a moment. Who What Wear flagged satin sneakers as a key summer 2026 trend, with It girls styling them with dresses and skirts.

Satin sneakers try-on result.
Fashion Diffusion AI-generated

What to check in the try-on: Satin and iridescent finishes catch light in a way that reads completely differently in a product photo versus in real wear. The reflective surface also interacts with outfit color in ways that are hard to predict. A try-on against the actual outfits you’d wear them with is particularly useful here.

Mixed Media / Colorblock Sneakers

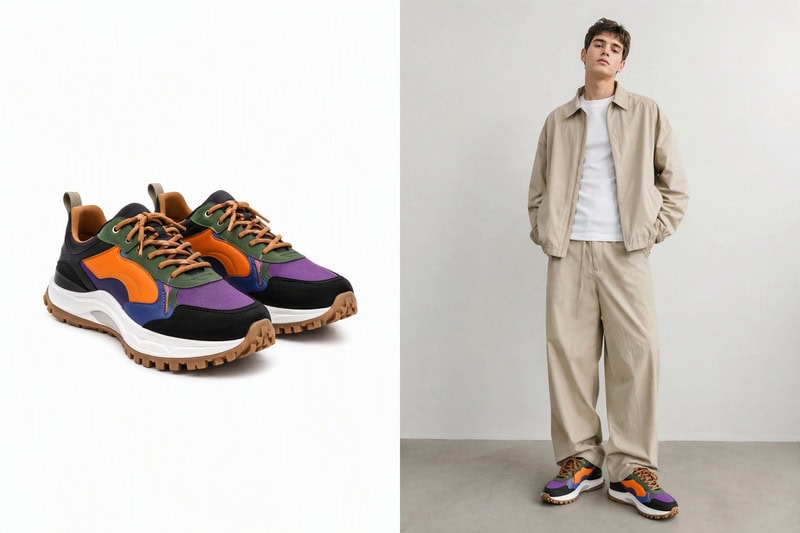
Bold colorways and material combinations — nylon with suede, leopard print with bright-green accents — are where 2026 sneaker design is getting interesting. Business Insider’s stylist panel called out mixed-media sneakers as a major 2026 trend, driven by a desire for something expressive after years of quiet luxury.

Colorblock sneakers try-on result.
Fashion Diffusion AI-generated

What to check in the try-on: The statement is the point — but a bold colorblock sneaker needs to work with your wardrobe, not against it. A try-on shows you immediately whether the color combination reads as intentional and pulled-together, or like it’s competing with everything else in the outfit.

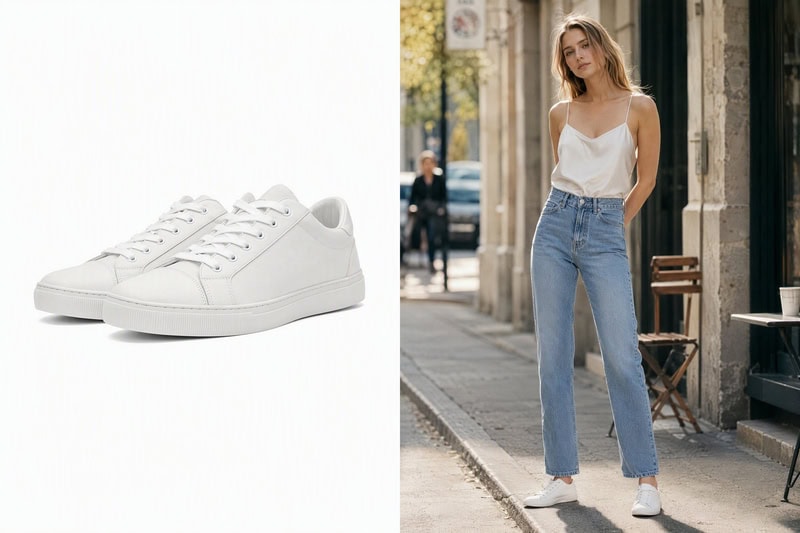
Canvas Low-Top Sneakers

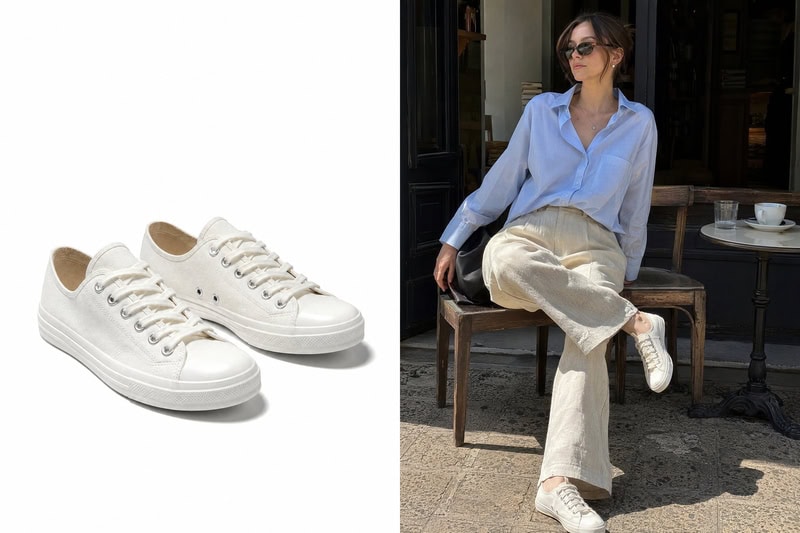
The Row, Jacquemus, and Veja have all brought the everyday canvas sneaker back onto serious fashion radars. Canvas sneakers are putting the everyday silhouette back on the radar this season — defined by a low-profile, lace-up look, these are the everyday pairs you can wear with just about everything.

Canvas low-top sneakers try-on result.
Fashion Diffusion AI-generated

What to check in the try-on: Canvas low-tops look clean and versatile in product photos. In wear, the visual effect depends heavily on the specific canvas color and outfit pairing. An off-white canvas toe reads very differently from a natural ecru against denim. The try-on is most useful here for color matching.

Cutout / Platform Athletic Sneakers

Sculptural soles, cutout details, and airy foam construction give this style a distinctive silhouette. Cutout kicks with airy, foamy soles and exposed socks are one of 2026’s more playful and irreverent sneaker directions — bold but still genuinely wearable.

Cutout athletic sneakers try-on result.
Fashion Diffusion AI-generated

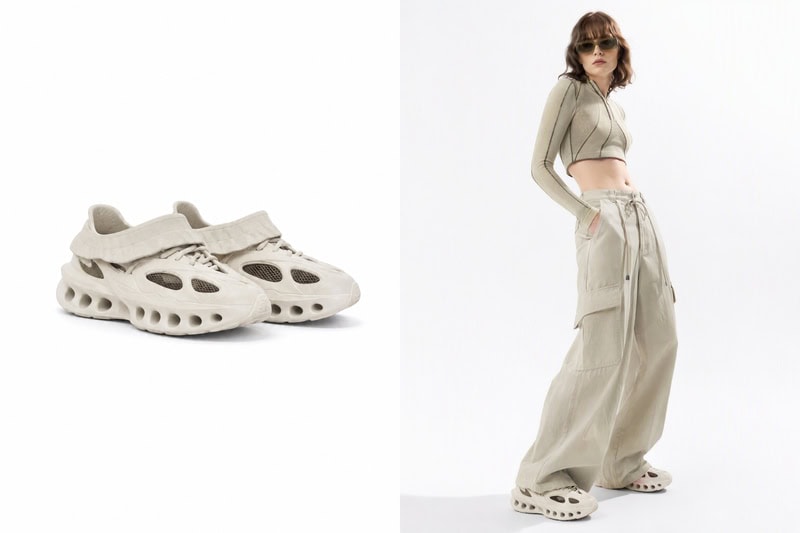
What to check in the try-on: The platform adds height, which changes how proportions read across the whole outfit. The cutout details also vary significantly in how bold they look depending on the specific model — some read as subtle and architectural, others as very statement-forward. See how the sole height works with your actual height before committing.

Try On Any Sneaker Before You Buy with Fashion Diffusion

The question you are really asking when you look at a sneaker online isn’t whether the shoe looks good in the photo. It’s whether it looks good on you, with the clothes you actually wear.

Fashion Diffusion’s AI sneaker try-on tool puts any shoe on your photo in seconds — upload a sneaker image from any brand or retailer, add a photo of yourself, and see the result before you decide. New accounts start with free credits.

FAQ

What is a virtual sneaker try-on?

An AI sneaker try on tool that places a sneaker product image onto a photo of a person using AI, generating a realistic preview of how the shoe looks when worn. It shows accurate scale and proportion relative to your body, so you can see whether the silhouette, colorway, and sole height actually work for you before buying.

What kind of photo do I need?

A full-body or three-quarter photo with even lighting and a simple background gives the most accurate result. The AI uses your proportions to place the sneaker at accurate scale, which is where the useful visual information comes from.

Can I try on shoes online with AI for free?

Yes. New Fashion Diffusion accounts start with free credits that can be used on the AI sneaker try-on tool.

How accurate is the AI try-on result?

The tool generates a realistic visualization showing the sneaker’s silhouette, sole height, colorway, and proportion relative to your body. It’s a visual preview, not a physical fitting — but it answers the questions product photos can’t, including how the shoe reads against your outfit and proportions.

Does it work for all sneaker types?

Yes. The AI shoe try-on supports sneakers, trainers, retro runners, platform sneakers, canvas low-tops, and other footwear styles — any sneaker image you can save or screenshot from a brand site works as an input.

Avatar photo 通过Alexander Wilson

AI Fashion Video Generator: How to Create Fashion Videos Without Filming

Video sells fashion better than photos. Shoppers who watch a product clip are significantly more likely to add it to their cart — by as much as 144% — than those who only see static images. And yet most fashion brands still rely on photography alone, because traditional video production is expensive, slow, and logistically heavy. A single filming day with a model, a crew, and a studio costs thousands of dollars before editing even starts.

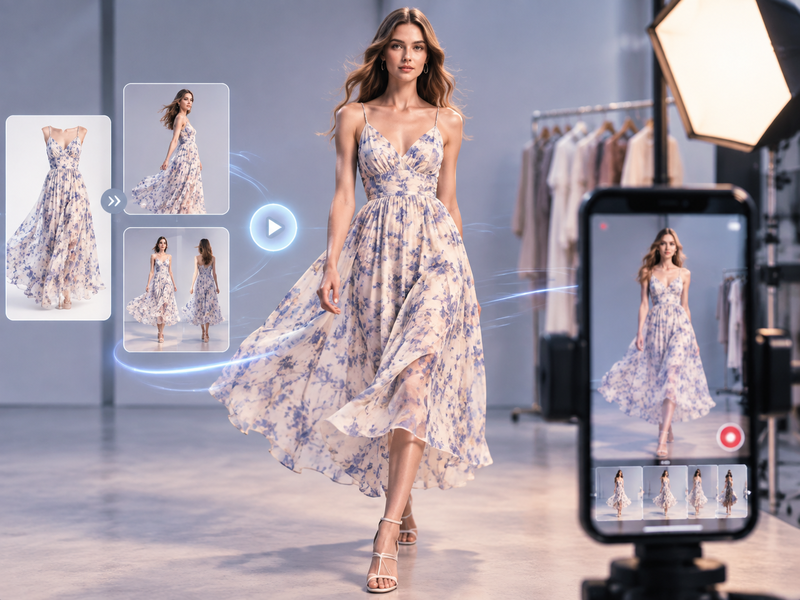
AI fashion video generators have changed that equation. Fashion Diffusion’s AI fashion video tool turns existing on-model photos into publish-ready video clips for TikTok, Instagram Reels, Amazon listings, and paid ads. No camera, no crew, no editing suite.

Why Fashion Brands Are Ditching the Film Crew in 2026

The demand for fashion video content has outpaced what traditional production can deliver. Instagram Reels now account for half of all time spent on the platform, and fashion is the most searched category on Instagram. TikTok Shop reached $66 billion in global GMV in 2025, with $23.4 billion projected for the US market alone in 2026. Short-form video ad spending hit $111 billion in 2025, the fastest-growing category in digital advertising.

Every major channel is prioritizing video. The brands that can’t keep up are leaving conversions on the table.

The production math doesn’t work for most brands. A full catalog shoot takes weeks to book, execute, and deliver. By the time finished video assets are ready, the product may have already sold through. Creating fashion video without filming — by using existing on-model photos as the source — solves both the timing and the cost problem. The same photo already in your asset library becomes a video clip in minutes, ready to go live the same day.

What You Need Before You Start

The quality of an AI-generated fashion video depends almost entirely on the source image. Getting the input right is more important than any tool setting.

  • Resolution matters. AI video generation stretches pixel data across motion frames, which means low-resolution images produce blurry, artifact-heavy results. 2500px or higher produces noticeably better results, especially in slow-motion sequences or close-up fabric shots.
  • Lighting should be even and diffused. Harsh shadows, backlighting, or uneven exposure confuse the AI’s reading of fabric texture and garment edges. Natural window light or soft studio lighting gives the AI clean data to work with. The lighting in the source image becomes the baseline for the entire video.
  • The background should be simple. Cluttered or busy backgrounds compete with the garment in motion. A plain, neutral background keeps the focus on the clothing throughout the clip.

How to Create Fashion Videos Without Filming — Step by Step

There are several best AI fashion video generators worth knowing about, but for a workflow built around on-model photography, Fashion Diffusion’s AI fashion video tool is purpose-built for the job. It runs in the browser with no software to install and no editing experience required.

Fashion Diffusion's AI fashion video generator interface.

Step 1: Upload Your On-Model Photo

Upload a clear, high-resolution on-model image. The garment should be fully visible, the model’s pose should be natural, and the background should be clean. The AI uses this image as the foundation for the entire video. Output quality reflects input quality directly.

Upload your model image.
Fashion Diffusion AI-generated

Step 2: Add a Description

Describe the motion and style you want. Name the movement type, the camera style, and the mood or aesthetic. The more precise the description, the closer the output will be to what you have in mind.

A few prompt examples:

  • Model walking forward confidently, fabric flowing naturally, editorial fashion style, slow motion.
  • Gentle fabric movement on a standing model, soft lighting, lifestyle mood, close-up on the hem detail.
  • Model turning slowly, 360-degree rotation, clean white background, ecommerce product style.
Add your motion description.

Step 3: Generate and Download

The AI produces the video in seconds. Review for fabric accuracy and natural movement — check that the garment moves realistically at the hem, sleeves, and neckline. If the first result isn’t right, adjust the description and regenerate. Once the output matches what you need, download in high resolution ready for direct upload to any channel.

Extend Your Video Library Without Extra Shooting

If you need more variety — different outfits, different poses, different model looks — you don’t need to go back to a shoot. Fashion Diffusion’s virtual try-on lets you generate on-model photos of any garment on any model from a single product image. Those AI-generated photos become new inputs for additional video clips, multiplying your video output from the same original asset.

Virtual try-on comparison photo.
Fashion Diffusion AI-generated

For brands that need a full multi-pose set from one image, the AI Lookbook generates a series of different poses and angles in one workflow. Each frame becomes a separate video source — giving you a varied video set that looks like it came from a multi-angle shoot.

Multi-angle e-commerce fashion photo generated by Fashion Diffusion's AI Lookbook.
Fashion Diffusion AI-generated

Where to Use AI Fashion Videos

The same AI-generated video clip can serve multiple channels with minimal adaptation. Here’s where fashion brands are putting them to work.

TikTok and Social Media

TikTok’s algorithm rewards volume and freshness. A brand that can produce multiple video variants from a single product photo can test more creative angles and post more consistently. Generate vertical 9:16 clips directly from your existing on-model photography and post the same day the product goes live.

For Instagram Reels and Stories, the same workflow applies. The visual language is slightly different — Reels can carry a more polished aesthetic than TikTok — but the source material and generation process are identical.

E-commerce Product Pages

Static product images are still the default on most product pages, which means video is still a competitive differentiator. A short 15-30 second clip showing fabric movement and garment drape communicates fit and quality in a way no still image can. For Amazon listings, Shopify product pages, and brand websites, a generated fashion video can be added directly alongside existing photography.

Paid Advertising

Video ads on Meta and TikTok consistently outperform static image ads for fashion categories. AI-generated video also makes creative testing practical at scale — generate three or four variants of the same product clip, run them against each other, and let performance data determine which direction to invest in for real production.

Start Generating AI Fashion Videos with Fashion Diffusion

The brands winning on video right now aren’t necessarily the ones with the biggest production budgets. They are the ones that can move fast — publishing the day a product launches, testing multiple creative angles in the same week, keeping their feeds and product pages fresh without waiting weeks for a shoot to deliver.

Fashion video no longer requires a filming day, a crew, or an editing timeline. Fashion Diffusion turns your existing on-model photography into publish-ready video clips for every channel, in minutes, from the photos you already have.

New accounts start with free credits. Upload your first on-model photo and see what the AI produces.

FAQ

What is an AI fashion video generator?

A tool that turns static fashion photos into short video clips using generative AI. You upload an on-model product image, describe the motion or style you want, and the AI produces a finished video ready for TikTok, Instagram, e-commerce listings, or paid ads — without a camera or editing software.

What kind of photo works best as input?

A high-resolution on-model photo with clean, even lighting and a simple background produces the best results. Aim for 2000×2000 pixels minimum — higher resolution produces noticeably better video quality, especially in slow-motion or close-up clips.

How long are the generated videos?

Fashion Diffusion’s AI fashion video generator produces clips in either 5 or 10 seconds — you choose the length before generating. Both formats work well for TikTok, Instagram Reels, and product page video.

Can I use AI-generated fashion videos for paid advertising?

Yes. Videos generated with Fashion Diffusion can be used commercially, including in paid ads on Meta, TikTok, and other platforms.

How does AI fashion video compare to a real filming session?

AI-generated video works best for catalog content, social media, and product pages where fabric movement and garment presentation are the goal. Traditional filming still has advantages for hero campaign content that needs human direction, specific locations, and editorial storytelling. For day-to-day catalog and social video, AI generation is faster, cheaper, and more scalable.

Is there a free way to try the AI fashion video generator tool?

Yes. New Fashion Diffusion accounts include free credits that can be used on the AI fashion video generator. Paid plans are available for higher-volume generation.

Avatar photo 通过Alexander Wilson

AI Lingerie Generator: How Brands Create On-Model Photos Without a Studio Shoot

A lace bralette looks completely different on a size 6 model than it does on a size 14. Shoppers know this. Brands know this. And yet most lingerie product pages still show one model, one size, one pose — and wonder why return rates are high.

The visual content demands of lingerie go further than almost any other category. A single product needs a white-background catalog image for the marketplace listing, lifestyle imagery for social media, campaign visuals for paid ads, and on-model photos across more than one body type. Sourcing all of that through traditional photography is slow, expensive, and rarely produces enough variation to cover every channel.

Brands that generate lingerie on model with AI can produce all of it from a garment photo and a model photo — without booking a studio or a photographer.

What Is an AI Lingerie Generator

An AI lingerie generator takes two inputs — a photo of the lingerie and a photo of the model — and generates a realistic on-body image showing the piece being worn. The AI places the garment onto the model, renders the fit and drape accurately for that body type, and produces a finished image. The result is ready for use across product pages, social posts, and campaign materials.

This is different from a general-purpose AI clothes generator. Lingerie is technically demanding for AI generation. Lace patterns, sheer fabrics, satin textures, and underwire construction all require accurate rendering to look realistic rather than flattened or distorted. A tool built specifically for intimate apparel handles these details in ways that general fashion AI tools typically don’t.

Why Lingerie Is One of the Hardest Categories to Shoot

The visual content demands of lingerie go beyond most other apparel categories. Three factors make it particularly difficult to produce at scale through traditional photography.

Fabric Complexity

Lace, sheer mesh, satin, and silk all behave differently under studio lighting and require different handling to photograph accurately. A lace bralette needs enough light to show the pattern without washing it out. A sheer bodysuit needs careful lighting to show the fabric’s transparency without looking cheap. Getting these details right in a traditional shoot requires an experienced photographer and often multiple setups per product. That kind of production overhead compounds quickly across a full catalog.

Lingerie has its fabric complexity.
Fashion Diffusion AI-generated

For AI generation specifically, fabric complexity is the hardest technical challenge in lingerie:

  • Lace requires the AI to render fine pattern detail without flattening it into a solid texture.
  • Mesh fabrics need accurate skin-tone rendering underneath the transparency layer.
  • Satin and silk depend on lighting simulation to show the fabric’s unique sheen.

Sizing and Body Type Coverage

Lingerie shoppers are acutely aware of how a piece will sit on their specific body. Seeing it on a single sample-size model leaves a significant portion of the target audience unable to picture themselves in the product. Brands that want to show the same piece across a range of body types need multiple models and multiple sessions. It’s a cost most brands absorb by simply not doing it.

AI lingerie generator adapts to different sizing and body types.
Fashion Diffusion AI-generated

Multi-Channel Visual Requirements

In 2026, the same lingerie item may need a clean e-commerce photo, an Instagram carousel image, a Pinterest moodboard, a TikTok Shop visual, a campaign image, and a landing page banner. Each of these has different requirements for background, lighting, pose, and composition. Traditional photography produces one set of images from one shoot. Adapting them across channels requires either multiple shoots or significant post-production work.

Model wearing lingerie with social media style.
Fashion Diffusion AI-generated

How to Generate Lingerie Product Photos with AI

The process requires two inputs and produces results in seconds. Fashion Diffusion’s AI lingerie try-on takes a photo of the garment and a photo of the model, places the lingerie onto the model, and generates a realistic on-body image — no studio, no additional equipment needed.

Step 1: Prepare your garment photo

A clean flat-lay or product photo on a plain background gives the AI the most accurate input. The garment should be fully visible with clear fabric detail — the AI uses this to understand the construction, texture, and color of the piece. Heavily styled or cluttered product shots produce less accurate outputs.

Upload your lingerie photo.
Fashion Diffusion AI-generated

Step 2: Upload a model photo

Upload a photo of the model you want to use. A front-facing, full-body image with even lighting works best. The AI uses this to map the garment onto the model’s body accurately, preserving natural drape and fit at key points like the waist, straps, and neckline.

Upload your model photo.
Fashion Diffusion AI-generated

Step 3: Generate and review

The AI combines both inputs and generates the on-model image in seconds. Review for garment accuracy — check that the fabric texture is rendered correctly and the fit looks natural. Adjust the model photo or regenerate if needed.

Generate the lingerie try on result.
Fashion Diffusion AI-generated

Step 4: Adapt for each channel

The same garment-and-model combination can be regenerated in different visual contexts. For brands that need the same look across multiple channel formats, Fashion Diffusion’s background changer lets you swap the backdrop on the generated image — a clean white studio setting for the marketplace listing, a lifestyle scene for social content — without regenerating the full look from scratch.

Change your photo background if needed.
Fashion Diffusion AI-generated

Prompt examples for different output styles:

  • E-commerce catalog: Clean studio lighting, neutral beige background, realistic fabric texture, elegant catalog style.
  • Lifestyle and social: Natural light, warm neutral bedroom background, editorial mood.
  • Campaign and paid ads: Soft pink background, gentle studio lighting, premium fashion magazine aesthetic.
  • Minimal product page: Soft studio light, simple white background, realistic fit, modern ecommerce look.

What AI Lingerie Generators Are Used For

The same tool serves different teams with different goals. Here’s how each uses it.

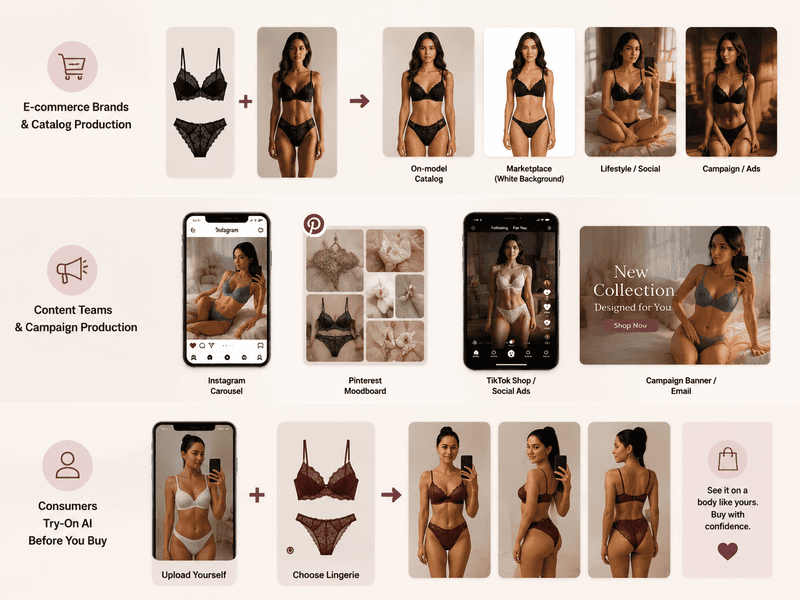
Ecommerce Brands and Catalog Production

For brands managing large catalogs, the core use case is producing consistent, channel-ready product imagery without booking shoots for every new style or colorway. An AI lingerie model generator produces on-model images from a garment photo and a model photo, showing fit, drape, and fabric detail that a flat-lay alone can’t communicate.

Common outputs from one garment-and-model combination:

  • On-model catalog photos across multiple body types;
  • White-background images for marketplace listings (Amazon, Shopify, Etsy);
  • Lifestyle and editorial versions for social media;
  • Campaign visuals for paid ads and landing pages.

Content Teams and Campaign Production

Social and campaign content requires a different visual register from catalog imagery — more atmosphere, more editorial feeling, more variety. The same product that appeared in a clean catalog image last week can appear in a lifestyle context this week.

From one garment-and-model combination, a content team can generate:

  • Instagram carousel images in editorial and lifestyle styles;
  • Pinterest-ready moodboard visuals;
  • TikTok Shop and social ad creatives;
  • Campaign banners for landing pages and email.

For brands running paid advertising, this also means faster creative testing. Generate a boudoir-style creative and a clean studio version from the same inputs, run them against each other, and let the data inform the next real shoot.

Consumers: Lingerie Try-On AI Before You Buy

For shoppers, the value is more personal. Lingerie try-on AI lets them see how a piece looks before committing to a purchase — on a body that resembles theirs, not just on a single sample-size model. Swimwear and lingerie have return rates of 30-35%, among the highest in fashion, with fit uncertainty cited as the primary driver. Seeing accurate fit information before buying is what changes that.

Use cases of the AI lingerie generator tool.

See Your Lingerie on a Model Instantly with Fashion Diffusion

Lingerie brands need more visual content, across more channels, showing more body types, than traditional photography can produce efficiently. Fashion Diffusion produces catalog images, social content, and campaign visuals from a garment photo and a model photo. At the speed and cost that catalog-scale production actually requires.

New accounts start with free credits. Upload your first garment photo and see what the AI produces.

FAQ

What is an AI lingerie generator?

A tool that generates realistic on-model lingerie images from two inputs: a garment photo and a model photo. The AI places the garment on the model, renders fabric texture and fit accurately, and produces finished images ready for e-commerce listings, social media, and campaign materials.

Can AI accurately render lace, sheer fabrics, and other delicate materials?

Yes, when the tool is built specifically for intimate apparel. Fashion Diffusion’s AI lingerie generator handles lace patterns, sheer fabrics, satin textures, and underwire construction. These are details that general-purpose AI fashion tools tend to flatten or distort.

What kind of input images work best?

Two images are needed: a clean garment photo and a model photo. For the garment, a flat-lay on a plain background with clear fabric detail works best. For the model, a front-facing full-body image with even lighting produces the most accurate result.

Can I use generated images commercially?

Yes. Images generated through Fashion Diffusion can be used commercially across product listings, social media campaigns, paid advertising, and marketing materials.

Can consumers use this to try on lingerie before buying?

Yes. Shoppers can use the lingerie try-on AI to see how a piece looks on their figure before purchasing. It provides the fit information that flat-lay product photos can’t.

Is there a free way to try the AI lingerie generator?

Yes. New Fashion Diffusion accounts start with free credits that can be used on the AI lingerie generator. Paid plans are available for higher-volume generation.

Avatar photo 通过Alexander Wilson

How to Make Clothes See Through in Photos with AI: A Complete Guide

Simulating transparent fabric effects used to mean manual layer adjustments, custom masks, and hours of editing. Even experienced designers found the process slow — and the results rarely looked natural. AI has changed that. A see through clothes filter powered by AI can transform the appearance of a garment in seconds, keeping the original pose, lighting, and composition intact.

This guide covers how to make clothes see through in photos with AI, how see through clothes AI works technically, and what fashion professionals and content creators actually use it for.

What Is a See Through Clothes Filter

A see through clothes filter is an AI image editing tool that creates the appearance of transparent or semi-transparent fabric in a photo. Instead of manually editing opacity or fabric layers, the AI analyzes the clothing area and generates a new material appearance based on the original image.

These tools can simulate different material effects, including sheer fabrics, mesh textures, lace, lightweight translucent layers, and futuristic fashion designs.

One clarification worth making upfront: AI see-through effects do not reveal hidden information or see through actual clothing. They create a generated visual interpretation of how a garment could look if made with transparent or sheer materials. The output is a new image — not a view through the original fabric.

How Does See Through Clothes AI Work

See through clothes AI creates transparent fabric effects by analyzing the clothing in an image and generating a new material appearance.

Instead of simply reducing opacity, AI considers factors such as:

  • Clothing shape and structure
  • Fabric texture and thickness
  • Lighting and shadows
  • The way the garment fits the body

Based on these details, AI can simulate different materials, such as sheer fabric, mesh, or lace, while keeping the overall style of the original image consistent.

The quality of the result also depends on the input photo. Clear clothing outlines, good lighting, and visible fabric details usually help AI generate more realistic effects.

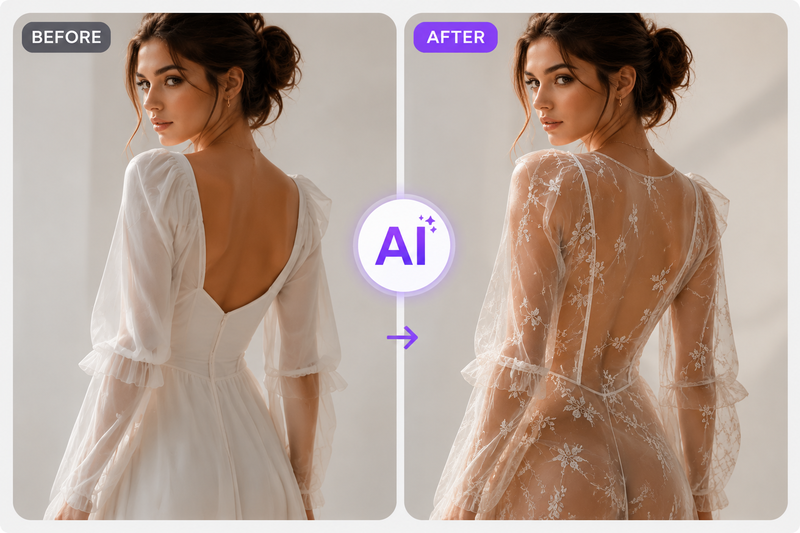
See through clothes effect before-and-after comparison.
Fashion Diffusion AI-generated

AI See Through Clothes Filter vs Traditional Photo Editing

Before AI tools became available, creating transparent clothing effects usually required traditional photo editing software. Editors needed to manually adjust layers, blend textures, and refine fabric details.

AI Xray Clothes provides a different workflow by generating the effect automatically based on the image and text instructions.

Traditional Photo EditingAI Xray Clothes
Editing processManual layer and mask adjustmentsAI-generated transformation
Required skillsRequires photo editing experienceEasier for beginners
SpeedTakes more time for complex editsFaster generation and iteration
Material explorationLimited by editing skillsEasy to test different fabric ideas
WorkflowDetailed manual controlPrompt-based creative exploration

Traditional editing is still useful when you need precise adjustments. However, AI tools are more convenient when you want to quickly explore different clothing materials, styles, or visual concepts.

What Are AI See-Through Clothing Effects Used For

AI see-through clothing effects are most useful when you need to explore a fashion idea before committing it to a physical sample or final image. Here are the main professional applications.

Exploring Fabric Variations Before Sampling

One practical use case is testing fabric ideas during the early design stage.

For example, a designer may have a jacket silhouette ready but want to explore different material options. They can use AI to compare how the design might look with:

  • A sheer mesh overlay
  • A lightweight translucent layer
  • A lace-inspired texture

This allows designers to evaluate different material directions before creating physical samples.

AI-generated concepts can be especially useful when experimenting with unconventional materials or layered transparent designs, helping teams decide which ideas are worth developing further.

Creating Fashion Concepts and Visual References

AI see-through clothing effects can also help creative teams develop visual directions for campaigns, editorials, and digital content.

For example, a brand planning a futuristic collection may want to explore how transparent fabrics, layered materials, or experimental styling could appear before organizing a photoshoot.

AI-generated images can be used as creative references to test:

  • Fashion campaign concepts
  • Editorial styling ideas
  • New material combinations
  • Social media visual directions

The goal is not to replace final product photography, but to help teams explore and communicate creative ideas more efficiently.

How to Make Clothes See Through in Photos with Fashion Diffusion

AI-powered clothing editing tools have made it easier to explore different fabric styles and visual effects without relying on complex photo editing software.

With Fashion Diffusion’s AI Xray Clothes, users can transform the appearance of clothing directly from an existing image. Instead of manually adjusting transparency, layers, or fabric textures, the tool uses AI to generate a new clothing effect based on the uploaded image and editing instructions.

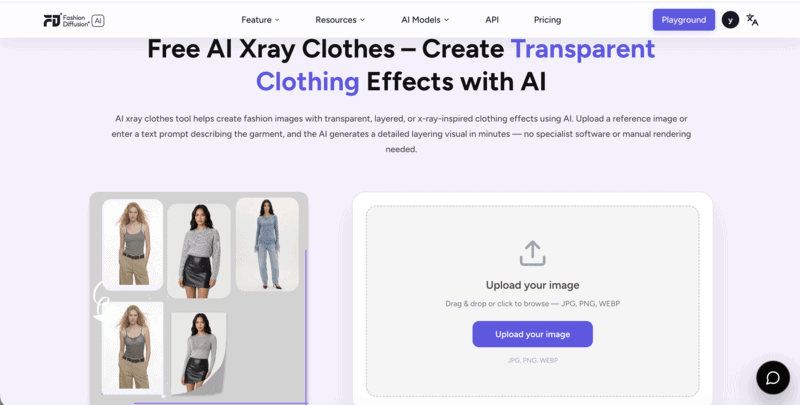
Fashion Diffusion AI x-ray clothes tool page.

The workflow is simple: start with a suitable image, describe the transparent fabric effect you want, and refine the result until it matches your creative direction.

Step 1: Upload a Clothing Image

The first step is to prepare an image where the garment is clearly visible.

This works best for:

  • Fashion product images
  • Model photos
  • Outfit images
  • Design references

A clear image helps AI better understand the garment structure, including its shape, folds, and overall style.

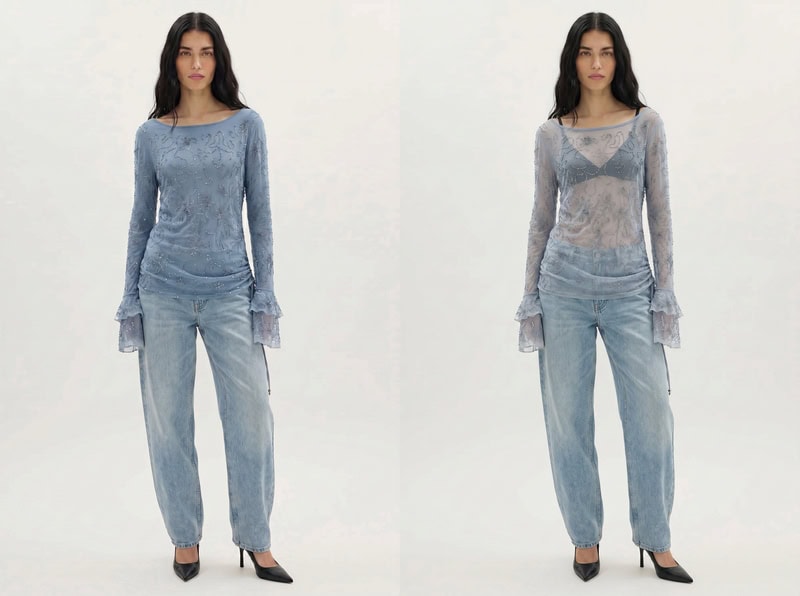
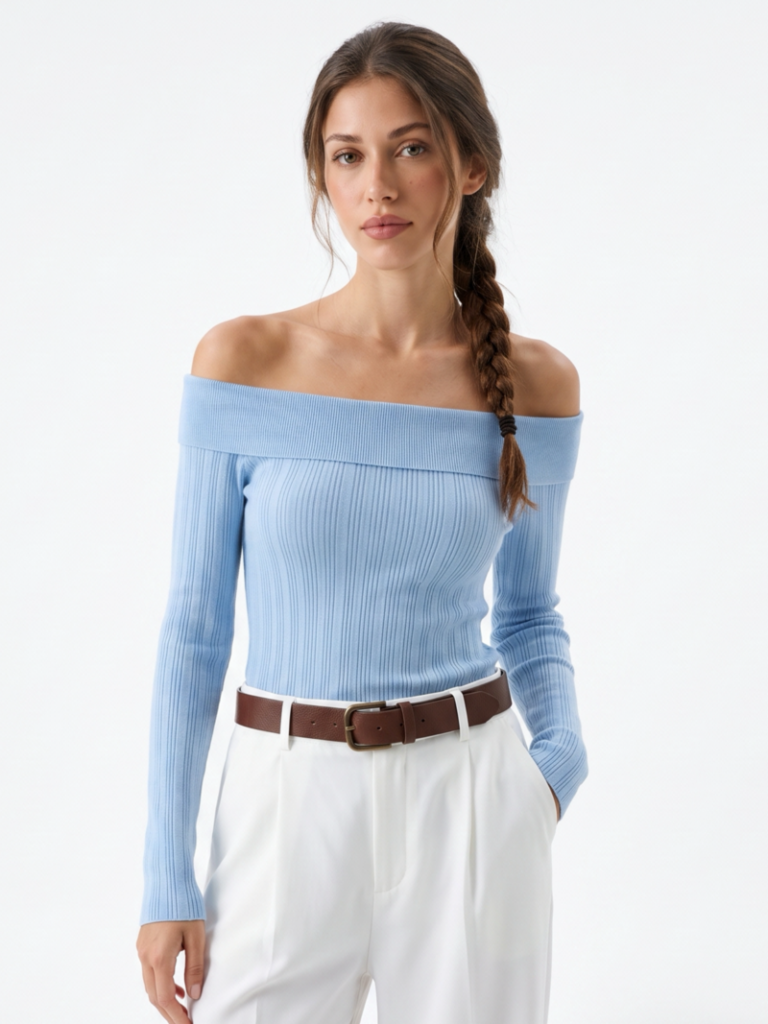
Source image generated by Fashion Diffusion.
Fashion Diffusion AI-generated

Unlike traditional editing, you do not need to manually select clothing areas or create masks. The AI analyzes the image and applies the transformation based on the garment’s appearance.

Step 2: Describe the See-Through Fabric Effect

After uploading the image, describe the material change you want to create.

Enter text description.

For example, instead of make clothes see through, try Transform the dress into a lightweight sheer organza fabric with soft transparency, realistic folds, and natural lighting.

You can include fabric type (sheer, mesh, lace, organza), transparency level, fashion style, and any mood or lighting details. Different descriptions produce different visual directions — a sheer lace effect looks quite different from a futuristic transparent mesh design.

Step 3: Review and Adjust the Result

AI-generated fashion images often work best through iteration.

After generating an image, review:

  • Whether the fabric effect looks natural
  • Whether the garment shape is preserved
  • Whether the transparency level matches your idea

If the result is not what you expected, adjust the prompt and try again.

For example:

  • Change transparent to slightly translucent for a more subtle effect
  • Add soft fabric texture for a more realistic material appearance
  • Specify editorial fashion style for a more creative visual direction

Small prompt adjustments can help you explore different interpretations of the same garment.

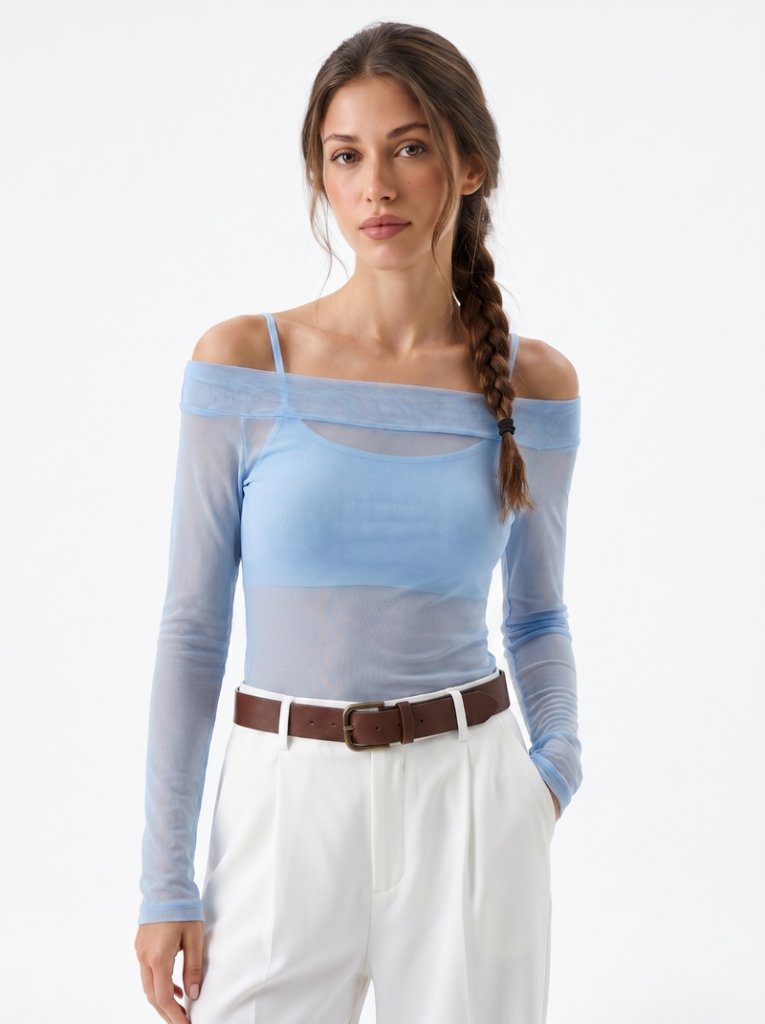
See through clothes AI output.
Fashion Diffusion AI-generated

Step 4: Explore Different Fashion Directions

One advantage of AI clothing transformation is that you are not limited to a single result.

After creating one version, you can experiment with different concepts:

  • A casual outfit with lightweight sheer layers
  • A futuristic look with transparent technical fabrics
  • A high-fashion editorial style with lace or mesh details

This makes AI useful not only for creating one image, but also for exploring multiple creative possibilities from the same starting point.

Create See-Through Clothing Effects with Fashion Diffusion

Exploring transparent fabric ideas no longer requires complex editing workflows or manual adjustments.

With Fashion Diffusion AI Xray Clothes, you can transform clothing appearances directly from your images and experiment with different material styles through AI.

Whether you want to explore sheer fabric concepts, develop fashion references, or test new visual directions, AI provides a faster way to turn creative ideas into images.

Upload your image, describe the fabric effect you want, and create different see-through clothing concepts with Fashion Diffusion.

FAQ

Can AI really make clothes see through in photos?

AI does not see through clothing or reveal what is underneath. Instead, it creates a generated visual effect that simulates transparent or semi-transparent fabric based on the original image and your prompt. The result is a creative image transformation. Not exposing anything hidden.

Is a see through clothes filter the same as removing clothes?

No. A see through clothes filter changes the material appearance of clothing to simulate sheer or transparent fabrics. It does not remove clothing from an image. The tool is designed for exploring fashion concepts, material variations, and creative visual effects.

What type of photos work best for AI see-through clothing effects?

Photos with clear garment details produce better results. The image should have a visible clothing area with clear outlines, good lighting, and sufficient resolution. A front-facing or slightly angled photo is usually easier for the AI to analyze.

Can designers use AI see-through effects during the design process?

Yes. AI-generated transparent fabric effects are useful for exploring material concepts, comparing styling directions, and creating visual references before developing physical samples. The tool is particularly useful during the early creative stage.

What is the easiest way to make clothes see through in photos?

Using an AI tool like Fashion Diffusion’s AI Xray Clothes is the fastest approach. Upload a suitable image and describe the transparent fabric effect you want. Refine the result through adjusted prompts until it matches your creative direction. The entire process takes minutes rather than the hours required for manual editing.

What fabric effects can the AI simulate?

The AI can simulate a wide range of transparent and semi-transparent material styles, including sheer organza, mesh, lace, lightweight chiffon, and experimental futuristic fabrics. The output is shaped by the prompt.

Avatar photo 通过Alexander Wilson

AI Clothes Changer for E-Commerce: How to Cut Product Photo Costs by 80%

A single product photoshoot can run anywhere from a few hundred to a few thousand dollars once you add up the model, the studio, and the retouching — a cost that scales with your catalog instead of your revenue. An AI clothes changer for e-commerce flips that math: one base photo, unlimited outfit changes, no reshoot.

Industry estimates across multiple AI photography platforms consistently land in the 80-95% cost reduction range compared to traditional studio shoots, with 80% as a commonly cited figure for apparel sellers specifically.

This article walks through the actual workflow — from the first model photo to a finished, marketplace-ready catalog. It covers where an AI outfit swap for product photos fits alongside the other tools most online stores already need.

Why Traditional Product Photography Doesnt Scale With Your Catalog

The math behind a traditional shoot is straightforward, and that’s the problem. Every new SKU means another round of the same fixed costs:

  • Model fees, which apply per session regardless of how many items you shoot;
  • Studio time, billed hourly whether you are photographing 5 items or 50;
  • Retouching, which scales linearly with image count;
  • Reshoots, whenever a color variant, size run, or new print needs its own session

None of these costs come down as your catalog grows — they just repeat. According to a 2026 breakdown of product photography costs, a mid-size brand with 500 SKUs can spend $125,000 to $250,000 a year on traditional photography once retouching, studio rental, and coordination are factored in.

The pattern shows up across real case studies too: one Shopify brand documented in a 2026 AI product photography case study cut its photography costs by 85%. Turnaround time dropped from 14 days to 30 seconds after moving to an AI-based workflow.

How an AI Clothes Changer Fits an E-Commerce Workflow

The basic mechanism is the same one used for personal outfit try-ons, just applied at catalog scale. Upload a photo of a person and a photo of a garment, and the AI generates a new image of that person wearing it. The face, pose, and proportions stay consistent throughout.

What makes this useful for e-commerce specifically isn’t the single swap — it’s that the same model photo can be reused across an entire product line. Shoot one model once, in one pose, under one lighting setup, and then run every SKU in the collection through that same base image. The result is a catalog where every product photo looks like it came from the same shoot.

This matters more than it sounds. Buyers compare listings side by side, and a catalog with mismatched lighting, inconsistent poses, or visibly different models across SKUs reads as unpolished — even if each individual photo looks fine on its own.

The Workflow: From One Photo to a Full Product Line

Here’s how the process actually breaks down for a multi-SKU catalog, step by step.

Step 1: Shoot or Source One Base Model Photo

You need exactly one clean, front-facing photo of a model — full body for dresses and outerwear, half body if you are only photographing tops. Even lighting and a plain background give the AI the cleanest possible base to work from. This is the only photography expense in the entire workflow; everything after this step is digital.

Step 1: select one base model photo.
Fashion Diffusion AI-generated

Step 2: Prepare Your Garment Photos

For each item in the line, you need a clear photo of the garment itself — a flat lay, a hanger shot, or an existing product photo. If your team already shoots flat lays for internal records or supplier catalogs, those photos work directly as input here. No restyling or remodeling required.

Step 2: prepare the garment photo.
Fashion Diffusion AI-generated

Step 3: Generate the Outfit Swap for Each SKU

Upload the base model photo and the first garment photo to Fashion Diffusion’s AI clothes changer, and the AI generates the model wearing that item. Repeat with the next garment photo, and the next, working through the line. Because the model photo stays constant, every output lines up visually with the last.

Most product pages need more than one angle. Run each swapped-outfit image through Fashion Diffusion’s AI Lookbook tool to generate a set of poses and angles from the same image. One outfit swap becomes a full multi-image set without a second photoshoot.

A set of fashion e-commerce photos generated from Fashion Diffusion's AI Lookbook tool.
Fashion Diffusion AI-generated

Step 4: Standardize the Output Into a Clean Catalog Format

A model-wearing shot and a flat-lay shot serve different purposes on a product page. The model shot sells the fit and feel; the flat lay sells the exact garment shape and detail without ambiguity.

If your listings need both, Fashion Diffusion’s flat-lay generator converts the same garment photo into a clean, white-background flat lay that meets the image specs most marketplaces require. It also runs in bulk, so a full SKU range can be standardized into the same format in one pass instead of one image at a time.

A clean flat-lay garment photo generated by Fashion Diffusion's flat-lay generator tool.
Fashion Diffusion AI-generated

Step 5: Match the Background to the Use Case

The same swapped-outfit image rarely works identically for every channel. A plain studio background suits a core product listing; a styled scene works better for a seasonal campaign or social post. You can swap the backdrop on the same image, without regenerating the outfit swap itself or booking a second shoot for either.

Two photos with swapped background.
Fashion Diffusion AI-generated

Keeping the Catalog Visually Consistent at Scale

Consistency is what separates a catalog that looks professionally produced from one that looks like a patchwork of different sessions. It’s also a conversion issue, not just an aesthetic one — research on e-commerce return rates shows that clothing already sees 20-30% returns on average, with mismatched or inconsistent product imagery as a contributing factor shoppers cite. A few habits make the biggest difference:

  • Reuse the same base model photo across a full collection. Buyers notice inconsistency faster than they notice quality.
  • Use the same pose set across a category. If dresses get three angles, every dress in the line gets the same three — generated through the lookbook tool.
  • Batch by category, not randomly. Run all tops before moving to bottoms; it’s easier to catch inconsistencies early.
  • Standardize background choice by channel, not by product. Decide once and apply the rule across the whole catalog.

Common Mistakes That Undercut the Cost Savings

A few avoidable habits eat into the time and cost benefits this workflow is supposed to deliver:

MistakeWhy It Costs YouFix
Reshooting the base model for every new collectionDefeats the entire point of reusing one photo across SKUsKeep a small library of approved base model photos and reuse them across seasons
Using low-resolution supplier images as garment inputProduces soft edges and flat-looking fabric in the outputRequest or re-photograph garment images at higher resolution before running them through the tool
Mixing inconsistent poses across a single collectionMakes the catalog look disjointed even when each image is individually cleanLock one pose per category and stick to it across the full run
Skipping the flat-lay step for marketplaces that require itRisks listing rejection or inconsistent formatting on platforms with strict image specsRun garment photos through the flat-lay generator before upload if the marketplace requires a clean product-only shot

Build Your Next Catalog With Fashion Diffusion

One model photo, swapped into every item in your line, standardized into the formats each channel needs — that’s the entire workflow, and it runs without booking a single additional shoot. Upload your base model photo and your first garment image to Fashion Diffusion and see how the rest of your catalog could look. New accounts start with free credits, so you can test the workflow on a handful of SKUs before committing a full collection to it.

FAQ

What is an AI clothes changer for e-commerce?

It’s a tool that takes a photo of a model and a photo of a garment, then generates a new image of that model wearing the garment — without a new photoshoot. This type of tool is sometimes also called a virtual try-on for online stores. For online stores, this means one base model photo can be reused across an entire product line, with each item swapped in digitally instead of reshot.

Do I need a professional model and studio for the base photo?

No, but the base photo is the one place worth investing a bit of care, since every SKU in the collection will inherit its quality. A clear, well-lit, front-facing photo — even shot with a good camera in natural light — works as a base. It doesn’t need a full studio setup, just clean lighting and a simple background.

Can this replace product photography entirely, or just reduce it?

For most catalogs, it replaces the repeat photography that used to happen every time a new color, print, or style launched. Many stores still book a traditional shoot occasionally for hero campaign imagery, while using the AI workflow for the bulk of catalog and listing photos. It is a hybrid approach that keeps costs down without losing flagship-quality visuals where they matter most.

Does the AI clothes changer work for every type of garment?

It handles most standard apparel categories well — tops, dresses, jackets, trousers, and outerwear. Heavily embellished items, sequins, or very complex layering can show minor texture loss compared to simpler garments. It is worth testing on a small batch before committing an entire collection to the workflow.

Can I use this for product images on multiple marketplaces with different requirements?

Yes. The underlying model-wearing image stays the same. You can run it through the flat-lay generator for marketplaces that require a clean product-only shot, or through the background changer for channels that call for a styled scene — without regenerating the core outfit swap each time.

Avatar photo 通过Alexander Wilson

How to Photograph Clothing to Sell Online: A Complete Guide for Fashion Brands

Your product photography is making or breaking sales before a customer reads a single word of your listing. Online shoppers can’t touch the fabric or try the garment on — your images carry the entire weight of communicating fit, quality, and style.

This guide covers exactly how to photograph clothing to sell online — from shoot setup and garment styling to platform-specific specs and where AI fashion tools fit in.

How to Prepare Clothing for Photography: Before You Shoot

Poor preparation is the most common reason good product photos fail. No amount of great lighting fixes a wrinkled garment or a piece of lint caught on camera.

Steam or Iron Every Garment

Wrinkles read as cheap on camera — even small ones the human eye ignores in person become obvious in a product photo. Steam is generally preferred over ironing for knitwear and delicate fabrics.

Use a Lint Roller Immediately Before Shooting

Lint and dust show clearly against most fabrics, especially dark colors and structured materials.

Shape the Garment

Stuff tissue paper into shoulders and sleeves to maintain structure. Use straight pins on the back of a garment displayed on a mannequin to pull excess fabric and show a clean silhouette from the front. Clip excess fabric on hanger shots with binder clips behind — out of frame.

Keep Accessories and Styling Consistent

If you’re photographing complete looks, keep styling consistent across your catalog. The same belt, the same fold, the same collar position for every similar garment — small inconsistencies across a product range read as unprofessional.

Clothing Photography Lighting: Natural vs Artificial

Lighting determines more about your final image than any other factor. Get this right first; everything else follows.

Natural Light

Natural light works well for most sellers and costs nothing. The key is knowing how to use it.

  • Position the garment next to a large window. North-facing windows give consistent, diffused light without direct sun. East-facing windows work well in the morning; west-facing in the afternoon.
  • Avoid direct sunlight. Direct sun creates harsh shadows and blows out fabric detail. Diffuse it with a white sheet or sheer curtain stretched across the frame.
  • Shoot within 2–3 hours of the window. Light changes throughout the day. Same window position, same time of day keeps your images consistent.
  • Use a white foam board as a reflector. Place it on the opposite side from the window to bounce light back and fill shadows.

Artificial Light

When natural light is unavailable or inconsistent, a simple lighting setup gives you full control.

  • A two-softbox setup is the industry standard. One softbox at 45 degrees, a second on the opposite side at half intensity. Even coverage without flat, directionless light.
  • Ring lights are practical for small items and hanger shots, less effective for larger garments where the circular catch light becomes visible.
  • Match your color temperature. Mixing daylight and artificial light creates color casts. Use one source consistently.

How to Photograph Clothing to Sell: Three Formats

There is no single correct format for clothing photography. The right choice depends on the garment type, the sales channel, and what question the image needs to answer for the buyer.

1. Flat Lay Clothing Photography

Top-down flat lay of beige linen women's shirt on white background with even side lighting and natural garment curve

Flat lay presents the garment from directly above, laid on a flat surface. It works well for lightweight garments, folded basics, accessories, and social media content.

Setup: Clean background (white seamless paper, or a surface that complements the garment), camera or phone directly overhead, even lighting from both sides.

Styling tips:

  • Steam the garment and let it settle before shooting — it needs to lie flat naturally
  • Leave space around the garment; don’t fill the entire frame
  • Arrange the garment with a slight natural curve in the body and a soft fold in the sleeves — this avoids the stiff, lifeless look of a garment that’s been forced flat

When it’s the right choice: Casual tops, folded knitwear, accessories, complete outfit layouts for social content, and any channel where a clean, top-down view communicates the product clearly.

The AI shortcut: If you have existing model or mannequin photos and need flat lay versions, Fashion Diffusion’s Flat Lay Generator converts them automatically — consistent background, reconstructed garment structure, no additional photography setup.

For a full breakdown of when to use flat lay vs ghost mannequin vs on-model shots, the angles table later in this guide covers all garment types

2. Hanger Shots

Navy tailored blazer on wooden hanger against white wall, soft natural light from left, buttons fastened, professional e-commerce product photography

Hanger shots are efficient and work well for showing garment length and drape. A practical choice for high-volume catalog production.

Setup: Clean wall or seamless background, garment on a quality hanger (wooden or velvet — thin plastic hangers make garments look cheap), camera at the same height as the center of the garment.

Styling tips:

  • Button the top button of shirts and jackets; tuck in any loose tags
  • Steam the garment while it’s on the hanger so it hangs naturally
  • The hanger choice matters more than sellers expect — a premium hanger signals a premium product

When it’s the right choice: High-volume catalog production, garments where length and drape are key selling points (dresses, blouses, coats).

3. On-Model Clothing Photography

Fashion model wearing white oversized shirt and straight-leg jeans mid-movement, natural studio lighting, white seamless background, e-commerce product photography

On-model photography communicates fit, movement, and scale better than any other format. Natural posing beats editorial for e-commerce — stiff poses can undermine trust when a shopper is trying to answer: how will this fit me?

With a live model:

  • Shoot at eye level or slightly below — shooting down on a model makes garments look smaller
  • Capture movement: a slight turn, a hand in a pocket, fabric in motion. Static poses lose the energy that makes people want to own the item
  • Always shoot front, back, and at least one three-quarter view. Buyers who can’t see the back of a garment often skip it

With a mannequin:

  • Use a matte white or gray mannequin — high-gloss finishes create distracting reflections
  • Pin garments from the back to achieve a clean, fitted silhouette from the front
  • Shoot the same angles as you would with a live model

Camera Settings and Equipment

You don’t need expensive equipment to photograph clothing well. A modern smartphone handles most product photography competently. What you need is control over a few key settings.

Smartphone Photography

  • Disable auto-HDR — HDR processing often oversaturates fabric colors. Shoot in standard mode.
  • Lock focus and exposure — Tap and hold on the garment in the viewfinder to lock both.
  • Shoot in RAW if available — RAW gives more latitude for color and exposure correction in post.
  • Use a tripod — A lightweight tripod with a phone mount costs under $30 and eliminates camera movement entirely.

DSLR and Mirrorless Settings

  • ISO 100–200. Low ISO keeps images clean and free of digital noise.
  • Aperture f/5.6–f/8 for flat lays. For mannequin and model shots, f/2.8–f/4 gives slight background separation.
  • White Balance: manual. Set to match your light source. Auto white balance drifts between shots.
  • Use a remote shutter or 2-second timer. Pressing the shutter physically moves the camera, causing blur at slower shutter speeds.

Which Angles to Photograph for Clothing Listings

Different garment types need different angles. The goal is to give buyers enough information to make a confident decision without returning the item.

Garment TypeEssential ShotsOptional
Tops (t-shirt, blouse, shirt)Front, back, three-quarterDetail (collar, cuffs, hem), flat lay
DressesFront, back, side, three-quarterDetail (neckline, back, print), on hanger
OuterwearFront, back, three-quarter, open and closedInterior lining detail, collar close-up
TrousersFront, back, side, length shotPocket detail, waistband close-up
KnitwearFront, back, fabric texture close-upDraped on surface, flat lay
AccessoriesMultiple angles, scale referenceDetail shots, styled with garment

Flat detail shots matter more than sellers expect. Close-up images of fabric texture, buttons, stitching, or a unique back detail are frequently the deciding factor for buyers who are almost persuaded.

How to Extend One Clothing Photo into a Full Catalog with AI

Traditional photography produces a fixed set of images per garment. AI tools let you extend a single good photo into multiple formats and variations without additional shooting.

Generate Flat Lays from Model Photos

If you shoot on-model but also need clean flat lays for marketplace listings, Flat Lay Generator converts model-worn shots into flat lay format automatically. One shoot produces both formats.

Adapt One Image for Multiple Platforms

Each sales channel has different visual requirements. Change Background lets you produce white-background versions for Amazon, lifestyle versions for Instagram, and branded scene versions for your own site — all from the same source image.

Test Colorways Without Reshooting

When a garment comes in multiple colors, Recolor generates the same image in every colorway from one source photo — consistent model, consistent background, consistent presentation across the full color range.

Generate Video for TikTok and Reels

Static product photos don’t perform on TikTok. AI Fashion Video animates any product photo into a short video clip — fabric movement, camera pan, or model motion — ready to publish without separate filming.

Clothing Photography Specs by Platform: Amazon, Shopify, Etsy, TikTok

Photographing clothing well is step one. Getting those images to meet each platform’s requirements is step two.

Amazon

  • Main image: White background (#FFFFFF), product fills 85% of frame, no props or text
  • Minimum resolution: 1000px on the longest side (2000px+ recommended for zoom)
  • Format: JPEG preferred
  • Additional images: Can include lifestyle, flat lay, detail, and infographic images — white background not required

(Per Amazon’s official image requirements)

Shopify and Your Own Store

  • Aspect ratio: Consistent across all products — square (1:1) is common, portrait (4:5) increasingly popular for mobile
  • Resolution: 2048 × 2048px maximum; Shopify scales down automatically
  • Consistency: Same background, same styling approach across your catalog

Etsy

  • Main image: Can include lifestyle photography (not required to be white background)
  • Minimum size: 2000px wide recommended
  • Square crop: Etsy thumbnails appear square — compose your main image to work at square crop

TikTok and Instagram Reels

  • Aspect ratio: 9:16 vertical
  • Resolution: 1080 × 1920px
  • Video length: 5–30 seconds for discovery content
  • Hook: Product must be clearly visible within the first second

Editing Clothing Photos to Sell: What to Fix and What to Avoid

Photo editing software showing clothing color correction: warm-tinted red dress on left panel being corrected to true red on right panel

Editing makes a good photo better. Over-editing makes it look fake — and when buyers receive a product that doesn’t match the listing image, returns follow.

Color Correction

Your primary goal. Match the garment’s color to how it actually looks in person. Check against a physical sample under neutral light and adjust until they match.

Exposure and Contrast

Minor adjustments to recover detail in shadows or pull back highlights. Don’t push these settings hard — aggressive contrast looks artificial.

Background Cleanup

Remove lint, dust specks, or small floor marks. Most editing apps have a spot healing tool for this.

Crop and Straighten

Keep crops consistent across your catalog. If you’re shooting flat lays, use a grid in-camera to keep the garment straight — fixing a rotated flat lay in post degrades image quality.

What Not to Do

  • Don’t smooth or blur fabric texture — buyers need to see what the material looks like
  • Don’t use filters that shift overall color tone — they make color accuracy impossible
  • Don’t resize to a low resolution to reduce file size — use proper compression tools instead (Squoosh, TinyJPEG, or Shopify’s built-in compression)

Image SEO for Clothing Listings: File Names, Alt Text, and Schema

Good product photography that isn’t SEO-optimized doesn’t get found. These steps take minutes and have a measurable effect on visibility.

File Naming

Name every image descriptively before uploading. IMG_8472.jpg tells search engines nothing. women-linen-blazer-beige-front.jpg tells them exactly what the image shows. This directly affects image search rankings and helps your product pages appear in visual search.

Alt Text

Write a short, descriptive alt text for every image. Be specific: “Front view of a beige linen women’s blazer on a white background” is more useful than “blazer.” Alt text is read by screen readers (accessibility) and indexed by search engines (discoverability).

File Size and Compression

Large image files slow page load times, which hurts both user experience and search rankings. Compress images to under 200KB where possible without visible quality loss. Tools like Squoosh (free, browser-based) handle this well.

Structured Data

For product pages, implement Product schema markup. This tells search engines the product name, price, availability, and image URL in a machine-readable format — increasing the chance of appearing in rich results and image carousels.

Photograph Clothing for Your Store with Fashion Diffusion

Fashion Diffusion’s AI tools work alongside your photography — converting existing product photos into flat lays, on-model shots, multiple colorways, and short-form video without additional shooting.

Try Fashion Diffusion AI free →

FAQs

How do I photograph clothes to sell online without a model?

Three options. Flat lay photography places garments on a surface and shoots from above — no model or mannequin needed. Hanger shots hang the garment against a clean background. Ghost mannequin photography shoots on a mannequin, then removes the mannequin in editing to create a 3D inhabited look. AI tools like Fashion Diffusion’s Virtual Try-On generate on-model images from a flat lay or product photo without booking a model.

What is the best background for photographing clothes to sell?

White or light gray seamless paper is the standard for marketplace listings (required for Amazon’s main product image). For lifestyle content and your own store, any background that complements the garment works. Consistency matters more than the specific choice.

Do I need a professional camera to photograph clothing to sell?

No. A modern smartphone handles most product photography well, especially in good natural light. The limiting factors are lighting, preparation, and consistency — not camera hardware.

How many photos do I need per garment?

At minimum: front, back, and one detail shot. For most garments, four to six images is the practical range — front, back, side or three-quarter, detail, and a flat lay or on-hanger alternate.

What image size do I need for Amazon product listings?

Amazon requires a minimum of 1000px on the longest side, with 2000px or larger recommended for zoom. The main image must have a pure white background (#FFFFFF) with the product filling 85% of the frame.

Avatar photo 通过Alexander Wilson

Best 7 Free AI Bikini Try-On Tools in 2026 (Tested & Compared)

Most “best AI try-on” lists treat swimwear like any other garment. It isn’t. Bikinis show more skin, more fabric detail, and more fit nuance than a t-shirt — and several popular try-on tools either handle this badly or don’t support it at all.

AI bikini try-on uses artificial intelligence to generate realistic on-model swimwear photos from a single product image — no photoshoot or model booking required.

We tested six tools that offer free or low-cost access to AI bikini try-on in 2026. This guide covers what each free tier actually gives you, where the output holds up, and where it falls short.

Quick Comparison: Free AI Bikini Try-On Tools

 Fashion Diffusion is the strongest free option for usable results — its free credits cover body type variation, which every other tool gates behind a paid plan. Kolors Virtual is genuinely free with no signup, useful for a quick test, but output quality is inconsistent and lacks model variation.

ToolFree AccessBody Type VariationSwimwear Support
Fashion DiffusionFree credits✅ Included free
SnappyitFree creditsPaid only
Kolors Virtual (Hugging Face)Unlimited, no signup
SellerPic20 credits, no cardPaid only
CamClo3DFree trial, no cardPaid only
Botika8 photo creditsPaid onlyFilter issues reported
WearViewNone (from $29/mo)✅ Paid

What to Look for in a Free AI Bikini Try-On Tool

Before comparing tools, it helps to know what actually matters for swimwear specifically — most general try-on reviews don’t cover this. Testing a free tier costs nothing, but picking the wrong tool costs time: swimwear has tighter fabric, print, and fit tolerances than most categories, so a tool that works fine for t-shirts may fall short here.

  • Does the tool support swimwear at all? Some platforms exclude swimwear and lingerie from their training data entirely. Check before you upload.
  • Does the free tier produce usable output, or just a preview? Some “free” tiers apply heavy watermarks or cap resolution below what’s usable for a product page.
  • How many free generations do you actually get? Credit counts range from “unlimited” to “enough for one test.”
  • Does it preserve fabric and print accuracy? This matters more for swimwear than most categories — a print that shifts or a strap that renders wrong is immediately obvious.
  • Can you generate different body types? For swimwear, this is one of the most requested features — and most free tiers don’t include it.
AI bikini try-on showing the same swimwear on multiple body types, from slim to plus-size models
Fashion Diffusion AI-generated

1. Fashion Diffusion — Best Free AI Bikini Try-On with Full Workflow

Best for: Swimwear brands and sellers who want try-on plus design, recoloring, and video using free credits.

Fashion Diffusion’s Virtual Try-On generates on-model bikini images from a flat-lay or product photo. New users get free credits that cover the core try-on and model generation tools.

Fashion Diffusion free AI bikini try-on platform showing virtual swimwear fitting and AI fashion design workflow

What can you do for free?

  • Virtual Try-On from a flat-lay or product photo

Strengths

  • The only tool on this list where try-on connects directly into a design and content workflow — recolor, background, and video all run on the same try-on output
  • Free credits cover both try-on and body type variation, which most competitors split across paid tiers
  • No watermark on output generated with free credits

Limitations

  • Free credits are limited in number; high-volume catalog work requires a paid plan
  • Best results depend on a clean, well-lit source photo

For a full walkthrough of the workflow — including prompt examples and how to extend results into colorways and video — see our AI bikini generator guide.

2. Snappyit — Best AI Bikini Try-On for E-Commerce Product Photos

Best for: Swimwear brands and online sellers who want to turn flat-lay or product photos into realistic on-model images without organizing a photoshoot.

Snappyit AI Fashion Model turns standalone garment photos into on-model fashion images. Users can upload a flat-lay, hanger, mannequin, or product photo, select an AI model, and generate model shots for bikinis, swimwear, lingerie, and other apparel.

What can you do for free?

  • New users receive free credits to try the tool
  • Generate AI model photos from flat-lay or standalone swimwear images
  • Choose from different AI fashion models and styles
  • Access other fashion image tools such as Ghost Mannequin and Color Change

Strengths

  • Built specifically for fashion e-commerce and product photography
  • Supports bikini, swimwear, lingerie, and other apparel categories
  • Works directly from product-only images — no original model photo is required
  • Helps sellers create on-model visuals without arranging a traditional photoshoot
  • Additional fashion tools are available within the same platform

Limitations

  • Free credits are limited, so larger catalogs may require a paid plan
  • As with other AI try-on tools, detailed garment elements such as straps, prints, and trims should be checked against the original product before publishing

3. Kolors Virtual — Best Genuinely Free AI Bikini Try-On, No Signup

Best for: Quick, no-commitment tests before choosing a paid tool.

Kolors Virtual Try-On is an open-source model, available through free Hugging Face Spaces. You upload a person image and a garment image, and it generates a try-on result — no account, no credits, no payment.

Kolors Virtual Try-On Hugging Face Space providing free AI bikini virtual try-on

What can you do for free?

  • Unlimited try-on generations on public Hugging Face Spaces
  • No signup, no credit card, no usage cap
  • Open-source model — multiple community-hosted versions available if one is busy

Strengths

  • The most genuinely free option available — no account required at all
  • Good baseline for testing whether AI try-on works for your specific garment before committing to a paid tool

Limitations

  • Output is stochastic — the same inputs can produce noticeably different results on different runs
  • Public Hugging Face Spaces can have long queue times during peak usage
  • No body type selection, no editing tools, no batch processing — it’s a single-image demo, not a workflow

4. SellerPic — Best Free AI Bikini Try-On Credits for E-Commerce

Best for: Shopify, Etsy, and Amazon sellers who want try-on alongside other product photo tools.

SellerPic‘s free plan includes 20 credits with no credit card required — enough to generate around 20 images and evaluate output quality on your own products.

sellerpic UI showing tools to generate E-commerce photo

What can you do for free?

  • 20 credits (roughly 20 image generations)
  • Access to Virtual Try-On alongside background removal, color changer, and other editing tools under one credit system
  • 5 scheduled posts and 1 concurrent video generation

Strengths

  • 20 free credits is enough to test multiple SKUs, not just one image
  • One credit system covers try-on plus a broad editing toolkit — useful if you need more than just try-on

Limitations

  • Some users report credits being consumed on failed or unsatisfactory generations
  • Paid plans start at $29/month for 500 credits — a notable jump from the free tier
  • Free tier output may include a watermark; commercial use requires a paid plan

5. CamClo3D — Best AI Bikini Try-On for Catalog-Scale Workflows

Best for: Brands evaluating whether a full AI photography platform fits their catalog before subscribing.

CamClo3D offers a no-credit-card free trial across its virtual try-on and product photography suite, including model swap, pose generation, and background changes.

CamClo3D AI product photography platform featuring virtual try-on, model generation, and background replacement tools

What can you do for free?

  • Free trial access without a credit card
  • Virtual try-on from flat-lay images
  • Access to model swap and pose generator tools for testing variation quality

Strengths

  • Trial covers the broader toolkit, not just try-on — useful for evaluating a full catalog workflow before paying
  • No card required to start testing

Limitations

  • Trial generation limits are lower than dedicated free-credit tools like SellerPic
  • Best suited to brands already planning to evaluate a paid platform, rather than one-off use

6. Botika — Free AI Bikini Try-On Credits for Shopify, with a Caveat

Best for: Shopify merchants already using Botika for general product photography.

Botika is available directly from the Shopify App Store, with the first 8 photo credits free. It’s built for “upload and generate” simplicity within Shopify admin.

Botika AI fashion photography homepage showcasing on-model image generation and automated product photo enhancement for ecommerce brands

What can you do for free?

  • 8 free photo credits, no separate signup outside Shopify
  • On-model generation and background swap from flat-lay or mannequin photos

Strengths

  • Native Shopify integration — generate without leaving store admin
  • Simple workflow with no learning curve for non-technical users

Limitations

  • Independent reviews note that Botika’s “rigid NSFW filters can sometimes interfere with lingerie or swimwear cataloging” — worth testing with your specific products before relying on it for a swimwear catalog
  • At $22/month for the next tier, the per-image cost is higher than several alternatives on this list
  • No pose changer or custom model options

7. WearView — AI Bikini Try-On with No Free Tier, but Worth Knowing About

Best for: Brands that need the widest model diversity and are ready to pay from day one.

WearView doesn’t offer a free tier — plans start at $29/month. We’re including it because it’s frequently recommended for swimwear specifically, and it’s worth knowing what you’d be paying for if free options don’t meet your needs.

Strengths

  • Strong model diversity across ethnicities, body types, and age groups
  • Converts flat-lays to on-model shots quickly, with consistent model identity across a catalog

Limitations

  • No free tier — there’s no way to test output quality on your own products before subscribing
  • Entry-level plan is priced higher than the free-tier options on this list

Free Tier Limits at a Glance

ToolFree GenerationsCard RequiredWatermark on Free Output
Fashion DiffusionFree credits (limited)NoNo
SnappyitFree trial (limited)NoNo
Kolors VirtualUnlimitedNoNo
SellerPic20 creditsNoLikely (paid plan for commercial use)
CamClo3DFree trial (limited)NoVaries
Botika8 creditsNoVaries
WearViewN/A — no free tierN/AN/A

Try Fashion Diffusion’s AI Bikini Try-On Free

Upload one swimwear photo and see it on a realistic AI model — then extend it into colorways, backgrounds, and video, all using free credits.

Try Virtual Try-On free →

FAQ

What is the best free AI bikini try-on tool in 2026?

Fashion Diffusion and Kolors Virtual are the most accessible free options. Fashion Diffusion’s free credits cover try-on plus body type variation and downstream editing tools. Kolors Virtual is completely free with no signup, but output quality varies between runs.

Is there a completely free AI bikini try-on tool with no signup?

Yes — Kolors Virtual, available through Hugging Face Spaces, requires no account, no credit card, and no credits. It’s open-source and unlimited, though output quality is less consistent than paid alternatives.

Do free AI try-on tools work well for swimwear specifically?

Most do, but not all. Botika’s NSFW filters have been reported to interfere with swimwear cataloging in some cases. Some general-purpose try-on platforms also exclude swimwear and lingerie from their training data entirely. Test with your specific products before committing to any tool.

Can free AI bikini try-on tools generate different body types?

Some can. Fashion Diffusion’s free credits cover AI Model Generator, which produces the same swimwear on different body types and skin tones from one source photo. Most free tiers from other tools don’t include this — it’s typically gated to paid plans.

Can I use free AI bikini try-on images commercially?

It depends on the tool. Output generated with Fashion Diffusion’s free credits has no watermark. SellerPic’s free tier likely requires a paid plan for commercial use and watermark-free output. Always check each platform’s terms before publishing free-tier images.

What photo should I upload for the best AI bikini try-on results?

A flat-lay or mannequin photo with even lighting, a neutral background, and the full garment visible — including straps and back details. Avoid heavy wrinkles or cropped views.

Why do some AI try-on tools not support swimwear or lingerie?

Some platforms deliberately exclude these categories from training data for content safety reasons. Others apply filters that can flag swimwear images even when the intent is standard e-commerce photography. This varies by platform — always test before relying on a tool for your catalog.