首页

Avatar photo 通过Alexander Wilson

How to Make Clothes See Through in Photos with AI: A Complete Guide

Simulating transparent fabric effects used to mean manual layer adjustments, custom masks, and hours of editing. Even experienced designers found the process slow — and the results rarely looked natural. AI has changed that. A see through clothes filter powered by AI can transform the appearance of a garment in seconds, keeping the original pose, lighting, and composition intact.

This guide covers how to make clothes see through in photos with AI, how see through clothes AI works technically, and what fashion professionals and content creators actually use it for.

What Is a See Through Clothes Filter

A see through clothes filter is an AI image editing tool that creates the appearance of transparent or semi-transparent fabric in a photo. Instead of manually editing opacity or fabric layers, the AI analyzes the clothing area and generates a new material appearance based on the original image.

These tools can simulate different material effects, including sheer fabrics, mesh textures, lace, lightweight translucent layers, and futuristic fashion designs.

One clarification worth making upfront: AI see-through effects do not reveal hidden information or see through actual clothing. They create a generated visual interpretation of how a garment could look if made with transparent or sheer materials. The output is a new image — not a view through the original fabric.

How Does See Through Clothes AI Work

See through clothes AI creates transparent fabric effects by analyzing the clothing in an image and generating a new material appearance.

Instead of simply reducing opacity, AI considers factors such as:

  • Clothing shape and structure
  • Fabric texture and thickness
  • Lighting and shadows
  • The way the garment fits the body

Based on these details, AI can simulate different materials, such as sheer fabric, mesh, or lace, while keeping the overall style of the original image consistent.

The quality of the result also depends on the input photo. Clear clothing outlines, good lighting, and visible fabric details usually help AI generate more realistic effects.

See through clothes effect before-and-after comparison.
Fashion Diffusion AI-generated

AI See Through Clothes Filter vs Traditional Photo Editing

Before AI tools became available, creating transparent clothing effects usually required traditional photo editing software. Editors needed to manually adjust layers, blend textures, and refine fabric details.

AI Xray Clothes provides a different workflow by generating the effect automatically based on the image and text instructions.

Traditional Photo EditingAI Xray Clothes
Editing processManual layer and mask adjustmentsAI-generated transformation
Required skillsRequires photo editing experienceEasier for beginners
SpeedTakes more time for complex editsFaster generation and iteration
Material explorationLimited by editing skillsEasy to test different fabric ideas
WorkflowDetailed manual controlPrompt-based creative exploration

Traditional editing is still useful when you need precise adjustments. However, AI tools are more convenient when you want to quickly explore different clothing materials, styles, or visual concepts.

What Are AI See-Through Clothing Effects Used For

AI see-through clothing effects are most useful when you need to explore a fashion idea before committing it to a physical sample or final image. Here are the main professional applications.

Exploring Fabric Variations Before Sampling

One practical use case is testing fabric ideas during the early design stage.

For example, a designer may have a jacket silhouette ready but want to explore different material options. They can use AI to compare how the design might look with:

  • A sheer mesh overlay
  • A lightweight translucent layer
  • A lace-inspired texture

This allows designers to evaluate different material directions before creating physical samples.

AI-generated concepts can be especially useful when experimenting with unconventional materials or layered transparent designs, helping teams decide which ideas are worth developing further.

Creating Fashion Concepts and Visual References

AI see-through clothing effects can also help creative teams develop visual directions for campaigns, editorials, and digital content.

For example, a brand planning a futuristic collection may want to explore how transparent fabrics, layered materials, or experimental styling could appear before organizing a photoshoot.

AI-generated images can be used as creative references to test:

  • Fashion campaign concepts
  • Editorial styling ideas
  • New material combinations
  • Social media visual directions

The goal is not to replace final product photography, but to help teams explore and communicate creative ideas more efficiently.

How to Make Clothes See Through in Photos with Fashion Diffusion

AI-powered clothing editing tools have made it easier to explore different fabric styles and visual effects without relying on complex photo editing software.

With Fashion Diffusion’s AI Xray Clothes, users can transform the appearance of clothing directly from an existing image. Instead of manually adjusting transparency, layers, or fabric textures, the tool uses AI to generate a new clothing effect based on the uploaded image and editing instructions.

Fashion Diffusion AI x-ray clothes tool page.

The workflow is simple: start with a suitable image, describe the transparent fabric effect you want, and refine the result until it matches your creative direction.

Step 1: Upload a Clothing Image

The first step is to prepare an image where the garment is clearly visible.

This works best for:

  • Fashion product images
  • Model photos
  • Outfit images
  • Design references

A clear image helps AI better understand the garment structure, including its shape, folds, and overall style.

Source image generated by Fashion Diffusion.
Fashion Diffusion AI-generated

Unlike traditional editing, you do not need to manually select clothing areas or create masks. The AI analyzes the image and applies the transformation based on the garment’s appearance.

Step 2: Describe the See-Through Fabric Effect

After uploading the image, describe the material change you want to create.

Enter text description.

For example, instead of make clothes see through, try Transform the dress into a lightweight sheer organza fabric with soft transparency, realistic folds, and natural lighting.

You can include fabric type (sheer, mesh, lace, organza), transparency level, fashion style, and any mood or lighting details. Different descriptions produce different visual directions — a sheer lace effect looks quite different from a futuristic transparent mesh design.

Step 3: Review and Adjust the Result

AI-generated fashion images often work best through iteration.

After generating an image, review:

  • Whether the fabric effect looks natural
  • Whether the garment shape is preserved
  • Whether the transparency level matches your idea

If the result is not what you expected, adjust the prompt and try again.

For example:

  • Change transparent to slightly translucent for a more subtle effect
  • Add soft fabric texture for a more realistic material appearance
  • Specify editorial fashion style for a more creative visual direction

Small prompt adjustments can help you explore different interpretations of the same garment.

See through clothes AI output.
Fashion Diffusion AI-generated

Step 4: Explore Different Fashion Directions

One advantage of AI clothing transformation is that you are not limited to a single result.

After creating one version, you can experiment with different concepts:

  • A casual outfit with lightweight sheer layers
  • A futuristic look with transparent technical fabrics
  • A high-fashion editorial style with lace or mesh details

This makes AI useful not only for creating one image, but also for exploring multiple creative possibilities from the same starting point.

Create See-Through Clothing Effects with Fashion Diffusion

Exploring transparent fabric ideas no longer requires complex editing workflows or manual adjustments.

With Fashion Diffusion AI Xray Clothes, you can transform clothing appearances directly from your images and experiment with different material styles through AI.

Whether you want to explore sheer fabric concepts, develop fashion references, or test new visual directions, AI provides a faster way to turn creative ideas into images.

Upload your image, describe the fabric effect you want, and create different see-through clothing concepts with Fashion Diffusion.

FAQ

Can AI really make clothes see through in photos?

AI does not see through clothing or reveal what is underneath. Instead, it creates a generated visual effect that simulates transparent or semi-transparent fabric based on the original image and your prompt. The result is a creative image transformation. Not exposing anything hidden.

Is a see through clothes filter the same as removing clothes?

No. A see through clothes filter changes the material appearance of clothing to simulate sheer or transparent fabrics. It does not remove clothing from an image. The tool is designed for exploring fashion concepts, material variations, and creative visual effects.

What type of photos work best for AI see-through clothing effects?

Photos with clear garment details produce better results. The image should have a visible clothing area with clear outlines, good lighting, and sufficient resolution. A front-facing or slightly angled photo is usually easier for the AI to analyze.

Can designers use AI see-through effects during the design process?

Yes. AI-generated transparent fabric effects are useful for exploring material concepts, comparing styling directions, and creating visual references before developing physical samples. The tool is particularly useful during the early creative stage.

What is the easiest way to make clothes see through in photos?

Using an AI tool like Fashion Diffusion’s AI Xray Clothes is the fastest approach. Upload a suitable image and describe the transparent fabric effect you want. Refine the result through adjusted prompts until it matches your creative direction. The entire process takes minutes rather than the hours required for manual editing.

What fabric effects can the AI simulate?

The AI can simulate a wide range of transparent and semi-transparent material styles, including sheer organza, mesh, lace, lightweight chiffon, and experimental futuristic fabrics. The output is shaped by the prompt.

Avatar photo 通过Sophia Mille

Y3K Outfit Ideas: The Futuristic Aesthetic Taking Over in 2026

When Zendaya stepped onto the Dune: Part Two red carpet in London wearing an archival Thierry Mugler cyborg suit from 1995 — silver armor, plexiglass cutouts, built-in gloves — the internet lost its mind. The look wasn’t from a runway. It was pulled from Mugler’s archives, a piece of fashion history that somehow felt more relevant in 2024 than it did when it was made.

Zendaya's futuristic outfit onto the Dune red carpet.

That moment crystallized something that had been building for a while: the future is the new nostalgia. Y2K spent years looking backward. Y3K points the other direction — and in 2026, it’s arrived.

Not sure what Y3K actually looks like on you? Generate a few outfits first and work from there.

What Is Y3K Fashion

Y3K is short for Year 3000. As a fashion aesthetic, it imagines what clothing might look like a millennium from now: metallic fabrics, architectural silhouettes, holographic surfaces, tech-inspired cuts. The feeling is of someone who has access to materials that don’t quite exist yet.

It grew out of Y2K — they share some DNA, particularly the metallics and the nostalgia-adjacent energy — but the difference is directional. Y2K looks back at 1998-2004. Y3K looks forward, past the present, into a future that’s still being invented. Where Y2K is nostalgic, Y3K is speculative.

How K-Pop Brought Y3K to the Mainstream

K-pop has been one of the clearest vehicles for the aesthetic going mainstream.

Aespa built an entire visual identity around it — their Whiplash era put chrome bodysuits, angular silhouettes, and cyborg-adjacent styling in front of a global audience.

Aespa's Whiplash MV screenshot.

Lisa’s Rockstar video pushed similar territory: headpieces, metallic layering, and an overall look that reads more like a transmission from the future than a music video.

Lisa's Rockstar MV screenshot.

These aren’t just fashion moments — they are reference points that defined what Y3K looks like for an entire generation of fans who then carried the aesthetic into their own wardrobes and feeds.

The Key Elements of Every Y3K Outfit

Before getting into specific looks, it helps to understand the visual grammar of Y3K — the elements that make an outfit read as futuristic rather than just metallic or edgy.

Materials

The material is usually where Y3K starts. Reflective fabrics, holographic surfaces, metallic weaves, technical mesh, and latex are all key. What these materials have in common is that they interact with light differently than standard fabrics — they catch it, reflect it, or change color as you move. That light-responsive quality is part of what gives Y3K its distinctly non-everyday feel.

The fabric and material of Y3K outfit clothes.
Fashion Diffusion AI-generated

Tech fabrics also play a role: structured neoprene, bonded materials, anything that holds its shape without softening. The feeling should be engineered, not draped.

Silhouette

Y3K silhouettes tend toward the deliberate and the extreme. Exaggerated proportions — a tiny structured top paired with oversized trousers, or a sculptural jacket over a barely-there skirt — appear constantly. Asymmetry is common: one sleeve, uneven hemlines, cut-outs placed precisely. The overall effect should feel like a decision was made about every line of the garment, not just the fabric.

Y3K silhouettes tend toward exaggerated proportions.
Fashion Diffusion AI-generated

Fitted bodysuit cuts are also central to the aesthetic, especially in silver or black. They read as a kind of base layer for the future — a second skin made of something that doesn’t exist in nature.

Color Palette

Silver is the defining color of Y3K. Black follows close behind, providing the contrast that makes metallics pop. Neon accents — acid green, electric blue, hot pink — appear as punctuation rather than main events. Chrome finishes, iridescent sheens, and mirror-like surfaces all fall within the palette.

Silver is the defining color of Y3K.
Fashion Diffusion AI-generated

Earth tones and muted neutrals are largely absent. If a color doesn’t look like it could have been generated by a computer or found in a spacecraft interior, it’s probably not Y3K.

Y3K Outfit Ideas for Every Occasion

Y3K doesn’t have one fixed entry point. The aesthetic scales from a single metallic piece in an otherwise minimal look, to a full head-to-toe statement. Here’s how it plays out across three different contexts.

Y3K at Work

The workplace version is about restraint — one or two futuristic pieces against an otherwise structured outfit. A chrome-finish blazer over tailored black trousers. Metallic accessories — a structured silver bag, geometric earrings — against a muted base. Tech-fabric trousers in an interesting cut paired with a matte black top: the silhouette is futuristic, the palette keeps it professional.

Y3K at work generated by Fashion Diffusion.
Fashion Diffusion AI-generated

Y3K for Content and Shoots

Metallic fabrics catch light in a way that photographs well, and strong silhouettes read clearly in an image. The contrast build works best here: matte base, shiny accent, deliberate proportions. A longline black coat over a silver bodysuit. Wide-leg tech-fabric trousers against a fitted chrome crop. One focal point per outfit — one element that holds the frame — rather than competing details across the whole look.

Y3K outfit ideas for content and shoots generated by Fashion Diffusion.
Fashion Diffusion AI-generated

Y3K for a Statement Night

Full commitment. A head-to-toe metallic look — silver bodysuit, matching trousers, platform boots — held together by a single strong silhouette. An asymmetric holographic dress with angular accessories. A sculptural headpiece that makes the outfit read as a complete visual concept.

Y3K for a statement night generated by Fashion Diffusion.
Fashion Diffusion AI-generated

How to Dress Y3K with Fashion Diffusion

One of the genuine barriers to Y3K is uncertainty about whether it’ll actually work on you. The aesthetic looks confident on a runway or a red carpet. It can be harder to picture on your own body in your own life — especially before you’ve bought anything.

Start with a Generated Look

Instead of buying a silver bodysuit and hoping for the best, describe the Y3K look you have in mind — silhouette, materials, occasion — and generate it first with Fashion Diffusion’s AI Outfit Generator. See what the aesthetic actually looks like before spending anything.

Fashion Diffusion's AI Outfit Generator page.

Transform an Everyday Look into Y3K

Already have an outfit you like? Fashion Diffusion’s AI Clothes Changer lets you change your outfit into something Y3K — swap the jacket for something metallic, trade the plain trousers for a reflective cut, and see the same look transformed without starting over. The before-and-after is often more dramatic than you’d expect.

Fashion Diffusion transforms an everyday look into Y3K.
Fashion Diffusion AI-generated

Try It On Before You Buy

Once you’ve landed on a direction, the last step before buying is seeing it on yourself — not on a model with different proportions. Upload a photo to Fashion Diffusion’s Virtual Try-On, put the outfit on your actual body, and see whether it actually works.

Shooting and Sharing Your Y3K Outfit

Y3K is one of the most photogenic aesthetics in fashion right now — the metallics catch light beautifully and the silhouettes read clearly in an image. But the background matters more than it does for most aesthetics. Industrial environments, empty parking structures, brutalist architecture, and minimalist studio settings all complement Y3K without competing with it.

For social content or editorial shots, swap in a backdrop that fits the aesthetic — a concrete environment, a dark studio, a subtle tech-infused scene. The look lands harder than it would against a neutral wall.

Change a Y3K background using Fashion Diffusion.
Fashion Diffusion AI-generated

Try a Y3K Outfit with Fashion Diffusion

Y3K is a forward-looking aesthetic in a cultural moment that’s ready for it. Metallics are trending, futuristic silhouettes are appearing across price points, and the visual language of the aesthetic is clearer than it’s ever been. The question isn’t whether the trend is real. It’s which version of it works for you.

Fashion Diffusion lets you work that out before you spend anything: generate the look, try it on, adjust until it’s right. Start with the AI outfit generator and describe the Y3K look you have in mind. The result is a starting point, not a final answer — but it’s a much better starting point than guessing.

FAQ

What is Y3K fashion?

Y3K is a futuristic aesthetic inspired by imagining what clothing might look like in the year 3000. It centers on metallic and holographic fabrics, architectural silhouettes, tech-inspired cuts, and a silver-and-black color palette. Unlike Y2K, which draws on actual 1998-2004 fashion, Y3K is forward-speculative — it’s not based on a real historical period.

What’s the difference between Y2K and Y3K?

Y2K is nostalgic: it references actual clothing trends from the late 1990s and early 2000s — low-rise jeans, baby tees, chunky sneakers, butterfly clips. Y3K is forward-looking: it imagines a future that hasn’t happened yet, using reflective materials, architectural shapes, and a palette that feels more digital than natural. They share an interest in metallics and chrome, but the references and the mood are different.

What are the key Y3K pieces to start with?

A reflective or metallic jacket is the easiest entry point — it adds a Y3K note to almost any outfit. After that: a structured silver or black bodysuit, tech-fabric trousers with an interesting cut, and footwear that reads as futuristic (platform boots, structured technical sneakers). Accessories in holographic or mirror finishes complete the look without requiring a full wardrobe overhaul.

Is Y3K hard to pull off if you are new to statement dressing?

Less so than it looks. Starting with a single reflective or metallic piece in a neutral outfit is genuinely low-risk — the piece does the work without the rest of the look needing to match it. The more you wear Y3K elements, the more intuitive the layering and proportion choices become.

Avatar photo 通过Ethan Davis

AI Pet Portrait Generator: The Content Format Pet Accounts Are Missing

Your dog as a Renaissance duke. Your cat rendered in watercolor, looking insufferably regal. Your rabbit in a cinematic portrait that belongs on a gallery wall.

Pet accounts already have one of the highest engagement rates on social media — around 5% on average, more than double the general benchmark. The audience is there. What most accounts are missing is visual variety. Post the same format long enough and even a devoted audience starts scrolling past. AI pet portraits are the format that breaks that pattern — and the one most pet accounts haven’t tried yet.

This article covers what an AI pet portrait generator produces and who’s using it. It also walks through exactly how to create one with Fashion Diffusion — step by step.

How an AI Pet Portrait Generator Works

Upload a reference photo and describe the style you want — or skip the photo and describe your pet entirely in text. Either way, the AI generates a finished portrait in seconds.

What’s happening under the hood is closer to generation than editing. The AI isn’t applying a filter or adjusting colors on top of your original photo. It reads the visual information — the pet’s face shape, fur texture, distinctive features — and reconstructs it as a new piece of artwork in the style you specified. That’s why the output reads as a finished portrait rather than a processed image.

What AI Pet Portraits Can Look Like

The same pet looks completely different depending on artistic interpretation. A realistic portrait captures your pet exactly as they are. A styled illustration reveals a different side of their personality. A poster-style render makes them campaign-ready. And then there’s everything beyond that.

Realistic Pet Portrait

True-to-life rendering — your pet’s actual coat texture, eye color, and expression, rendered with clarity and detail. This style works best when you want the portrait to feel like a high-quality photograph, just without the photoshoot.

Realistic cat portrait generated by Fashion Diffusion.
Fashion Diffusion AI-generated

Watercolor and Cartoon

Loose brushwork and soft color for watercolor; bold outlines and flat color for cartoon. Both styles lean into personality over precision — the result feels expressive and immediately shareable, a natural fit for social content.

Watercolor and cartoon portrait generated by Fashion Diffusion.
Fashion Diffusion AI-generated

Poster-Style Portrait

Clean composition, strong contrast, commercial-quality output. This style is designed to be used — on product packaging, e-commerce listings, loyalty cards, or any branded material that needs a pet as its visual centrepiece.

E-commerce poster portrait generated by Fashion Diffusion.
Fashion Diffusion AI-generated

Surreal and Creative

Your pet as a space explorer. A mythical creature. A Renaissance painting subject wearing armour. This category has no rules — describe the concept and the AI renders it. The results tend to be the most surprising, and the most talked-about.

Surreal dog portrait generated by Fashion Diffusion.
Fashion Diffusion AI-generated

The output isn’t a filter on top of a photo. Each portrait is generated as a finished piece of art in the style you specify — which is why it reads differently in a feed than any photograph does.

How to Create an AI Pet Portrait with Fashion Diffusion

Fashion Diffusion’s AI pet portrait generator runs in the browser — no download or design skills required.

Step 1: Upload a reference photo or start with a text description

Start with what you have.

Upload a photo of your pet and describe the style you want — oil painting, watercolor, cartoon, or any artistic direction you have in mind. Or describe your pet and the portrait entirely in text if you don’t have a reference photo to hand.

Step 2: Write a specific style description

The more precise the description, the closer the result. Name the art style, describe the lighting, include details about background, mood, or any accessories you want in the portrait.

Text prompt sample.

Step 3: Generate and Download

Hit generate. If the first result isn’t right, adjust the description and try again — each attempt takes seconds. Download in high resolution, watermark-free, ready to use for social posts, print, merchandise, or campaign materials.

Final dog portrait output generated by Fashion Diffusion.
Fashion Diffusion AI-generated

How Pet Creators Use AI Pet Portraits for Social Media

A pet account posting 4-7 times a week needs up to 28 pieces of content a month. Most of that comes from real-time photography — which means the content output is directly tied to whether the pet is cooperative, the light is good, and the creator has the energy to shoot. AI pet portraits break that dependency.

A format that holds its own in a crowded feed

A styled portrait — oil painting, watercolor, cinematic — stops a scroll in a way a standard photo often doesn’t. It prompts a different kind of reaction: people look longer, comment more, and save more often. For a format that accounts are already producing anyway, that difference in engagement is worth paying attention to.

Seasonal content without the production overhead

Holiday posts, themed content, seasonal campaigns — these drive strong engagement but usually require props, outfits, and a dedicated shoot. A portrait generated from a single reference photo handles all of it. A Christmas card-style portrait, a Halloween illustration, a Valentine’s Day watercolor — none of it needs your cat to sit still in a costume for twenty minutes.

Pet micro-influencers already deliver 10-40% engagement rates compared to 2-5% for macro accounts. Adding a visually distinct content format on top of that audience strength compounds the advantage.

How Pet Brands Use AI Pet Art for Marketing

For brands, the problem isn’t engagement — it’s production. Every campaign, every seasonal launch, every new SKU needs fresh visual assets. A studio shoot with a trained animal, a handler, and a photographer is expensive and slow to schedule. AI pet portraits close that gap.

Campaign assets without a studio booking

A reference photo and a style description produce campaign-ready visuals in minutes. Styled to match the aesthetic of the campaign, ready to use across product pages, social posts, and ads.

For small pet brands running multiple seasonal launches a year, this is the difference between having custom-feeling content for each one and reusing the same images across everything.

UGC campaigns that actually scale

Some of the strongest pet brand campaigns run on user participation: submit a photo of your pet, get a branded portrait back. It gives pet owners something personal and shareable — and every portrait they post extends the campaign’s reach. UGC already earns 8.7x more engagement than branded content in the pet space. A branded portrait campaign puts that multiplier to work with controlled visual quality on both ends.

Tips for Getting the Best Results from Your AI Pet Portrait Generator

AI pet portraits are fast to generate, but a few small decisions upfront make a noticeable difference in the output.

  • Reference photo quality shapes the output. A clean, well-lit photo gives the AI more to work with. Blurry or backlit photos produce portraits with soft edges and muddled detail.
  • Be specific in the style description. Vague prompts produce generic results. Name the art movement, describe the lighting, include mood and background. The more detail you give, the more control you have over the outcome.
  • Use portraits alongside real content, not instead of it. Audiences follow pet accounts for a specific animal. Portraits work best as a recurring format — weekly, seasonal, or tied to campaigns — while real-time photos and video keep the personal connection that drives engagement.

Generate Your Custom AI Pet Portrait with Fashion Diffusion

Pet content already outperforms most other categories on engagement — the audience is there, and it responds. What AI pet portraits add is a format that sits alongside your existing content without competing with it: visually distinct from a standard photo, faster to produce than a commissioned piece, and flexible enough to serve a weekly social post, a seasonal campaign, or a full product line.

For creators, that means a content calendar that doesn’t depend entirely on whether your pet is cooperating today. For brands, it means campaign-ready visuals without the studio booking. And for anyone who just wants to see their dog rendered as a baroque oil painting — that too.

Your pet already has an audience. Fashion Diffusion’s AI pet portrait generator gives you a content format they haven’t seen yet — and one that takes seconds to produce. New accounts start with free credits. Generate your first custom AI pet portrait now and see where it fits!

FAQ

What is an AI pet portrait generator?

An online tool that turns a pet photo, a text description, or both into a finished piece of artwork — oil painting, watercolor, cartoon, poster-style, or any other direction you specify. Fashion Diffusion’s generator produces the portrait in seconds, in high resolution, without any design experience required.

Can I use the pet portraits for commercial purposes?

Yes. Free credits upon registration cover commercial use including e-commerce listings, social media campaigns, and branded materials. Paid plans offer higher volume and additional benefits for brand teams generating across multiple campaigns.

I run a pet account. How often can I realistically use AI portraits without the feed feeling repetitive?

Most creators treat it as a recurring format rather than a one-off — weekly themed portraits, seasonal content drops, or style variations tied to a campaign or collab. Because each portrait looks visually distinct from the last (different style, different mood, different composition), the format holds up across regular use without feeling repetitive the way the same photo filter would.

I’m a pet brand. Can I maintain a consistent visual style across a full campaign?

Yes. If you use the same style description and reference inputs across a campaign, the output stays visually cohesive — same artistic treatment, same mood, same colour register. That consistency is useful for packaging, social feeds, and any branded material where the visual language needs to be recognisable across multiple touchpoints.

How does this compare to commissioning a portrait artist?

A commission typically takes weeks and costs hundreds of dollars — one image, limited revisions, one chance to get it right. An AI portrait is ready in seconds, free to start, and you can generate variations until the result feels right.

Avatar photo 通过Alexander Wilson

AI Clothes Changer for E-Commerce: How to Cut Product Photo Costs by 80%

A single product photoshoot can run anywhere from a few hundred to a few thousand dollars once you add up the model, the studio, and the retouching — a cost that scales with your catalog instead of your revenue. An AI clothes changer for e-commerce flips that math: one base photo, unlimited outfit changes, no reshoot.

Industry estimates across multiple AI photography platforms consistently land in the 80-95% cost reduction range compared to traditional studio shoots, with 80% as a commonly cited figure for apparel sellers specifically.

This article walks through the actual workflow — from the first model photo to a finished, marketplace-ready catalog. It covers where an AI outfit swap for product photos fits alongside the other tools most online stores already need.

Why Traditional Product Photography Doesnt Scale With Your Catalog

The math behind a traditional shoot is straightforward, and that’s the problem. Every new SKU means another round of the same fixed costs:

  • Model fees, which apply per session regardless of how many items you shoot;
  • Studio time, billed hourly whether you are photographing 5 items or 50;
  • Retouching, which scales linearly with image count;
  • Reshoots, whenever a color variant, size run, or new print needs its own session

None of these costs come down as your catalog grows — they just repeat. According to a 2026 breakdown of product photography costs, a mid-size brand with 500 SKUs can spend $125,000 to $250,000 a year on traditional photography once retouching, studio rental, and coordination are factored in.

The pattern shows up across real case studies too: one Shopify brand documented in a 2026 AI product photography case study cut its photography costs by 85%. Turnaround time dropped from 14 days to 30 seconds after moving to an AI-based workflow.

How an AI Clothes Changer Fits an E-Commerce Workflow

The basic mechanism is the same one used for personal outfit try-ons, just applied at catalog scale. Upload a photo of a person and a photo of a garment, and the AI generates a new image of that person wearing it. The face, pose, and proportions stay consistent throughout.

What makes this useful for e-commerce specifically isn’t the single swap — it’s that the same model photo can be reused across an entire product line. Shoot one model once, in one pose, under one lighting setup, and then run every SKU in the collection through that same base image. The result is a catalog where every product photo looks like it came from the same shoot.

This matters more than it sounds. Buyers compare listings side by side, and a catalog with mismatched lighting, inconsistent poses, or visibly different models across SKUs reads as unpolished — even if each individual photo looks fine on its own.

The Workflow: From One Photo to a Full Product Line

Here’s how the process actually breaks down for a multi-SKU catalog, step by step.

Step 1: Shoot or Source One Base Model Photo

You need exactly one clean, front-facing photo of a model — full body for dresses and outerwear, half body if you are only photographing tops. Even lighting and a plain background give the AI the cleanest possible base to work from. This is the only photography expense in the entire workflow; everything after this step is digital.

Step 1: select one base model photo.
Fashion Diffusion AI-generated

Step 2: Prepare Your Garment Photos

For each item in the line, you need a clear photo of the garment itself — a flat lay, a hanger shot, or an existing product photo. If your team already shoots flat lays for internal records or supplier catalogs, those photos work directly as input here. No restyling or remodeling required.

Step 2: prepare the garment photo.
Fashion Diffusion AI-generated

Step 3: Generate the Outfit Swap for Each SKU

Upload the base model photo and the first garment photo to Fashion Diffusion’s AI clothes changer, and the AI generates the model wearing that item. Repeat with the next garment photo, and the next, working through the line. Because the model photo stays constant, every output lines up visually with the last.

Most product pages need more than one angle. Run each swapped-outfit image through Fashion Diffusion’s AI Lookbook tool to generate a set of poses and angles from the same image. One outfit swap becomes a full multi-image set without a second photoshoot.

A set of fashion e-commerce photos generated from Fashion Diffusion's AI Lookbook tool.
Fashion Diffusion AI-generated

Step 4: Standardize the Output Into a Clean Catalog Format

A model-wearing shot and a flat-lay shot serve different purposes on a product page. The model shot sells the fit and feel; the flat lay sells the exact garment shape and detail without ambiguity.

If your listings need both, Fashion Diffusion’s flat-lay generator converts the same garment photo into a clean, white-background flat lay that meets the image specs most marketplaces require. It also runs in bulk, so a full SKU range can be standardized into the same format in one pass instead of one image at a time.

A clean flat-lay garment photo generated by Fashion Diffusion's flat-lay generator tool.
Fashion Diffusion AI-generated

Step 5: Match the Background to the Use Case

The same swapped-outfit image rarely works identically for every channel. A plain studio background suits a core product listing; a styled scene works better for a seasonal campaign or social post. You can swap the backdrop on the same image, without regenerating the outfit swap itself or booking a second shoot for either.

Two photos with swapped background.
Fashion Diffusion AI-generated

Keeping the Catalog Visually Consistent at Scale

Consistency is what separates a catalog that looks professionally produced from one that looks like a patchwork of different sessions. It’s also a conversion issue, not just an aesthetic one — research on e-commerce return rates shows that clothing already sees 20-30% returns on average, with mismatched or inconsistent product imagery as a contributing factor shoppers cite. A few habits make the biggest difference:

  • Reuse the same base model photo across a full collection. Buyers notice inconsistency faster than they notice quality.
  • Use the same pose set across a category. If dresses get three angles, every dress in the line gets the same three — generated through the lookbook tool.
  • Batch by category, not randomly. Run all tops before moving to bottoms; it’s easier to catch inconsistencies early.
  • Standardize background choice by channel, not by product. Decide once and apply the rule across the whole catalog.

Common Mistakes That Undercut the Cost Savings

A few avoidable habits eat into the time and cost benefits this workflow is supposed to deliver:

MistakeWhy It Costs YouFix
Reshooting the base model for every new collectionDefeats the entire point of reusing one photo across SKUsKeep a small library of approved base model photos and reuse them across seasons
Using low-resolution supplier images as garment inputProduces soft edges and flat-looking fabric in the outputRequest or re-photograph garment images at higher resolution before running them through the tool
Mixing inconsistent poses across a single collectionMakes the catalog look disjointed even when each image is individually cleanLock one pose per category and stick to it across the full run
Skipping the flat-lay step for marketplaces that require itRisks listing rejection or inconsistent formatting on platforms with strict image specsRun garment photos through the flat-lay generator before upload if the marketplace requires a clean product-only shot

Build Your Next Catalog With Fashion Diffusion

One model photo, swapped into every item in your line, standardized into the formats each channel needs — that’s the entire workflow, and it runs without booking a single additional shoot. Upload your base model photo and your first garment image to Fashion Diffusion and see how the rest of your catalog could look. New accounts start with free credits, so you can test the workflow on a handful of SKUs before committing a full collection to it.

FAQ

What is an AI clothes changer for e-commerce?

It’s a tool that takes a photo of a model and a photo of a garment, then generates a new image of that model wearing the garment — without a new photoshoot. This type of tool is sometimes also called a virtual try-on for online stores. For online stores, this means one base model photo can be reused across an entire product line, with each item swapped in digitally instead of reshot.

Do I need a professional model and studio for the base photo?

No, but the base photo is the one place worth investing a bit of care, since every SKU in the collection will inherit its quality. A clear, well-lit, front-facing photo — even shot with a good camera in natural light — works as a base. It doesn’t need a full studio setup, just clean lighting and a simple background.

Can this replace product photography entirely, or just reduce it?

For most catalogs, it replaces the repeat photography that used to happen every time a new color, print, or style launched. Many stores still book a traditional shoot occasionally for hero campaign imagery, while using the AI workflow for the bulk of catalog and listing photos. It is a hybrid approach that keeps costs down without losing flagship-quality visuals where they matter most.

Does the AI clothes changer work for every type of garment?

It handles most standard apparel categories well — tops, dresses, jackets, trousers, and outerwear. Heavily embellished items, sequins, or very complex layering can show minor texture loss compared to simpler garments. It is worth testing on a small batch before committing an entire collection to the workflow.

Can I use this for product images on multiple marketplaces with different requirements?

Yes. The underlying model-wearing image stays the same. You can run it through the flat-lay generator for marketplaces that require a clean product-only shot, or through the background changer for channels that call for a styled scene — without regenerating the core outfit swap each time.

Avatar photo 通过Sophia Mille

Change Clothes to a Bikini with AI — Free Virtual Try-On for Fashion Brands

Swimwear shoots are expensive, slow, and hard to scale. Booking a photographer, coordinating models, and styling dozens of bikini looks can take weeks — and the moment a colorway changes, the whole process starts over.

Fashion Diffusion removes that bottleneck entirely: upload a garment image, select an AI model, and the tool swaps the outfit in seconds. Brands use it to preview collections, generate lookbook content, and test styles across different model types — all without a studio session. Start with the Change Clothes to a Bikini tool to see it in action.

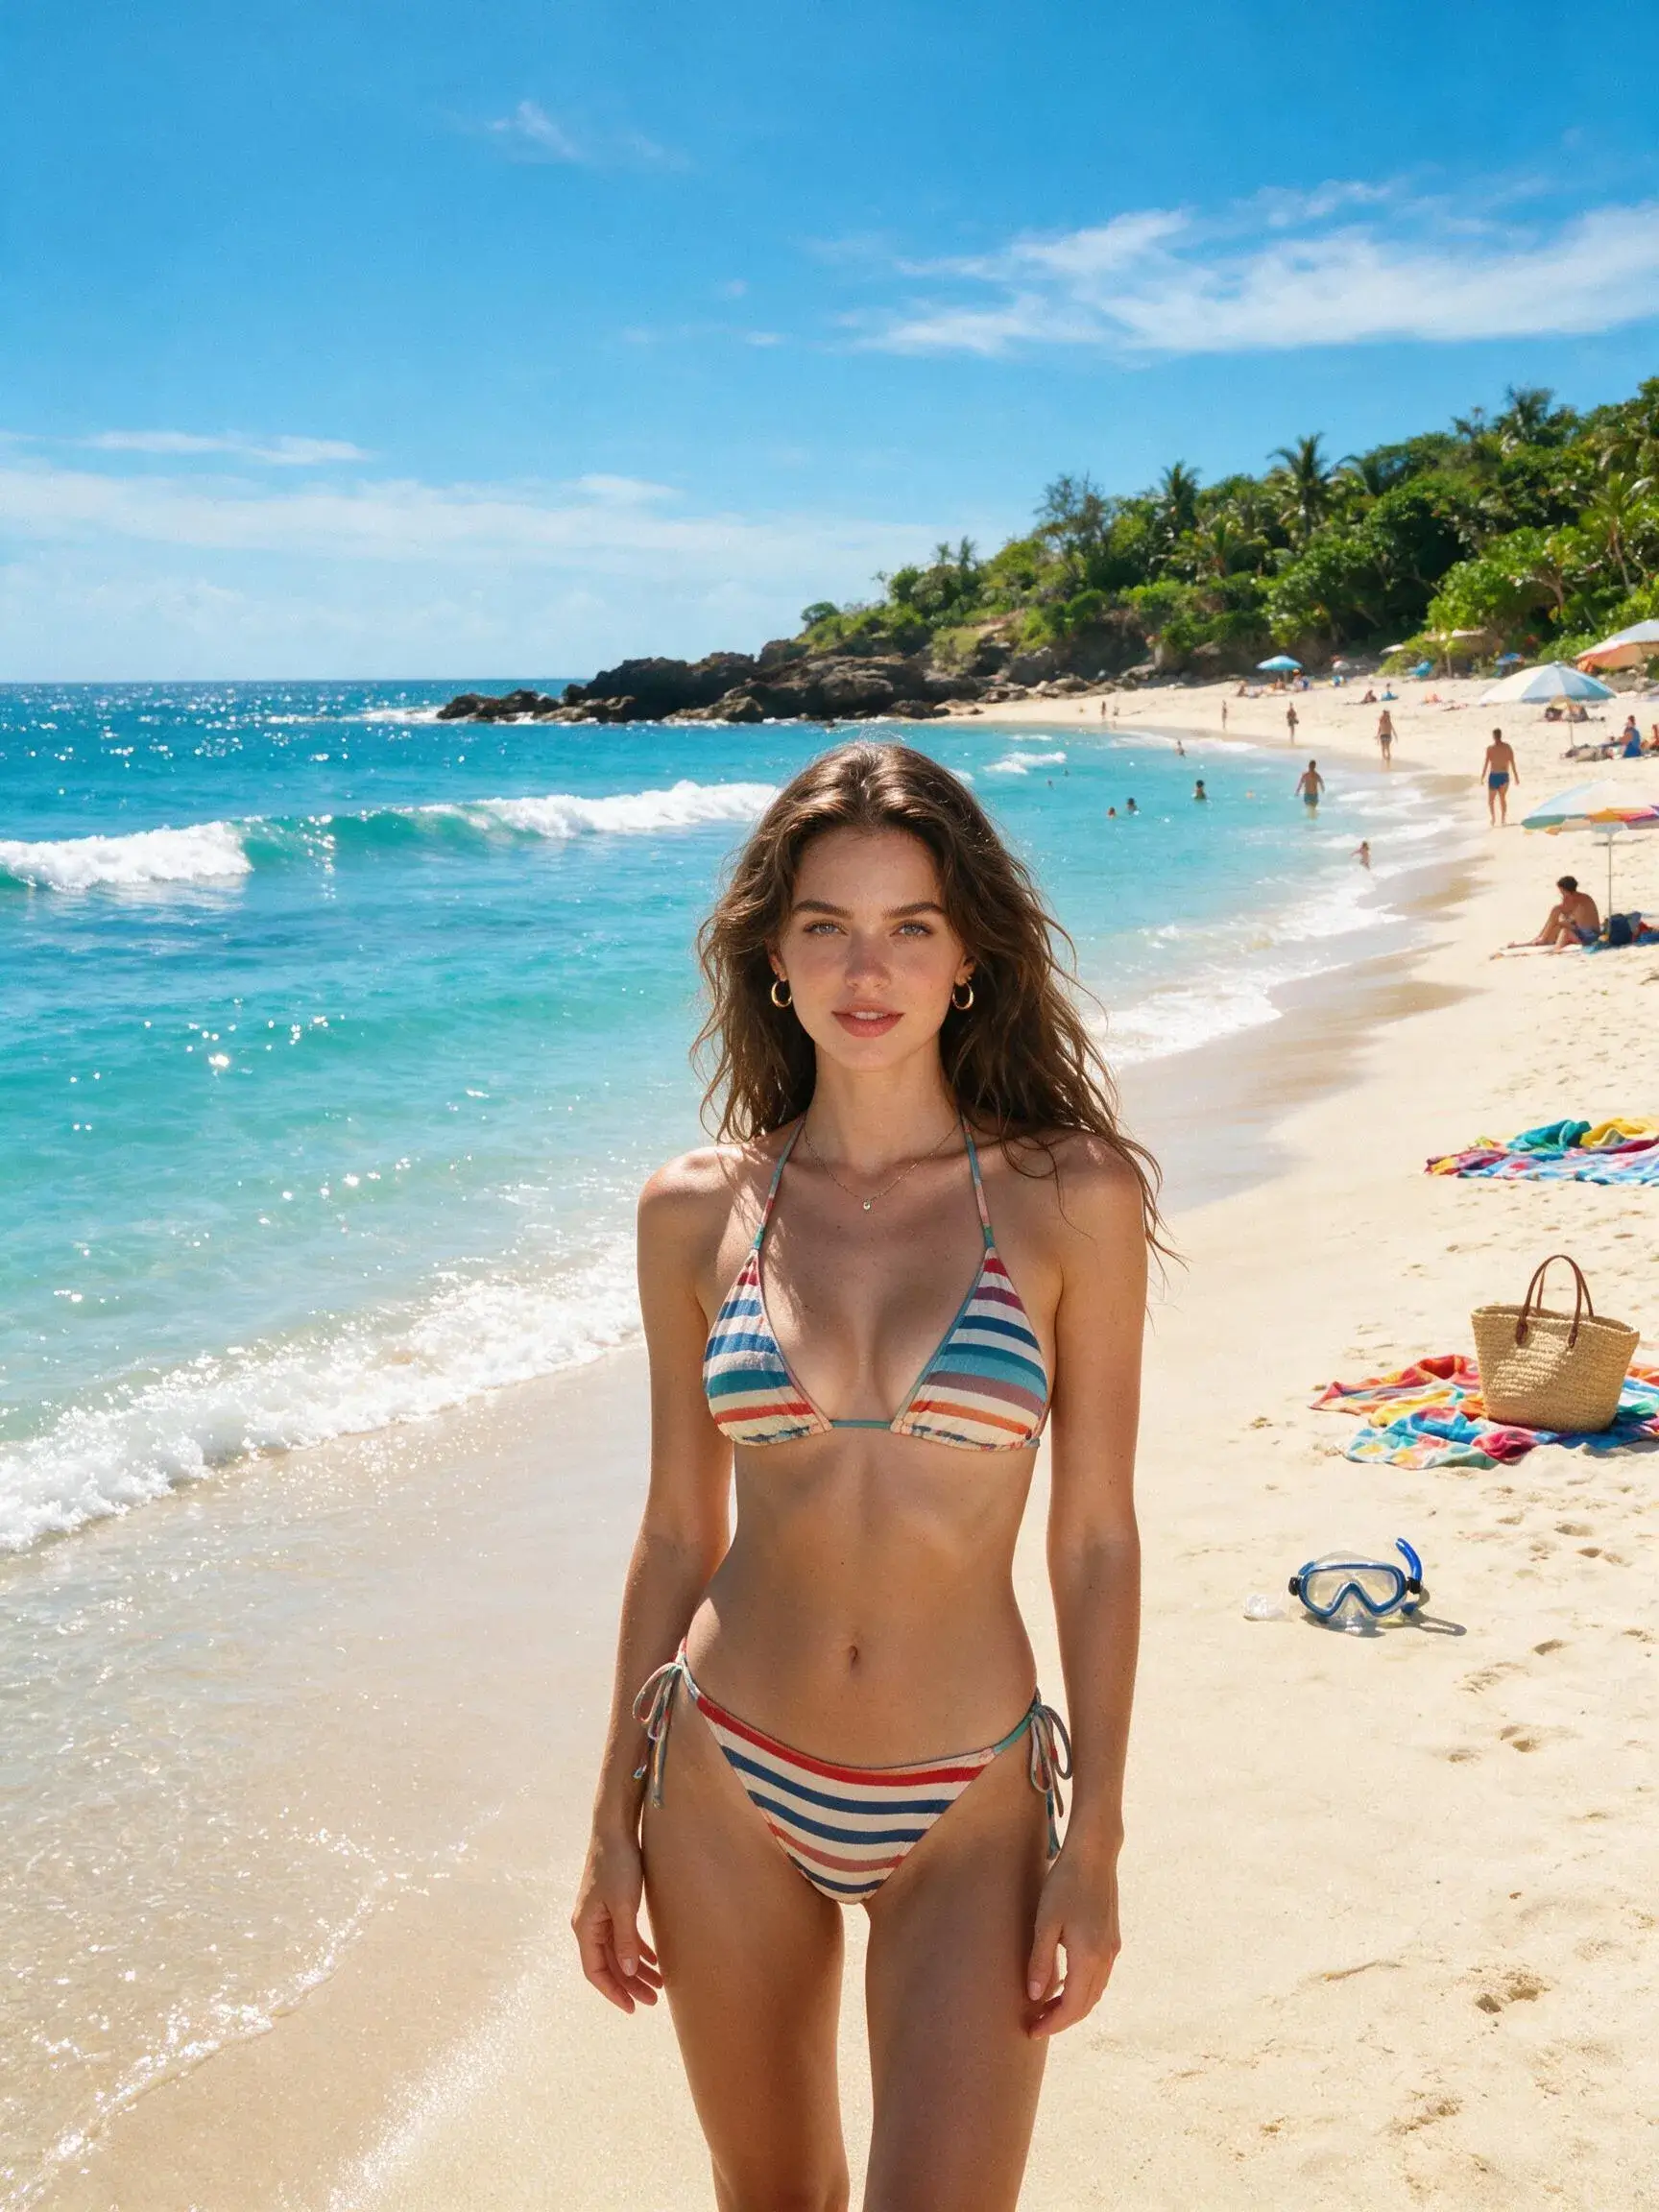
Fashion Diffusion Bikini Image

Why Fashion Brands Use AI to Change Clothes to a Bikini

Fashion brands are turning to AI clothes changers for swimwear production for several reasons:

Scale product visuals without scaling costs

A bikini that comes in eight colorways used to mean eight separate shots. With Fashion Diffusion, one base image generates all eight — same model, same pose, different colors,all in minutes.

Test styles before sampling

Design teams use the Virtual Try-On workflow to visualize how a new cut reads on a body before committing to a physical sample. Catching a proportion issue at the AI stage is far cheaper than catching it at the fitting stage.

Diversify model representation

Showing swimwear across different body types, skin tones, and aesthetics matters to today’s shoppers. Rotating AI models across the same garment makes inclusive imagery a standard part of production, not an add-on.

Feed social and campaign content continuously

Seasonal swimwear campaigns need a steady stream of fresh visuals. The AI Outfit Generator handles content variations — different backgrounds, styling details, model looks — fast enough to keep up with a weekly posting schedule.

The result is a swimwear production workflow that moves at the speed of your creative decisions, not your logistics.

How to Change Clothes to a Bikini with Fashion Diffusion

Fashion Diffusion AI Clothes Changer web page

The process takes under a minute from upload to result. Here’s how it works:

Step 1: Open the AI Clothes Changer

Open the tool from Fashion Diffusion’s main dashboard.

Step 2: Upload Two Images

One of the bikini or swimwear garment, and one of the model you want to dress. Both can be your own product photos or AI-generated references.

Step 3: Move to the Playground

Once both images are uploaded, the tool automatically carries them into the Virtual Try-On workspace, so nothing needs to be re-uploaded or reconfigured.

Step 4: Add Extra Notes

This is where you can direct the output: specify a bikini style detail (“keep the halter tie visible”), a fit preference, or a styling note like “beach setting, natural light.”

Step 5: Set Output Preferences

choose Aspect Ratio, Resolution, and Output Count based on where the image will be used (square for Instagram, portrait for PDP, high-res for print).

Step 6: Generate

Results come back in seconds, ready to download or iterate on.

Each generation keeps the garment’s original color, texture, and silhouette intact — so a white triangle bikini stays a white triangle bikini, fitted to the chosen model rather than distorted by the swap.

What Swimwear Styles Can You Generate

Fashion Diffusion’s AI Clothes Changer handles the full range of swimwear. The tool reads garment structure accurately, so different cuts and silhouettes render distinctly rather than blending into a generic “swimsuit” output.

Styles that work well include:

  • Bikinis — triangle, bandeau, halter, high-waisted, and sporty crop styles. Tops and bottoms are treated as a set or separately, so mix-and-match combinations are easy to preview across colorways.
  • One-piece swimsuits — racerback, plunge, cut-out, and wrap styles, structured or minimal. Useful for brands that want to show how a structured silhouette holds its shape across different body types.
  • Tankinis — two-piece with more torso coverage. Particularly practical for brands targeting a broader age range or modest swimwear segments.
  • Beach cover-ups — sheer kaftans, linen shirts, sarongs, and wrap skirts layered over swimwear. The tool renders layering and fabric transparency accurately, making cover-up styling easier to visualize.
  • Men’s swimwear — board shorts, swim trunks, and rash guards. The same garment-swap workflow applies, so a single trunk style can be shown across multiple model types quickly.

Tips for Better Bikini AI Try-On Results

The quality of your output depends heavily on the quality of your inputs. A few adjustments at the upload stage make a significant difference in how accurately the AI renders the final look.

Use clean garment images

Flat lays on a white or neutral background work best — the AI reads fabric edges, texture, and color most accurately when there’s no visual noise competing with the garment.

Choose a model photo with a clear body outline

Front-facing poses with arms slightly away from the torso give the tool the most surface area to work with.

Match the garment scale to the model frame

Uploading a macro close-up of a bikini top against a full-body model image creates a scale mismatch the AI has to compensate for.

Use Extra Notes to lock in specific details

If the bikini has a distinctive feature, a tie side, a specific strap configuration, a textured fabric — call it out in the notes field.

Run multiple outputs before selecting

Setting Output Count to 3 or more on the first generation gives you a range to choose from rather than committing to a single render.

Conclusion

Swimwear is a visual category, shoppers decide fast, and the image does most of the selling. Brands that move quickly on bikini visuals have a real edge, and that’s exactly what Fashion Diffusion is built for.

From early concept to final campaign asset, Fashion Diffusion AI covers the full production arc — at a fraction of the time and cost of a traditional shoot. Try the AI Clothes Changer and get your first result in under a minute.

FAQs

Can I use Fashion Diffusion’s AI clothes changer for free

Yes. Fashion Diffusion offers a free virtual try-on for swimwear — upload your garment and model images and generate your first result without a paid plan.

Does the AI keep the original garment color and design intact

The tool preserves the garment’s original color, texture, and silhouette throughout the swap. A printed fabric stays printed; a white bandeau stays white. The model changes, the garment does not.

What image formats and file sizes are supported

The tool accepts PNG and JPEG files up to 10 MB per image. For best results, use clean flat-lay garment shots and front-facing model photos with a clear body outline.

Avatar photo 通过Ethan Davis

How to Change Clothes in a Photo with AI — Step-by-Step Guide

Changing clothes in a photo used to mean Photoshop layers, manual masking, and a lot of trial and error. Change clothes AI tools like Fashion Diffusion’s clothes swap tool have replaced that entire process with a single upload. You give the AI a photo and a garment, and it puts the two together — matching pose, lighting, and body shape automatically.

This guide walks through exactly how to change clothes in a photo with AI, step by step, including the photo habits that actually affect your results. Most failed outfit swaps don’t come from a weak AI model — they come from a weak input photo. Fix that, and quality jumps immediately.

What Is an AI Clothes Changer

An AI clothes changer is a tool that swaps the outfit in a photo without any manual editing. You upload a photo of a person and a photo of a garment, and the AI generates a new image of that same person wearing the new clothing — keeping the face, pose, and background intact.

This is different from filters or sticker-style overlays, which just paste a flat image on top of a photo. An AI clothes changer actually re-renders the garment to fit the body’s shape, angle, and lighting, which is what makes the result look like a real photo rather than an edited one.
How AI Changes Clothes in a Photo

Knowing the basic process explains most of the tips in this guide. It happens in three steps:

  • Body and pose detection. The AI maps the person’s outline and posture, and separates the existing clothing from skin, hair, and background. A clear, front-facing photo makes this step far more accurate.
  • Garment mapping. The new garment photo is re-rendered to follow the body’s contours and angle, with lighting recalculated to match the original photo.
  • Selective blending. Only the clothing region is regenerated; the face, hands, and background stay untouched. This is why edge areas like collars and cuffs are where issues most often show up.

Who Uses AI Clothes Changers (and What For)

The same tool gets used for fairly different goals depending on who’s behind the upload.

A few common ones:

  • Shopping decisions. Before buying an item online, upload a photo of yourself and the product image to see roughly how it would look, instead of relying only on a model photo with a different body type and skin tone.
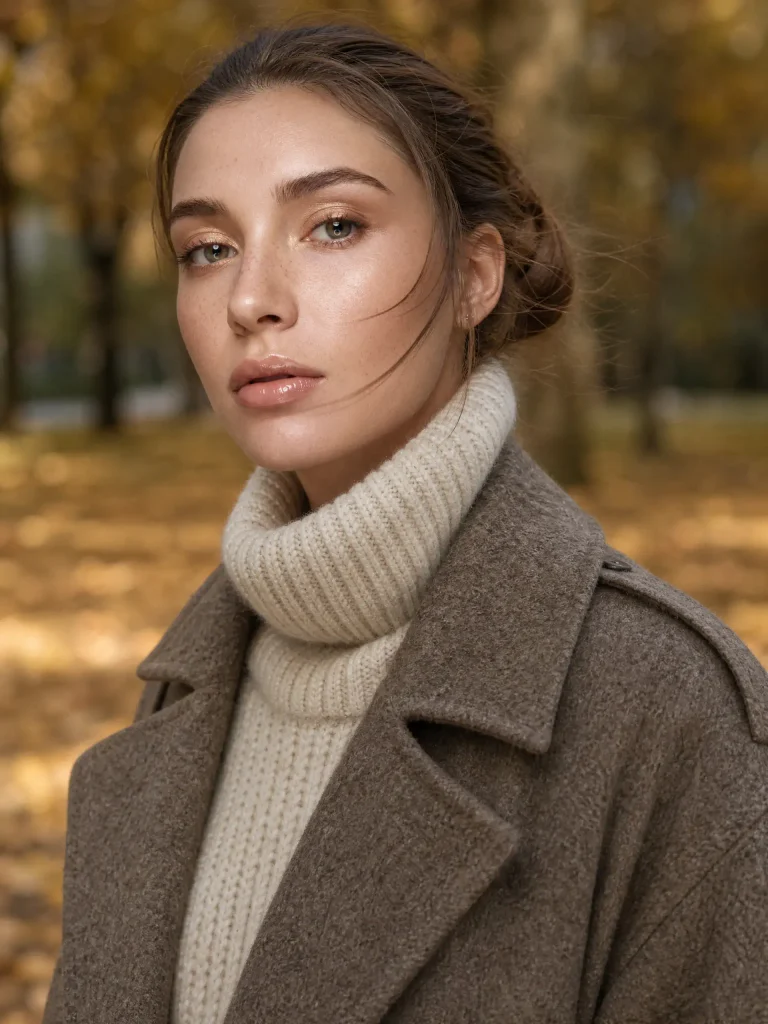
  • Content creation. Creators use an AI clothes changer to produce multiple outfit looks from a single photo session — useful for social posts, lookbooks, or testing which styles get better engagement before committing to a real shoot.
  • E-commerce and catalog work. Online sellers and small fashion brands use it to show the same garment on different body types, or to generate fresh product visuals from existing inventory photos without booking a new model or studio session.
  • Design and prototyping. Designers use a rough sketch or sample garment photo to visualize a concept — a fabric, a silhouette, a color combination — on a real body before committing to a sample or photoshoot.
  • Wardrobe planning. Some people use it simply to decide what to wear from items they already own, by quickly previewing combinations on their own photo.
Illustration on who uses AI clothes changer.

None of these require different tools or settings — the underlying process is the same. What changes is the garment photo you choose to upload for the task at hand.

What You Need to Change Clothes in a Photo with AI

Before opening any AI clothes changer online free tool, gather two things:

  • A photo of the person (yourself, a model, or a customer photo) whose outfit you want to change;
  • A photo of the new garment you want to put on them — a flat lay, a product photo, or a photo of someone else wearing it.

That’s it. No design software, no manual cutout work, no layering. The AI handles segmentation, fit, and lighting on its own.

Step 1: Pick a Photo That Works Well for AI Outfit Changes

This is the step most tutorials skip, and it’s the one that decides whether your result looks real or broken. The AI is only as good as what you feed it.

Best Photos for an AI Clothes Changer

  • Front-facing, full body or half body. A straight-on pose gives the AI a clean view of the body outline. Full body is best for dresses, jumpsuits, and pants; half body is fine for tops, shirts, and jackets.
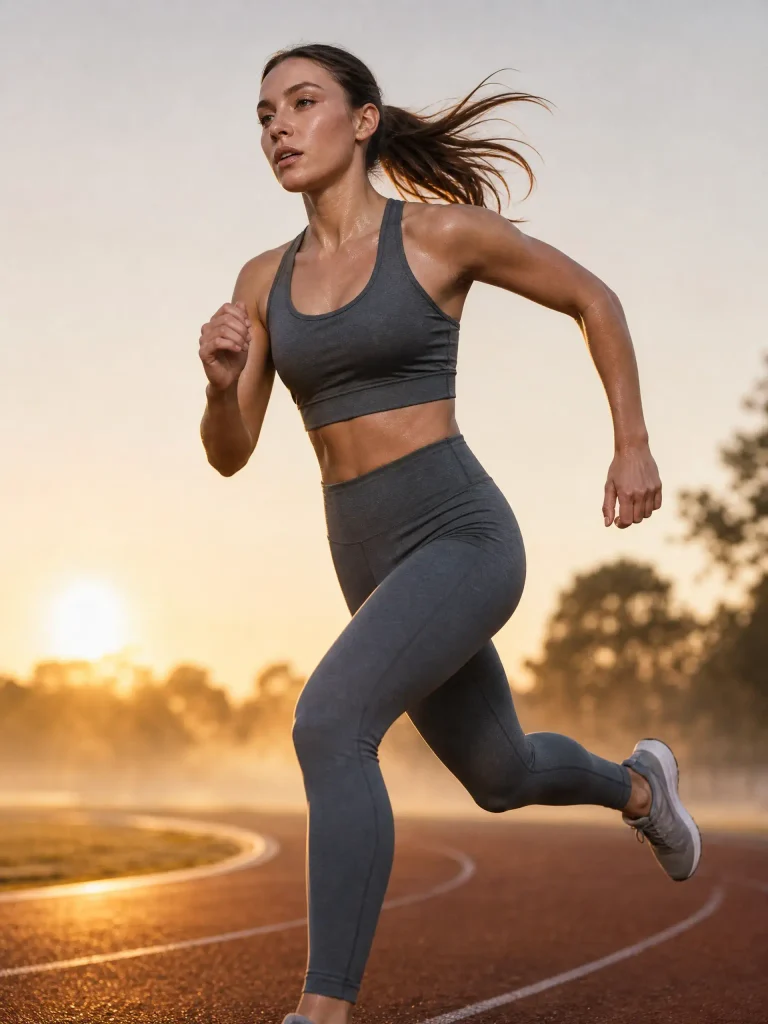
  • Even, natural lighting. Daylight near a window or outdoor shade works better than harsh flash or backlighting, since the AI needs to read shadows correctly to make the new outfit sit naturally.
  • Plain or simple background. A cluttered background doesn’t break the AI, but a clean one helps it separate the person from the scene faster and more accurately.
  • Visible body outline. Arms slightly away from the torso, not crossed or hidden, so the AI can map where the garment edges should fall.
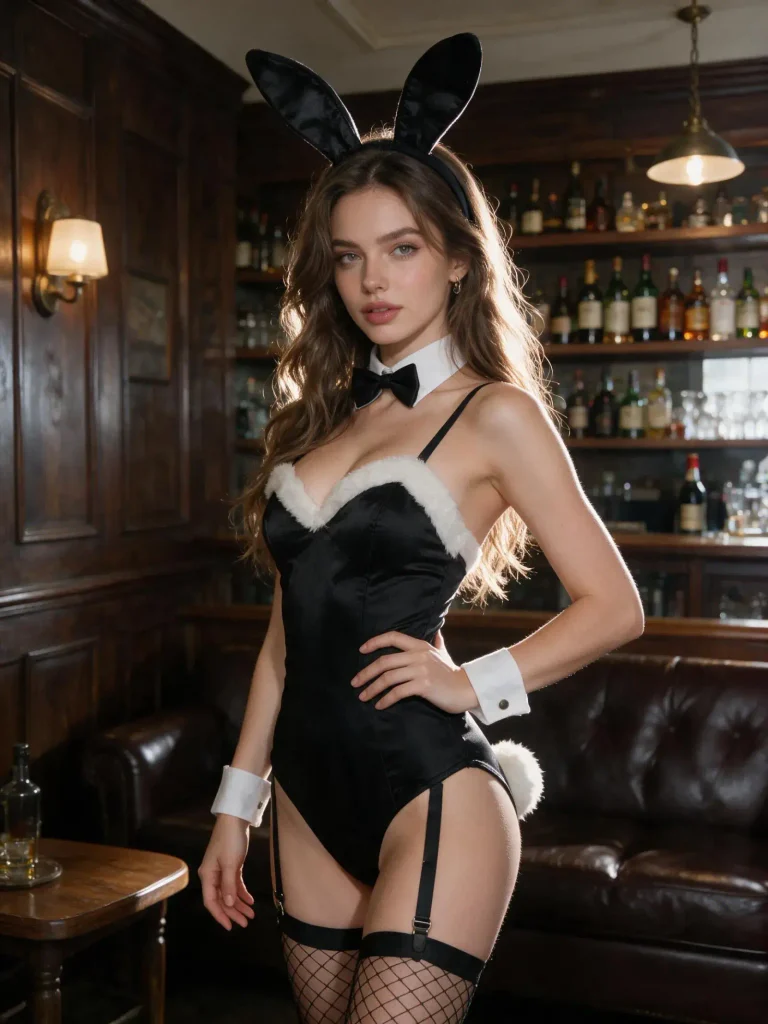
Best photos for an AI clothes changer (sample).

Photos to Avoid When Changing Clothes with AI

  • Side profiles or extreme angles. The AI fits clothing based on what it can see — a side view gives it half the information it needs.
  • Heavily filtered or edited photos. Beauty filters, warped proportions, or heavy color grading confuse the body-mapping step before clothing is even applied.
  • Group photos. The AI needs to lock onto one person. Crop to a single subject first.
  • Low resolution or blurry images. Compressed screenshots or zoomed-in crops lose the detail the AI needs for clean edges around hands, hair, and clothing lines.
Photos to avoid when changing clothes with AI (sample).

A quick rule of thumb: if you can clearly see the person’s outline and posture at a glance, the AI can too.

Step 2: Pick a Clean Garment Photo

The second input matters just as much as the first. Pick a garment image where:

  • The clothing is fully visible and not blocked by bags, hands, or folded fabric;
  • The image is reasonably sharp — a product photo or flat lay works better than a low-res screenshot;
  • The garment isn’t extremely cropped (you want the AI to see the full neckline, hem, or sleeve length).

Product photos from any online store, your own camera roll, or a flat lay you shoot yourself all work. Solid colors and simple patterns convert most reliably; very busy prints or sequins can occasionally render with minor texture loss, which is worth knowing going in rather than discovering after several attempts.

Step 3: Generate the Outfit Change with Fashion Diffusion

Once you have a clear subject photo and a clean garment photo, the actual outfit swap takes under a minute:

Open Fashion Diffusion. Fashion Diffusion’s AI clothes changer tool runs directly in your browser — no install needed.

  • Upload the subject photo — the person whose outfit you want to change.
  • Upload the garment photo — the new clothing you want them wearing.
  • Generate.
  • Review and download. Results are ready in seconds in high resolution.
Fashion Diffusion's AI clothes changer tool interface.

If the first result isn’t quite right, you don’t need to start over — just swap in a sharper version of either input photo and run it again. Small input changes usually fix most issues.

Step 4: Iterate Until the Result Looks Right

Even with two solid input photos, the first result isn’t always perfect — and that’s normal. Instead of treating one generation as final, treat it as a first pass:

  • Generate once, then review closely. Zoom in on the edges — collar, sleeves, where hair meets the shoulder. These are the areas most likely to show small artifacts.
  • Use AI Inpainting for targeted edits. If the outfit looks close but the style, fit, or a specific detail isn’t quite right, refine only the area you want to change with AI Inpainting tool instead of generating the entire image again. You can adjust garment shapes, replace details, or modify the clothing style while keeping the rest of the image consistent.
  • Change one input at a time. If something looks off, swap only the subject photo or only the garment photo, not both. This makes it clear which input actually caused the issue.
  • Keep your best result before trying again. Download each version you are happy with before regenerating, since a new attempt replaces the previous output.
  • Run two or three variations for anything client-facing or commercial. For catalog images, social content, or anything going out publicly, generating a couple of versions and picking the cleanest one takes less time than troubleshooting a single imperfect result after the fact.
Variations generated from Fashion Diffusion's AI clothes changer.

Why AI Clothes Changes Fail (and How to Fix Them)

Even with a good AI clothes changer, small issues can still appear if the input photos aren’t ideal. Most failed results come from a few common mistakes rather than the AI itself. The table below explains the most frequent problems, what usually causes them, and the easiest ways to fix them before generating again.

ProblemLikely CausesFix
Outfit doesn’t match body shapeSide angle or unclear poseUse a front-facing, full-body photo
Blurry or warped clothing edgesLow-resolution inputUpload a sharper, higher-res photo
Wrong garment proportionsCropped or partially hidden garment photoUse a full, unobstructed garment image
Unnatural lighting on new outfitLighting mismatch between the two photosMatch lighting conditions where possible
AI struggles with the patternBusy print, sequins, or laceTry a simpler version first, then the detailed one

Change Clothes in Your Photo with Fashion Diffusion

No design software, no studio, no waiting on edits — just two photos and a few seconds. The process is the same one covered in this guide: upload a clear, front-facing photo of the person, pair it with a clean garment image, and let the AI handle the rest.

Try our free AI clothes changer and see the outfit change generated instantly, in high resolution. Whether you are previewing an outfit before buying, building out product visuals for a store, or putting together content for a shoot, the same upload-and-generate process applies. New accounts start with free credits, so you can try it right now — no commitment, no learning curve, just a result in seconds.

FAQ

How do I change clothes in a photo using AI?

Upload a photo of the person and a photo of the garment you want them to wear into an AI clothes changer like Fashion Diffusion. The AI detects the existing outfit, analyzes pose and body shape, and generates a new image with the new clothing applied — typically in under a minute.

Will the AI change my face or background, not just the outfit?

No. The tool is built to keep everything outside the clothing region untouched — face, pose, skin tone, and background stay exactly as they were in the original photo. Only the garment area is detected and replaced.

Why does my AI-generated outfit look unrealistic?

This almost always comes down to the input photos. Side-angle poses, blurry images, heavy filters, and cropped garment photos are the most common causes. Switching to a clear, front-facing photo with even lighting usually fixes it.

Can I change a specific item, like just a jacket or just pants, instead of the whole outfit?

Yes. The same upload process works whether you are replacing an entire outfit or a single piece. Crop the garment photo to the specific item you want applied, and the AI will focus the swap on that part of the body rather than the full look.

Do I need Photoshop or editing skills to change clothes in a photo?

No. AI clothes changers handle masking, fit, and lighting automatically. You only need to upload the two photos — no manual editing required.

Is there a free AI clothes changer online?

Yes. Signing up for Fashion Diffusion gives you free credits to use on tools including the AI clothes changer, with high-resolution, realistic output. Once those credits run out, continued use requires a paid plan.

Avatar photo 通过Sophia Mille

How to Use an AI Clothes Editor — And Actually Get Realistic Results

This guide covers how AI clothes editors work, how to pick the right input photo for clothing edits, and a step-by-step walkthrough using Fashion Diffusion — plus the most common reasons AI clothing edits look unrealistic and how to fix them.

Written by the Fashion Diffusion team. Fashion Diffusion is an AI fashion tool for clothing swaps, virtual try-on, and e-commerce photo production.

What Is an AI Clothes Editor

image showing AI clothes editor before and after comparison — same model, two outfits

An AI clothes editor is a tool that replaces the clothing in a photo while leaving everything else — face, pose, skin tone, background, lighting — exactly as it was. You provide two inputs: a photo of a person and an image of the garment you want them to wear. The AI handles the rest, producing a result that looks like the person was photographed wearing that outfit. No studio. No model rescheduling. No Photoshop.

How Does an AI Clothes Editor Work

Stage 1: Segmentation

The process starts with segmentation: the AI identifies which pixels are clothing and which are skin, hair, and background. Whether you need to edit clothing in an AI workflow or swap a specific garment on a model photo, a clean segmentation mask is the foundation everything else depends on.

Stage 2: Inpainting

The AI then inpaints the clothing region with a new garment, conditioned on the surrounding image so the lighting, shadows, and body contour stay consistent. This is where quality lives or dies. If the segmentation mask is clean, the output looks natural. If the mask bleeds into hair, hands, or accessories, the output looks like a bad Photoshop job — regardless of which tool you use.

This means input quality controls output quality. More than the tool. More than the settings.

How to Pick the Right Input Photo for AI Clothing Edits

Before you upload anything, check your photo against this list. Getting this right eliminates most failure cases before they happen.

Pose

Front-facing or three-quarter angle works best. Crossed arms, turned backs, and extreme side profiles give the segmentation model less clothing surface to work with, so the result degrades fast.

Background

Plain or simple backgrounds. Busy backgrounds increase the chance the mask bleeds into areas it shouldn’t touch. If your best model photo has a complex background, use Fashion Diffusion’s background replacement tool to clean it up before running the clothes edit.

Lighting

Even, diffused light — studio, window, or overcast outdoor. Harsh directional shadows on the clothing area confuse the inpainting model when it tries to match the new garment’s shadow angles.

Clothing Visibility

The full garment should be visible from neckline to hem. Cropped photos that cut off the waist or lower half produce incomplete results.

Accessories

Heavy jewelry, scarves, or bags overlapping the clothing area are common failure points. Remove them from the photo or choose a photo where they don’t cross the clothing region.

Step-by-Step: Edit Clothes in a Photo with Fashion Diffusion

  1. Go to Fashion Diffusion’s AI clothes editor and sign in to your free account.
  2. Upload your model photo — apply the input checklist above before uploading.
  3. Upload the garment image. Flat-lay photos and product images on white backgrounds give the most accurate results. On-model garment photos also work if the clothing area is clearly visible.
  4. Click Generate. Fashion Diffusion maps the garment onto the model while preserving pose, skin tone, and background.
  5. Download your result. If the output has edge artifacts around the neckline or sleeves, try a cleaner input photo rather than regenerating with the same images.
How to Use an AI Clothes Editor

The full process takes under 30 seconds per image.

Based on our internal testing across thousands of generations, white-background flat-lay garment images combined with front-facing model photos produce the highest quality results — clean edges, accurate fabric texture, and no segmentation bleed in over 90% of cases. Complex backgrounds and crossed-arm poses are the two most common causes of failed outputs, accounting for the majority of regeneration requests from new users.

5 Reasons Your AI Clothes Editor Results Look Fake

Most failed outputs come down to the same handful of input mistakes — not the tool itself. Here’s what to look for and how to fix each one before you regenerate.

1. The Mask Bled into Hair or Hands

Fix: use a photo where the clothing boundary is clearly separated from hair and accessories. This issue is especially common with dark long hair against dark clothing — the segmentation model struggles to distinguish the two. Pull hair back, or choose a model photo where hair color contrasts clearly with the garment.

2. The Garment Photo Is Low Resolution

Fix: use the highest resolution product image available. The inpainting model samples texture detail from the garment image — a blurry source produces a blurry result.

3. The Lighting in the Model Photo and Garment Photo Conflict

Fix: match light direction roughly — both from the left, or both from the front. The AI corrects for some discrepancy, but extreme conflicts show up in the final shadow rendering.

4. The Pose Obscures Part of the Garment Area

Fix: choose a straighter, more frontal pose. The AI can’t inpaint what it can’t see.

5. You’re Using a General-Purpose Image Editor

General editors treat clothing edits as image generation prompts. Purpose-built tools like Fashion Diffusion are trained specifically on garment-to-model mapping, so fabric drape, body contour matching, and edge handling are significantly more accurate.

Try Fashion Diffusion’s clothes changer →

AI Clothes Editor vs Virtual Try-On — Which One Do You Need

Both tools change clothing in photos, but they solve different problems.

AI Clothes Editor

Works with an existing photo of a person and replaces what they’re wearing. You control the model — it’s your photo, your team’s model shot, or a customer’s selfie. Use this when you need to update a specific existing image or show a specific person in a different outfit.

Virtual Try-On

Virtual try-on places a garment on a model — AI-generated or uploaded — and is optimized for e-commerce product display, where consistency across hundreds of SKUs matters more than using a specific person’s photo. Use this when you need to generate product listing images at scale from a garment photo alone.

Start Getting Realistic AI Clothes Editor Results

The difference between a realistic AI clothing edit and a fake-looking one is almost always in the inputs — not the model, not the settings, not luck. Clean model photo, high-resolution garment image, matched lighting: get those three right and the output takes care of itself.

Fashion Diffusion is built specifically for garment-to-model mapping — not adapted from a general image editor. That means better edge handling, more accurate fabric rendering, and consistent results across large batches of product photos.

Try the AI clothes editor free →

How do I edit clothing in a photo with AI?

Upload two images to Fashion Diffusion: a model photo and a garment image. The AI segments the clothing region, replaces it with the new garment, and renders the result with matching lighting and body contour. The full process takes under 30 seconds. For best results, use a front-facing model photo and a flat-lay or white-background garment image.

How is an AI clothes editor different from Photoshop?

Photoshop requires manual masking and compositing — a skilled editor can spend 20–30 minutes on a single clean swap. An AI clothes editor automates the entire process, producing a comparable result in under a minute with no design skills required. For high-volume e-commerce workflows, the difference in production speed is significant.

Can I use AI to change clothes in a photo for e-commerce?

Yes, and it’s one of the most common use cases. Upload one model photo and swap in multiple garments to generate a full product listing page without scheduling a photoshoot. Fashion Diffusion keeps the model’s pose, skin tone, and background consistent across every variation — making the output ready for Shopify, Amazon, and independent store listings.

Is the AI clothes editor free to use?

Yes. Sign up for a free Fashion Diffusion account and you’ll get free credits to start editing clothes in photos right away. No credit card required for the free tier. Paid plans unlock higher resolution exports, batch processing, and watermark-free downloads for commercial use.

Avatar photo 通过Alexander Wilson

How to Photograph Clothing to Sell Online: A Complete Guide for Fashion Brands

Your product photography is making or breaking sales before a customer reads a single word of your listing. Online shoppers can’t touch the fabric or try the garment on — your images carry the entire weight of communicating fit, quality, and style.

This guide covers exactly how to photograph clothing to sell online — from shoot setup and garment styling to platform-specific specs and where AI fashion tools fit in.

How to Prepare Clothing for Photography: Before You Shoot

Poor preparation is the most common reason good product photos fail. No amount of great lighting fixes a wrinkled garment or a piece of lint caught on camera.

Steam or Iron Every Garment

Wrinkles read as cheap on camera — even small ones the human eye ignores in person become obvious in a product photo. Steam is generally preferred over ironing for knitwear and delicate fabrics.

Use a Lint Roller Immediately Before Shooting

Lint and dust show clearly against most fabrics, especially dark colors and structured materials.

Shape the Garment

Stuff tissue paper into shoulders and sleeves to maintain structure. Use straight pins on the back of a garment displayed on a mannequin to pull excess fabric and show a clean silhouette from the front. Clip excess fabric on hanger shots with binder clips behind — out of frame.

Keep Accessories and Styling Consistent

If you’re photographing complete looks, keep styling consistent across your catalog. The same belt, the same fold, the same collar position for every similar garment — small inconsistencies across a product range read as unprofessional.

Clothing Photography Lighting: Natural vs Artificial

Lighting determines more about your final image than any other factor. Get this right first; everything else follows.

Natural Light

Natural light works well for most sellers and costs nothing. The key is knowing how to use it.

  • Position the garment next to a large window. North-facing windows give consistent, diffused light without direct sun. East-facing windows work well in the morning; west-facing in the afternoon.
  • Avoid direct sunlight. Direct sun creates harsh shadows and blows out fabric detail. Diffuse it with a white sheet or sheer curtain stretched across the frame.
  • Shoot within 2–3 hours of the window. Light changes throughout the day. Same window position, same time of day keeps your images consistent.
  • Use a white foam board as a reflector. Place it on the opposite side from the window to bounce light back and fill shadows.

Artificial Light

When natural light is unavailable or inconsistent, a simple lighting setup gives you full control.

  • A two-softbox setup is the industry standard. One softbox at 45 degrees, a second on the opposite side at half intensity. Even coverage without flat, directionless light.
  • Ring lights are practical for small items and hanger shots, less effective for larger garments where the circular catch light becomes visible.
  • Match your color temperature. Mixing daylight and artificial light creates color casts. Use one source consistently.

How to Photograph Clothing to Sell: Three Formats

There is no single correct format for clothing photography. The right choice depends on the garment type, the sales channel, and what question the image needs to answer for the buyer.

1. Flat Lay Clothing Photography

Top-down flat lay of beige linen women's shirt on white background with even side lighting and natural garment curve

Flat lay presents the garment from directly above, laid on a flat surface. It works well for lightweight garments, folded basics, accessories, and social media content.

Setup: Clean background (white seamless paper, or a surface that complements the garment), camera or phone directly overhead, even lighting from both sides.

Styling tips:

  • Steam the garment and let it settle before shooting — it needs to lie flat naturally
  • Leave space around the garment; don’t fill the entire frame
  • Arrange the garment with a slight natural curve in the body and a soft fold in the sleeves — this avoids the stiff, lifeless look of a garment that’s been forced flat

When it’s the right choice: Casual tops, folded knitwear, accessories, complete outfit layouts for social content, and any channel where a clean, top-down view communicates the product clearly.

The AI shortcut: If you have existing model or mannequin photos and need flat lay versions, Fashion Diffusion’s Flat Lay Generator converts them automatically — consistent background, reconstructed garment structure, no additional photography setup.

For a full breakdown of when to use flat lay vs ghost mannequin vs on-model shots, the angles table later in this guide covers all garment types

2. Hanger Shots

Navy tailored blazer on wooden hanger against white wall, soft natural light from left, buttons fastened, professional e-commerce product photography

Hanger shots are efficient and work well for showing garment length and drape. A practical choice for high-volume catalog production.

Setup: Clean wall or seamless background, garment on a quality hanger (wooden or velvet — thin plastic hangers make garments look cheap), camera at the same height as the center of the garment.

Styling tips:

  • Button the top button of shirts and jackets; tuck in any loose tags
  • Steam the garment while it’s on the hanger so it hangs naturally
  • The hanger choice matters more than sellers expect — a premium hanger signals a premium product

When it’s the right choice: High-volume catalog production, garments where length and drape are key selling points (dresses, blouses, coats).

3. On-Model Clothing Photography

Fashion model wearing white oversized shirt and straight-leg jeans mid-movement, natural studio lighting, white seamless background, e-commerce product photography

On-model photography communicates fit, movement, and scale better than any other format. Natural posing beats editorial for e-commerce — stiff poses can undermine trust when a shopper is trying to answer: how will this fit me?

With a live model:

  • Shoot at eye level or slightly below — shooting down on a model makes garments look smaller
  • Capture movement: a slight turn, a hand in a pocket, fabric in motion. Static poses lose the energy that makes people want to own the item
  • Always shoot front, back, and at least one three-quarter view. Buyers who can’t see the back of a garment often skip it

With a mannequin:

  • Use a matte white or gray mannequin — high-gloss finishes create distracting reflections
  • Pin garments from the back to achieve a clean, fitted silhouette from the front
  • Shoot the same angles as you would with a live model

Camera Settings and Equipment

You don’t need expensive equipment to photograph clothing well. A modern smartphone handles most product photography competently. What you need is control over a few key settings.

Smartphone Photography

  • Disable auto-HDR — HDR processing often oversaturates fabric colors. Shoot in standard mode.
  • Lock focus and exposure — Tap and hold on the garment in the viewfinder to lock both.
  • Shoot in RAW if available — RAW gives more latitude for color and exposure correction in post.
  • Use a tripod — A lightweight tripod with a phone mount costs under $30 and eliminates camera movement entirely.

DSLR and Mirrorless Settings

  • ISO 100–200. Low ISO keeps images clean and free of digital noise.
  • Aperture f/5.6–f/8 for flat lays. For mannequin and model shots, f/2.8–f/4 gives slight background separation.
  • White Balance: manual. Set to match your light source. Auto white balance drifts between shots.
  • Use a remote shutter or 2-second timer. Pressing the shutter physically moves the camera, causing blur at slower shutter speeds.

Which Angles to Photograph for Clothing Listings

Different garment types need different angles. The goal is to give buyers enough information to make a confident decision without returning the item.

Garment TypeEssential ShotsOptional
Tops (t-shirt, blouse, shirt)Front, back, three-quarterDetail (collar, cuffs, hem), flat lay
DressesFront, back, side, three-quarterDetail (neckline, back, print), on hanger
OuterwearFront, back, three-quarter, open and closedInterior lining detail, collar close-up
TrousersFront, back, side, length shotPocket detail, waistband close-up
KnitwearFront, back, fabric texture close-upDraped on surface, flat lay
AccessoriesMultiple angles, scale referenceDetail shots, styled with garment

Flat detail shots matter more than sellers expect. Close-up images of fabric texture, buttons, stitching, or a unique back detail are frequently the deciding factor for buyers who are almost persuaded.

How to Extend One Clothing Photo into a Full Catalog with AI

Traditional photography produces a fixed set of images per garment. AI tools let you extend a single good photo into multiple formats and variations without additional shooting.

Generate Flat Lays from Model Photos

If you shoot on-model but also need clean flat lays for marketplace listings, Flat Lay Generator converts model-worn shots into flat lay format automatically. One shoot produces both formats.

Adapt One Image for Multiple Platforms

Each sales channel has different visual requirements. Change Background lets you produce white-background versions for Amazon, lifestyle versions for Instagram, and branded scene versions for your own site — all from the same source image.

Test Colorways Without Reshooting

When a garment comes in multiple colors, Recolor generates the same image in every colorway from one source photo — consistent model, consistent background, consistent presentation across the full color range.

Generate Video for TikTok and Reels

Static product photos don’t perform on TikTok. AI Fashion Video animates any product photo into a short video clip — fabric movement, camera pan, or model motion — ready to publish without separate filming.

Clothing Photography Specs by Platform: Amazon, Shopify, Etsy, TikTok

Photographing clothing well is step one. Getting those images to meet each platform’s requirements is step two.
Amazon

  • Main image: White background (#FFFFFF), product fills 85% of frame, no props or text
  • Minimum resolution: 1000px on the longest side (2000px+ recommended for zoom)
  • Format: JPEG preferred
  • Additional images: Can include lifestyle, flat lay, detail, and infographic images — white background not required

(Per Amazon’s official image requirements)

Shopify and Your Own Store

  • Aspect ratio: Consistent across all products — square (1:1) is common, portrait (4:5) increasingly popular for mobile
  • Resolution: 2048 × 2048px maximum; Shopify scales down automatically
  • Consistency: Same background, same styling approach across your catalog

Etsy

  • Main image: Can include lifestyle photography (not required to be white background)
  • Minimum size: 2000px wide recommended
  • Square crop: Etsy thumbnails appear square — compose your main image to work at square crop

TikTok and Instagram Reels

  • Aspect ratio: 9:16 vertical
  • Resolution: 1080 × 1920px
  • Video length: 5–30 seconds for discovery content
  • Hook: Product must be clearly visible within the first second

Editing Clothing Photos to Sell: What to Fix and What to Avoid

Photo editing software showing clothing color correction: warm-tinted red dress on left panel being corrected to true red on right panel

Editing makes a good photo better. Over-editing makes it look fake — and when buyers receive a product that doesn’t match the listing image, returns follow.

Color Correction

Your primary goal. Match the garment’s color to how it actually looks in person. Check against a physical sample under neutral light and adjust until they match.

Exposure and Contrast

Minor adjustments to recover detail in shadows or pull back highlights. Don’t push these settings hard — aggressive contrast looks artificial.

Background Cleanup

Remove lint, dust specks, or small floor marks. Most editing apps have a spot healing tool for this.

Crop and Straighten

Keep crops consistent across your catalog. If you’re shooting flat lays, use a grid in-camera to keep the garment straight — fixing a rotated flat lay in post degrades image quality.

What Not to Do

  • Don’t smooth or blur fabric texture — buyers need to see what the material looks like
  • Don’t use filters that shift overall color tone — they make color accuracy impossible
  • Don’t resize to a low resolution to reduce file size — use proper compression tools instead (Squoosh, TinyJPEG, or Shopify’s built-in compression)

Image SEO for Clothing Listings: File Names, Alt Text, and Schema

Good product photography that isn’t SEO-optimized doesn’t get found. These steps take minutes and have a measurable effect on visibility.

File Naming

Name every image descriptively before uploading. IMG_8472.jpg tells search engines nothing. women-linen-blazer-beige-front.jpg tells them exactly what the image shows. This directly affects image search rankings and helps your product pages appear in visual search.

Alt Text

Write a short, descriptive alt text for every image. Be specific: “Front view of a beige linen women’s blazer on a white background” is more useful than “blazer.” Alt text is read by screen readers (accessibility) and indexed by search engines (discoverability).

File Size and Compression

Large image files slow page load times, which hurts both user experience and search rankings. Compress images to under 200KB where possible without visible quality loss. Tools like Squoosh (free, browser-based) handle this well.

Structured Data

For product pages, implement Product schema markup. This tells search engines the product name, price, availability, and image URL in a machine-readable format — increasing the chance of appearing in rich results and image carousels.

Photograph Clothing for Your Store with Fashion Diffusion

Fashion Diffusion’s AI tools work alongside your photography — converting existing product photos into flat lays, on-model shots, multiple colorways, and short-form video without additional shooting.

Try Fashion Diffusion AI free →

FAQs

How do I photograph clothes to sell online without a model?

Three options. Flat lay photography places garments on a surface and shoots from above — no model or mannequin needed. Hanger shots hang the garment against a clean background. Ghost mannequin photography shoots on a mannequin, then removes the mannequin in editing to create a 3D inhabited look. AI tools like Fashion Diffusion’s Virtual Try-On generate on-model images from a flat lay or product photo without booking a model.

What is the best background for photographing clothes to sell?

White or light gray seamless paper is the standard for marketplace listings (required for Amazon’s main product image). For lifestyle content and your own store, any background that complements the garment works. Consistency matters more than the specific choice.

Do I need a professional camera to photograph clothing to sell?

No. A modern smartphone handles most product photography well, especially in good natural light. The limiting factors are lighting, preparation, and consistency — not camera hardware.

How many photos do I need per garment?

At minimum: front, back, and one detail shot. For most garments, four to six images is the practical range — front, back, side or three-quarter, detail, and a flat lay or on-hanger alternate.

What image size do I need for Amazon product listings?

Amazon requires a minimum of 1000px on the longest side, with 2000px or larger recommended for zoom. The main image must have a pure white background (#FFFFFF) with the product filling 85% of the frame.

Avatar photo 通过Ethan Davis

7 Best Modelia Alternatives for AI Fashion Photography (2026)

AI fashion photography has gone mainstream. According to McKinsey, generative AI could add $150–$275 billion in value to apparel, fashion, and luxury over the next few years. Zalando has also reported significant reductions in image-production costs through AI-generated visuals, reflecting wider adoption across fashion ecommerce workflows.

Modelia helped many brands ship their first on-model image. But as catalogs grow, teams keep hitting the same wall — a watermarked free tier, no real design tools, and credits that drain fast on video.

This guide compares the seven best Modelia alternatives for 2026. You’ll find pricing, features, pros and cons, and recommendations based on different fashion photography workflows.

What Is Modelia AI?

Modelia is an AI fashion imaging platform for apparel and ecommerce brands. It turns garment photos, flat lays, mannequin shots, and sketches into photorealistic on-model visuals, and it produces both images and short videos.

Modelia AI fashion photography tool for generating on-model product images from flat lays and mannequin shots

The platform bundles fashion-specific workflows: flatlay-to-model, mannequin-to-model, model swap, virtual try-on, repose, outfit generation, and accessory tools for hats, bags, glasses, and shoes. A Consistent Character feature reuses the same AI model across an entire catalog. Modelia also ships a native Shopify app, so brands can generate product imagery inside their store workflow.

Its free Starter tier gives 20 credits a month, which is enough to test some tools before paying.

Why Look for a Modelia Alternative?

Modelia covers a lot of ground. But it is a broad image toolkit first and a focused fashion studio second. Several recurring gaps push brands to compare alternatives.

  • The free tier is watermarked and non-commercial. Starter gives 20 credits a month, capped at 10 a day, but every output carries a watermark and can’t be used commercially. You need a paid plan for store-ready images.
  • No design or ideation tools. Modelia generates photos, not concepts. There’s no sketch-to-render, recolor, fabric swap, or text-to-outfit, so design-led teams still reach for a second platform.
  • No dedicated ghost mannequin effect. Brands that lean on clean ghost-mannequin listings won’t find a built-in tool for it.
  • Video burns credits fast. A five-second clip costs 25 credits; ten seconds costs 40. On smaller plans, a handful of videos can wipe out a month’s budget.
  • Tool sprawl. Around 18 tools — including general utilities like image describer, color changer, and facial-expression editor — add interface weight when your day-to-day is catalog production.

None of this makes Modelia a bad tool. It just means a more specialized, better-value, or design-inclusive platform may suit your workflow better.

7 Best Modelia AI Alternatives — A Brief Overview

  • Fashion Diffusion — Best overall for AI fashion design and photography. Combines a full design suite, on-model photography, and 1080p video in one workflow. From $12/month.
  • FASHN AI — Best for virtual try-on quality and developer API. Industry-leading try-on accuracy plus a full REST API for custom integrations. From $19/month.
  • Botika — Best for high-volume on-model photography on Shopify. Turns flat lays and mannequin shots into model imagery, with a built-in human retouching safety net. From $22/month.
  • Veeton — Best for outfit styling and AI photoshoots. Mix-and-match outfits with camera, lighting, and background control. From $29.99/month.
  • Rawshot AI — Best for prompt-free control and compliance. Click-based art direction with provenance logs and full commercial rights. From $9/month.
  • Photoroom — Best for general ecommerce visuals at scale. Class-leading background removal, batch editing, and an image API across every product category. From $12.99/month.
  • Picjam — Best for managed, agency-style production. A self-serve studio plus a fully managed “visual production agent” option with quality assurance. From $3 (3-day trial).
ToolKey StrengthBest ForStarting Price
Fashion DiffusionDesign + photography + video in one platformBrands and designers who need concept-to-campaign in one platform$12/mo
FASHN AIVirtual try-on + full APIEcommerce teams and developers embedding try-on$19/mo
BotikaHigh-volume on-model + human retouchingShopify brands with large SKU counts$22/mo
VeetonOutfit mix-and-match + photoshoot controlsBrands shooting full styled looks$29.99/mo
Rawshot AIClick-based control + compliance/provenanceEU brands and precise art direction$9/mo
PhotoroomBackground removal + batch at scaleMulti-channel sellers across categories$12.99/mo
PicjamManaged visual-production agentEstablished brands wanting hands-off output$3 (trial); $99/mo

These picks draw on each platform’s documented capabilities and pricing, plus aggregated user feedback across G2, Capterra, Trustpilot, and the Shopify App Store. We weighted garment fidelity, fashion-specific features, video support, and value for ecommerce teams.

How the Top Modelia Alternatives Compare on Features

The table below compares core capabilities.

FeatureModeliaFashion DiffusionFASHN AIBotikaVeetonRawshot AIPhotoroomPicjam
Free access20/mo or 10/day (watermarked) Trial available10 signup creditsNo free planTrial available7-day free trialFree tier (watermarked)$3 / 3-day trial
Max resolution4K4K4KUp to 4K (Advanced)Not stated2–4K2K–4KNot stated
Diverse modelsYesYes40 facesYesYes600+YesCustom + branded
Batch processingYes (Basic+)LimitedYesYesYesYesYesYes
Video generationYes (5–10s)Yes (1080p, all plans)YesYes (Pro+)YesYesYesYes
API accessYesNoYesYesNoYesYesNo

The 7 Best Modelia Alternatives, Reviewed

1. Fashion Diffusion — Best Overall for AI Fashion Design and Photography

Fashion Diffusion spans the whole fashion workflow, from first sketch to finished campaign. Where Modelia stops at photography, it adds a full design suite, on-model shoots, model generation, and AI video in one subscription. The models are trained on fashion imagery rather than generic stock, so garment detail tends to hold up better on apparel.

Fashion Diffusion AI interface showing sketch-to-render, virtual try-on, and fashion model generation workflow

Key Features

  • Design studio: AI outfit generator, style innovation, AI Sketch, apply fabric, recolor, AI inpainting, seamless patterns, and print and pattern extraction.
  • Photoshoot tools: virtual try-on, mix & match, AI lookbook, flat lay generator, change background, product detail shots, remove background, and 4K upscale.
  • Models and video: swap to any AI model or face, then animate stills into 1080p fashion clips with motion control.

Best Use Cases

  • Brands and D2C labels that want design prototyping and commercial photography in one place.
  • Designers turning sketches into rendered visuals, then straight into on-model shots.
  • Teams producing editorial and campaign content who need recolor, fabric swaps, and style exploration alongside catalog images.
  • Agencies juggling several fashion clients on a single toolset.

Pricing

  • Starter: $12/mo — 50 credits, all tools, 4K generation and upscaling, 1080p video.
  • Creator: $29/mo — 160 credits (most popular).
  • Pro: $59/mo — 380 credits.
  • Studio: $199/mo — 1,400 credits.

Pros

  • Combines design tools, AI fashion photography, and video generation in a single platform.
  • Fashion-trained models designed for apparel workflows, not generic image generation.
  • 4K image output and 1080p AI video available across all plans, including entry-level tiers.
  • Low-cost starting point at $12/month with a broad feature set.

Cons

  • No managed human-retouching service.
  • Team-collaboration features aren’t detailed in public plans.
  • No permanent free tier — a trial and bonus credits instead.

2. FASHN AI — Best for Virtual Try-On Quality and Developer API

FASHN AI is built around best-in-class virtual try-on. Its diffusion engine wraps garments onto models with strong fabric and print fidelity, and a Face Reference feature keeps the same model identity across a catalog. Beyond the app, it ships a full REST API with TypeScript and Python SDKs, so dev teams can embed try-on and model generation directly into a storefront.

FASHN AI virtual try-on platform with high-accuracy garment rendering and REST API for ecommerce integration

Key Features

  • Virtual try-on, product-to-model, model creation, model swap, and face-to-model, all in one studio.
  • Face Reference for consistent identity, with a 40-face library and custom faces on Agency.
  • AI video up to 1080p, background removal, upscaling, and parallel generations (3 on Basic, up to 11 on Agency).
  • Full developer API with a usage dashboard, plus a chat-based iOS app.

Best Use Cases

  • Ecommerce teams that need the most realistic try-on for shopper-facing product pages.
  • Developers integrating try-on or model generation into their own apps via API.
  • Brands refreshing existing catalogs through model swap, without new shoots.
  • Agencies that need shared credits across a team.

Pricing

  • Basic: $19/mo — 200 credits, 4K images, two seats.
  • Pro: $49/mo — 750 monthly plus 50 daily credits, five seats.
  • Agency: $99/mo — 1,500 monthly plus 100 daily credits, 1080p video, custom faces, ten seats.
  • The developer API is billed separately at $0.075 per credit, dropping at volume. Every account starts with 10 free credits; there’s no permanent free plan.

Pros

  • Among the most realistic virtual try-on on the market.
  • The most complete developer API in this lineup.
  • Daily credits on Pro and Agency ease month-end limits.
  • Commercial rights on all outputs.

Cons

  • No design tools and no dedicated ghost mannequin.
  • Base try-on resolution is modest, so you’ll often upscale for Amazon or large listings.
  • No native Shopify app — integration is via API.
  • No free tier; $19 is the floor.

3. Botika — Best for High-Volume On-Model Photography on Shopify

Botika turns flat-lay, mannequin, and packshot photos into professional on-model images, built for brands that need volume. Its model library spans ethnicities, body types, and ages, and credits roll over while you stay subscribed.

The standout is a built-in human retouching service. On paid plans, Botika’s team fixes images that miss the mark, at no extra cost.

Botika AI fashion photography tool for Shopify converting flat lays and mannequins into on-model product images with retouching support

Key Features

  • On-model generation from flat lays, mannequins, or packshots.
  • A wide, diverse AI model library, with full access on Pro and Advanced.
  • Human retouching: two rounds within 48 hours on Pro, three within 24 hours on Advanced.
  • AI video on Pro and above, plus a native Shopify app and credit rollover.

Best Use Cases

  • Mid-to-large Shopify brands with high SKU counts needing consistent model imagery.
  • Teams that want a human-reviewed quality safety net built into the plan.
  • Brands prioritizing model diversity for inclusive presentation.

Pricing

  • Lite: $22/mo — limited model and background selection.
  • Pro: $35/mo — all models and backgrounds, 2K, video, and retouching.
  • Advanced: $230/mo — 4K, team collaboration, and custom background colors.
  • Enterprise: custom. Annual billing lowers the effective rate.

Pros

  • Strong on-model quality with one of the widest model libraries.
  • Built-in human retouching — unique in this list.
  • Credit rollover while subscribed.
  • Native Shopify app.

Cons

  • No design tools or text-to-model creation.
  • 4K only on the top consumer plan.
  • Some users report delivery delays and slow support during demand spikes.

4. Veeton — Best for Outfit Styling and AI Photoshoots

Veeton is an AI photoshoot studio built around full-outfit styling. You mix and match tops, bottoms, and accessories, then control camera angle, lighting, and background like a virtual studio. It also cleans up rough product shots into flat-lay or ghost-mannequin visuals, and it exports without a watermark, even on the entry plan.

Veeton AI fashion photoshoot tool for outfit styling with adjustable lighting, camera angles, and background control

Key Features

  • AI photoshoot with mix-and-match outfit styling.
  • Custom AI models or a ready-made portfolio, plus model swapping.
  • Dedicated visuals for shoes and eyewear.
  • Batch generation from 2 to 100+ SKUs, AI video, and product recoloring.

Best Use Cases

  • Brands that routinely shoot full styled looks rather than single garments.
  • Teams wanting photoshoot-style controls at the generation step.
  • Footwear and eyewear sellers needing category-specific shots.

Pricing

  • Starter: $29.99/mo — 30 credits, no watermark, AI editing, recoloring, model swap, and video.
  • Pro: $69.99/mo — 70 credits, unlimited team members, and a custom model generator.
  • Studio: custom, for large volumes. No credit card needed to start.

Pros

  • Outfit mix-and-match with real photoshoot controls.
  • No watermark, even on Starter.
  • Footwear and eyewear specialization.
  • Unlimited team members on Pro.

Cons

  • Low monthly credit allowance on Starter.
  • No design tools.
  • No public API.

5. Rawshot AI — Best for Prompt-Free Control and Compliance

Rawshot AI replaces text prompts with direct, click-based control. You set camera, pose, lighting, and background through buttons and presets, which suits teams that want repeatable art direction over prompt roulette.

Rawshot AI prompt-free fashion generation tool with click-based control, provenance tracking, and commercial usage rights

Built in the EU, it adds provenance logs, AI labeling, and full commercial rights — useful for brands with compliance requirements.

Key Features

  • Click-driven control over camera, pose, lighting, and background.
  • 600+ synthetic models and 1,500+ backgrounds, across fashion, plus-size, lingerie, and jewelry.
  • Shoot types from lookbook and catalog to editorial and campaign.
  • Video and ad formats — shorts, commercials, UGC — at 2–4K, with API access.

Best Use Cases

  • Teams that prefer sliders and presets to writing prompts.
  • Brands needing audit-ready imagery with provenance and clear AI labeling.
  • EU brands prioritizing GDPR compliance and commercial-rights clarity.

Pricing

  • Starter: $9/mo — 80 tokens (about 16 images).
  • Growth: $39/mo — 400 tokens (about 80 images).
  • Pro: $89/mo — 960 tokens (about 192 images).
  • Business: $179/mo — 2,000 tokens (about 400 images). All plans include video, full commercial rights, and GDPR compliance.

Pros

  • Prompt-free, click-based art direction.
  • Strong garment fidelity and catalog-consistency focus.
  • Compliance and provenance built in.
  • Low $9 entry with commercial rights on every plan.

Cons

  • The token model is tight on Starter — about 16 images.
  • No design ideation tools.
  • No Shopify-native app.

6. Photoroom — Best for General Ecommerce Visuals at Scale

Photoroom is a broad ecommerce visual editor, not a fashion-only tool. Its background removal is among the fastest and most accurate anywhere, and batch processing handles hundreds of images in one pass. A Virtual Model feature adds AI fashion try-on, but it sits inside a wider product-photography suite rather than a design platform.

Photoroom ecommerce image editing tool for batch background removal and multi-category product photo optimization

Key Features

  • Industry-leading background removal, AI shadows, recolor, and product staging.
  • AI Virtual Model for fashion, plus ghost mannequin, at 2K and 4K.
  • Batch processing, brand kit, instant resize, and video templates for Reels and TikTok.
  • Image API, Shopify publishing, and marketplace feeds.

Best Use Cases

  • Multi-channel sellers managing visuals across fashion, beauty, home, and more.
  • Teams that need background removal and listing-ready images at high volume.
  • Sellers wanting white-background or marketplace-spec images fast.

Pricing

  • Free: watermarked exports for testing.
  • Pro: $12.99/mo — advanced AI tools, 500 batch exports, and 1,000+ templates.
  • Max: $34.99/mo — better models, 1,500 batch exports, and Shopify publishing.
  • Ultra: $99/mo — 5,000 batch exports and the fastest processing. Enterprise adds API access and SOC 2.

Pros

  • Best-in-class background removal.
  • Deep batch processing and a flexible image API.
  • A huge template and format library with instant resize.

Cons

  • General-purpose, not a fashion design suite — the virtual model is one feature.
  • Less specialized garment control than dedicated fashion tools.
  • Some users report frustration with billing and mid-plan credit changes.

7. Picjam — Best for Managed, Agency-Style Production

Picjam positions itself as a visual production agent for established brands. You can run it self-serve or hand the work to Picjam’s team through a managed Concierge tier with a four-point quality check. The toolkit covers AI models, fashion photography, ghost-mannequin removal, lifestyle and listing shots, poses, video, and UGC.

Managed AI visual production platform offering self-serve tools and agency-style content creation with quality assurance

Key Features

  • AI virtual model, fashion photography, and ghost-mannequin removal.
  • Lifestyle and listing photos, pose adjustment, and product close-ups.
  • Video and UGC generation, plus StyleWith for styling garments together.
  • Batch generation, clean-up, upscaling, background removal, and SEO keyword tools.

Best Use Cases

  • Established brands wanting a hands-off, managed production option.
  • High-volume SKU catalogs needing batch output with human QA.
  • Teams that want listing visuals and SEO support in one place.

Pricing

  • Studio Trial: $3 for 3 days — 400 one-time credits, full Studio access, commercial license.
  • Studio: $99/mo — 2,000 credits, custom and branded models, video, and UGC.
  • Concierge: custom — fully managed by Picjam, with QA and high-volume processing.

Pros

  • Low-risk $3 three-day trial.
  • A managed Concierge option with a four-point QA system.
  • Video and UGC included, plus SEO keyword tooling.

Cons

  • No permanent free tier — trial only.
  • Self-serve jumps to $99/mo.
  • No design ideation tools, and Concierge is custom-priced.

How to Choose the Right Modelia Alternative

Start with one question: do you need fashion design tools alongside photography, or photography alone?

  • If you need design and photography in one platform, Fashion Diffusion covers sketch-to-render, recolor, outfit generation, and on-model photography without a second subscription.
  • If you need on-model imagery at scale, Botika and Veeton are strong options. Botika is well suited to ecommerce catalogs that benefit from credit rollover and optional human retouching, while Veeton offers more control over styling, camera angles, and lighting.
  • If virtual try-on quality or API access is your priority, FASHN AI stands out for garment preservation and developer-friendly integrations, including a REST API.
  • If you need broader ecommerce content tools or a more managed workflow, Photoroom supports multi-category batch editing and background removal, while Picjam includes built-in quality review processes.
  • If budget is the main factor, Rawshot AI starts at $9/month, includes commercial usage rights and provenance tracking, and requires minimal setup.

Switching from Modelia: AI Fashion Workflow Setup

Start with clean inputs — well-lit flat lays or ghost-mannequin shots on a plain background give the AI more to work with and reduce re-rolls. Be specific upfront: define body type, pose, lighting, and background before generating to keep outputs consistent without wasting credits.

Stage your workflow before committing. Use a short trial or free tier to test concepts, then move final assets into a fashion-trained platform for production output. Upscale only the images you plan to publish.

If you want design, photography, and video in one place, Fashion Diffusion starts at $12/month with a free trial. Upload a garment, generate on-model images, and export a 1080p reel — no separate tools or subscriptions needed.

FAQ

What is the best Modelia alternative for fashion brands?

Fashion Diffusion is the strongest all-round Modelia AI alternative — it pairs AI photography with a full design suite from $12 a month, which Modelia doesn’t offer. For pure virtual try-on precision, FASHN AI is the specialist pick. For Shopify brands needing high-volume on-model imagery with human QA built in, Botika is worth a direct comparison.

Modelia vs Fashion Diffusion — which is better for ecommerce brands?

Depends on what you need. Modelia is stronger for consistent-character catalog production and has a native Shopify app. Fashion Diffusion is the broader platform: it adds a full design suite — sketch-to-render, outfit generation, style innovation— alongside AI photography and 1080p video on every plan.

How do I turn flat-lay photos into on-model images with AI?

Upload the flat-lay or ghost-mannequin photo, choose an AI model, set a background and pose, and the platform maps the garment onto the model automatically. Fashion Diffusion, FASHN AI, Botika, and Rawshot AI all support this workflow natively. Clean, well-lit flat lays on a plain background produce the most accurate garment fidelity with the fewest re-rolls.

Can I use AI-generated fashion model images commercially?

Yes, on any paid plan. Fashion Diffusion, FASHN AI, Botika, Veeton, Rawshot AI, Photoroom, and Picjam all grant commercial rights on their subscriptions. The exception is Modelia’s free Starter tier, which outputs watermarked, non-commercial images. Always confirm the license terms for the specific plan you’re on before publishing.

Which Modelia alternatives support AI fashion video and reel generation?

Most do. Fashion Diffusion generates 1080p fashion video on every plan, including the $12 Starter. FASHN AI, Veeton, Rawshot AI, and Picjam all produce video or UGC-style clips. Botika adds video on Pro and above. Photoroom offers branded video templates for Reels and TikTok. Modelia generates video too, but clips cost 25–40 credits each.

Which Modelia alternative is best for Shopify sellers?

Botika is well suited for Shopify-based fashion catalogs, offering a native integration, credit rollover, and optional human retouching for high-volume product workflows. Photoroom may be a better fit if you also sell across marketplaces like Amazon or Etsy, since it supports batch background removal and multi-category product editing beyond fashion.

How much does AI fashion photography cost compared with a traditional photoshoot?

AI fashion photography is dramatically cheaper. A standard shoot runs $5,000–$15,000 per session; AI tools generate comparable on-model images for a few cents to around $1 per image — a potential 90% or greater cost reduction. Complex garments like sheer fabrics and fine embroidery still benefit from a manual quality check.

Avatar photo 通过Sophia Mille

How to Create Fashion Videos for TikTok Using AI no Filming: A Step-by-Step Guide for Brands

Fashion brands creating fashion videos for TikTok face a specific problem: the platform rewards frequency. Posting once a week isn’t enough. The algorithm favors accounts that publish consistently — ideally daily — and the content that performs best tends to be short, visually immediate, and product-forward.

The traditional answer to this was a production team. A camera, a model, a location, a lighting setup, and an editor. That workflow costs time and money most brands don’t have available on a daily basis.

AI fashion video changes the equation. One product photo becomes a TikTok-ready video in minutes — no crew, no filming, no editing software. This guide covers exactly how to do it, and how to build a content workflow around it.

Why Fashion Brands Need More TikTok Video Content Than They Can Film

TikTok’s algorithm is built around consistency and recency. A single high-production video published once a month will consistently underperform compared to simpler content published daily. For fashion brands, this creates a real operational tension.

A standard product photoshoot produces 20–40 images and maybe one or two short video clips. Those assets get spread across a full season of content — and they run out fast. Brands that publish video content daily see meaningfully higher organic reach than those on a weekly cadence. When they do, most brands go quiet, post recycled content, or fall back on generic trending audio with static images. None of these work as well as fresh product video.

The math doesn’t favor traditional production. But it does favor AI.

What an AI Fashion Video Generator Does for Fashion Brands

An AI fashion video generator is a tool that converts a static product image into a short animated video with realistic motion — ready to publish on TikTok, Instagram Reels, or product pages without filming or editing. The garment moves, the scene is animated, and the output looks like it was filmed, not generated.

Fashion Diffusion’s AI Fashion Video tool is built specifically for this workflow. You upload an existing product image, and it generates a short video ready for TikTok, Instagram Reels, or your product pages. No camera. No crew. No editing.

The key difference from general AI video tools: garment fidelity. General video AI tools often distort fabric texture, change print patterns, or blur detail when animating. Fashion-specific tools are trained to keep those details intact — which matters for e-commerce, where the video has to accurately represent the product.

Step-by-Step: How to Create TikTok Fashion Videos with AI

Upload a product photo to Fashion Diffusion‘s AI Fashion Video tool, choose a motion style (fabric movement, camera pan, or model walk), generate a 5–15 second clip, then add hook text and trending audio in TikTok’s native editor. No crew, no filming, no editing software required.

Step 1: Choose Your Source Image

Your input determines your output quality. For TikTok, the best source images are:

  • On-model shots — a model wearing the garment, ideally with a clean or simple background
  • Flat-lay photos — garments laid flat with clear fabric texture and color
  • Existing campaign images — repurpose photography you already have

Avoid heavily cropped images, very dark backgrounds, or shots with multiple people — the AI has less to work with and quality drops accordingly.

For a 9:16 vertical output (TikTok native format), a portrait-orientation source image gives better results than a landscape crop.

Step 2: Open Fashion Diffusion’s AI Fashion Video Tool

Navigate to AI Fashion Video and upload your image. Sign up for a free account and you’ll receive free credits to test the output quality on your specific product before committing.

Navigate to AI Fashion Video and upload your image

Step 3: Set Your Output Parameters

Choose the motion style and duration. For TikTok, the effective range is 5–15 seconds — long enough to show the product clearly, short enough to hold attention.

Write a prompt to describe the scene, mood, and motion you want. Be specific about the setting and movement. The more detail you give, the closer the output matches your creative direction.

Motion styles to consider:

  • Fabric movement — subtle wind or body movement, fabric flows naturally. Works best for dresses, lightweight tops, and flowing garments.
  • Camera pan — slow zoom or pan across the product. Works well for structured pieces like jackets and tailored separates.
  • Model walk — the model moves through the scene. Strong for full-look shots and outfit reveals.
Pick one motion style per video. Mixing motion types in a 10-second clip tends to feel rushed.

Step 4: Generate and Review

The AI produces your video clip in seconds. Watch it through once and check:

  • Does the fabric texture look accurate — no warping or distortion?
  • Is the color consistent with your source image?
  • Does the motion feel natural, not mechanical?

If anything looks off, adjust the motion parameters and regenerate. Iteration is instant.
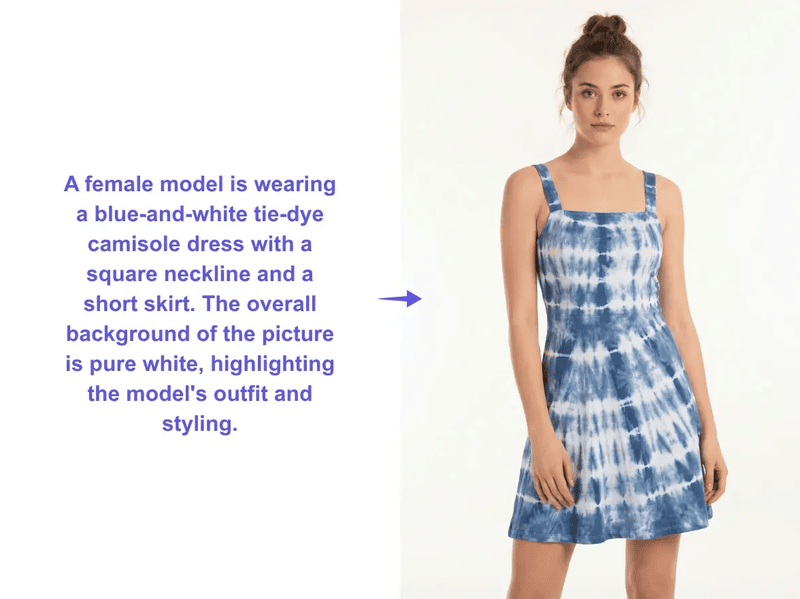
Step 5: Add Your Hook and Audio in TikTok

AI fashion video gives you the visual. TikTok’s native editor adds the rest:

  • Hook text — overlay text in the first 2 seconds. The hook is what stops the scroll. Make it specific: “This dress sold out in 48 hours” performs better than “New arrival.” Tell people something they need to know.
  • Audio — use trending audio that fits the visual mood. TikTok’s algorithm surfaces content with trending sounds more aggressively. Check the Sounds tab for trending audio in your category.
  • Captions — TikTok auto-generates captions from any voiceover. Add a voiceover describing the product (fabric, fit, occasion) and let TikTok caption it. This improves accessibility and boosts discoverability.

Below are examples of TikTok videos created with our AI fashion video tool:

5 TikTok Fashion Video Formats That Drive Engagement

The AI video handles the product visual. What you do with it determines performance. These are the five formats that consistently drive engagement for fashion brands on TikTok.

Outfit Reveal

Start with a flat-lay or packshot, then cut to the AI-generated on-model video. The format creates a before/after moment that naturally drives replays and saves.

Length: 8–12 seconds.  Hook: “Wait until you see this on” / “The flat lay doesn’t do it justice.”

New Drop Announcement

A 6–10 second AI fashion video of a new product, with hook text announcing the drop date or availability. Simple, high-frequency, effective for building anticipation.

Length: 6–10 seconds.  Hook: Drop date + “only X left” or “launching [day].”

Colorway Series

Generate the same garment in multiple colorways using Recolor, then animate each version as an AI fashion video. Cut them together as a fast-paced colorway reveal. One product, one shoot day, multiple pieces of content.

Length: 10–15 seconds.  Hook: “Which colorway are you?” or show all colorways with a “pick yours” text overlay.

Behind-the-Brief

Show your AI-generated design concept next to the finished product. Brands that show their process consistently outperform those that only show finished looks — TikTok’s audience has developed strong filters for promotional content.

Length: 15–30 seconds.  Hook: “This started as an AI sketch.”

Trend Styling

Take an existing product video and restyle it around a TikTok trend — a specific aesthetic, occasion, or cultural moment. Use Change Background to adapt the setting, then animate with AI Fashion Video.

Length: 8–15 seconds.  Hook: Reference the trend directly in the first frame.

Building a High-Volume TikTok Content Workflow

The value of AI fashion video isn’t producing one video — it’s producing enough to post consistently without a production team.

Here’s a weekly workflow for a brand posting 5 days per week:

DayContent TypeSourceTool
MondayNew drop announcementProduct photoAI Fashion Video
TuesdayColorway revealSame product, recoloredRecolor → AI Fashion Video
WednesdayOutfit on modelFlat-lay → model shotVirtual Try-On → AI Fashion Video
ThursdayBackground variantMonday’s video baseChange Background → AI Fashion Video
FridayBehind-the-briefSketch or concept imageSketch to Render → AI Fashion Video

Every piece of content starts from a single product photo. The AI handles the variations — model, color, background, motion. The brand handles the hook text and audio selection.

This workflow produces 20+ pieces of unique content per month from what might be 4–5 source images. Traditional production can’t match that economics at the same quality level.

TikTok Video Specs for AI Fashion Content

Get these right before publishing your AI fashion videos. Wrong specs reduce quality and can hurt distribution.

SpecRecommended
Aspect ratio9:16 (vertical)
Resolution1080 × 1920px minimum
Duration5–30 seconds for discovery content
File formatMP4
Hook text positionUpper third of frame, first 2 seconds
Product visibleBy second 1 — don’t bury the lead

TikTok’s algorithm penalizes low-resolution uploads. Make sure your AI video output is at full resolution before uploading. Fashion Diffusion outputs at production-ready resolution by default.

What Makes a Good AI Fashion Video Generator for E-Commerce

Not all AI video tools produce usable fashion content. The distinction matters for fashion brands and e-commerce sellers:

  • Garment accuracy: Does the fabric texture remain consistent through the motion? Does a floral print stay a floral print, or does it blur and shift? Fashion-specific AI tools handle this. General video tools often don’t.
  • Motion appropriateness: A chiffon dress needs different motion treatment than a structured leather jacket. Fashion-trained AI understands these distinctions. Generic AI applies the same motion parameters regardless of material.
  • Output for e-commerce: The video needs to accurately represent the product — not just look good. A beautiful AI video that misrepresents the fabric color or garment silhouette creates returns and erodes trust.

Fashion Diffusion’s AI Fashion Video is built for fashion e-commerce, not general video production. The difference is visible in the output.

Create TikTok Fashion Videos with AI

Most fashion brands already have the raw material — product photos, campaign images, flat-lays. The gap isn’t content ideas or creative direction. It’s production capacity. AI fashion video closes that gap: one image becomes multiple formats, every product in your catalog becomes publishable video, and your TikTok presence stops being limited by how often you can book a shoot.Start with one product photo. See what it becomes.

Try AI Fashion Video free →

FAQs

What is an AI fashion video generator?

An AI fashion video generator takes a static image — a product photo, flat-lay, or model shot — and produces a short animated video with realistic motion. For fashion brands, this means turning existing product photography into TikTok and Instagram Reels content without filming new footage.

How long should TikTok fashion videos be?

For discovery content (reaching new audiences), 5–15 seconds consistently performs best. Longer videos (15–30 seconds) work for formats where storytelling is the point — behind-the-scenes, process content, or tutorial-style posts. Hook text in the first 2 seconds is critical regardless of length.

Do I need a studio or camera to create TikTok fashion videos with AI?

No. AI fashion video tools like Fashion Diffusion’s AI Fashion Video generate video from a product photo you already have. If you have product images — flat-lays, on-model shots, or campaign photography — you have everything you need to start.

Can AI fashion video accurately show my product’s fabric and color?

Yes, if you use a fashion-specific AI video tool. General AI video generators often distort fabric texture and shift colors during animation. Fashion Diffusion is trained on fashion imagery and designed to preserve garment details — fabric texture, print accuracy, and color — through the motion generation process.

How many TikTok videos can I create from one product photo?

Using Fashion Diffusion’s full toolkit: multiple motion styles from the same image, multiple colorways via Recolor, multiple background settings via Change Background, and multiple model variants via AI Model Generator. A single product image can realistically produce 8–12 unique pieces of TikTok content.

What’s the best TikTok format for fashion brands in 2026?

Outfit reveals, new drop announcements, and colorway series consistently perform well for fashion brands. The common thread: the product is the main character, the hook is specific (not generic), and the video is short enough to replay without friction. AI fashion video works particularly well for these formats because you can produce them in volume without a production crew.